
Are you looking for a simple method to install and run Android OS with Windows 10/7 in Dual boot environment? Then Phoenix OS is the best one to start.
Phoenix OS is a customized Android PC OS based on Android x86 open source project, supported by some Chinese software technology company. If you see the original Android x86, you feel old and uncomfortable interface which is not in its fork Phoenix OS.
Here we will learn the simplest method to dual boot PhoenixOS with Windows 10 or Windows 7 without harming or deleting any existing file. You can even install it on a USB drive, however, that solely your own choice of usage. And remember Phoenix os is not an emulator.
Dual Boot Android Phoenix OS with Windows 10 or 7
Here we are not using regular ISO image of this Android OS flashed on a USB drive, instead of an executable file of its which meant for Windows platforms and work exactly like any other Windows software.
Step 1: Download Phoenix OS executable file
As I mentioned above that we are not going to use the traditional ISO image installation process which is in most of the case makes Primary Windows OS unbootable, if you don’t know how exactly deal with partitioning and boot manager systems.
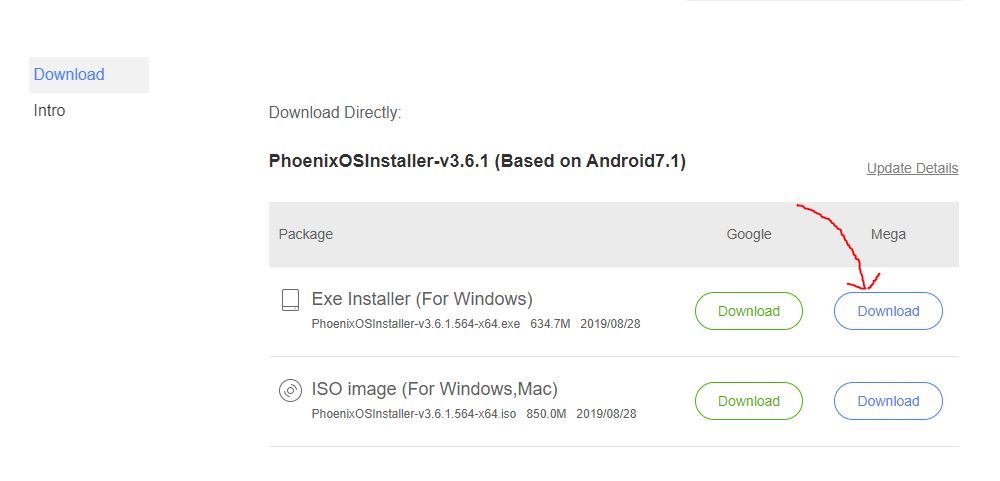
Go to official PhoenixOS download page, here is the link for your convenience and click on the Download button (google drive link or Mega) given in the front of Exe Installer (For windows). While performing this tutorial, the latest version of Android available on this PC Android OS was 7.1, which may be different in yours. The file-based on Android 7.1 is a 64-bit one, so if your is system is 32-bit then go for PhoenixOS base on Android 5.1, available on the same page.
Step 2: Run PhoenixOS executable Installer file
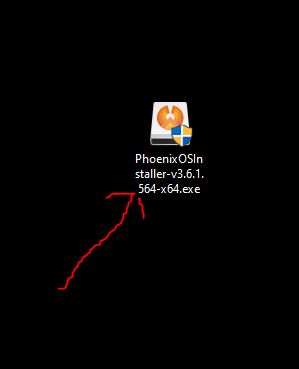
Once the downloading is completed, go to the executable installer file and double click on that to run it or simply right-click and select Run as administrator.
Step 3: Install Phoenix OS on Windows
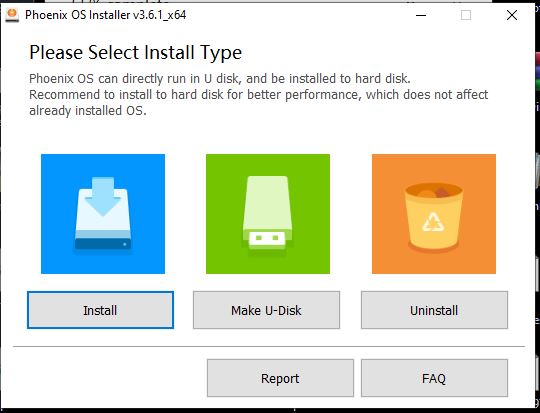
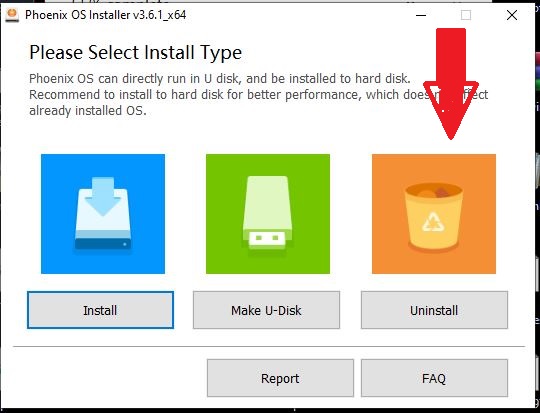
So, here you will get three options Install, Make U-Dik and Uninstall. If you want to install this Android OS on your PC hard drive then select the Install option and for those want to set up it on Pen Drive, they can go for the “Make -U-Disk“. However, if you want a good performance, it is recommended to install it on a local hard drive. Here we are selecting “Install” to place it on the hard disk. Don’t worry, it will not touch or delete your existing Windows OS files.
Step 4: Select the Drive or partition to install Android OS
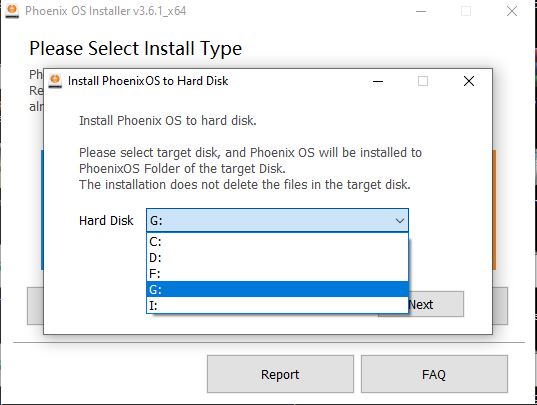
Although it not going to harm existing Windows 10 or 7 installation, still I would recommend not to install it on the same partition where your previous OS is, just for precautions, thus here in this tutorial instead of selecting C: drive partition, we have gone for G: partition which has our other common files and folders.
Note: PhoenixOS will install in a folder created by its own name and will not delete or format your existing partition, thus don’t worry.
After selecting, click on the Next button.
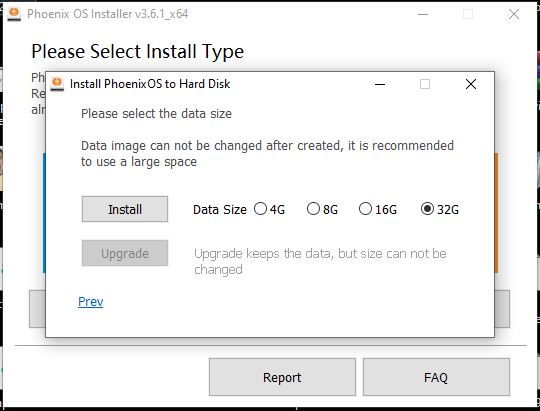
Step 5: Select Data size for Phoenix OS installation
The data image size is a size which will allocate to PhoenixOS to install and use the same for further apps installation from Google play store. You can say that it is a C: drive for this Android OS just like we have one for Windows, thus choose as per your available space. Since, we are installing it on a local drive, not on some USB disk, thus 32 GB is not a big deal and selects that only. Plus click on the Install button.
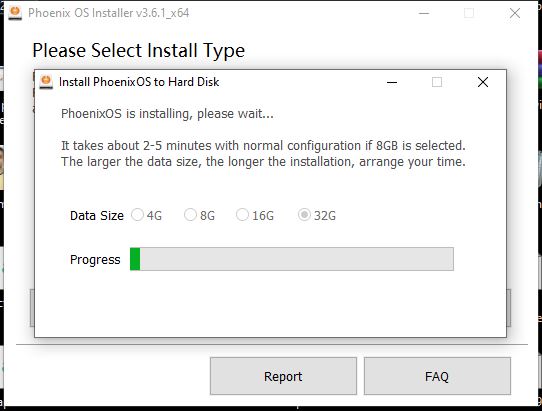
Step 6: Installation Progress
Wait for few minutes until it decompressed the compressed PhoenixOS images on your local drive in a folder.
Step 7: Reboot system
After the decompressing and adding boot value to your current menu for Android, the setup wizard will give the Reboot Now option. Save your current work and click on this option.

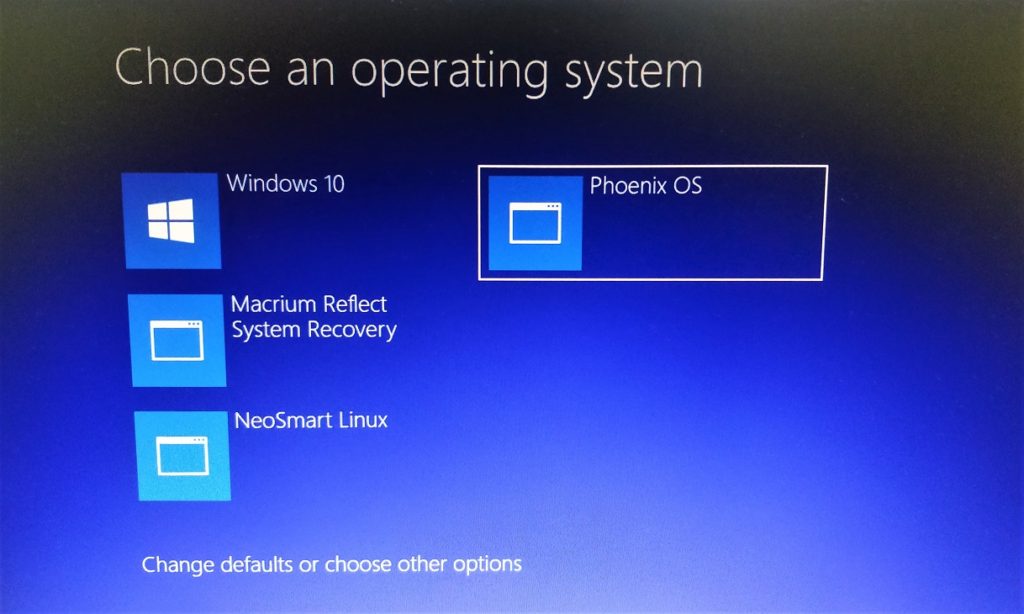
Step 8: Windows 10 and Phoenix Dual Boot Menu
When you reboot your system, Windows 10 boot menu will appear, which also will feature an option for Phoenix OS, click on it so that we can boot our newly install Android PC operating system.
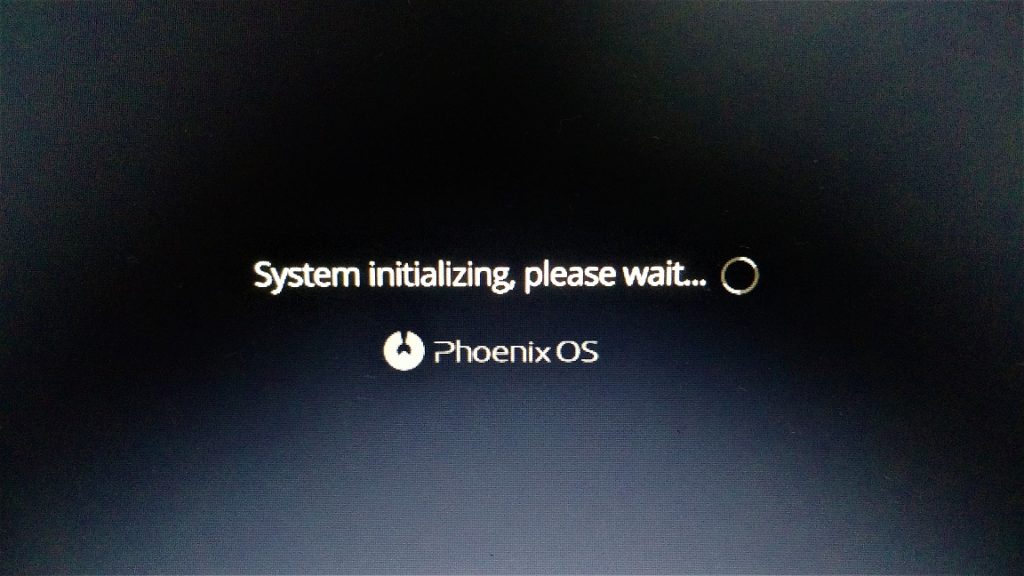
Step 9: System initializing
Wait for some time, while the system is setting up the files and other settings for Phoenix.
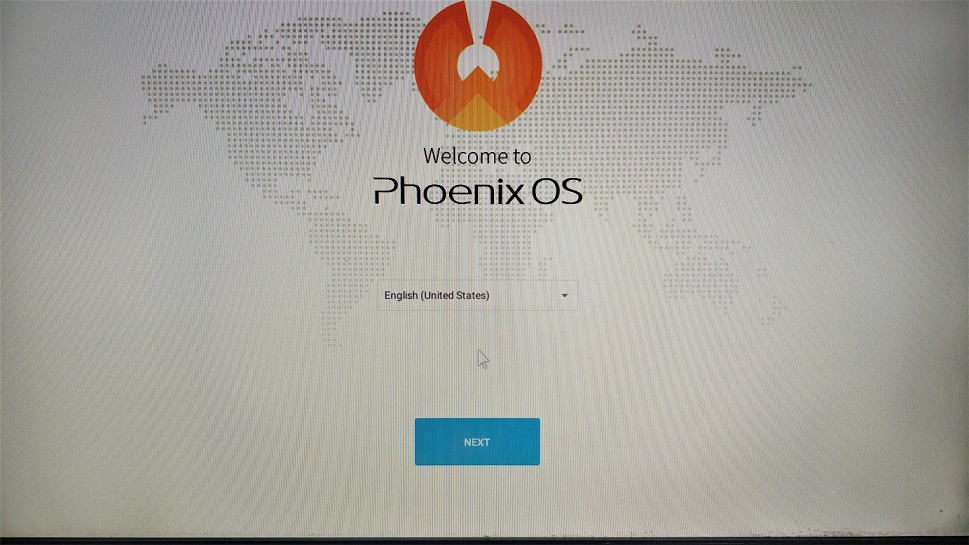
Step 10: Select Android OS language
By default, the OS comes in Chinese language and I am sure you are not familiar with it, thus click on the drop-down box and select the English language.
After that click on the Next button.
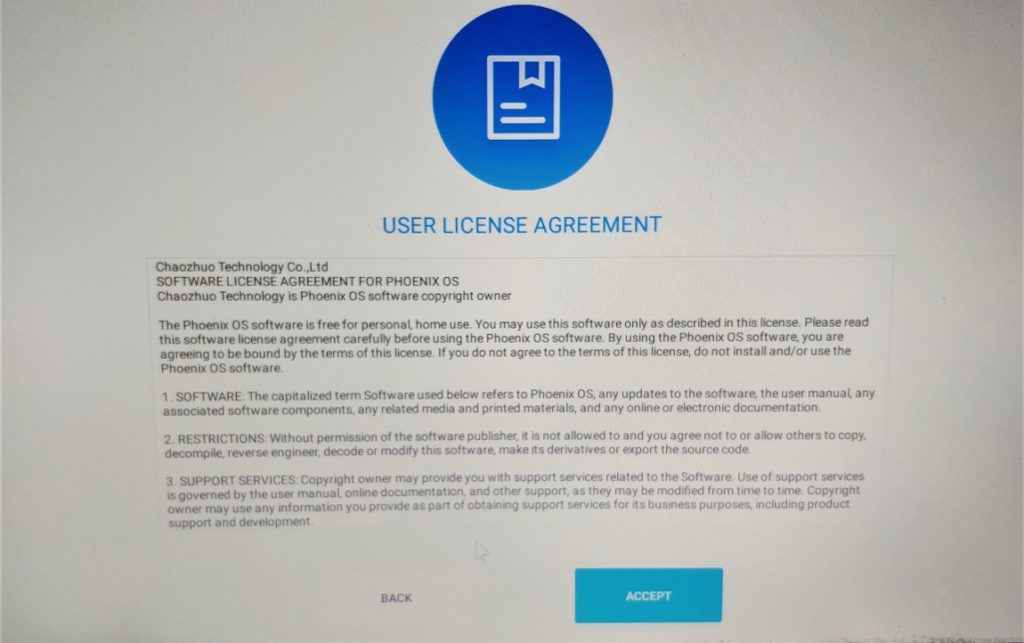
Step 11: User license Agreement
Read the agreement, if you want and click on the Accept button to accord with all given terms and conditions.
Step 12: Connect Network
To receive security updates and for the installation of apps, connect to existing WiFi connection of yours, however, you can do it later from the OS interface as well.

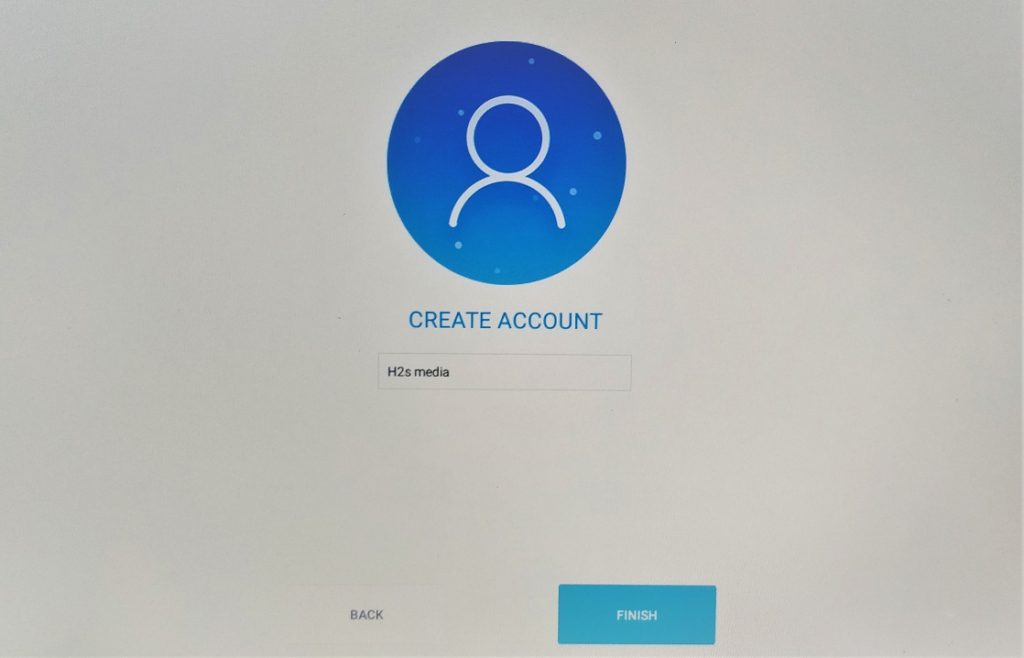
Step 13: Create a User account
Given some name to your PhoenixOS user account. Here we are giving H2S Media.
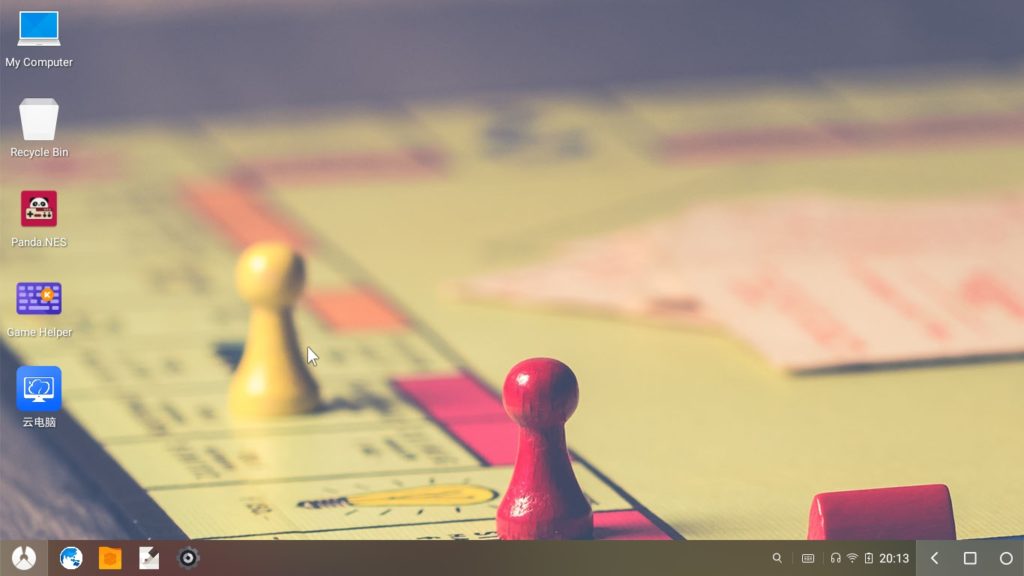
Step 14: Phoenix OS Interface
So, finally, you got an Android Operating system on your PC which mimics the user interface of Windows 10 or 7 OS. In this below screenshot of Phoenix, you can see that.
How to uninstall Phoenix os
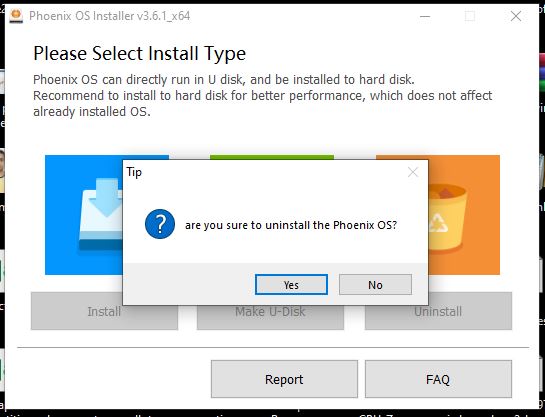
In case after some time you want to uninstall Phoenix OS from your computer then simply again boot into your Windows 10 or 7 operating system from the OS selection boot menu. And there again run the Phoenix OS executable file.
When it gets opened, select the Uninstall button.
Select the Yes option when it says “Are you sure to uninstall the Phoenix OS?” That’s it.
Phoenix os review
We know so many users out there want to try easy to use Android OS either on their Virtual machines or in PC dual boot environment and believe us guys after using Phoenix, we can say it is the easiest and safest way to experience Android OS on Desktop or Laptop till now. Before writing this Quick Phoenix review we used it for a couple of hours and here is our experience with it.
If we talk about its interface than it is somewhat similar to Deepin Linux Desktop environment and has all basic things needs to operate an OS on PC hardware. However, because of a wide range of hardware in the market, few features would not work as they meant for, such as in our case display brightness bar didn’t work, thus full brightness on the screen put lots of strain on our eyes and makes it difficult to use for a long period of time…
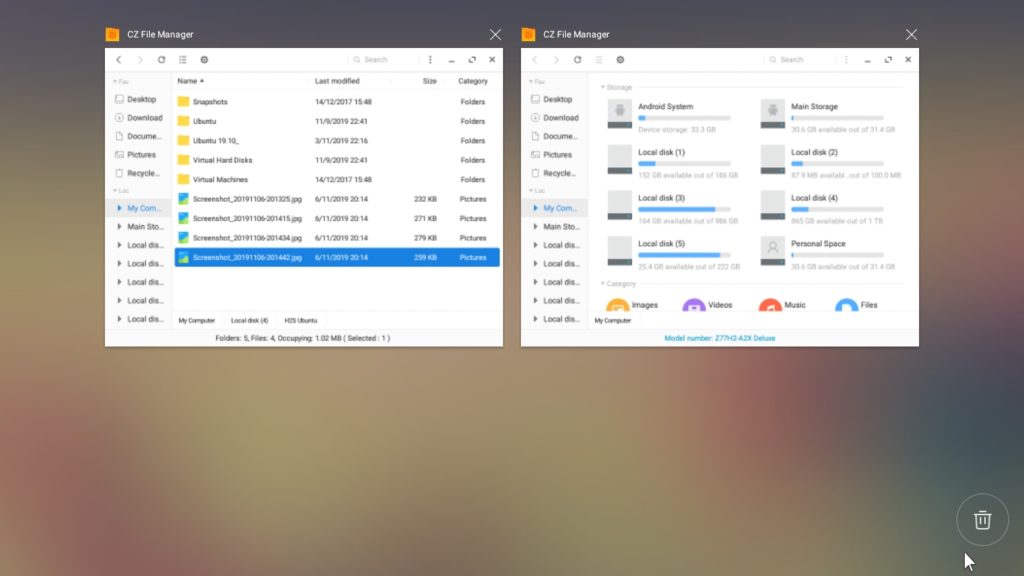
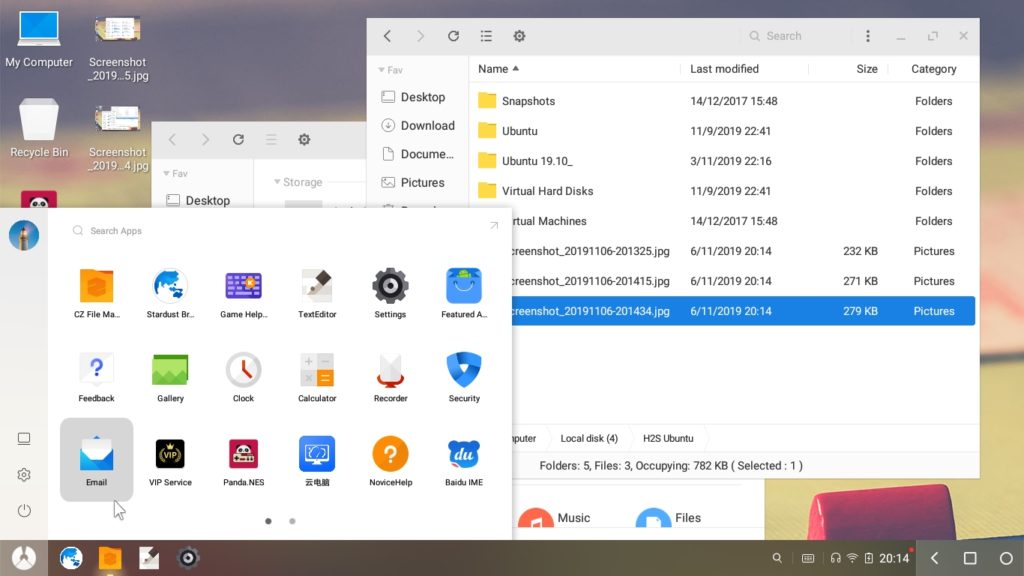
Phoenix OS file manager
Giving a glance on the below screenshot one can easily get an idea how much user-friendly this OS is. Our all system drives can easily be accessed by Phoenix with beautiful drive icons and storage space indicator. Just like Windows or Linux on the left side, we get the shortcuts to jump on important folders or drives.
Below the drive info, shortcuts for different categories have been given such as Music, Images, Videos and Files which allow users to access all same kind of file extensions under one roof. For example, you want to see videos, click on its category and all videos on the system will be there to watch.

Drag and Drop
Another pretty good feature is drag and drop facility same like Commerical Desktop operating systems. Yes, we don’t have to copy and paste things, just use the mouse click, select and drag the items to move or copy.

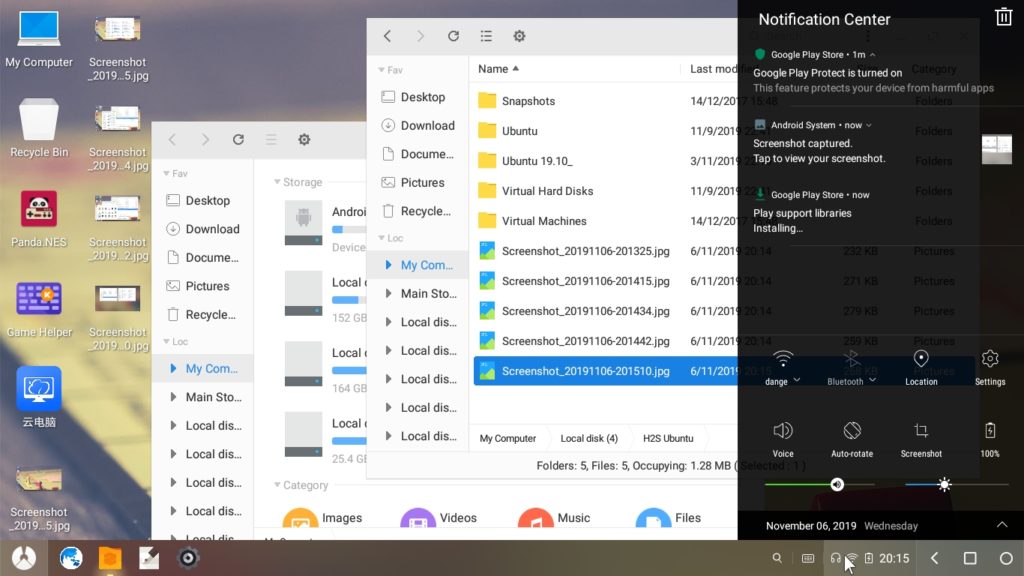
Notification centre
If you are Windows 10 and macOS user then you will not miss the notification centre, since it is also available on PhoenixOS. To access it, click on any of the feature icon given on the right side bottom and it will pop out. Also, same as Windows 10 quick setting shortcuts available on it such as Volume bar, Display brightness, Screenshot tool, location, Wifi, Bluetooth and more.
Multi-windows settings
Another wonderful feature of the PhoenixOS- Switching or quick access to opened applications/windows. If you are working on multiple things and want to jump over some already running background application, then simply click on the recent apps icon given on the right bottom side and you are good to go.
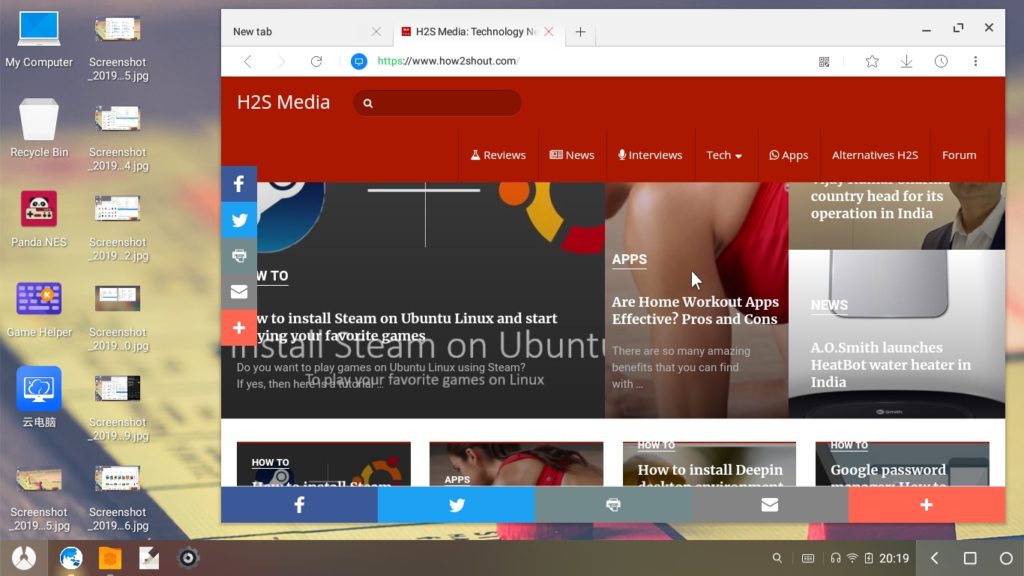
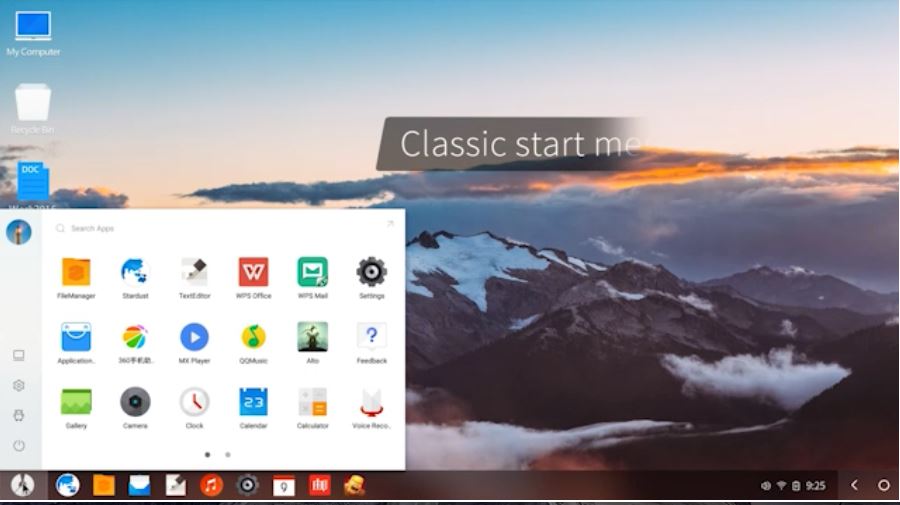
PhoenixOS has not been stuffed by the developers with apps, only the essential things are there on it those can be accessed from the familiar start menu of its. For example browser, it comes with its own StarDust browser.
StarDust is a lightweight browser comes with advertisement filtering and sleek materialistic design. It uses a strong Chromium kernel to provide a better web browsing experience.
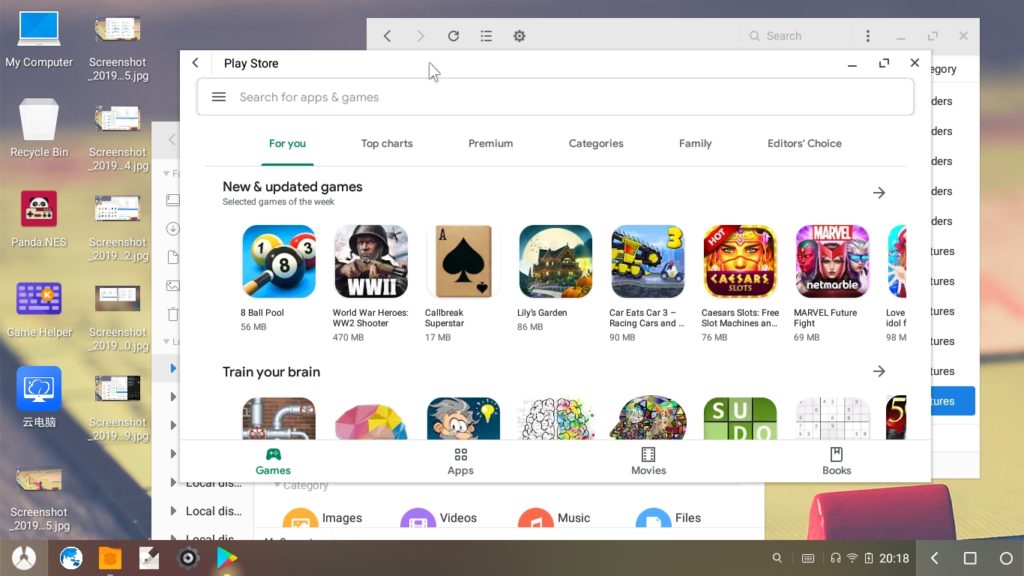
Phoenix Google play store
Another best thing of OS is it has pre-installed Google Play store app which means we can install any app available on it directly on our Android OS.
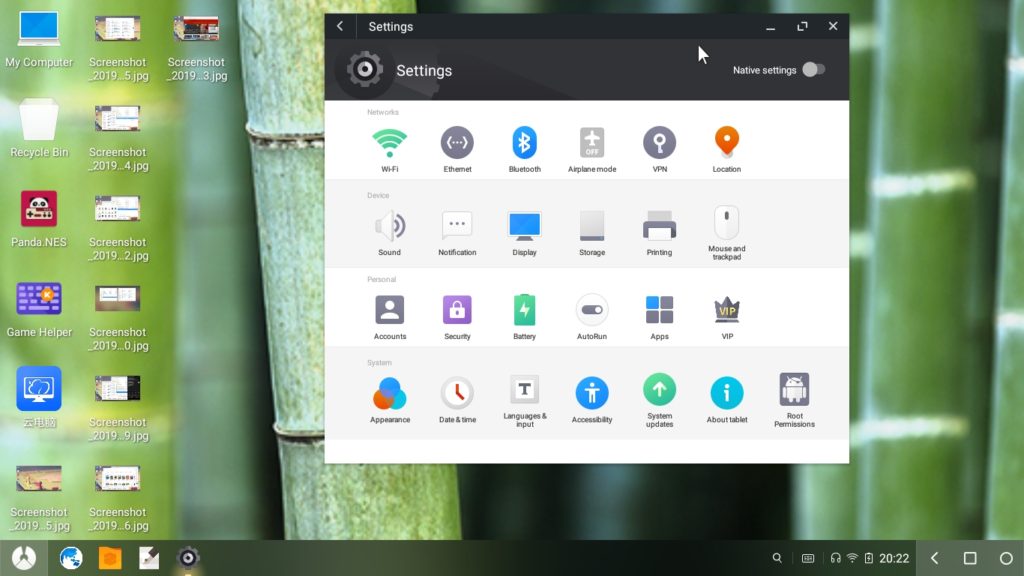
Settings
As we know, it is a customized Android version, thus along with the standard view of the setting, it also has a beautiful grid of setting items in colourful icons.
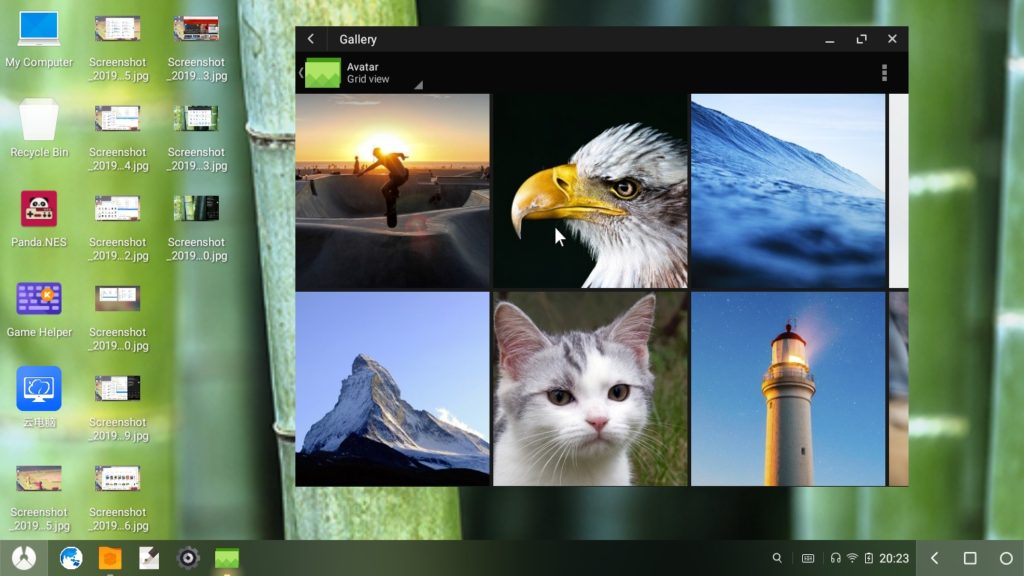
Gallery app of the OS worked smoothly without any problem in our case, also it features some pre-available wallpapers to set as the home screen background.
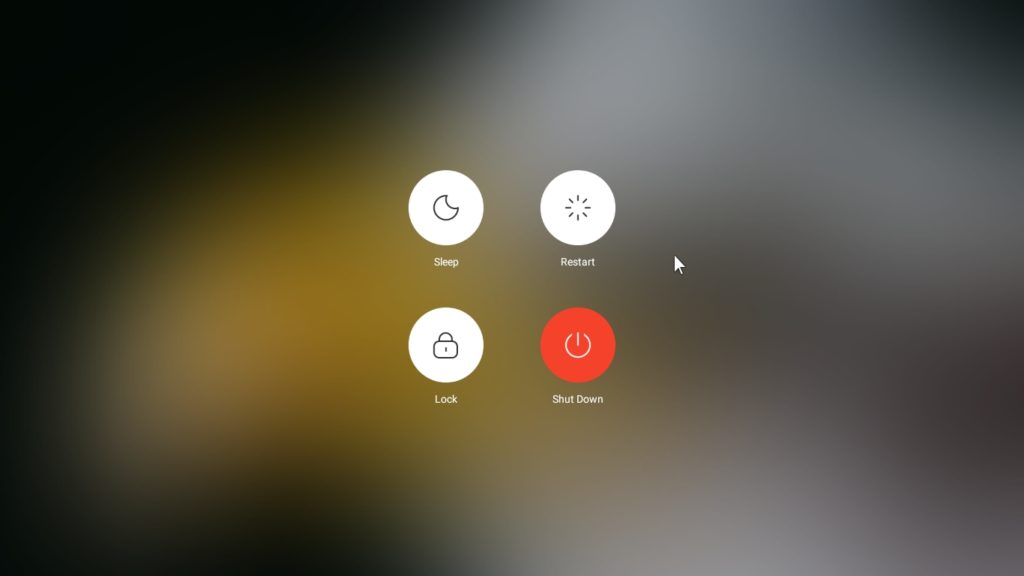
Again an attractive arrangement of the shutdown, sleep, restart and lock icons with smooth edges and blur background which mimics iOS.
Verdict
If you want to try Android OS your system then Phoenix is the best way, indeed Prime OS is also out there, however, by providing Windows dual boot installer, the Phoenix obviously has an upper hand. Also, because of the Octopus keymapping engine, one can easily use Keyboard and mouse to play popular games like Pubg. To work with office apps and other productive task PhoenixOS support common keyboard shortcuts such as Ctrl+C, Win+D, Alt+Tab, and Alt+F4. You can create multi clones of the same app, LAN access is there, Microsoft Office Suite for free, apps like WPS, Evernote; universal search all are there, moreover, if you are on a tablet, then one key switch back to stock Android.
Really, developers of PhoenixOS has done a tough job, thus, if you have some system with low configuration, you can install it to take all benefits of Android OS on PC along with fun games and apps without using any emulator.
Other Articles:

Can i install this on Windows 8.1 Pro?
Yes, absolutely you can even with Windows 7.
FYI, this doesn’t work on the Samsung ATIV 500T (and likely, any other device with similar BIOS). You get stuck at “Trying to terminate EFI services again”
`Morning, this is my tenth attempt at installing your OS, and as of yet, it has only failed to install. I have used an internal hard drive (H) (for 5 attempts) and a 32 and 64 GB stick for the rest). NONE have gotten further than placing strings of periods on my screen. I do know that my computer (though a new (Dell Alienware R9) is the biggest piece of shit that was ever produced (originally booting from DRIVE 1 not 0). NOW, after having attempted ten times to install your OS, what the hell am I doing wrong. Yesterday, I just let it run for several hours after booting into your OS, the screen was full of periods… NO FRIGGING ERROR OR ERROR CODES, JUST PERIODS.