Cloud hosting is now cheaper than before. Few big payers such as Google, Amazon web, Azure already dominating the market but somewhere the part of affordability is missing for the small organization or should I say, bloggers. If you have a website with thousands of traffic per day and need a cloud hosting then DigitalOcean can be chosen. Because of low prices, it easily affordable for you and me. Another great benefit of using the DigitalOcean is they also provide a free trial of their cloud services just like Google and Amazon. The DigitalOcean offer 100$ credit for 60 days, so that can deploy and test your WordPress blog or other solutions before paying them.
We will also cover in our upcoming article that how to migrate WordPress based website including a database to DigitalOcean Droplet.
Note: Before thinking for Droplet you should have some technical knowledge, though it is not a rocket science, having some information on how cloud server works, give you an additional benefit.
Here, we only discuss the initial procedure of settings up a server on DigitalOcean.
Step 1: First of all, go to Digitalocean and signup your account with your email ID.
- Note: While Signing up you should have a valid credit card, don’t worry they will not charge anything until before you spent free credit of $100.
Step 2: Once you created your account, you will see the DigitalOcean Droplet dashboard to create a new project.
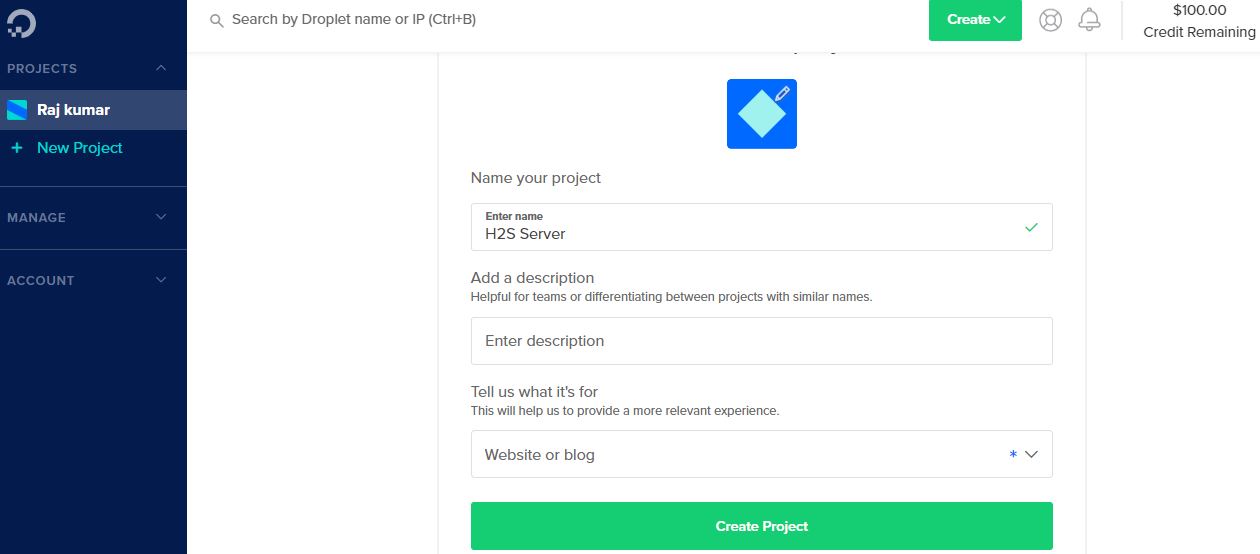
Step 3: Just click on the Create button given at the top right side or you can also use the New Project option available on the left side pan area of the dashboard.
Step 4: Now enter the project name, whatever you want including the description The description will help in the case of multiple projects handle by different people on a single droplet.
Also, select for what purpose you are using this droplet project. Like, I want to set up a blog and the same thing was in my preference.
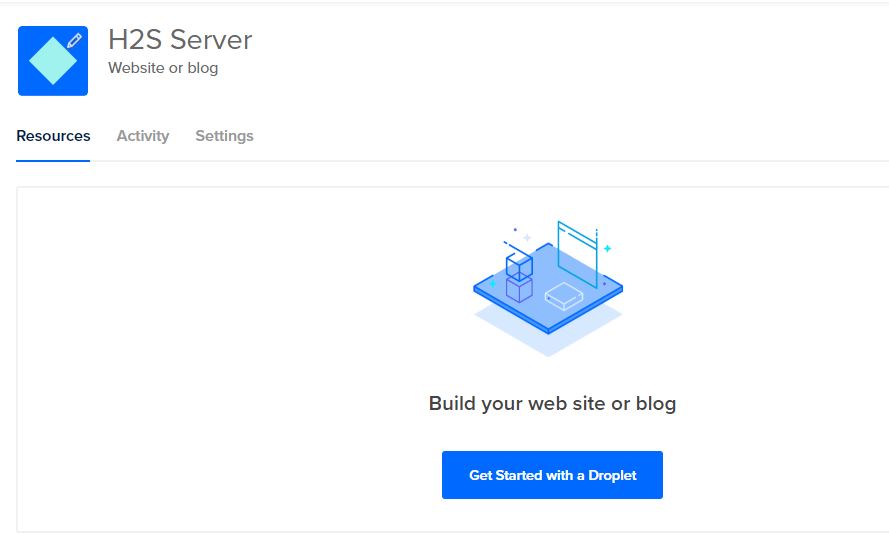
Step 5: After creating a project, you will get an option Move Resources, this would be helpful for those want to move their existing Droplets, Space load balances, domain to a new project, however, by the time now, we don’t have such requirements, so please click on the Skip for now option.
Step 6: Now the account creation on the DigitalOcean for Droplet is completed. Click on the Get started with a Droplet button to move further.
Step 7: It’s time to configure the Droplet server, storage, and other configuration.
DigitalOcean offers all major Linux server distros such as Ubuntu, FreeBSD, Fedora, Debian, and CentOS. It’s upon you what you want to set up for your WordPress, however, it is recommended to use Ubuntu because of ease and hundreds of tutorial availability, in case you stuck somewhere.

Step 8: Furthermore, users those want to save themselves from the hassle of installing WordPress they can also choose the OneClick section to install the most common apps on the server; quickly.

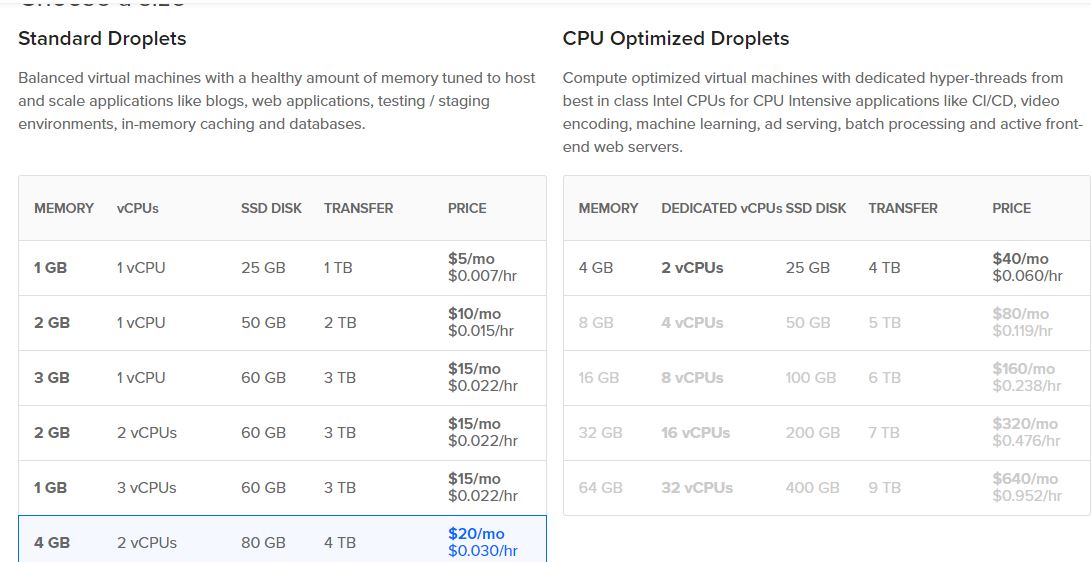
Step 9: After selecting the app or Linux distro of your choice, the next step is to configure the server’s virtual hardware such as storage, RAM, and CPU. The DigitalOcean offers a wide range of options, select as your requirements. But for smooth of running WordPress at least start from the $10 or $15 monthly plan.
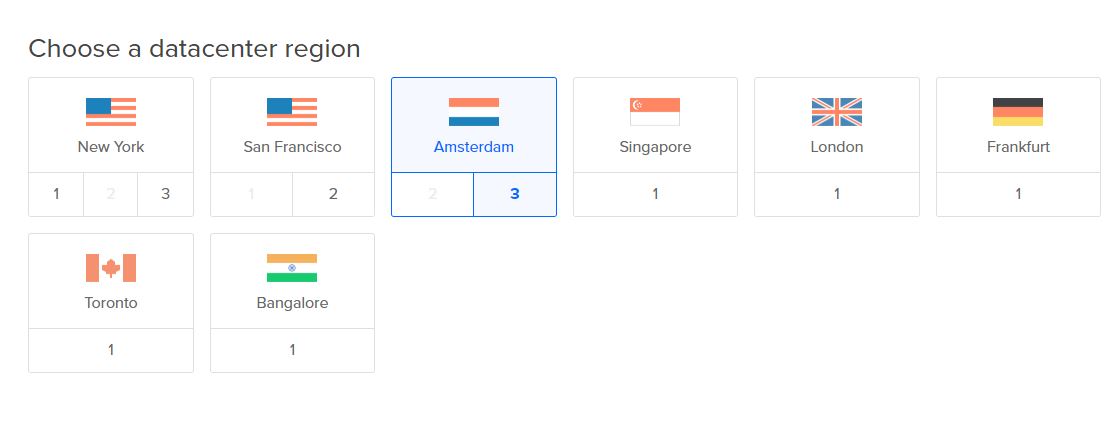
Step 10: Choose the nearest datacenter region of the DigitalOcean to your country or place.
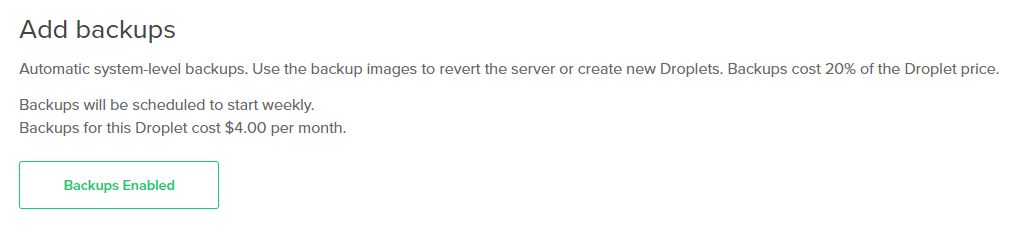
Step 11: Enable the backup, if you are using the droplet for production purpose and want to secure your data, in case you have accidentally fired up your server.
Step 12: Select the IPv6 and Monitoring… If you want to communicate internally between droplet server then you can enable the private networking option and also the Use data in case you need it.
Step 13: To login root, it is not wise to use the password every time because it increases the security risk. It is recommended to create SSH keys so that you can remotely log in to the server via SSH clients applications such as PUTTY.

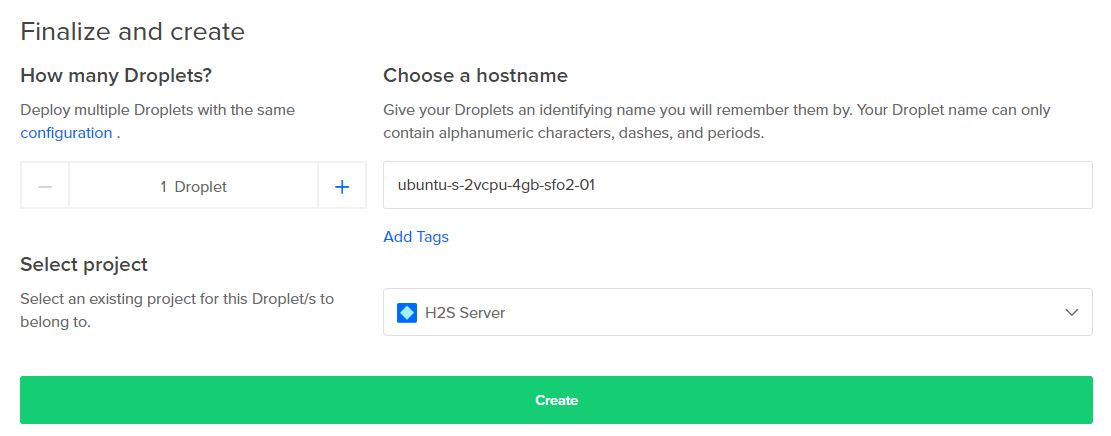
Step 14: If you want to rename the default hostname of your server then do it here because it let you identify and remember the droplet server easily when you are using multiple droplets…
Just click on Create to finalize your server…
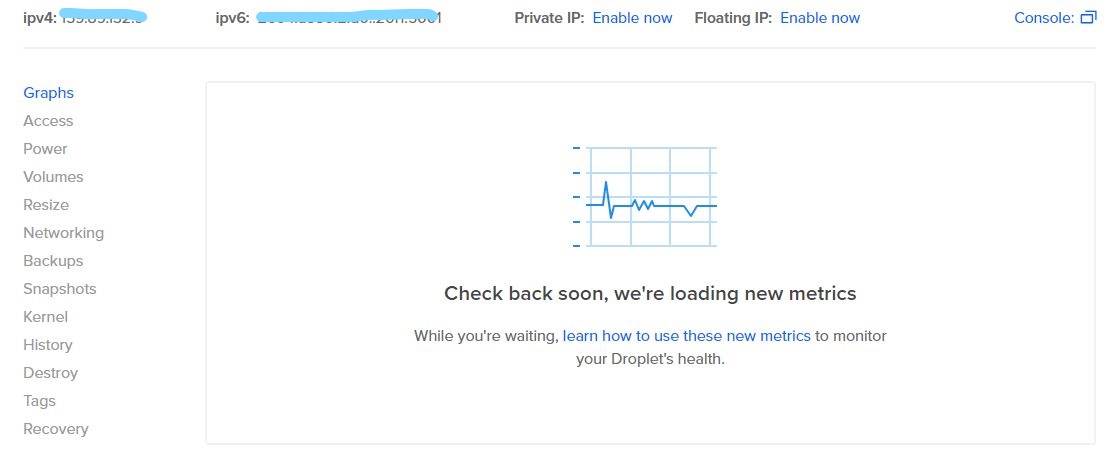
Step 15: When everything is done correctly!! You will ee the dashboard to manage your cloud server. To connect the newly created Ubuntu server directly from the Droplet just click on the Console given at the extreme right side of the management dashboard.
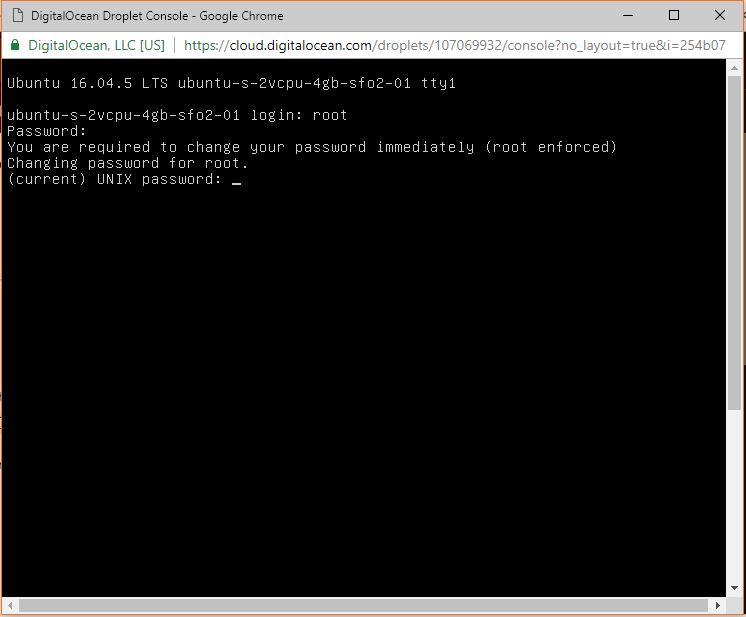
Step 16: When you click on the Console, a terminal screen will open in a new window of the browser. Enter the root user details which you have received by mail from DigitalOcean. After entering the root credentials you will get a prompt to enter a new password for the root user.
So, the server is ready, you can now set up the WordPress…
You might also like to know about:
- How to remove ads on uTorrent and BitTorrent for free
- 10 Best Free & Open source Home Media Server Software
- How to Setup Ubuntu Root User Password Using Command
- 6 Best Open source Personal Cloud Software to Setup Cloud storage
Related Posts
Connect & Manage AWS lightsail Windows server using WAC
Install Azure CLI on Windows 11 or 10 using Powershell or CMD
Top 8 technology buzzwords that you should know in 2023
What is Open source IoT stack?
Top 10 Free Open Source Blogging Platforms or CMS in 2023
6 Best Open source Personal Cloud Software to Setup Cloud storage