If you are dealing in documents or official papers then often you need a watermark on them. And generally, people don’t have the extensive knowledge of Ms-Word, Excel or powerpoint may struggle in inserting the Watermark.
Watermarks are generally a faded text or picture or logo behind the text typed or written on the paper. For example, the confidential word behind the secret documents of government or some business. Even the companies use Digital watermarks to videos and images files, to identify the copyright. However, nowadays, it is much easier than before to add the Watermark on paper by anyone with the help of office suites like Microsoft office.
So, without further ado, let’s see how to insert watermark in Microsoft Excel tutorial
- Open Microsoft Excel.
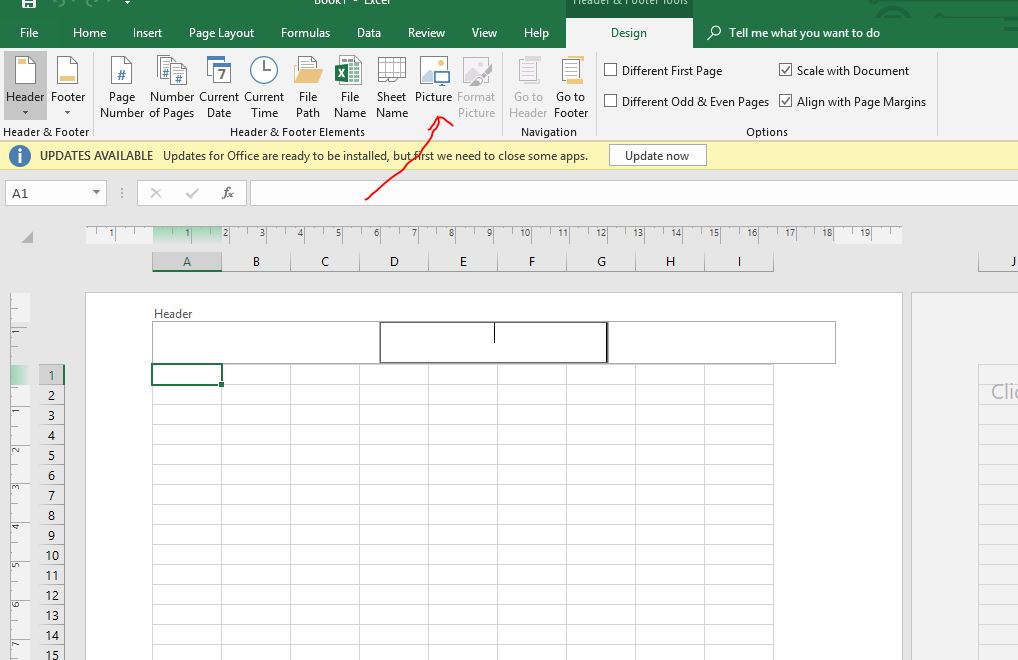
- Click on the Insert Tab.
- From the Insert option ribbon, click on the Text option which reveals further other options.
- From there select the Header & Footer.
- Now from the menu select the option Picture.
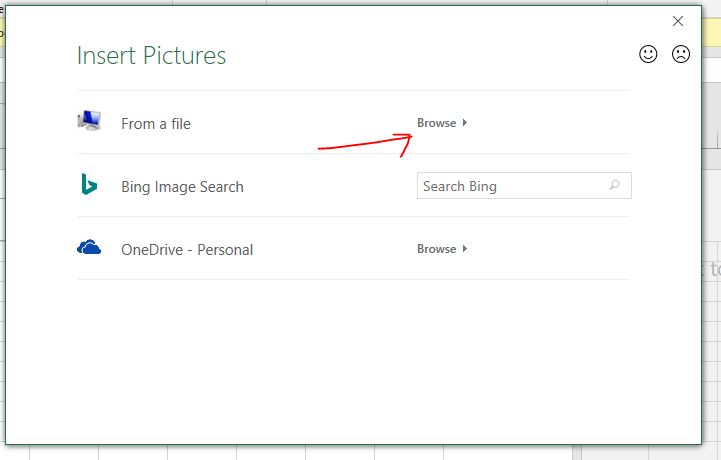
- A pop-up window will appear. Upload the picture that you want to insert as a watermark in Excel.
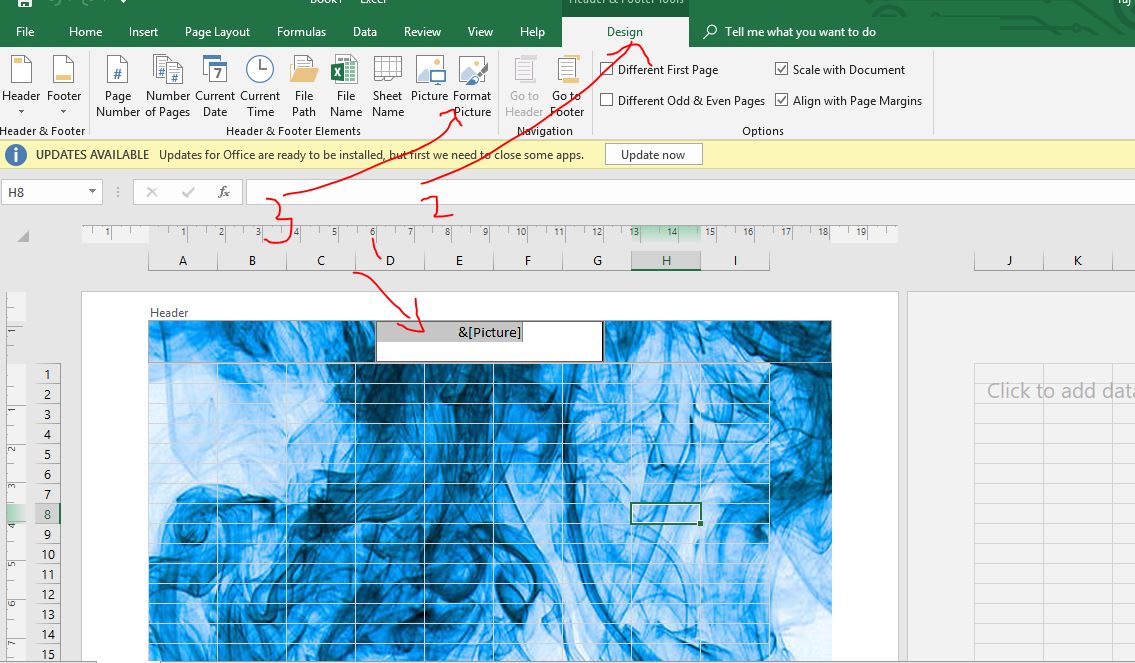
- You will see text &[picture] on the Header of the Excel sheet.
- Now click on anywhere on the sheet’s column outside the header area.
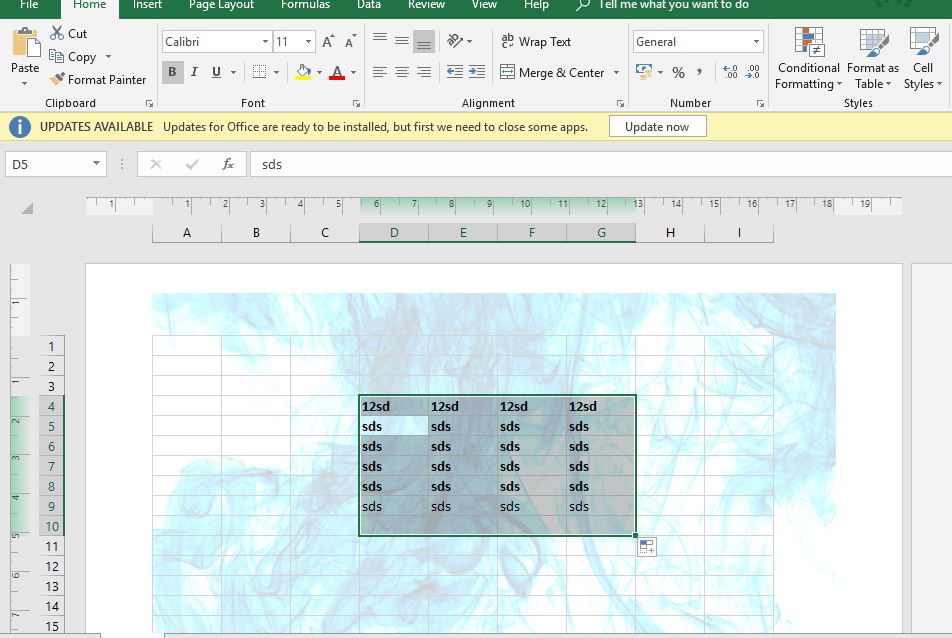
- A picture will automatically appear behind the text of the Excel sheet.
- To make it fade so it looks like a watermark. Click again on the header area and then Design Tab.
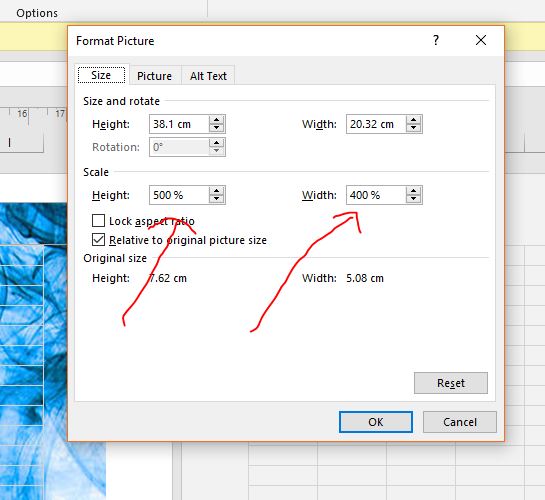
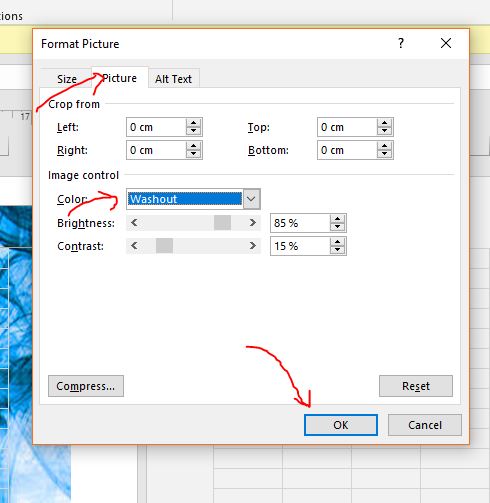
- From Design tab select the Format picture option.
- Select the Picture tab and then under Image control -> Color-> Click Drop down box-> Select the Washout and click OK button.
- That’s it you will see the washed picture watermark on your excel sheet.
Screenshots:
In the Excel to insert picture watermark click on the Insert Tab->Text-> Header & Footer

Under the Design tab, select the Picture.
We have three ways to upload pictures to Excel for setting Watermark: One is from the local hard drive, Bing Search engine and One Drive. We have the picture on our system, so we have selected the first option From a file- ‘Browse’.
Again Click on the Header column on the &[Picture] and then Design-> Format Picture.
To change the Size of the Watermark, play with the Height and Width under Scale section.
To blur or give washed out appearance to the Watermark simply click on the Picture Tab of Format picture and then click on the Drop down given in the front Color option and select the Washout and finally click on the OK button.
Final output after washout watermark in Excel
How to insert watermark in Excel: Text
Inserting Text watermark is much simple then the Picture.
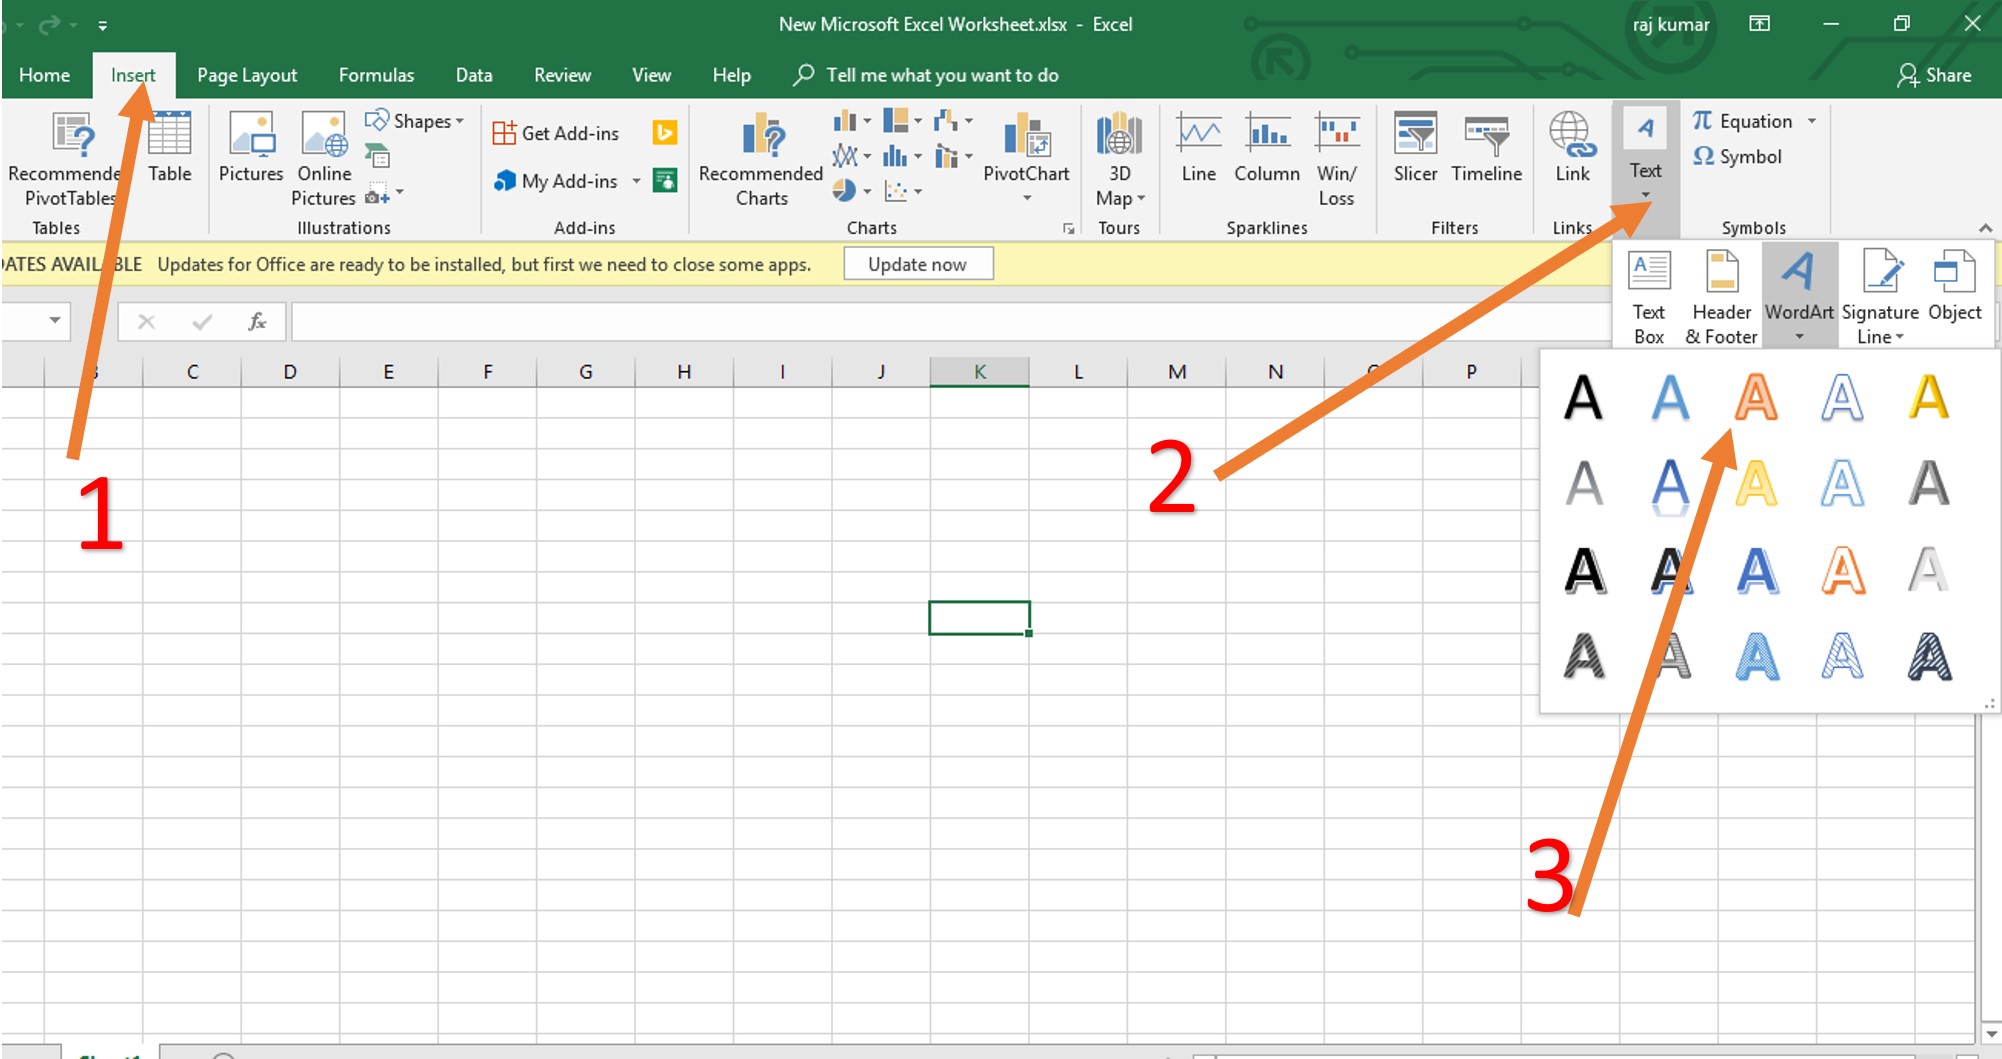
1. On the Excel, click on Insert Tab-> Text and select Word Art
2. Write the Text which you want to be used as Watermark and then right click on the Text’s outer area and select the Format Shape option.
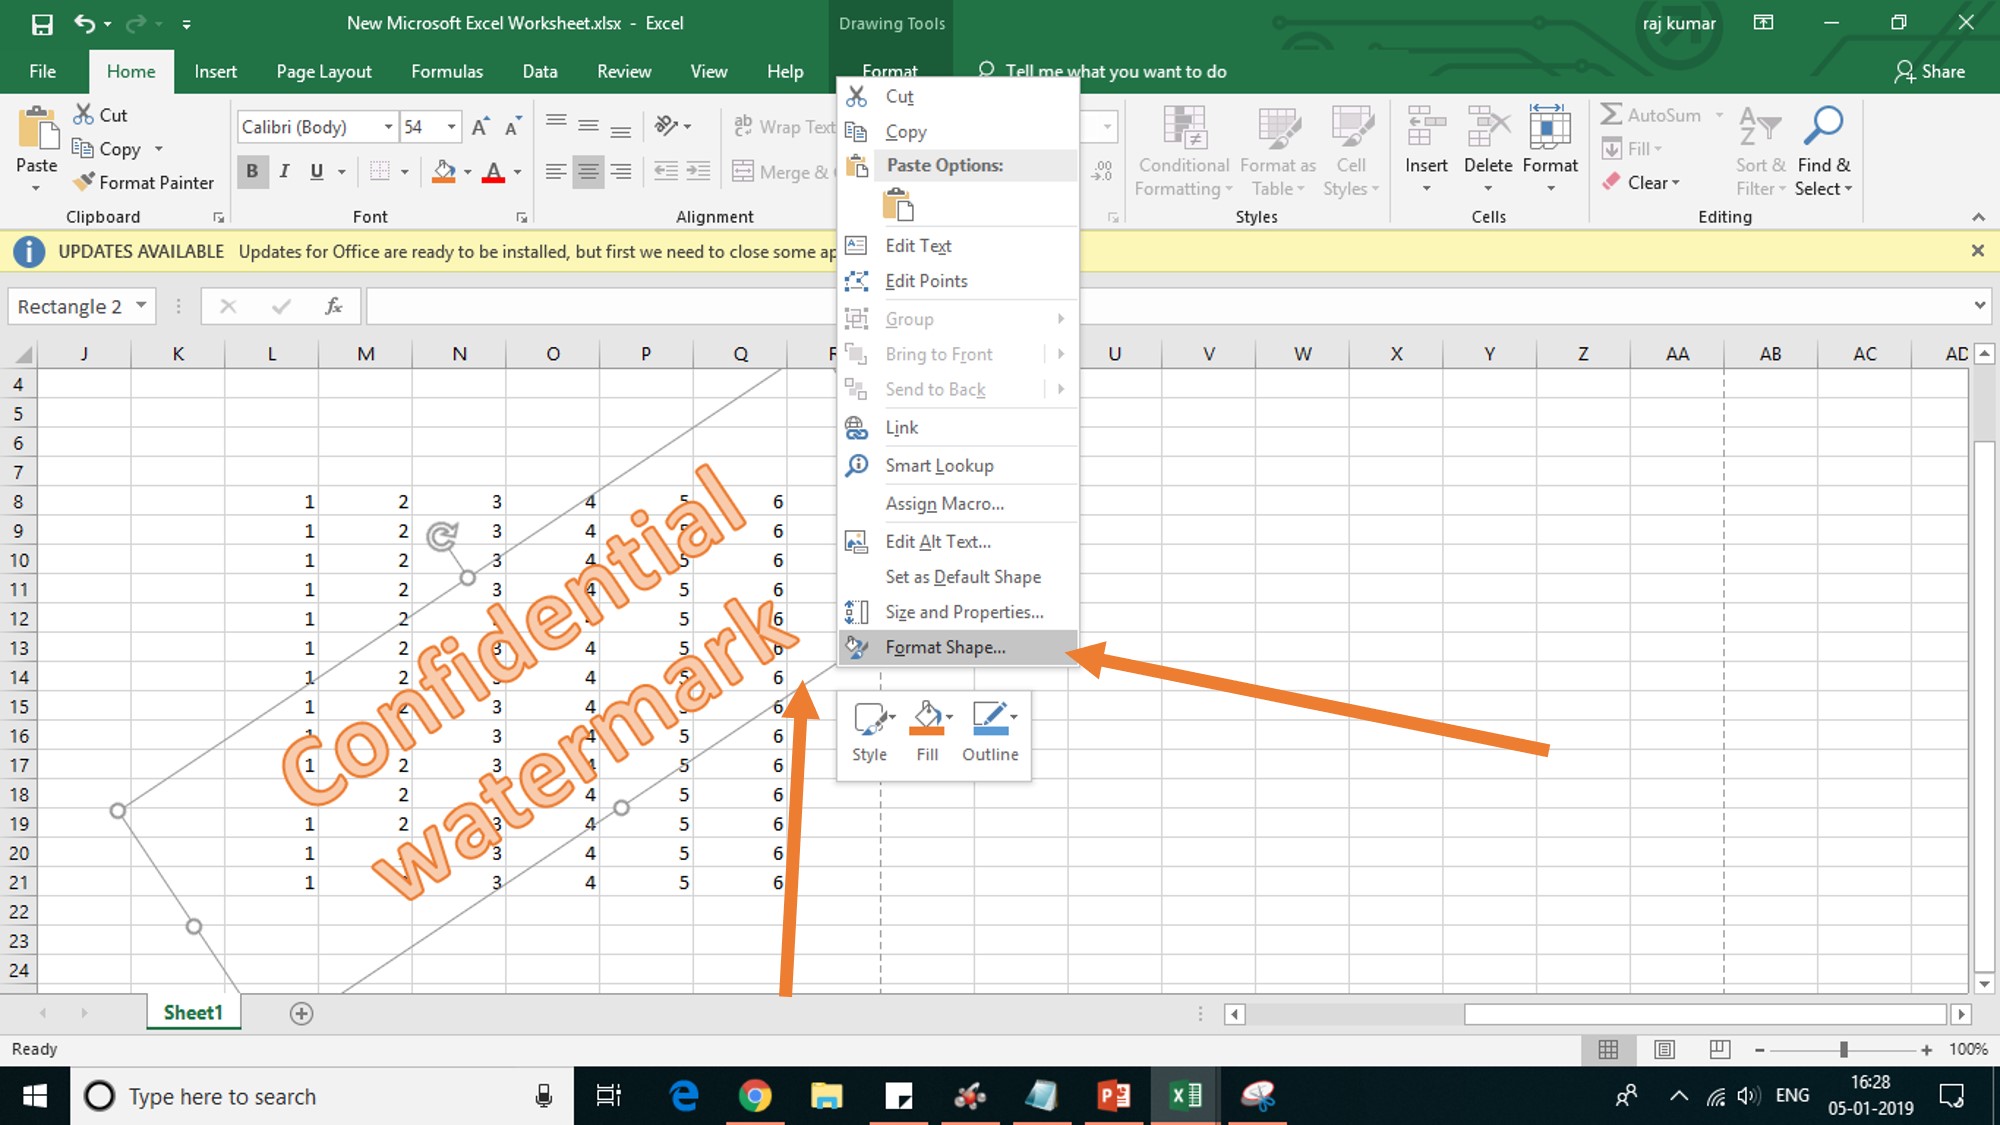
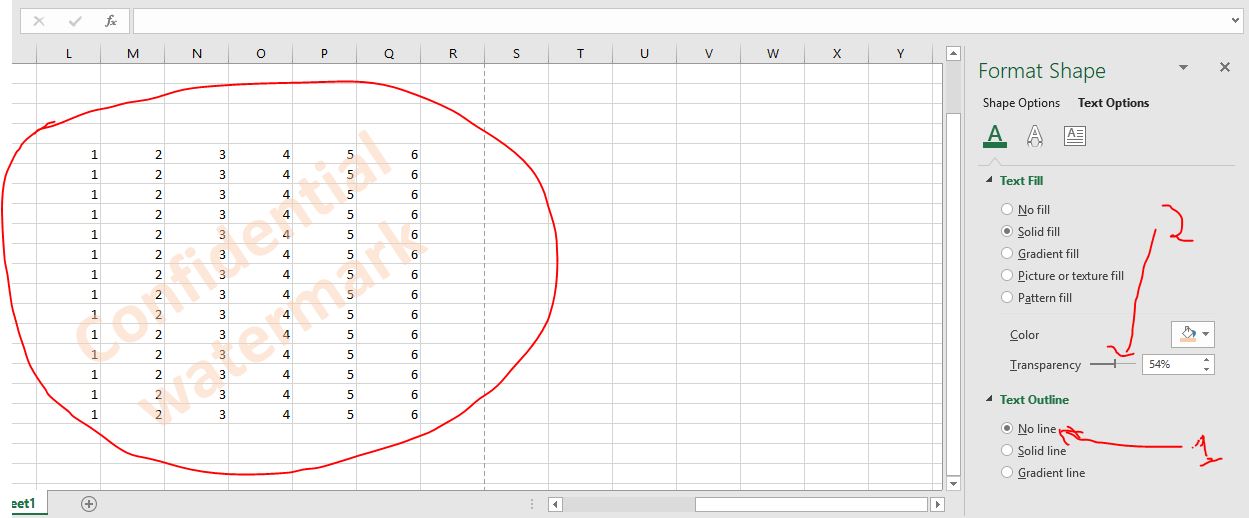
3. From Format Shape click on the Text options.
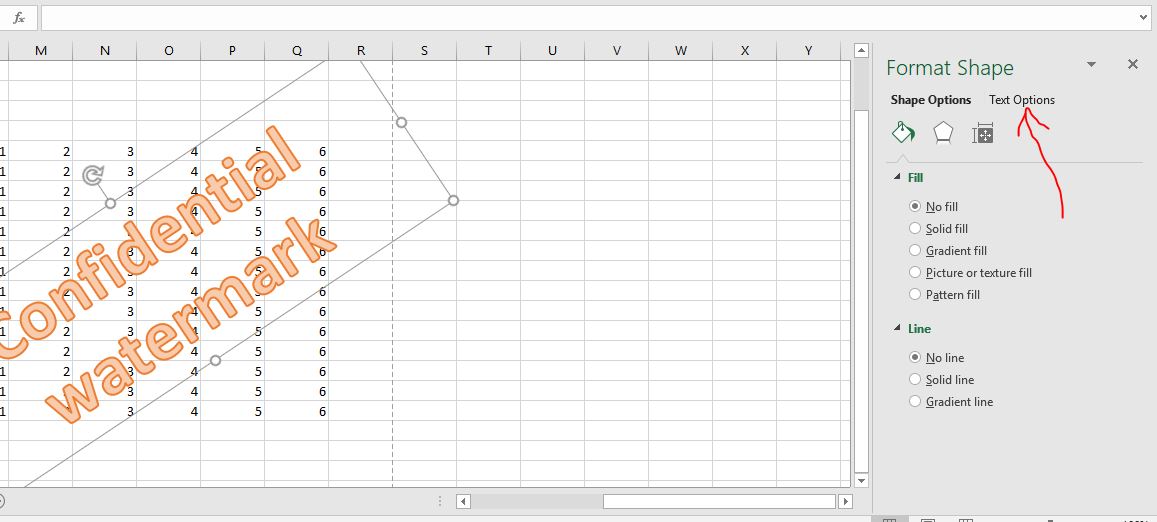
4. Now if your text has an outline then select the No Line option and then use the Transparency slider to adjust the lightness or fading of the Text. When you think the text looks alike a Watermark just leave it there and you will get the Text watermark on Excel.
Other Useful Resources:
- What are CSV files? How to make them and why they are great to organize data
- Tutorial to stop Gboard from censoring text using block offensive words feature
- Hide Whatsapp chat without archive in GBwhatsApp: Android
- Convert scanned PDF to Word online
- How to get a Microsoft Excel Worksheet within Microsoft Word to handle data more efficiently


Hi Rajkumar,
Nice Article. Thanks for sharing this informative and useful article on your blog. Keep sharing. Looking forward to the next post. Also, see out Excel file comparison tool Synkronizer