The Internet is full of harmful objects or security issues such as viruses, malware, ransomware hackers and more. The big organizations spend an enormous amount of money to maintain security infrastructure and in building firewalls to protect their internal networks and data.
To secure home or office networks you don’t need to spend a heavy amount, it can be possible with the help of simple open source firewall Linux operating systems like PfSense. It is a network firewall or router software distribution based on FreeBSD. Anyone with some technical knowledge can turn an old system or routers into a dedicated network firewall.
However, the pfSense is not alone opensource firewall there are a couple of others too, you can see our articles for more information on this: Nine Top opensource network firewall Linux systems.
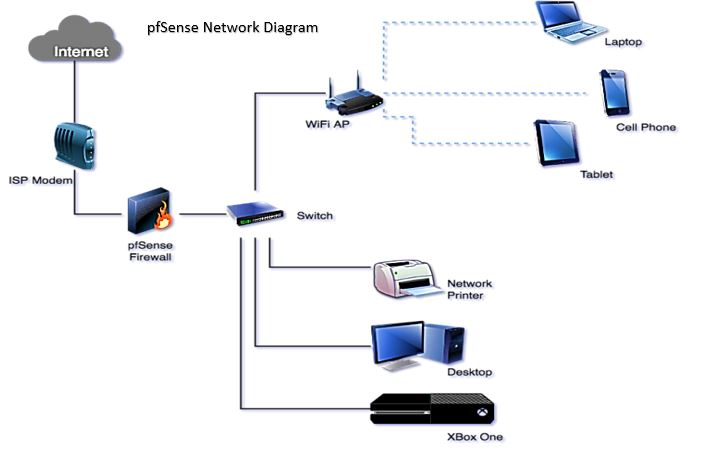
The pfSense should be installed between the Internet and other products that are using the Internet as shown in the above diagram. Also, make sure the system you are using for the pfSense must have two network interfaces one for WAN and others to connect LAN.
The minimum hardware or system requirements for the pfSense are also basic, any old system with below-given configuration can easily handle the installation and process…
| Linux pfSense System Requirements: | |
| Minimum |
|
| Recommended |
|
| Requirements Specific to Individual Platforms: | |
| Full Install |
|
Here in this tutorial, we let you know how to install & setup pfSense on Virtualbox and Vmware.
The process of Linux pfSense installation on Virtualbox is same for Linux Ubuntu, Windows, MacOS or any other operating system and the same for Vmware Workstation player too.
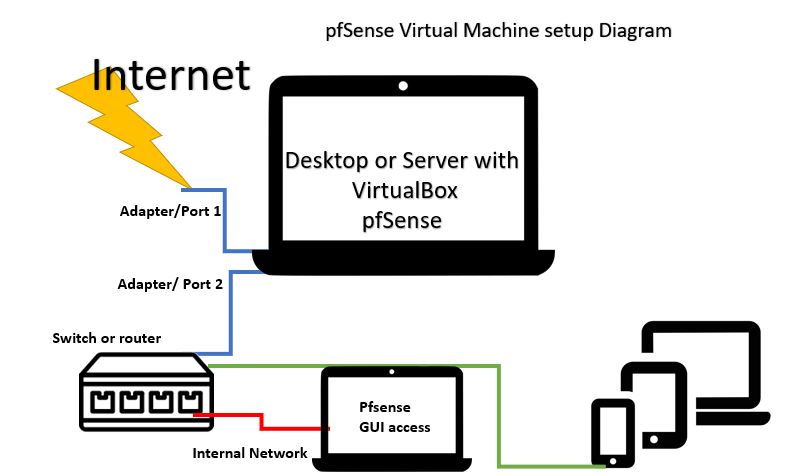
Note: To set up and use pfSense on Virtualbox virtual machine environment as a firewall to save the network from threats; your physical machine should have two adapters. It can be Wireless+Wilress or Wireless + Ethernet or Ethernet+Ethernet.
Note: If you just want to test the pfSense then one network adapter can be used to access it by setting up a same physical adapter for both virtual adapter of VirtualBox and later when the installation is done the just manually enter the LAN address within same range to WAN address from pfSense management screen.
In our case: We have one Wireless that we are using to access the internet and one is ethernet that is connected to the internet network switch from where further devices such as laptops, printers, router, are connected.
pfSense VirtualBox / Vmware Virtual machine internal/external network diagram
Step 1: Download pfSense ISO file
Go to the pfSense website and download the pfSense ISO file. Select the architecture AMD64 and CD image (ISO) installer and click on the Download button.

Step 2: Setup Virtual box for pfSense
Assuming that you already have the Virtualbox installed on your system, if not then first download and install that.
- Open the Virtualbox.
- Click on New Button.
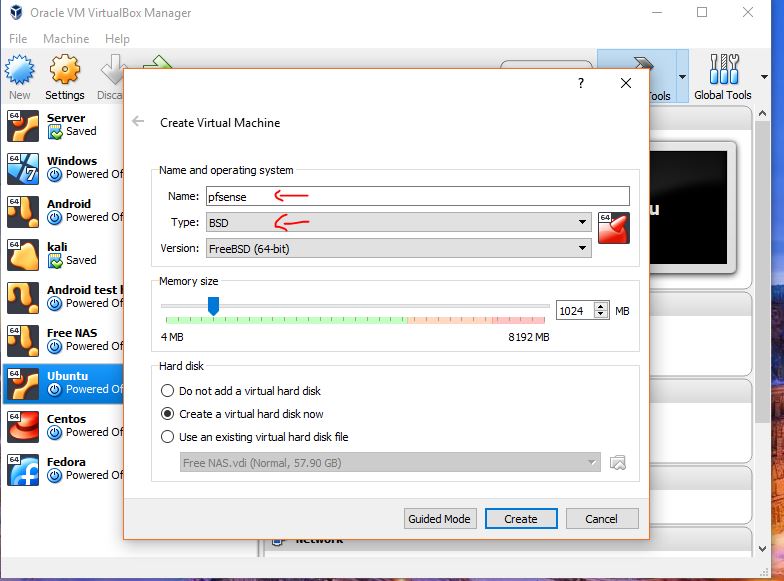
- Give some name to your machine as we have given pfSense. From Type select the BSD and Version: FreeBSD (64-bit). Assing memory around 1Gb for better performance and then click on the Create button.
- Select Create a virtual disk now option.
Step 3: Create a Virtual hard disk for pfSense
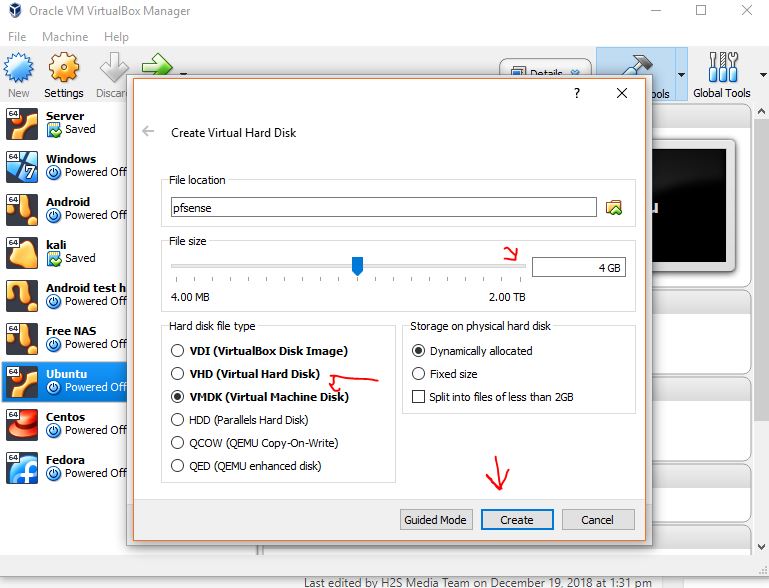
- Select the size of the hard disk you want to assign to pfSense firewall. Like we have given the 4GB which is more than enough.
- Select the hard disk file type, you can select any of them.
- Click on the Create button.
Step 4: Add pfSense ISO image to Virtualbox
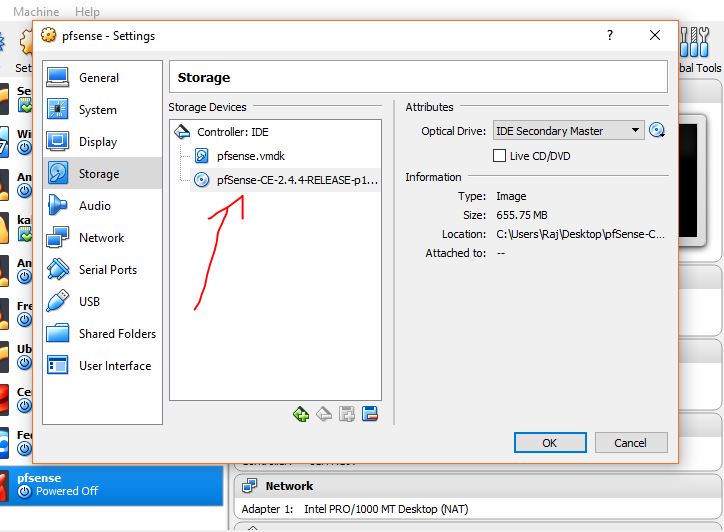
Select the newly created pfSense virtual machine and then click on the settings option.
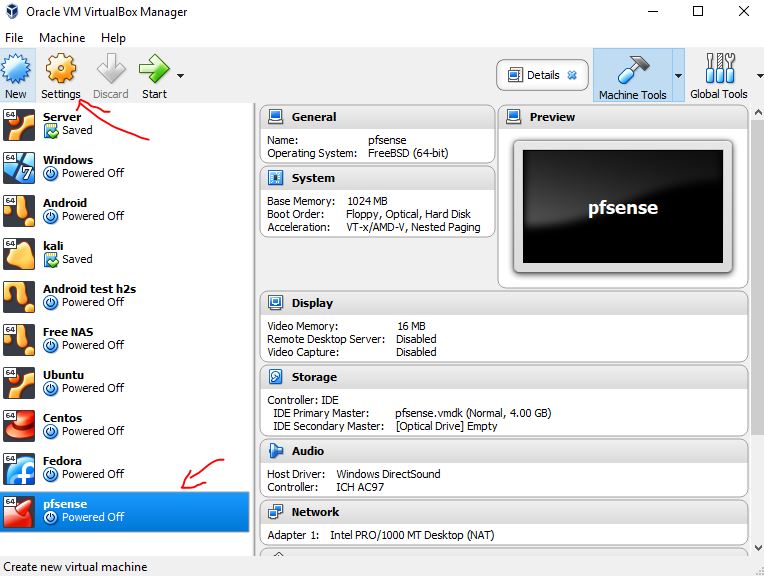
- Click on the Storage settings option
- Select the Empty CD ROM icon
- Click on the CD icon given on the right side of the Optical drive drop down box.
- Use the Choose Virtual Optical disk file option to select the downloaded pfSense image.
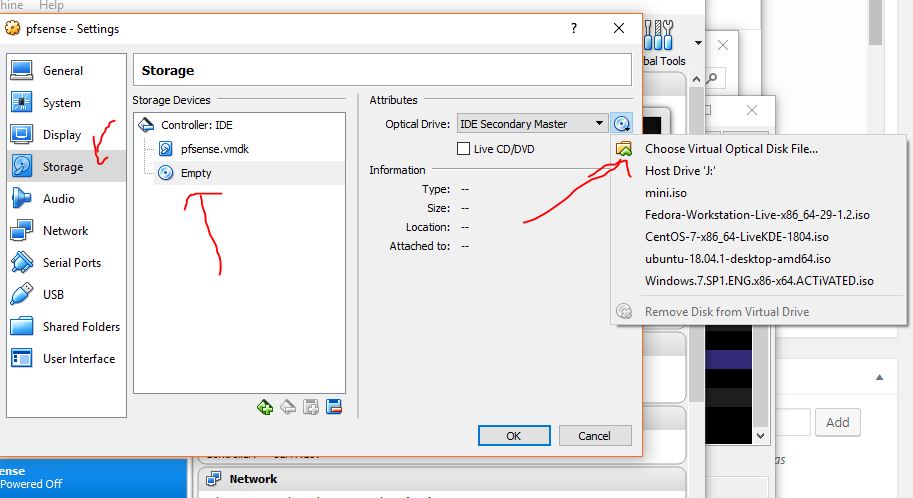
Once you select the pfSense image it will show under the Storage devices section of the Virtual box.
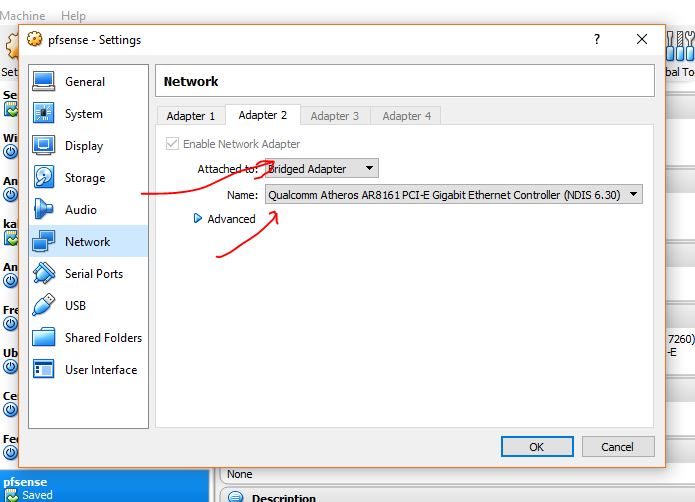
Step 5: VirtualBox network settings for the pfSense virtual machine
Now from the Network settings, you need to add two adapters for your pfSense firewall. One is acting as WAN and another one is for LAN or internal network.
Note: If you just want to test the firewall and only have one physical adapter then you can use the same adapter in Adapter 1 and Adapter 2.
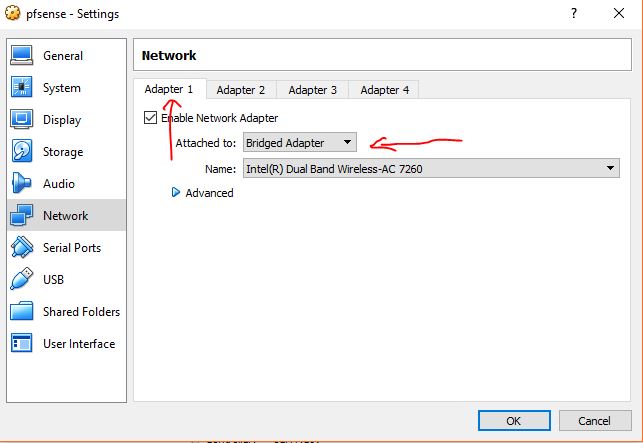
Enable the second adapter and select the adapter that is attached to your internal network. Add press OK
Note: The Name of the adapter would be different in your case.
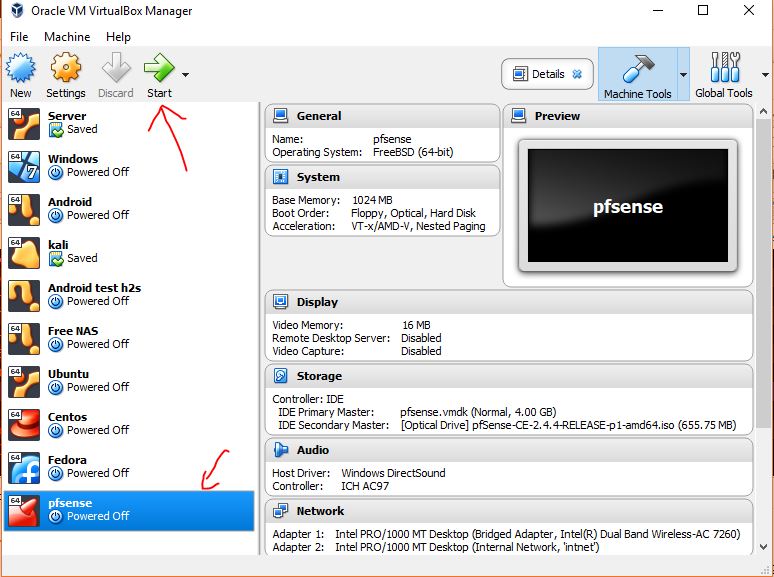
Step 6: Start pfSense Virtual machine
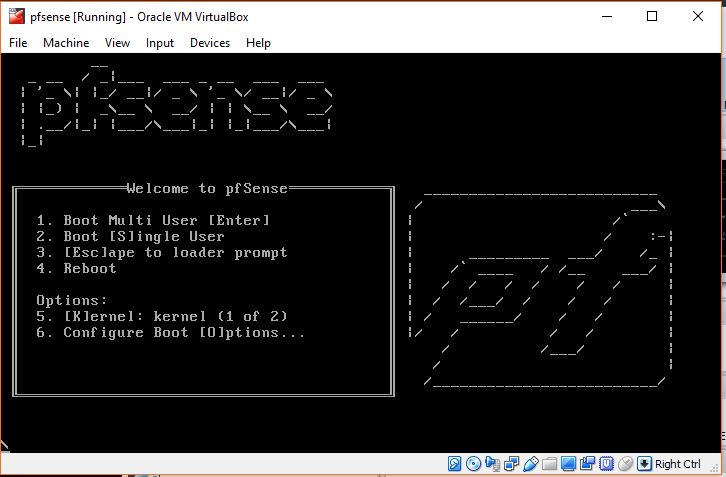
Step 7: pfSense Boot screen
The pfSense will start boot automatically in few seconds to install the firewall on Virtualbox.
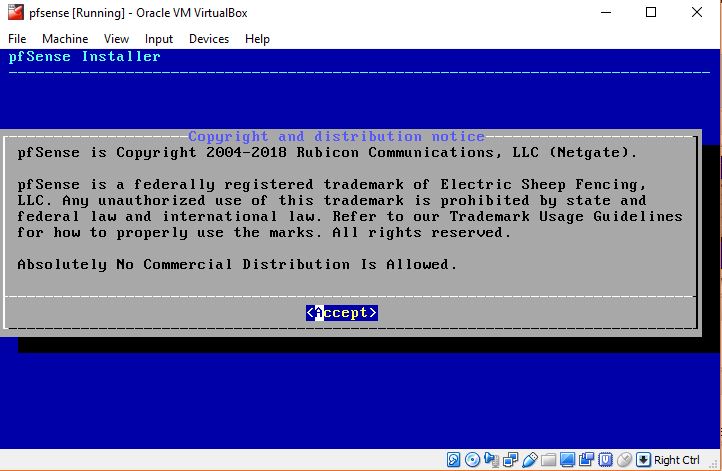
Step 8: Accept the distribution license for pfSense.
Hit the Enter key to move further
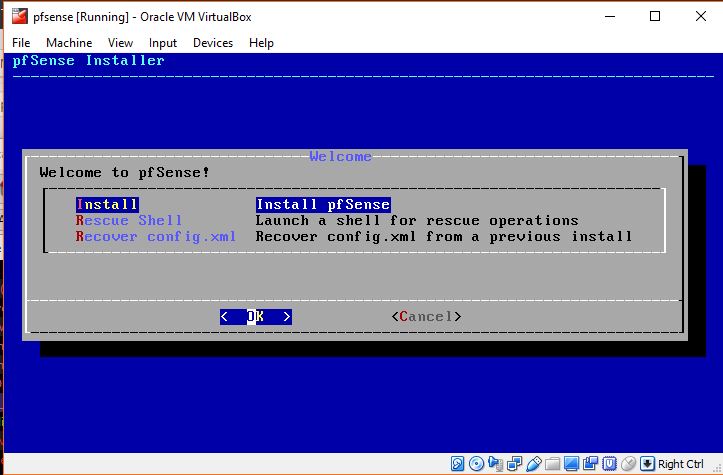
Step 9: Install pfSense
Again leave the default settings and just hit the Enter button to make the install.
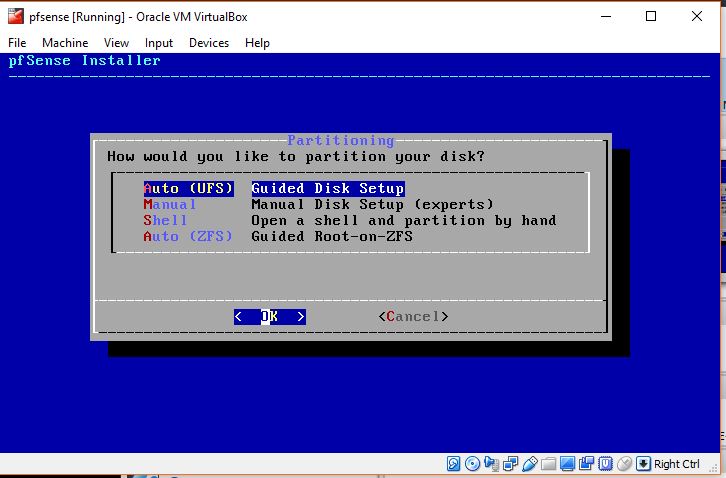
Step 10: Guided Disk setup
Hit the OK button…
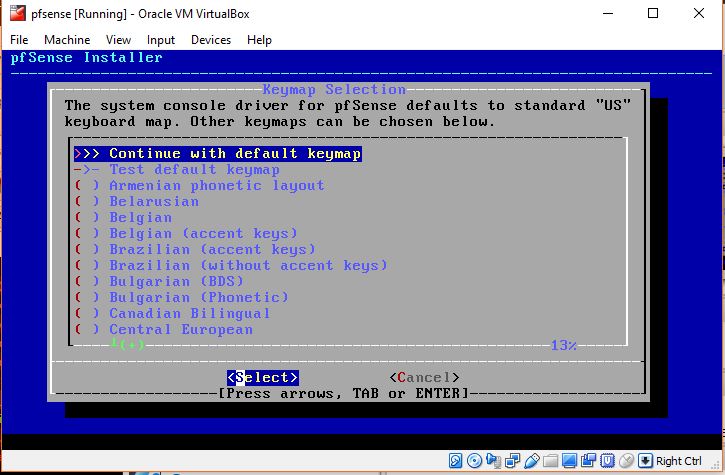
Step 11: Continue with default keymap
If you are using the standard keyboard which generally we all do, then leave the setting as it is and press the Enter button.
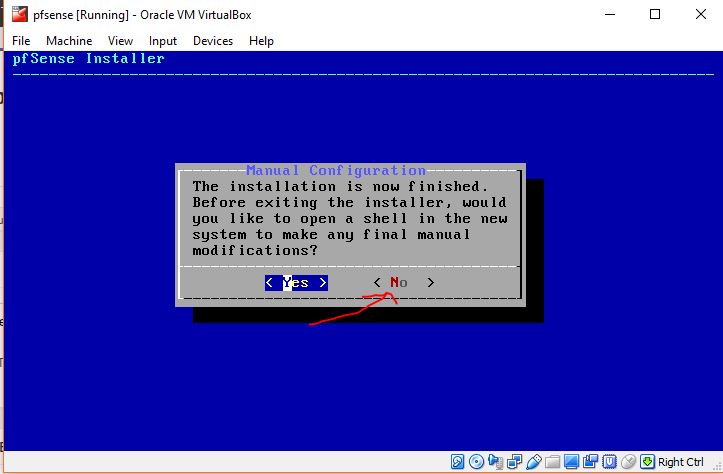
Step 12: Manual configuration: Select No
There is no need to do any manual modifications just select the No option and press the Enter button
Step 13: Eject the attached ISO image of pfSense.
Select the Devices->Optical Drives and then click on pfSense ISO.
You will get a pop-up to force unmount the ISO click on the Force unmount option.

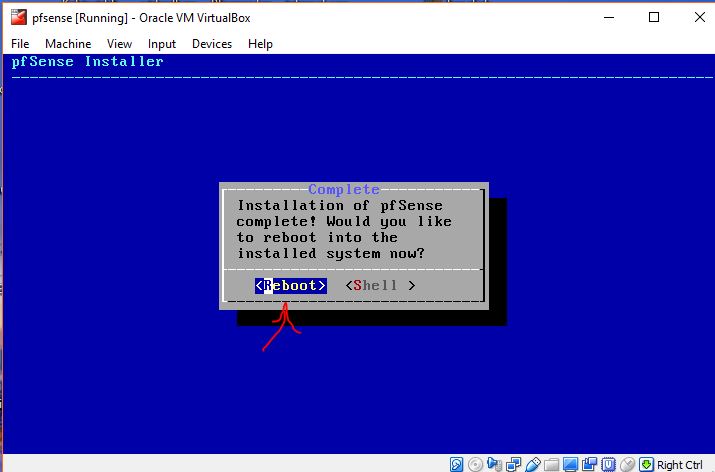
Step 14: Reboot the pfSense virtual machine
Click on the Reboot option when appears.
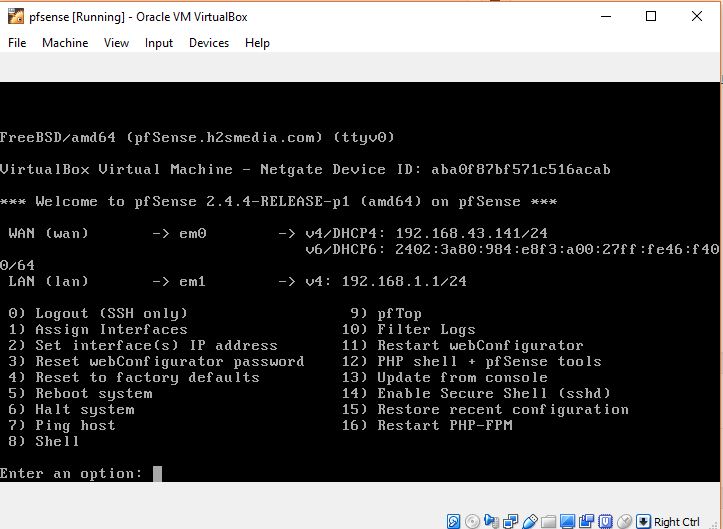
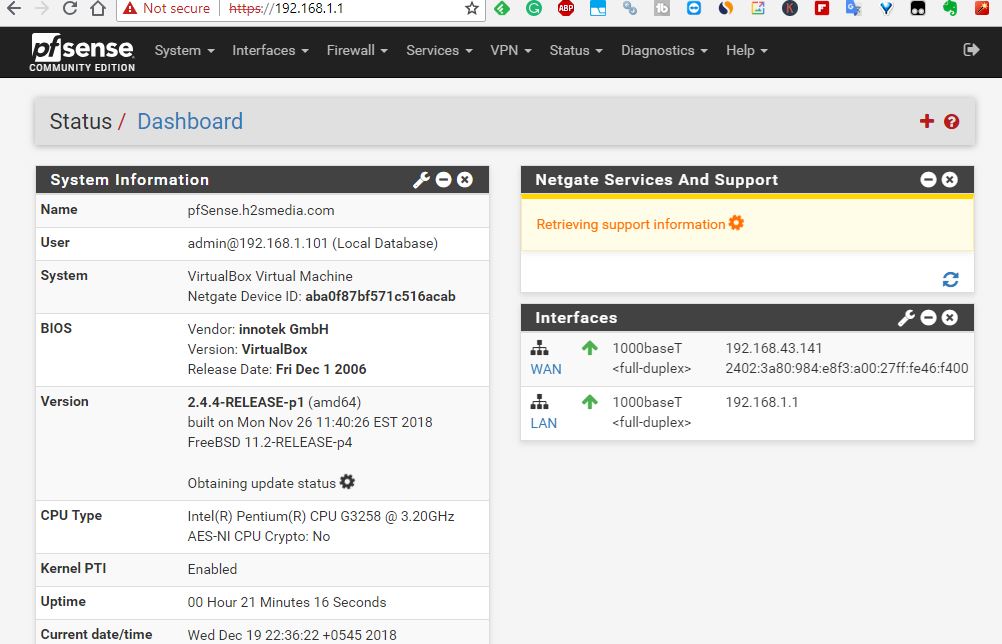
Step 15: pfSense IP addresses
Once the pfSesne gets booted you will receive two IP addresses one is which pfSesne got for WAN access and other is for the local network.
In our case:
WAN: 192.168.43.141 (Adapter 1 of Virtual box)
LAN: 192.168.1.1 (Adapter 2 of Virtual box)
To access the front end or Web interface of pfSesne to configure it. You need to go to the system that connected to the Adapter 2 or LAN (em1) network of the computer/server in which you have installed the pfSense Virtual machine.
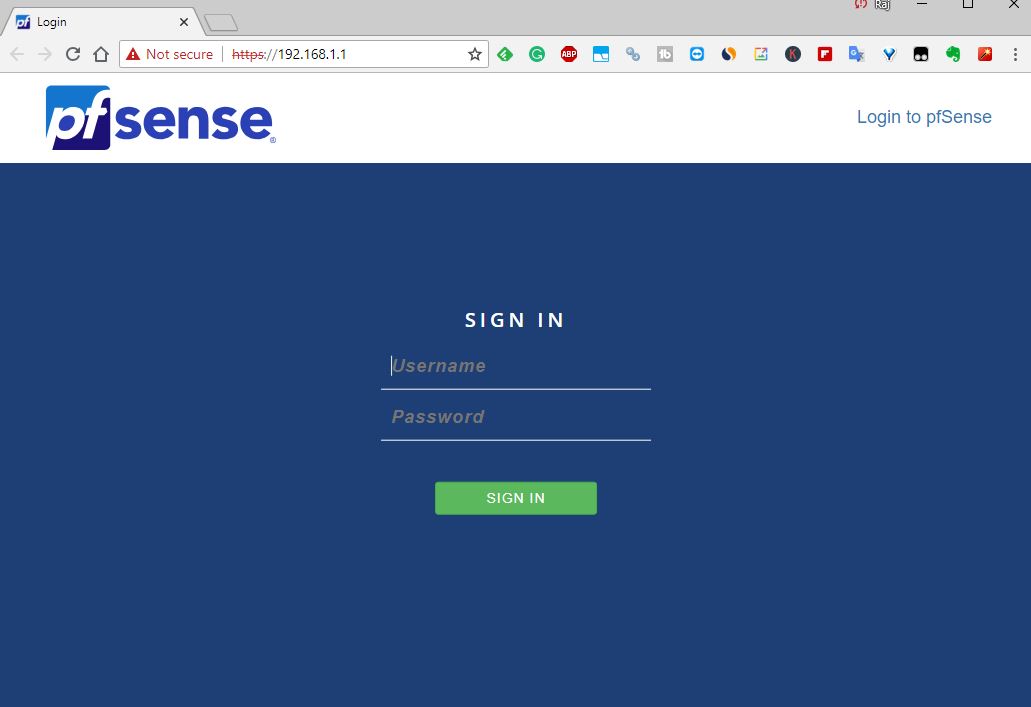
Step 16: pfSense default password
In the browser, type, the LAN IP address mentioned on the pfSense booted screen. As soon as you enter it will show https error just add it as an exception and click on the link proceed safely. When the pfSense login screen appears to enter the default password and username type them username: admin and password: pfsense respectively.
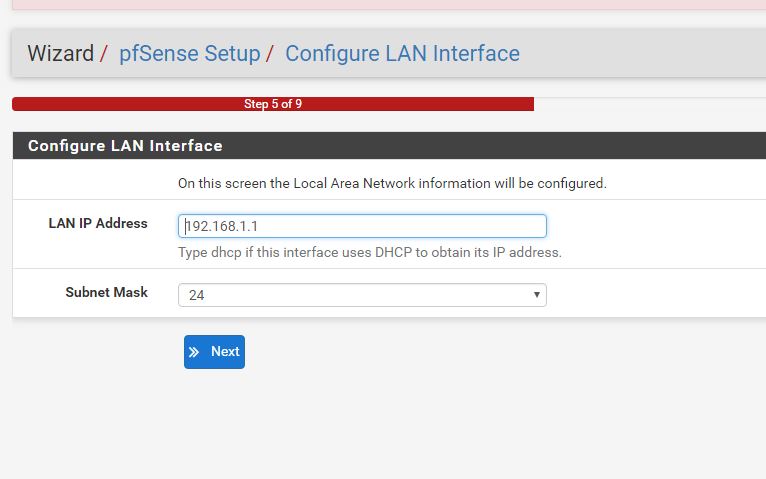
Step 17: Follow the guides screen of pfSense firewall
Leave LAN interface IP address as it is… and click on the Next.
Update the Admin password when it asks for…
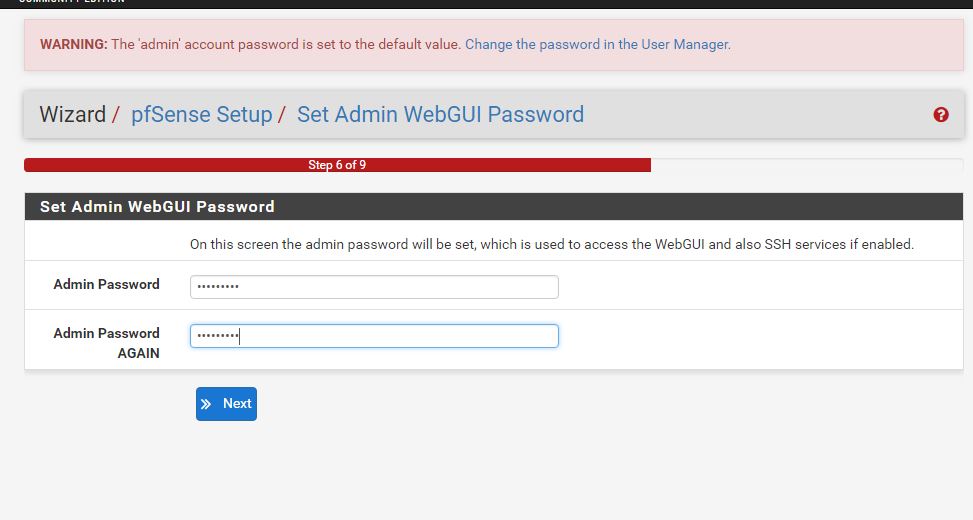
Complete the pfSesne setup wizard and Click on the Finish button…

Now the Dashboard of the pfSense will appear from where you can control firewall, VPN, Status, Interfaces, System, Diagnostics…
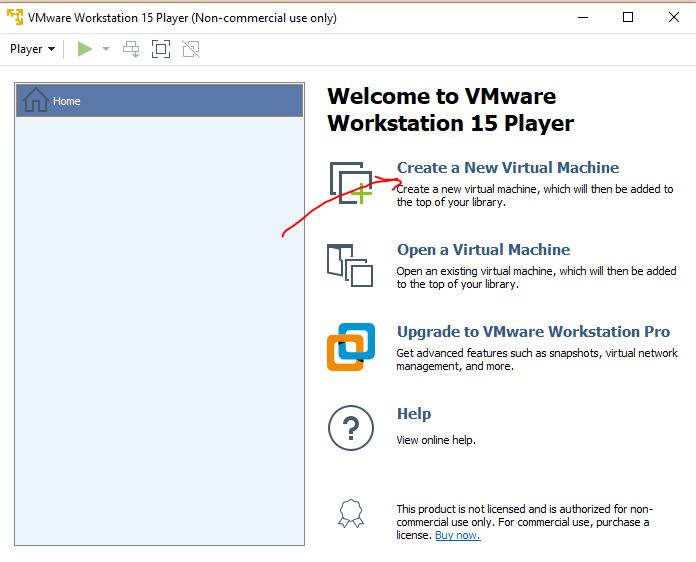
If you are using the VMware Workstation then everything from pfSense installation to setup will same except the creating of Virtual Machine on it.
To create a virtual machine on VMware open it and click on the Create a New Virtual Machine option.
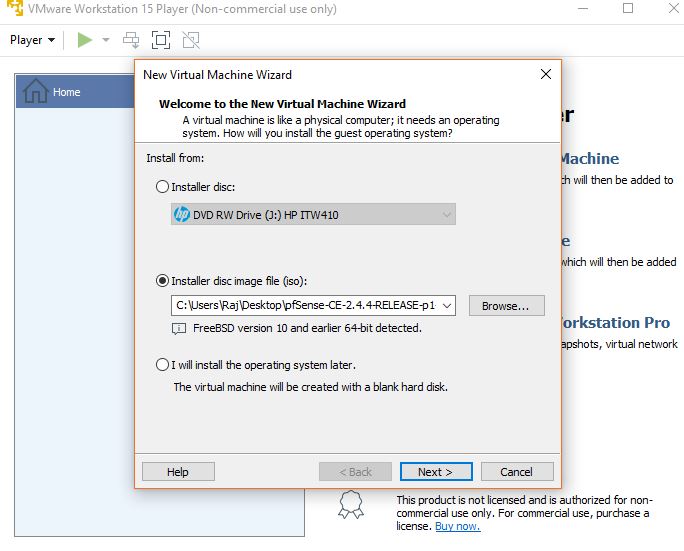
Select the Installed disc Image file (ISO) option and then click on the Browser button and select the downloaded pfSesne ISO image and then click on the Next button.
Type some custom name if you wish to give your pfSense VM and then click on the Next button.
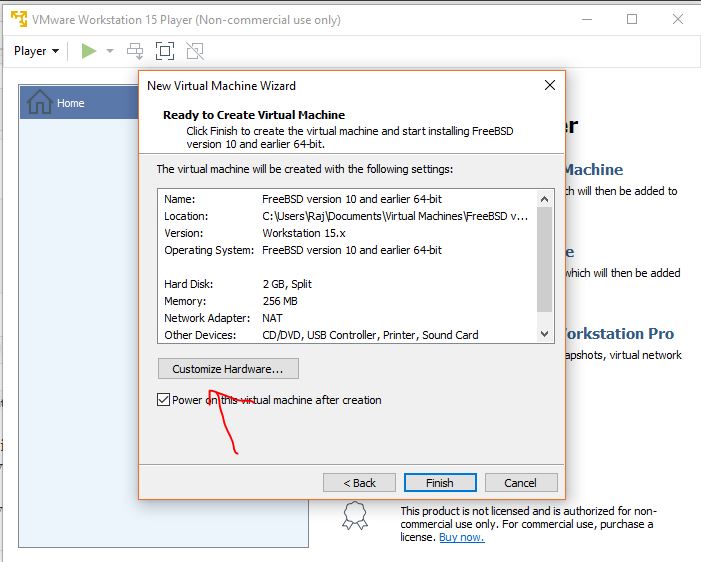
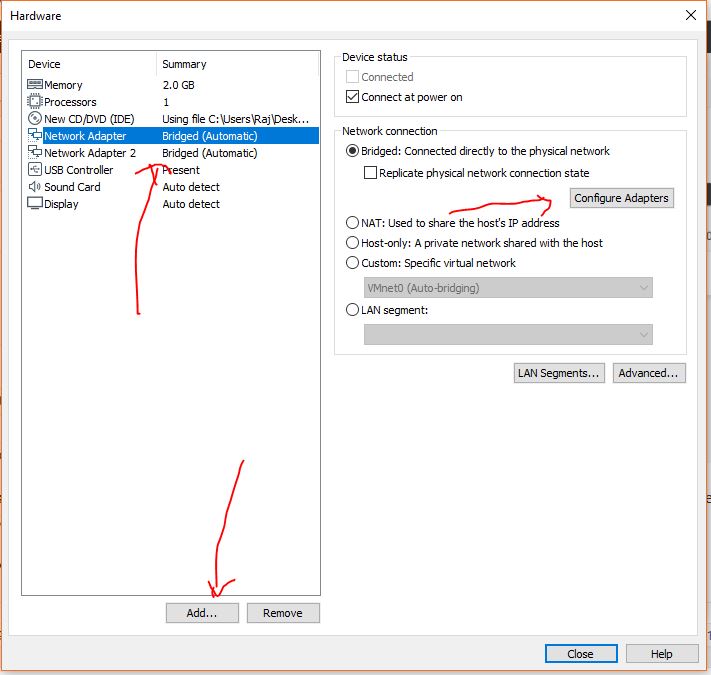
Click on the Customize Hardware button…
Change the RAM to 1 or 2GB and then click on the ADD button to add one more Network Adapter for pfSense VM. For both, the network adapters select the bridge option and then select the Adapters using the Configure adapter option. As we did for Virtualbox above.
In this way, you can use the install, setup and use the pfSense firewall on Virtualbox or Vmware workstation player virtual machine to use it as a commercial, home or office firewall solutions without wasting hardware resources.
Other Useful Resources:


I did all this and installed pfSense, but it isn’t actually useful in this configuration as far as I can tell. pfSense is a firewall and it does not act as a firewall for the host computer if it is running as a virtual machine under VMware or VirtualBox. Nor does it seem possible to attach other LAN machines to the pfSense firewall to use it as protection, but on this point I am not sure. There could be some configuration of host Ethernet configuration and virtual machine Ethernet configuration that could work and I have not found it yet. It seems like this article about using pfSense in a virtual machine ignores the hard part, which is how to set up pfsense to actually be usable as a firewall from a virtual machine.
really thanks for these steps. It helped me a lot
Right, so I am a bit stuck at step 15.
“You need to go to the system that connected to the Adapter 2 or LAN (em1) network of the computer/server in which you have installed the pfSense Virtual machine.” – stupid question, but how do I reach that system, considering the only OS installed is pfSense (i.e. there is no browser)?
My approach was to install Linux Mint in another instance of VirtualBox, and in Settings > Network, I selected “Internal Network” to make Linux and pfSense part of the same environment. However I can’t connect to the network in my Linux VM (note: when I leave the Network setting to the default NAT, I have internet access in Linux).
Any suggestions are welcome.
You have to use an external browser, that’s why we put it in the bridge, which is for communication between the VM and your computer. Try to enter the IPs of your PF Sense interface, sometimes you need to open the pf sense shell and disable the frontend firewall, press 8 in pf sense which is to enter the shell and use pfctl -d. I can only access the frontend over the WAN.