
Python is no doubt one of the most popular languages for programming and is also extensively used in data science. That being said, you might need to use a number of dependencies from time to time, to get to greater heights, when you are using Python. It comes with numerous tools for data analysis, data visualization, in the field of data mining and data science. Apart from that, you can also get access to a number of advanced tools, which can eventually be helpful in application development, and scientific analysis. Canopy python is completely free to download, and thus, if you are a Python programmer, get Canopy today. I will guide you through the Canopy installation instructions, on Windows and Linux (like Ubuntu & LinuxMint).
There is Python Canopy for Max, as well, but I will be discussing the methods to install it on Windows and Linux. Canopy is free, and thus, there isn’t any Canopy subscription, when you are using it for personal use. Canopy is also available for servers, and enterprises, which make Canopy the cross-platform tool, for development, and a number of advanced tasks. Without further delay, let’s start with the installation of Canopy on Linux.
Tutorial Guide to Install canopy python on Windows and Linux
Canopy Installation on Linux
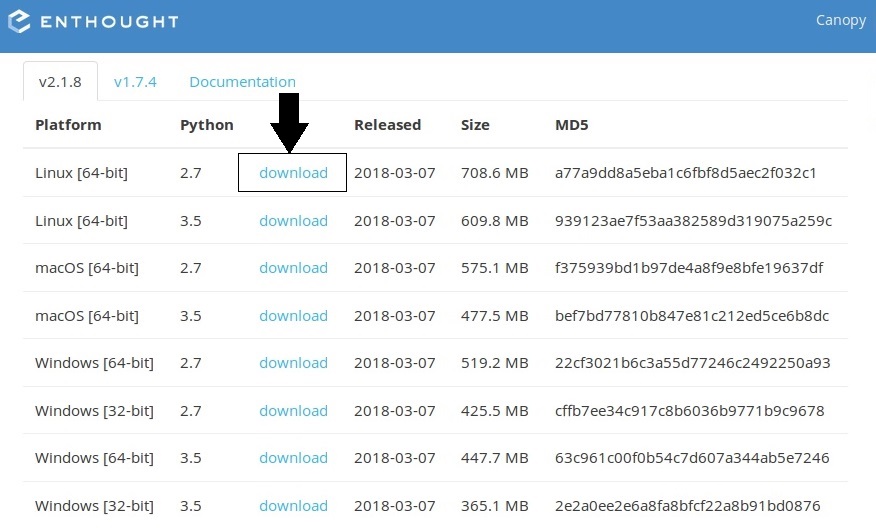
Step 1: Go to ‘https://store.enthought.com/downloads/’, and download the latest version of Canopy, unless you are needing a specific version of it. For the sake of compatibility, I will be downloading the Version 2.7 for Linux. The prerequisite is that you should have a 64-bit edition of Linux, for Canopy to run. I am not sure, whether there are ways to use Canopy on a 32-bit Linux, but the ‘.sh’ for Linux 32-bit is not available in the Downloads section.
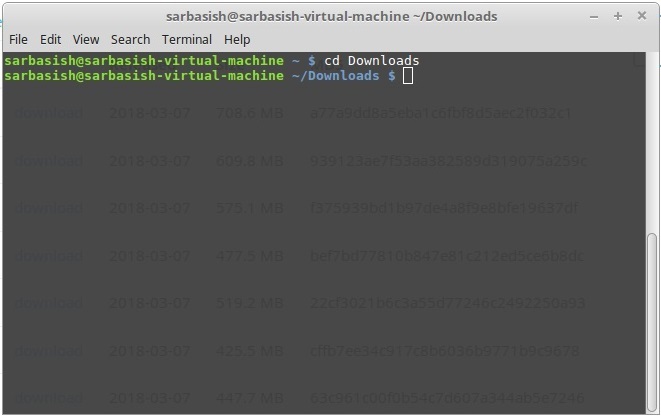
Step 2: After the download is complete, open ‘Terminal’, and move on to the directory, where the downloaded file is present. If you haven’t moved it somewhere else, it should be present in the ‘Downloads’ folder in your Linux Home directory. Just type, ‘cd Downloads’, from the Home directory and hit the enter key, to move to the Downloads folder.
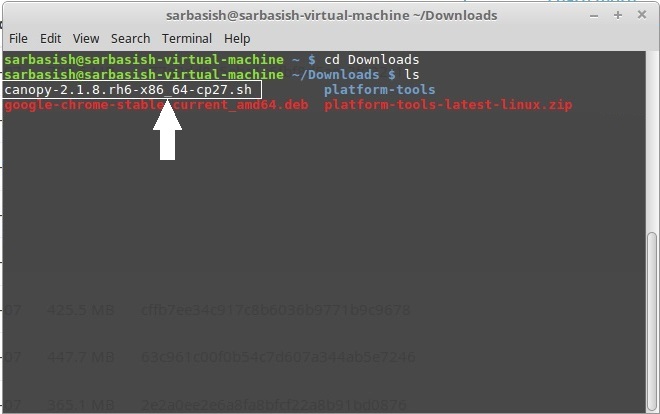
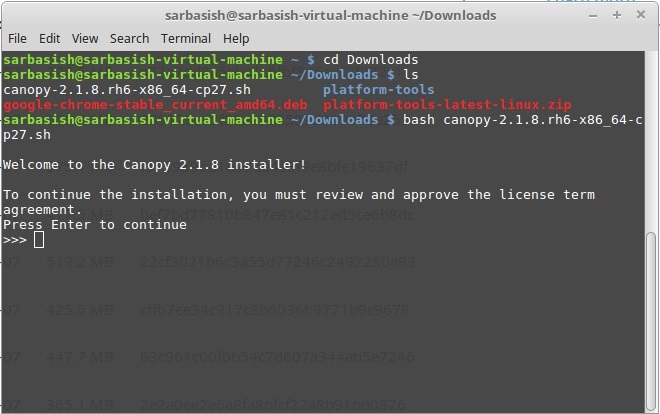
Step 3: Now, type ‘bash <filename>.sh>, where the filename should be the name of the file you downloaded. If you cannot remember the filename, just type ‘ls’, and hit the enter key, to find a list of files, which will also include the installer, in .sh format.
Step 4: The installation will start now, and you will have to give some permissions at the time of installation, and the installation will take no longer than 5 minutes, even with a decent hardware.
Once you start the installation, it will ask for permission, and you will have to hit the Enter key to proceed with the installation process.
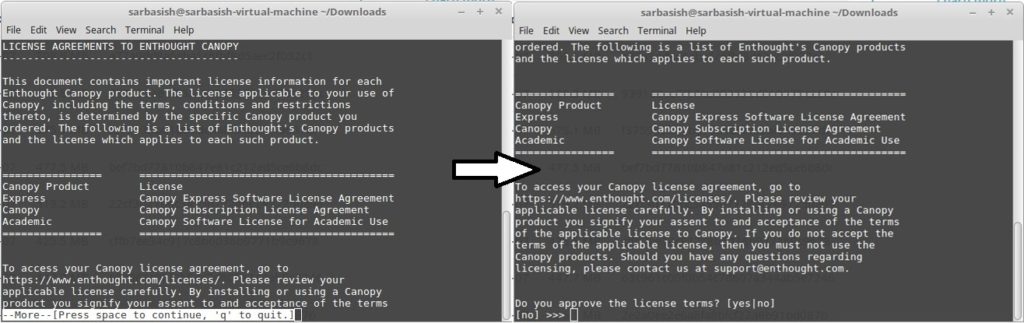
Step 5: Now, after that, the license agreement will be shown, and you will have to press the space bar when asked, to read the remaining part of the license. After reading the license, you will have to type ‘yes’, and hit the enter key, to accept the agreement, and carry on with the remaining part of the installation process.
Step 6: Now you will be asked to enter the Canopy Python installer path, where you want to install Canopy, and the default path will be in your Linux Home directory. You can write the path, where you want to install Canopy, or just hit enter, to start installation in the home directory.

Step 7: Once you see the screen below, the installation is completed successfully.
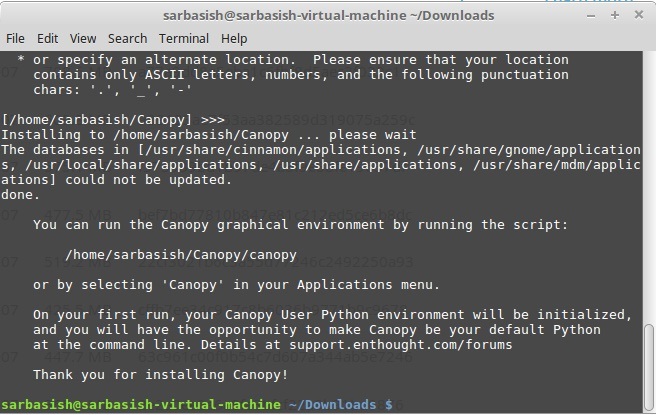
The Enthought Canopy, in my case, is installed in the home directory, and thus, in order to open Canopy, I will have to type ‘~/Canopy/canopy’. In case, it is installed in a different directory, just type ‘<path>/Canopy/canopy’, and hit the enter key.
*Linux being case sensitive, the ‘C’ for the first Canopy, or the Canopy folder should be in capital, while it should be ‘c’ in case of the second Canopy.
It will take some time to load, for the first time, and if you get a screen like this, ‘Canopy’ is properly installed, and you can launch it anytime with the command given above, directly from the Terminal.

Canopy installation on Windows
The installation of Canopy and Enthought Canopy packages on Windows involves the same process of downloading the installer from the official Canopy website, and go through the installation process. But, unlike Linux, you will not have to work with Command Prompt on Windows, at least at time of installation. Let’s begin with the process of downloading Canopy on Windows 7.
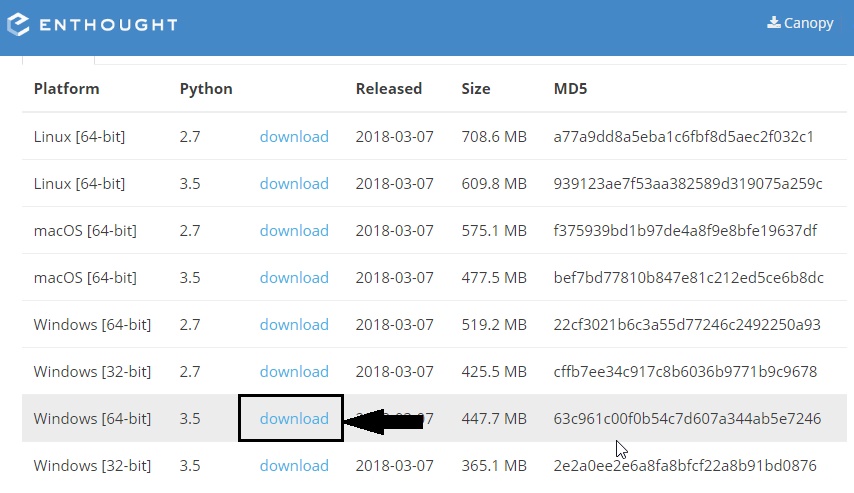
Step 1: Navigate to the same ‘https://store.enthought.com/downloads/’, and choose the most suitable one for you Windows, depending upon, whether you are having a 32-bit or 64-bit edition of Windows. 32-bit or 64-bit, I will always recommend you to go for the latest version, unless you need a lower version for some requirements.
In this case, I will be downloading the Version 3.5 for Windows 64-bit, as I am currently using the 64-bit version of Windows 10, on my computer.
Step 2: After the download is complete, navigate to the folder, where it is downloaded, and it will come the extension ‘.msi’, which are Windows installers? For me, the filename will be ‘canopy-2.1.8.win-x86_64-cp35.msi’, which can be different for, if you download different versions. Double click on it to start the installation process.
A window like this will appear.
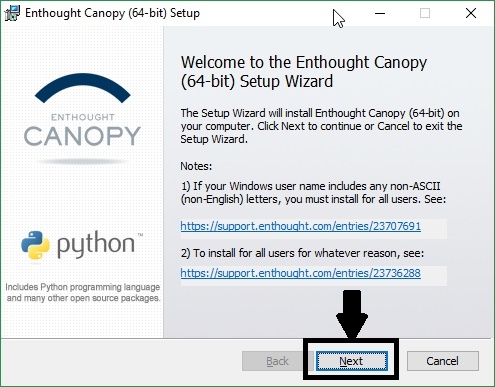
Step 3: The installation of Canopy on Windows is easy, and you will have to click on ‘Next’ now, accept the ‘Terms and Conditions’ on the next page, and again click on ‘Next’ again.
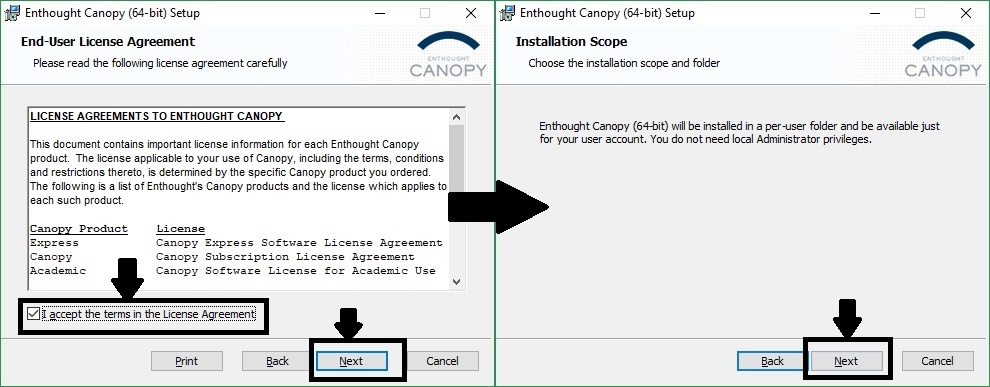
Step 4: Finally, just click on the ‘Install’ button to start the final installation.
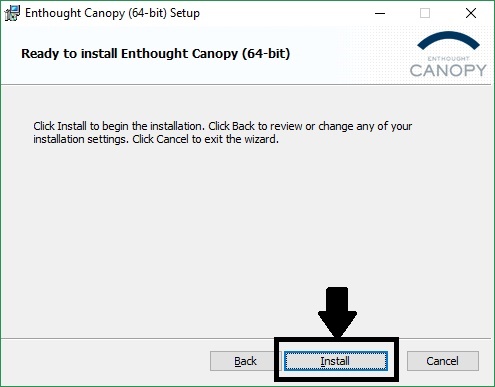
The installation process will hardly take a few minutes, depending on your computer.
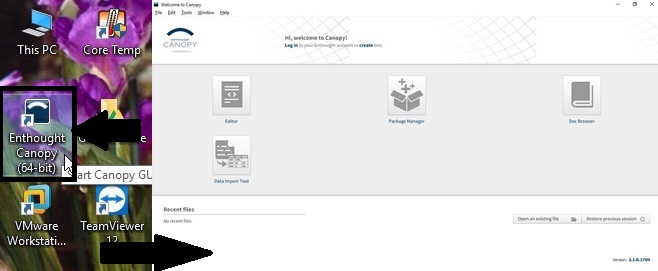
Step 5: After the installation is complete, just click on ‘Finish’ button to close the installer. You can unmark the option saying ‘Launch Canopy when setup exits’ if you do not want to launch Canopy instantly after the installation.

Step 6: If you are missing the option to install Canopy in your desired folder, the option is not available, as Canopy Install package will always install itself in the home directory of Windows, Thus, the Canopy Python path will be ‘<Primary partition:\>Users\<User_name>\Canopy’.
But, the good side is, you can open Canopy directly from your desktop, and the start screen will look something like this.
Hope, the small tutorial on how to install Canopy on Windows and Linux, was helpful to you. You can even find a number of Enthought Canopy tutorial, to get the maximum potential of Canopy, when you are working with Canopy for your requirements.
You can also take the advantage of Canopy at the time of going through Python data science training, and Python machine learning training, and it will surely make everything, a piece of pie for you. If you have more questions on Canopy installation, do not forget to comment it down below, to allow me to help you with all your queries.
You might also want to know about:
- Reset Windows 10 Password without Admin Login
- Install Java in Ubuntu / Linux mint using Terminal
- How to install Owncloud 10 on Ubuntu 16.0.4 Server
- How To Change Ubuntu Root Administrative password, if Forgotten
- Install Covenant add-on for Kodi for Windows, Android, and other platforms
Related Posts
How to proceed with the Python Canopy installation steps, on Windows and Linux?