We almost every day use a computer to do various kind of jobs. From office works to communication needs, for gaming or any other entertainment needs and for any type of internet usage we pretty much use a computer every day several times. Using a single desktop or laptop is the most common type of thing which most people do. Though there are many users who do use multiple computers for many reasons. Many programmers do use multiple computers for their ease of job, many graphics designer also do the same. However, in the case of online game streamers, using multiple computers at the same time is one of the most common things to be noticed. Except this, there are many people who have multiple PCs at home and they always looking for a way to easily connect them with each other for file sharing. So, whoever the user is and whatever the reason behind it, any new user can easily be confused about the technique of connecting two PCs. Especially if those computers have the different operating system installed. So, to make it easy and confusion less the reader should go through this article thoroughly.
Ways of connecting two PCs
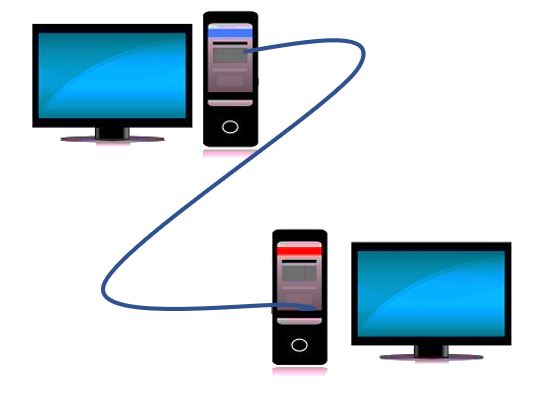
The most common way to do it, is of course using the RJ45 ethernet cable to connect the computers. It also can be done using a wireless router, but to do that the PCs must be Wi-Fi enabled. As, the connections can be many types of like, Windows to Mac, Mac to Mac, Windows to Windows, for sharing the internet from the mac pc or from the windows pc, so of course there are many types of confusions can arise in each type. Here we have discussed about all the methods below.
There is one thing the user should know that sharing the internet of one pc to another is one thing while sharing the files which are stored in a pc from another pc is something else. So, one should not be confused in between these two procedures.
Procedure 1: Sharing WiFi internet connection of a windows PC with another via LAN
- A user can think about sharing the internet connection from a windows PC to another. To do this the user have to connect those PCs with a RJ45 ethernet cable. However, there is only one RJ45 port can be found in a laptop or desktop normally. So, users can RJ45 adapter.
- Then the user has to click on the Windows logo in the bottom left corner of the screen in the computer and navigate to the Control Panel from which the user wants to share the internet.
- There the option of Network and Internet can be found, after clicking on that another option of Network and Sharing Center can be found upon which the user has to click. Here the user will find the list of currently available connections. The user will find a button named Change adapter settings at the upper left side of the window.
- Then the user has to hold down the Ctrl button of the keyboard and have click on both of the Computer icons on the window, one of which will have “Wi-Fi” written under it while the other one has written “Ethernet” under it.
- Then the user has to press the right click which will led to a drop-down menu to appear. The button named Bridge Connections can be found there. After clicking on the Bridge Connections, the user has to wait more a moment, then the Wi-Fi of the computer will share with the other computer.
Procedure 2: Sharing internet connection of a Mac PC with another
In case of Mac PCs the user need to connect the RJ45 Ethernet cable first. But the problem is that Mac PCs do not have any RJ45 port built in, so, to connect the Ethernet cable the user need to connect an Ethernet to USV-C adapter to the PCs Thunderbolt 3 port first, only after that the normal RJ45 ethernet cable can be connected to the Mac PC.
- Now after connecting the cable the user has to click on the Apple logo, which is at the top left corner of the screen and a drop-down menu will appear.
- There will be an option named System Preferences, the user have to click on the option, and hence a window will appear.
- On the newly opened window there will another option named Sharing, after clicking on this option another window will pop up.
- In the newly popped window, the user has to click on the checkbox of Internet Sharing. This option can be found on the left side of the window.
- Now the user has to click on the Share your connection from drop down box. This can be found in the middle of the window. There the user has to click on the Wi-Fi option.
- Lastly the user has to click on the Ethernet checkbox, and its done.
Procedure 3- Sharing files of a windows PC from another windows PC
File sharing is the main need of this kind of computer to computer connection setup. In most of the cases the users of multiple computers do face the trouble of copying files from one pc to another via USB sticks or external hard drive. Doing such procedure everyday again and again can be such a pain. So, file sharing from one pc to another via LAN can be a permanent solution for this.
- To share file of one Windows PC from another Windows PC, the user has to connect the both PCs together along with an Ethernet connector first.
- Then the user has to click on the Windows logo in the bottom-left corner of the screen. This is to be done in the PC from which the user wants to share the files. This step is important so be cautious about it.
- Then the user has to navigate to the control panel option and has to click on it in order to open it.
- There the option Network and Internet can be found, the user has click on that option. After that there the user can find another option named Network and Sharing Center, the user has to click on it.
- In the newly popped window there an option of Advanced Sharing settings can be found, it can be found on the upper-left corner of that window. Click on it.
- In the new window the user has to check the Turn on file and printer sharing box which is just below the File and printer sharing heading in the middle of the window.
- Now to share any folder the user has to navigate to the folder in the file explorer and has to select it by doing a single left click on it. Then the user has to press on the Share tab in the same window > then has to click on the Specific people > Then has to select Everyone from the drop-down menu which is at the top of the window > then has to click on the Share button > click on Done.
- Now on the other computer the user has to navigate to the File Explorer icon and has to click on it > Then has to click on the name of the first computer name (it can be found below the Network heading on the left side of the window) > Now the user can copy the shared folder into the second computer just using normal Ctrl+C and Ctrl+V, and its done.
Procedure 4: Sharing files of a Mac PC from another Mac PC
Again, in this case the both computers have to be connected with the help of Ethernet cable. But in case of Mac PCs the Ethernet to USB-C adaptor has to put in use as the Mac pcs do not has a built in RJ45 / Ethernet port. But if both of the Mac and Desktop pc then the adaptor may not be needed. If the adaptor is needed it is to remember that the adaptor has to be connected through the Thunderbolt 3 ports only.
- In the menu item in the top of the screen the GO option can be found. Clicking upon in a drop-down menu will appear. This procedure has to be done from which the user wants to share the files.
- Near the bottom in the drop-down menu the option Connect to Server can be found. Clicking upon it a new window will pop up.
- In the newly opened window Browse option can be found. After clicking upon the Browse option, a new window will po upon the screen of the second computer.
- The user has to double click on the name of the second pc, which can be found in the newly popped up window > then the password of the second computer will be needed to enter and after this the second computer will be allowed to connect to the first one. Sometime it may show that wrong password entered in that case the user should try the password of the first computer.
- After the above procedure is done a new window should pop up on the screen, in which an option named Connect can be found at the lower right side of the window. Click on it.
- Now the user has to open the Finder app by double clicking upon the icon.
- Now in the newly popped up window the user has to navigate to the file or folder the user wants to share, and just has to use the copy Command+C and paste Command+V, and its done.
Procedure 5: Sharing files of a Windows PC from another Mac PC
Ethernet cables has to connected in both of the PCs. Remember to use the Ethernet to USB-C adaptor in case of Mac laptops. If both of PCs share connected to the same network with the same router then the file sharing can be done over the WI-FI, and this technique can be used in other previous discussed scenarios also. Though it will lead to a slow communication process hence much more time will be needed in order to copy files.
- First the user has to enable the file sharing system of the windows pc, to do so, the followings steps have to be done, Go to Start > Go to Control Panel > Click on Network and Sharing > Click on Network and Sharing Center > Click on Advanced sharing settings > Click on the Checkbox of Turn on file and printer sharing.
- Now to share any folder the user has to,
Open Start > Click on File Explorer > Navigate to and select the folder > Click on the Share tab > Click on the Specific people > Select Everyone from the drop-down menu > Click on Share > Click on Done. - Now the user has to enable the file sharing system of the Mac PC. To do so the user has to,
Open the Apple Menu > Click on the System Preferences > Click on the Sharing > click on the checkbox of File Sharing > Change the Everyone permission from Read only to Read and write. - Now to share any folder from the Mac PC the user has to,
click on the “+” (Add) icon below the list of the shared folders, after that the user has to double click on the folder which he desires to share. - To access the Mac PC’s file from the Windows pc,
Open File explorer > Click on the Mac PC’s name below the Network heading on the left side tab of the window > open the shared folder (shared from the Mac PC) > and do the copy and paste in order to save the file in the windows pc. - To access the Windows Pc’s file from the Mac PC,
Open the Finder app > Click on the windows Pc’s name in the lower left side of the popped-up window > Open the shared folder (Shared from the windows pc) > do the copy and paste in order to save the file in the Mac PC.
Conclusion
These techniques can be used in order to fast file transfer, the user can also use the Wi-Fi if wants, but it will make the file transfer speed may slower. If someone is new at using computer then these complex techniques are not advised to be done single handedly. An experienced user’s guidance should be taken in that case. The user can connect more than two PCs also, in that case he has to use router, and in case of Ethernet wiring all the PCs should be connected to the Router instead of connected between themselves. The rest of the techniques will be the same for that case also.
Related Posts
What is ipconfig on Windows CMD used for?
How to View Listening Ports Using Netstat
From Wi-Fi to Li-Fi: A Glimpse into the Future of Wireless Technology
7 Key Steps involved in creating a Home network from scratch
What is the difference between a WiFi and an Ethernet connection?
What is the use of a Local Area Network – LAN?