Hyper-V is a Microsoft-owned Windows Hypervisor platform (Type-1) that allows users to run virtual machines with high performance. However, if you are using Windows 10 Home Edition, then you will not have the “Hyper-V” option in the “Turns Windows feature on or off” to run virtual computers because it is available only for Windows 10 Professional, Education, and Enterprise Editions (know the difference). However, still, there is a way to easily download, install and enable the Hyper-V feature on Windows 10 Home using the command line.
Requirements:
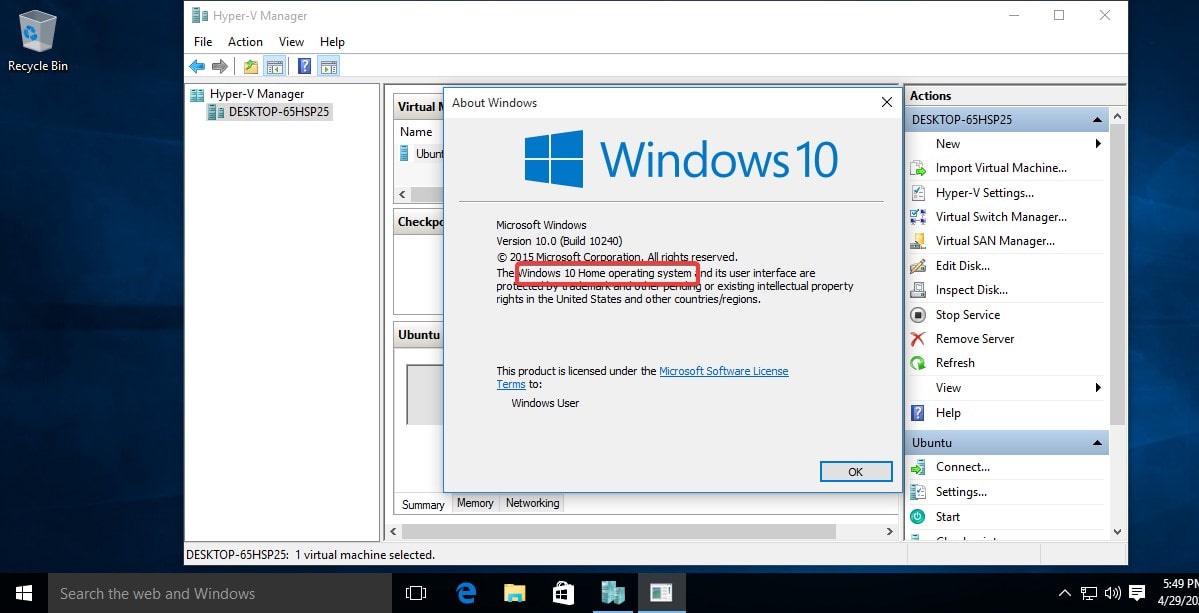
- Windows 10 Home OS
- Administrator access
- Virtualization must be enabled in BIOS to create VMs
- Active Internet connection
Although, in modern systems Virtualization is enabled in BIOS by default, however, to confirm it, just right-click on Taskbar and select Task manager ⇒ Performance and find whether it is on or off.


Well, if you don’t want to use Hyper-V then try out some other best third-party Virtual machine creator software programs.
Steps to Activate Hyper-v Feature on Windows 10 Home
Here are the simple steps that we can follow to download and install Hypervisor using a Command-line script.
1. Script to download Hyper v for Windows 10 home
There is a code available on Github that allows users to automate the process of downloading and enabling the Hyper-V feature. Here is that
pushd "%~dp0" dir /b %SystemRoot%\servicing\Packages\*Hyper-V*.mum >hyper-v.txt for /f %%i in ('findstr /i . hyper-v.txt 2^>nul') do dism /online /norestart /add-package:"%SystemRoot%\servicing\Packages\%%i" del hyper-v.txt Dism /online /enable-feature /featurename:Microsoft-Hyper-V -All /LimitAccess /ALL pause
What we have to do is – Right-click on the Desktop and select Text Document. A new file will be created, now open it and paste the above code in that. After that rename that file to Hyper-V Enabler.bat
Alternative- However, to make all this easy for you, we already have created this bat file that you can download directly using this link.
2. Run Hyper-V Enabler Batch file
Once you downloaded or created a Batch file with the given code by yourself on your Desktop. Right-click on that and select “Run as Administrator“.

3. Feature installation will start
As we run the Batch file, it will open a Command prompt to run the code saved in it. Make sure you have an active internet connection on your system to download files required to install and activate Hyper-V on Windows 10 Home. This will take some time depending upon your network speed.
4. Restart your Windows 10 System
Once the installation is complete, the Hyper-v will automatically get enabled on your system. Thus, to make changes into effect, the system will ask you to restart it. Simply type Y on your command terminal and press the Enter key.

5. Run Hyper-V Manager on Windows 10 home
Let’s check whether this Microsoft Windows Hypervisor feature is on our system or not. For that, in the search box type- Turn Windows features on or off, as its icon appears, click to open it.

There scroll and find -Hyper-V and make sure all its tools are checked as shown in the above screenshot, if not already, and then hit the OK button.
Now, we know this free Microsoft virtualization software is on our system, it’s time to run it and start creating virtual machines.
Go to Windows 10 Search box again or simply press the Win key on your keyboard and this time type- Hyper-V, click on its icon when appears.
Alternatively, we can use a command to run Hypervisor- open CMD or the RUN box (shortcut key- Win key + R) and type – virtmgmt.msc

6. Create a Virtual Machine
- To create a virtual machine in Hyper-V Manager, right-click on the connected server and select the New option.

- Click on the Next button and give some name to your virtual machine. For example Ubuntu.
- Choose the Generation for your Virtual machine. If the operating system you want to install supports 32-bit or 64-bit and requires legacy BIOS features then go for Generation 1. Whereas for the latest features and only 64-bit with UEFI boot supported OS users can go for Generation 2. However, you can leave the default selection as it is if you are not sure about this.
- Assign the amount of RAM or Memory you want to use.
- Configure Network. For that select the Default Switch from the Drop-down box. If you don’t have then first create one.
- Select the Size of Virtual Disk.
- Assign the ISO file of the OS you want to install.
To get a step by step guide you can see our article- How to use hyper-v to install Linux Virtual machine on Windows 10
7. Uninstall or Disable Hyper-V feature on Windows 10 Home
Hyper-V is not compatible completely with other Type- 2 virtualizers, even though the latest version of Vmware and Virtualbox can run along with it, there will be a huge performance issue. Thus, if you are planning to use Vmware player or Virtualbox on Windows 10 Home, then first, Deactivate the Hyper-V.
To uninstall this feature, we need to uncheck it from the “Turns Windows features on or off” section. To open it you can either find it from the Search box of Windows 10 or simply press Win Key + R to open the RUN box and type- optionalfeatures.exe

Now uncheck the box given for Hyper-v.

7.1 Command line to disable windows virtualization feature (optional)
If you want then can use a very straightforward method that is either using command prompt or PowerShell command line-
On Powershell run this
Disable-WindowsOptionalFeature -Online -FeatureName Microsoft-Hyper-V-All
Whereas on Command prompt, use this one-
dism.exe /Online /Disable-Feature:Microsoft-Hyper-V-All
7.2 Restart your system
To make sure the hypervisor feature gets disabled completely, now restart your system. This uninstalls it completely.
7.3- In case you want to enable it again (optional)
In the future if you want to enable Microsoft Hypervisor again then you don’t need to run the Batch file this time, just got Windows Features and select it. Or use the command line-
Powershell
Enable-WindowsOptionalFeature -Online -FeatureName Microsoft-Hyper-V
CMD
DISM /Online /Enable-Feature /All /FeatureName:Microsoft-Hyper-V
Also See- Hyper-V vs VirtualBox: A basic comparison
Closing thoughts
Well, this was the quick way to use the Microsoft Windows hypervisor on Windows 10 Home edition. In case you are facing any problem while enabling it, let’s know, the comment section is all yours…


does we need to save the file in ANSI format
No, in .bat format
How about download on windows 10 professional
Professional version already have Hyper-v, hence no need to download it.
Thank you very much from Isreal
how can i download it
By using the given script in the article
As per your Instructions, i downloaded the .bat file using the link.
Once I ran the .bat file as Administrator, it started a CMD window and started running.
In the Progress bar, when it reached 70.2%, it was on hold to much time.
+ was pressed, then i see the same command runs again and again continuously.
I need to the Window forcibly.
After this action, restart the System and when i checked the Windows Features, the Hyper-V was not checked, so i checked the Hyper-V Checkbox. But i find the Hyper-V Platform is graded out, means unable to use it.
My Question is without the Hyper-V Platform selection, would i be able to work please.
No, the Hyper-V feature must be selected in the Windows Features. You can try the command to enable the Hyper-V feature. Maybe it would work.
you are the best, thank you from Palestine.
lol what is palestine i dont see it on the map
You will see it when you have eyes
please send me link vm ware hyper v
many diffrent options , even offered in Microsoft forums didn’t work to me but this one did!
Thank you!
When I try running the .bat as admin, the command menu only opens for a split second before closing again, how do I get it to work from there?
The bat file has the commands on separate lines bu for some reason, you have pasted it in to this post as all on one line – doesn’t work that way.
When I run the batch file, I get a file that presents on the Desktop called “nul’). In that file it has one statement; “invalid switch – “f”. I believe this is referring to the statement “for /f %%i…” Could you help me fix this? I don’t know how to troubleshoot this part of the batch file. Thank you
Thank you
Thanks much, it alleviated the issue and now i am able to see Hyper V compute service running in my PC
if you still tried to install and hyper v did not appear in the windows features, restart the pc and be patient for the windows updates to be installed, enter the system service and right click on properties and automatically activate all the hyper v sections, click again on the installation link and wait until it shows 5 times 100 percent, go to windows features and you will see that it is checked automatically, check ok and wait until the files are downloaded, then it will ask you to restart the PC and it is ready to install
Could not get this to run when I created the batch file, because of the formatting. It neds to be exactly like this (as in the downloaded batch file):
pushd “%~dp0″
dir /b %SystemRoot%\servicing\Packages\*Hyper-V*.mum >hyper-v.txt
for /f %%i in (‘findstr /i . hyper-v.txt 2^>nul’) do dism /online /norestart /add-package:”%SystemRoot%\servicing\Packages\%%i”
del hyper-v.txt
Dism /online /enable-feature /featurename:Microsoft-Hyper-V -All /LimitAccess /ALL
pause
I just installed Hyper-v on my Windows 10 Home edition computer. It was really easy to do and I’m glad I did it.