Hyper-V on Windows 10 doesn’t need to download, it already on your machine, and just need to enable it. You can disable or enable hyper v on Windows 10 via PowerShell or graphically from the control panel to install Linux Virtual machines. Here in this tutorial, we will show you how?
What is Hyper-V used for?
The Hyper-V is a virtual platform just like Vmware or VirtualBox but this one is specifically designed and developed by Microsoft for Windows Desktop and Server operating systems to enable virtualization.
Also, one has to upgrade Windows 10 home to pro for it because the Hyper-v is only available for Windows 10 Enterprise, Pro, or Education. Yes, indeed this Microsoft Virtualization platform optimized for Windows and can be used without downloading anything party software, however, Server or Windows 10 hyper-v has its own limitations, it is not like VirtualBox full of different features, open-source in nature, easy to manage machines, drag and drop support to VMs and more… You can know about it in details here- What is the difference between Hyper-V and VirtualBox?
So, now let’s come to the main topic which is the tutorial on enabling hyper-v and Linux VM installation over it using Windows 10 as a host operating system.
Step 1: How to enable Hyper v virtualization on Windows 10
Hyper v prerequisites:
Before turning it on, one should make sure that his/her system is running on Windows 10 Enterprise, Pro, or Education version with 64-bit Processor, 4GB RAM and Virtualization should be enabled in motherboard bios.
Graphically from Windows 10 control panel #1- method
If you are not familiar with the command line, then simply follow the steps given below to enable Hyper-v.
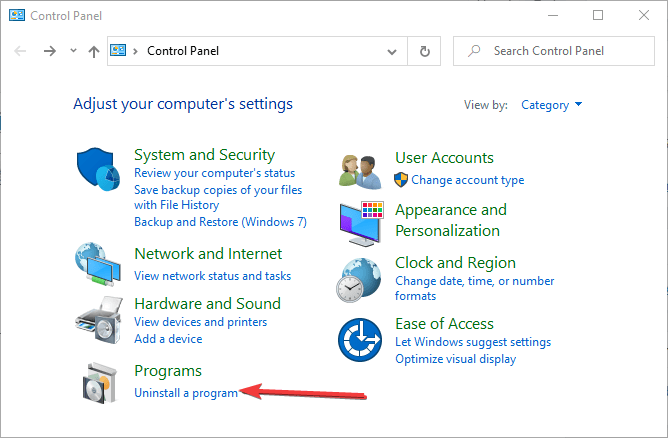
- Go to the search box of Windows 10 and type the control panel to enable Windows Hypervisor.
- As it appears, click on that to open it.
- From there click on the “Programs- Uninstall a program“.
- Now on click on the option “Turn off Windows features on or off“.
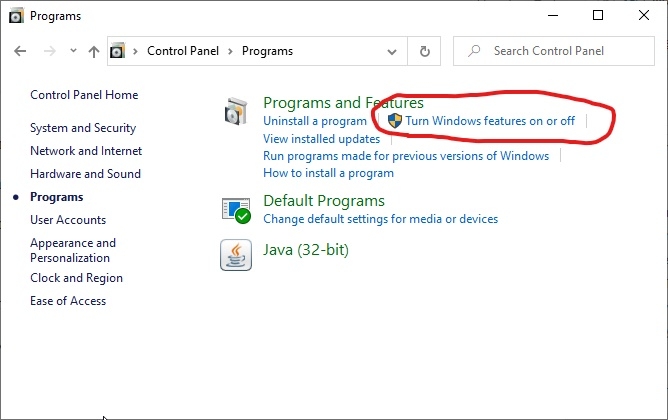
- Now Scroll down and select the box of Windows Hypervisor Platform and click on the OK button.

- When the setup asks you to restart the system, do it.
- In the future, if you want to remove the Hypervisor, just perform the above steps again and uncheck the option.
Enable or disable hyper-v from Windows 10 Powershell #2=Method
- Right-click on the Windows 10 start button.
- Select Windows Powershell (Admin).

- When Powershell opened, type the below command to enable the Hypervisor.
Enable-WindowsOptionalFeature -Online -FeatureName Microsoft-Hyper-V-All
- Once the above command is executed successfully, restart your PC.
- In the future, if you want to disable or uninstall it again, then use this one:
Disable-WindowsOptionalFeature -Online -FeatureName Microsoft-Hyper-V-All
Step 2: Run Windows 10 Hypervisor
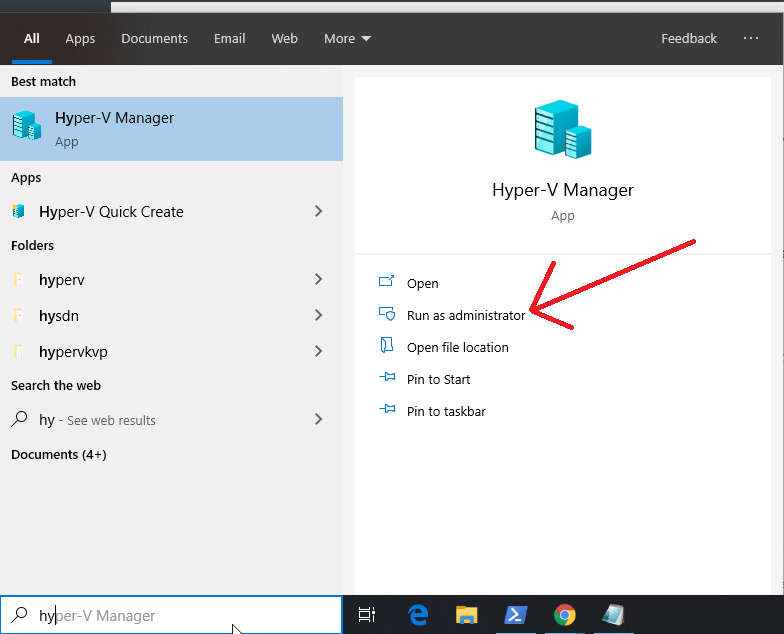
After the successful installation, it’s time to run the Hyper-v. In the search box of WIndows type- Hyper-v and when its icon appears click on it to start creating VMs.
Trivia: The thing is to be noted that, when the hypervisor is enabled on the system, at that time VirtualBox or Vmware workstation will not work on Windows. To use them you have to disable them.
Step 3: Create a virtual machine in Hypervisor
Now, we have the hyper-v and it’s time to create a Virtual Machine on Windows 10 using it. You can create any VM, however, here we will show how to install a Linux operating system Ubuntu. the process will be the same for Windows 8, 7, or CetnOS, Linux Mint, or any other OS.
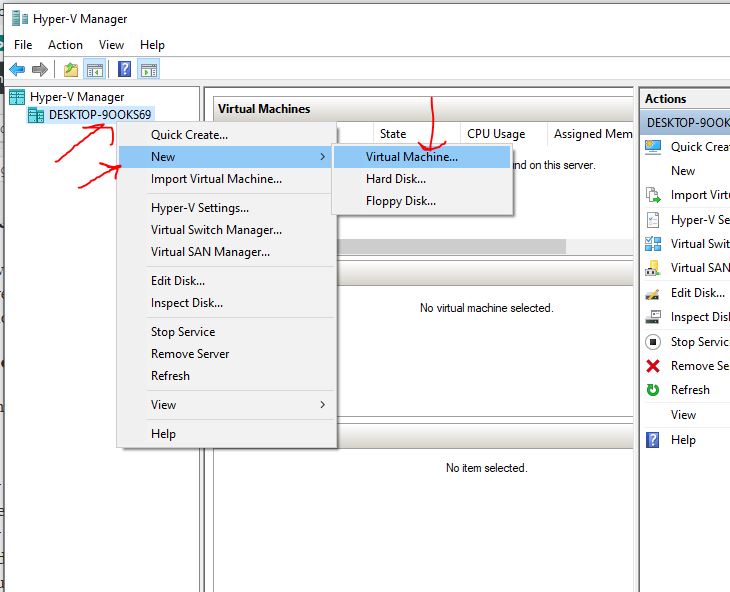
Select Hyper-V Manager server
Right-click on the machine or hypervisor server available under the Hyper-V Manager and select the option “New -> Virtual Machine“.
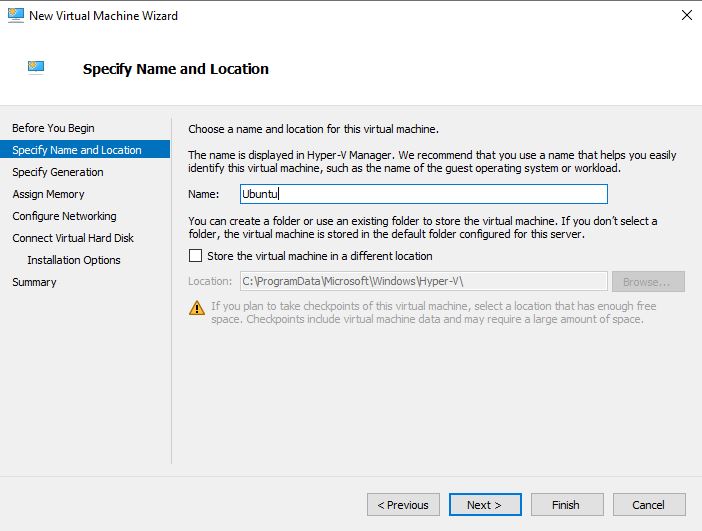
Specify Name and Location
Give some name to your virtual machine. By default, it all will store under “C:\ProgramData\Microsoft\Windows\Hyper-V\” If you want to change it then check the box given in front of “Store the virtual machine in a different location” and then simply use the Browse button to select that location.
After that click on the Next button for further options.
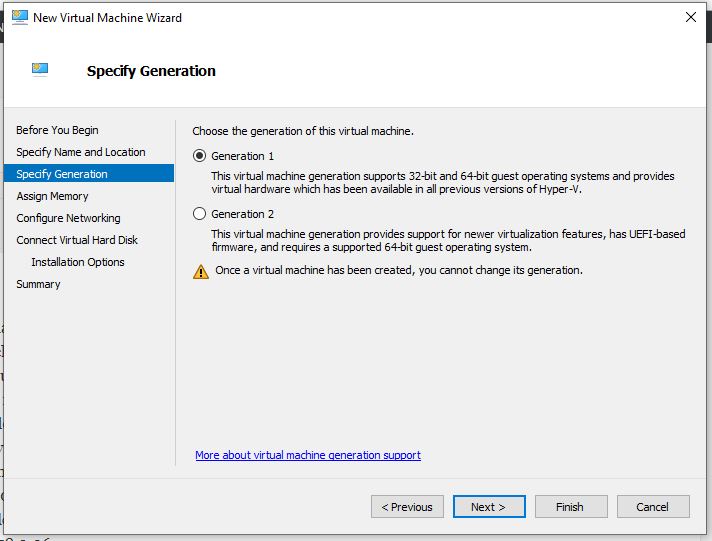
Choose the generation of the Virtual Machine
You will get two options Generation 1 and Generation 2. The first one supports both 32-bit and 64-bit systems and also compatible with all previous versions of the Hyper-V. If you choose this then you will be able to use your Virtual machine VHD on other Windows platforms without installing it again. However, the same can be done for Generation 2 but only on the latest supported hardware and for the latest 64-bit guest operating systems.
Thus, leave this option as default and click on the Next button.
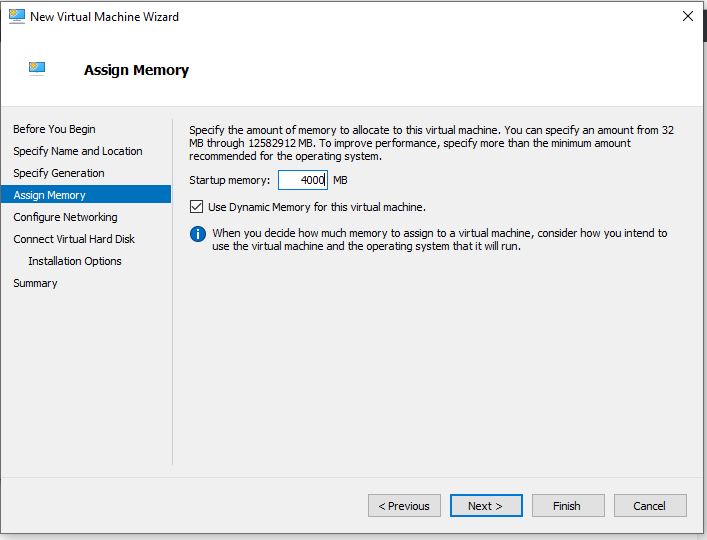
Assign RAM to Virtual Machine on Windows 10
As per the operating system, you are installing on Hyper-v you have to set the amount of memory for smoother operations. For example, here I am installing Ubuntu 19.04 with GUI and for good performance, it requires 4GB and the same I have allotted.
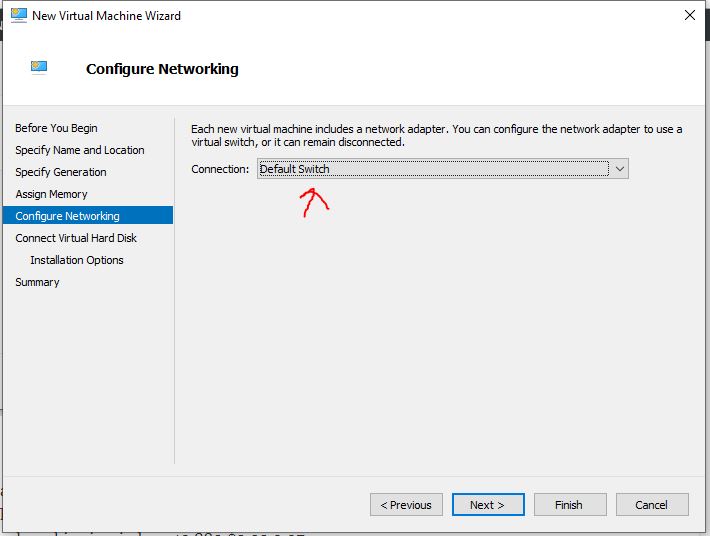
Configure Networking on Hyper-V
To provide internet connection and local connectivity, we need to assign an adapter to our virtual machine. The hyper-v provides its own default network adapter that can communicate with the host OS network. Thus, select the Default Switch and click on the Next button.
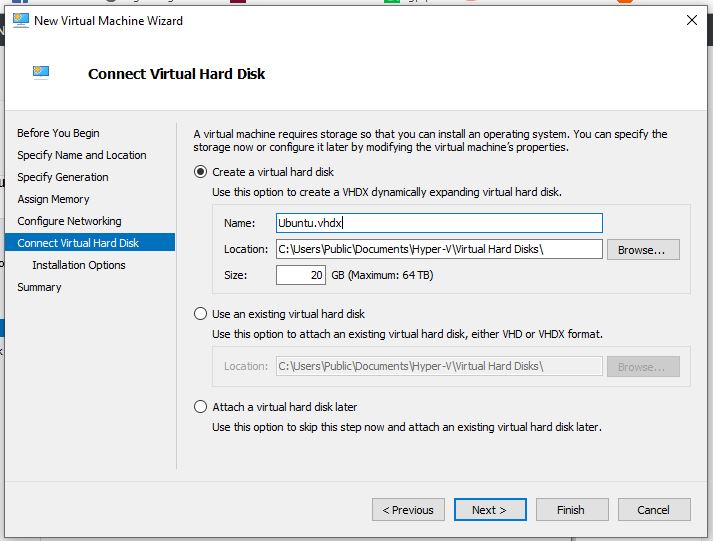
Create or Connect the Virtual hard disk
If you already have some VHD or VHDX virtual hard disk image then you can select that, however, here we are creating a new virtual machine, thus, enter the amount of VHD you want, here we are giving 20GB but you can select low or high depending on your system requirements.
After that click the NEXT button.
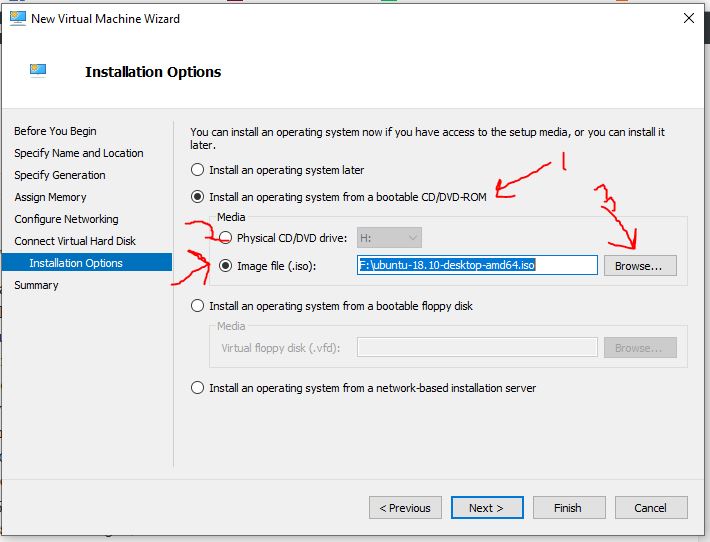
Select ISO file for installing the Linux operating system
This is a very important step because here we select our operating system ISO file which we want to install. Select the option “Image file (.iso)” and then click on the Browse button to navigate and choose the image file.
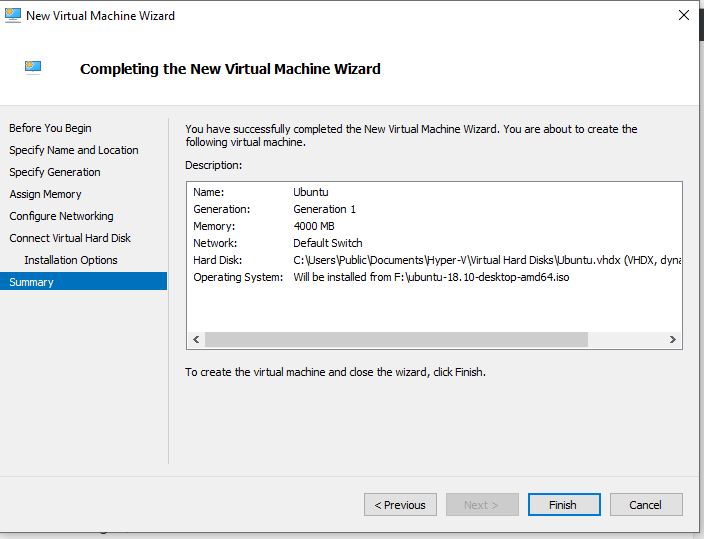
Then click on the NEXT and finish the Virtual Machine creation wizard.
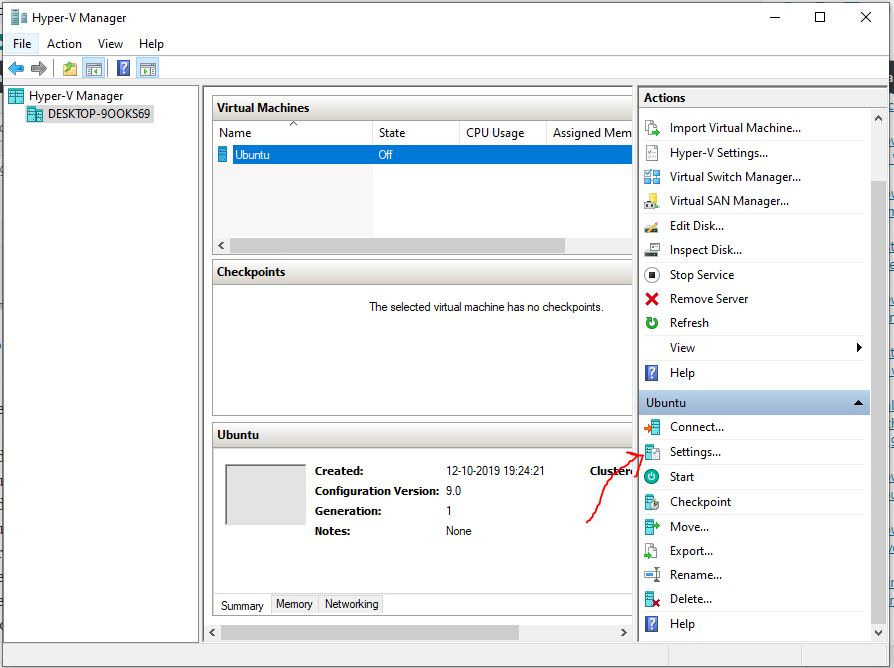
Step 4: Virtual Machine Hardware settings
Here we perform some changes to the already created Virtual machine on the Windows 10/7 Hypervisor so that it can work properly.
Select the create VM and then click on the Settings option given on the Right side panel of Hyper-v.
Click on the Memory and set the maximum Dynamic memory amount to the total amount of RAM you have set for your machine. After that click on the OK button.
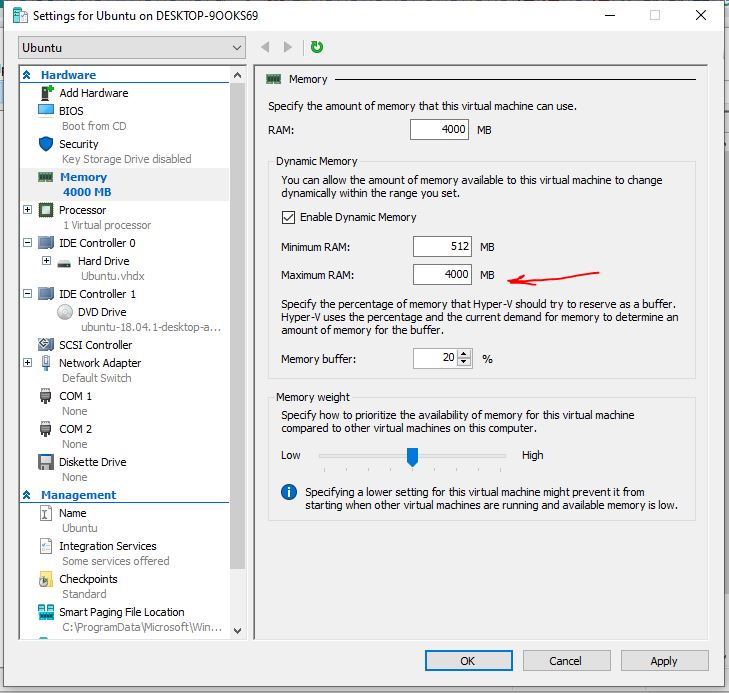
Furthermore, if you want to add an extra Network adapter, increasing RAM, processor, and more can be done from individual Hyper-V virtual machines on Windows 10/8/7 or server.
Step 5: Run Virtual Machine to install
Now right click on the created virtual machine and click on the Connect option. However. we can also connect Hyper-V VM after starting it.
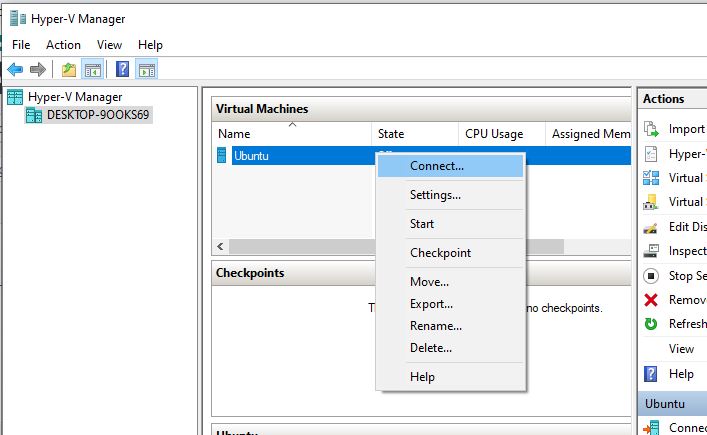
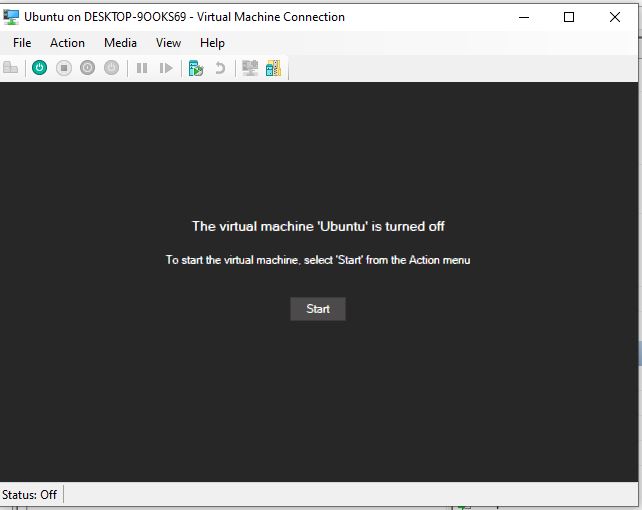
You will see that yet our VM has not started, so select the start button to initialize it.
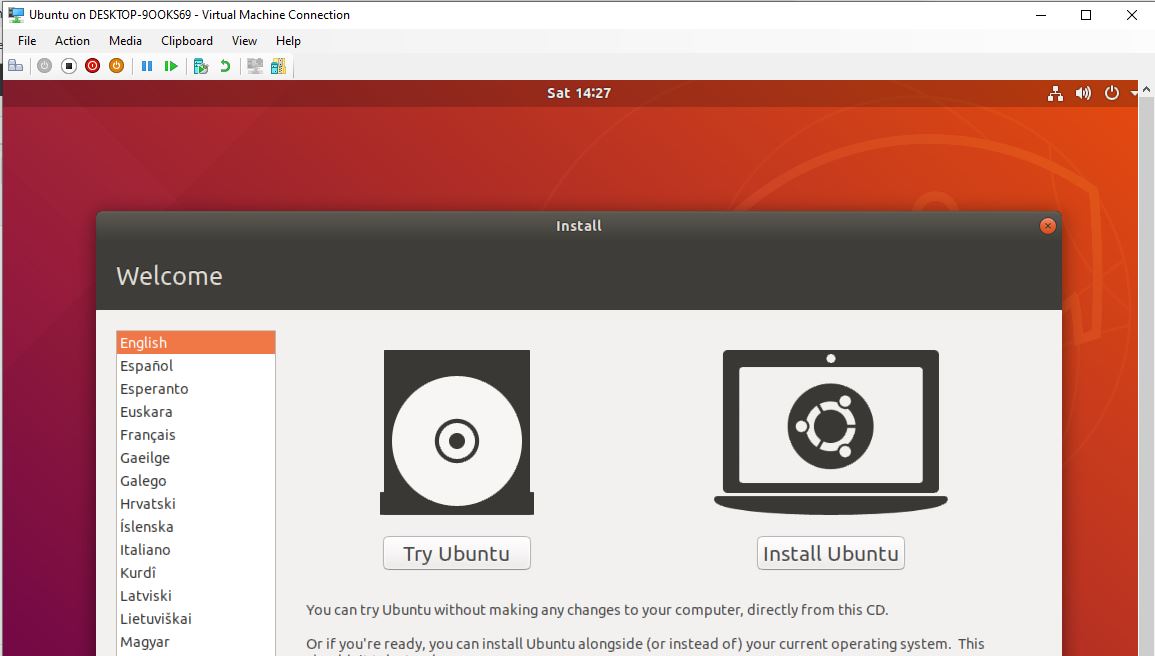
Step 6: Install Ubuntu Linux on Hyper-V
No, you will see the boot menu and installation wizard of Ubuntu Linux, just follow it and the Linux OS will set up on your Windows 10 hypervisor.
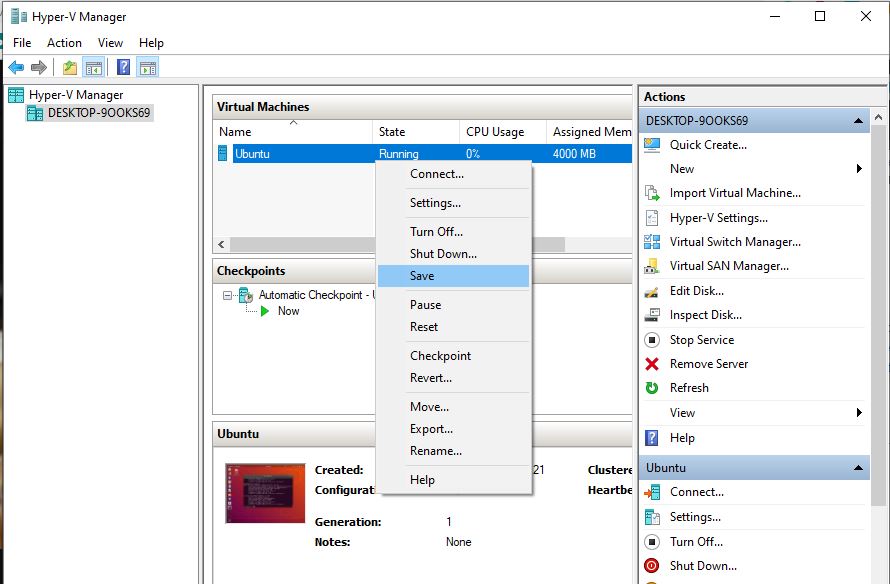
Step 7: Use, Save, or Shutdown VM on Hyper V
Just like Virtualbox or Vmware, we can also save the running virtual machine to use it in the future from the same point where we have left it. This helps to save important work and instantly start the VM with all previous running processes, you can compare it to the hibernation feature of the different operating systems. However, if you don’t want to save then the Shutdown option is always there.
In this way, we can create and use the hyper-v running Virtual machines on Windows 10 or Windows 8/7 operating system. If you have any confusion or doubt, let us know, the comment box is all yours…
Other Useful Articles:
- Best Opensource bare-metal hypervisors (Foss)
- 4 Best Docker GUI tools
- How to install Windows XP ISO (free) on Windows 10 VirtualBox


Hi,
Is the default switch network adaptor function as NAT? What if I want this VM to only talk to my Host OS and would not share network privileges with it?
Example:
My host OS will be connected to my company’s VPN network, while my Guest OS acts as another physical machine that is not connected to the VPN but can talk to the LAN IP of my Host OS. Thanks.