In one of my last articles, I have given a tutorial on how to use native ‘Bash’ on Windows 10, to emulate the command line or Terminal of Linux. It will be helpful for a number of developers, or people, who do not want to use a virtual machine to run the Linux command-line interface. But, the power of Bash on Windows 10 is not limited to just executing the Linux commands. Yes, then what else we can do! So, we can even run GUI or graphical Linux apps on Windows 10 using the Bash.
That’s really great. Isn’t it! But how to do that? Let’s find out. Before proceeding further I would like to say you, I tried some basic Linux based graphical applications with Bash, and it worked out to be fine for me. I don’t know, how well it will perform, with heavy apps. I am leaving this thing to my readers, and let me know in the comment section, how the heavy apps were handled by Bash. I will also not recommend you to use it as a replacement for your Linux computer, or any other Linux, which is handled pretty well, with the help of a virtual machine.
However, I am giving the tutorial here. If you find it to be the best replacement for a virtual machine running Linux, just go for it. If you don’t know the procedure to enable the bash on Windows 10 then you can see my tutorial: how to install WSL or Bash on Windows 10. Just read it, and come back.
How to run Linux GUI apps on Windows 10 WSL
Step 1: Checking the run Linux GUI apps compatibility on Windows 10
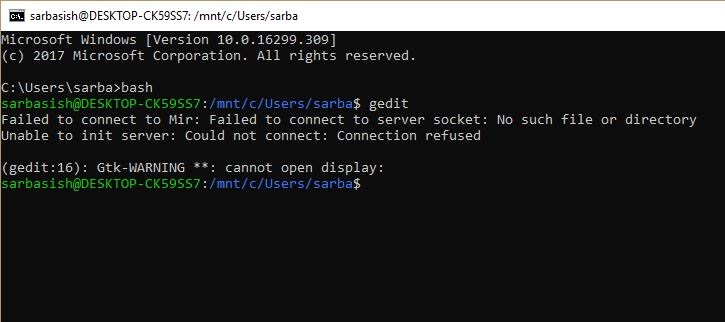
After installing Windows Subsystem for Linux, if you try to run any graphical (GUI) Linux applications on Bash, you will find an error. Here, I am trying to run ‘Gedit’, one of the best text editors for Linux, and I got the following error.
Thus, let’s find out the tutorial. I promise it is easier than you can think.
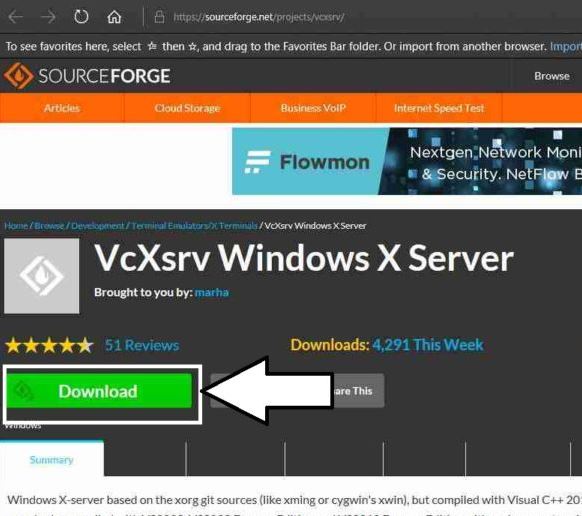
Step 2: Download VcXsrv Windows X Server
Your first step would be to download VcXsrv Windows X Server from this link. It is a small piece of the program, which is just 40 MB in size.
Step 3: Install VcXsrv Server
Just locate the downloaded installer, and install it. The process of installation is quite easy. Still, I am discussing it, just to make the things transparent.
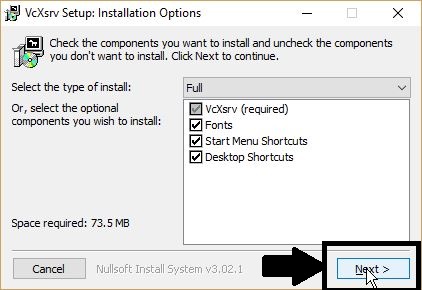
Step 4: Open Windows User Account Control
After opening the installer, you might get a message from the Windows User Account Control. Just click on ‘Yes’, and you will get the following screen. By default, ‘Full’ installation will be selected. You can even change it according to your requirements. I will recommend you to go for the full installation
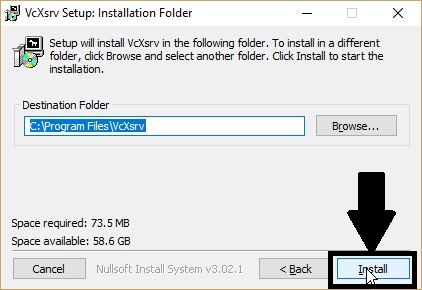
Step 5: Installation path
Now, you will have to choose the installation path. By default, ‘Program Files’ will be selected. You can even change it, depending on your needs. But, I will recommend you to keep the default installation path.
Once the installation is complete, just click on the ‘Close’ button. Now it is ready to use.
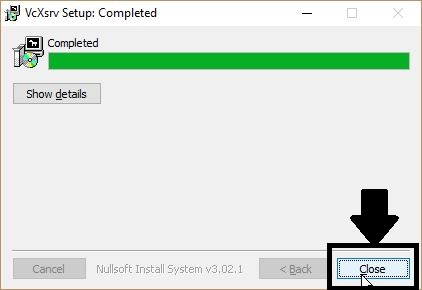
Now, you will get two shortcuts on your desktop, as shown in the screenshot below.

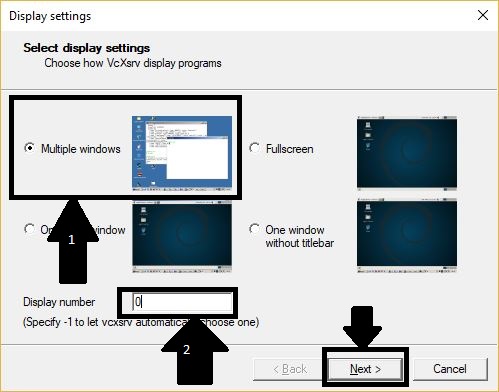
Step 6: Open XLaunch
Open the shortcut, named ‘XLaunch’. You will get the following screen, and you will have to choose ‘Multiple Windows’, and change the value of ‘Display Number’ to 0. Click on ‘Next’.
Now, leave the thing’s default, and keep clicking the Next button. Just compare the settings, with the screenshot given here, for keeping things all right.
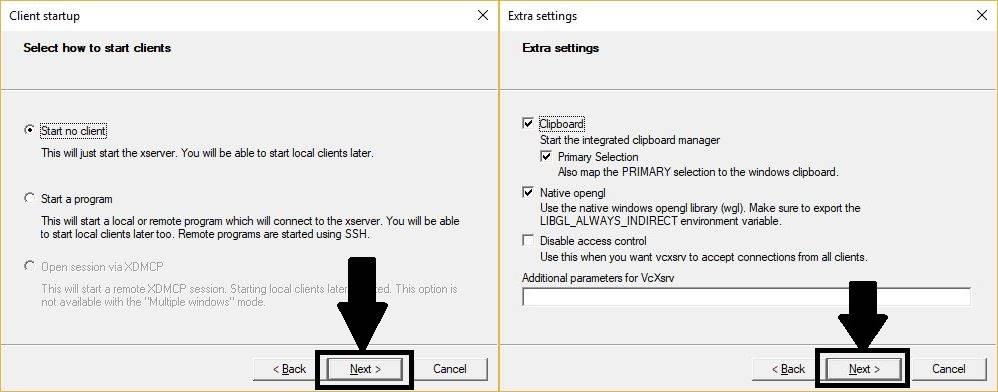
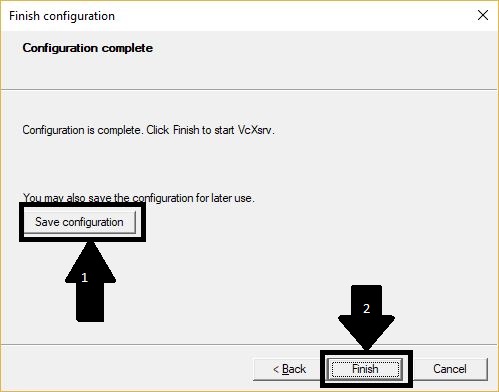
Step 7: Click on ‘Save configuration’
It will be better to save the configuration. Click on ‘Save configuration’, and choose the location and the filename.
*If you do not save the configuration, you will have to repeat the same settings, each time you use Bash. I am sure, that will be a tedious job.
Now it is ready. It is the time to run some Linux GUI apps on Windows 10. But before that, you just need to enter a command on your Bash terminal.
Step 8: Run the Windows 10 Bash terminal
Just run ‘Bash’, and once you get the Bash terminal, type ‘export DISPLAY=localhost:0’, and hit the enter key. It is better that you memorize this thing, or write it down at a safe place, as you will have to enter this command, every time you want to run Linux GUI applications with Bash.
You can even save this command as a batch file; if you have the idea of, how to run batch files on Linux terminal.

Step 9: Run Linux apps on Windows 10
After that, just try to open any GUI application and it will certainly work. I am opening Gedit here, and you can see in the screenshot below, how well it is working on my Windows 10 desktop.
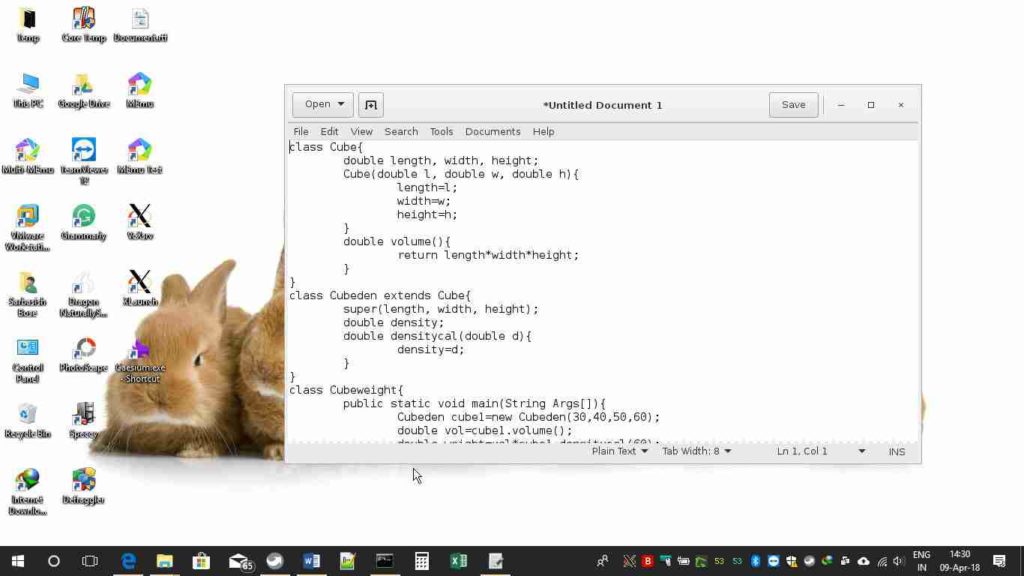
You can save the files even on your Windows disks, and that will not at all be trouble.
The only thing, which you should keep in mind is that you should not exit Bash, or the Command Prompt window, or Windows PowerShell; when you are running any GUI applications. It is because all the GUI apps are being handled by Bash container.
Hope this little information was helpful for you. Let me know, how you felt about this tutorial, in the comment section below.
ALSO, SEE:
- How to Install Ubuntu on Windows 10 using Virtualbox Virtual Machine
- Reset Windows 10 Password without Admin Login
- Enable Native OpenSSH Client Beta Windows 10
- Run Virtual Machines via Portable Virtualbox on USB
- How to install XAMPP on Windows
Related Posts
How to Install 7-Zip on Windows 11 or 10 with Single Command
Install Google Earth on Windows 11 or 10 Using a Single Command
How to install Gaming Services on Windows 11
How to Install Telnet Client on Windows 11 Using PowerShell
How to Install ASK CLI on Windows 11 or 10
How do you install FlutterFire CLI on Windows 11 or 10?