
If you are a blogger or just a small business entrepreneur website owner and want to create a free professional email address for your website domain then here is the solution. Although Gmail also offers business email accounts, at INR 1500 per year. Thus, if you don’ want to pay anything in your initial stage there are some email services equivalent to Gmail such as Zoho mail those provides a free business email address. Email address with your own domain name improves your presences and trust of customers like [email protected] looks more professional than [email protected].
In this tutorial, we are going to show you how to get a free business email address using ZOHO Mail, if you have an existing domain. Also, we are going to show you how to connect your free business email account to your existing Gmail account. So that you don’t need to login to third party email service to manage your emails. From just one Gmail account you can manage both personal and business email accounts.
Zoho is one of the best free email services that provides truly free email business accounts without any cost. Also, they offer total 50GB space along 25 Free Business Email Address accounts each with 5GB storage. The free plan of ZOHO is enough for bloggers and small business holders.
How to Get a Free Business Email Address account from Zoho mail
Step 1. Signup to Zoho Mail Account
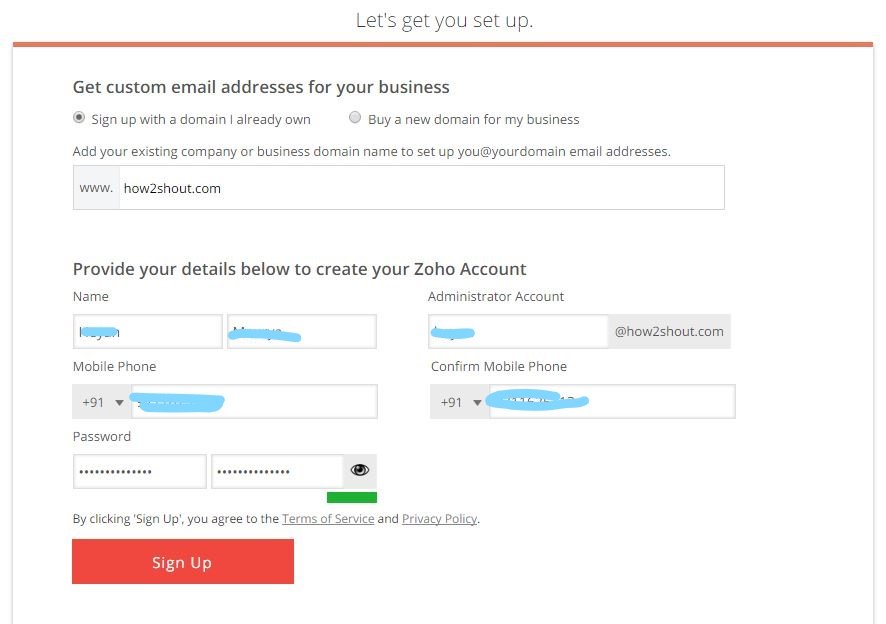
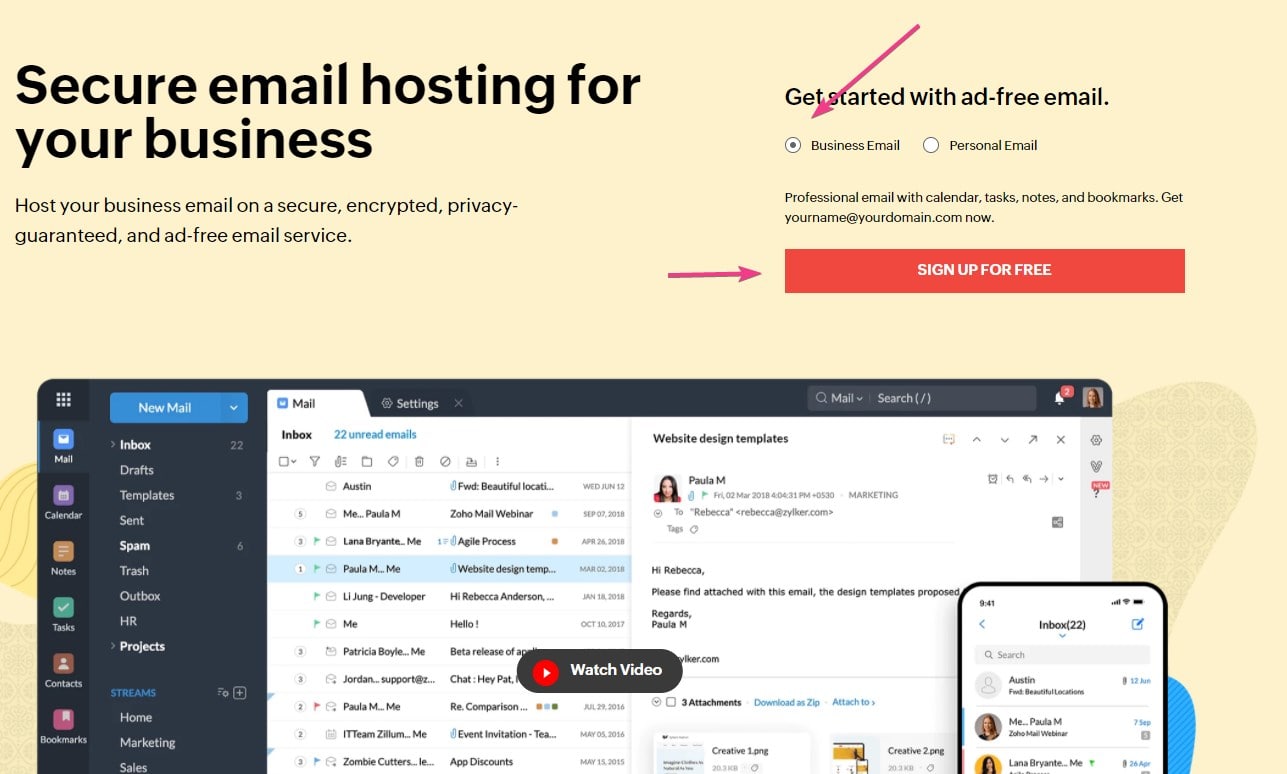
Visit Zoho.com and from the top select the option “Business Email”. After selecting click on the Signup button.
Step 2: Verify Domain with Zoho Mail
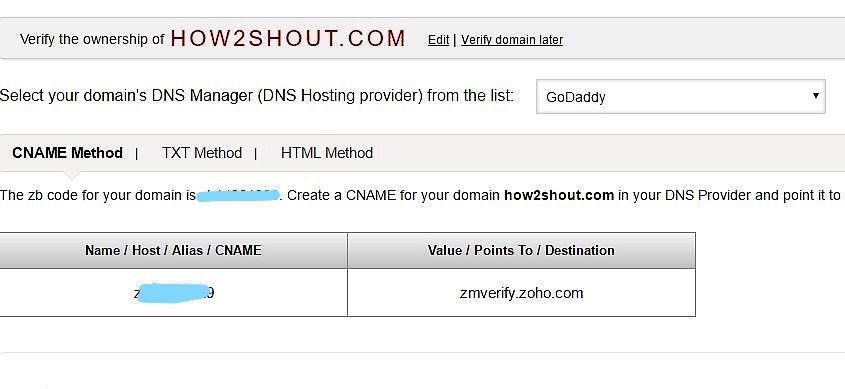
The second thing is to verify your Domain by using the CNAME, TXT or HTML method. As shown in screenshot ZOHO will provide drop down box from where you can choose your Domain to provide like mine is Godaddy, so I have chosen it and to get the CNAME and Destinations values.
Step 3: How to Add CNAME records in a GoDaddy hosted Domain
If your domain hosted with Godaddy or with any other hosting service follow these steps to add the CNAME records. then fIf the DNS Manager for your domain is hosted with GoDaddy follow the below steps to add a CNAME and verify the domain.
- Log in to your GoDaddy DNS Manager >> My Account >> Domains.
- Expand Domains and click the Manage DNS button across the domain, which you want to verify by CNAME in Zoho.
- The DNS Manager page opens with the existing DNS records information.
- Scroll down to view and click the Add button to add a DNS Record
- In the Add DNS record, select ‘CNAME‘ from the DNS Record Type dropdown.
- In the Host field, provide the zb******* the unique zbcode generated for your domain in Zoho Mail.
- In the Points To field, provide zmverify.zoho.com and click Save.
You have now added the CNAME successfully. Generally, if you are adding the CNAME for the first time, it gets effective within a few minutes. However, in some cases, you may have to wait for a while, and then click Verify by CNAME button in the Zoho Mail Setup wizard to proceed further.
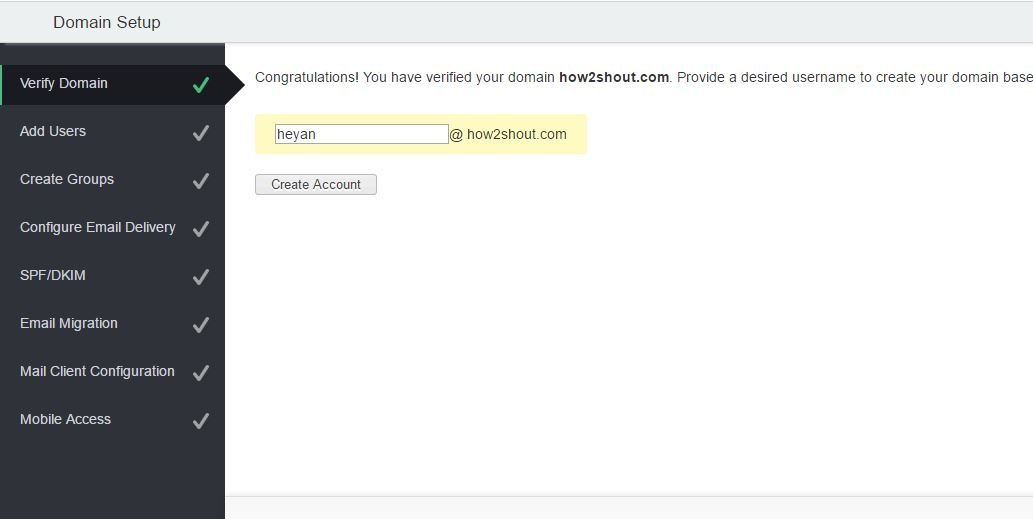
Step 4: Add the company users
The Zoho mail provides 25 free business email addresses and in this step, you have to create an admin email address that also serves as your login. After adding the user the next step is to “Create Groups”. You can create email accounts for employees and their groups here.
Step 5: Adding Zoho mail MX Records
After verifying the domain now you need to add the MX records into your Domain DNS records so that the Zoho can deliver the emails using your domain. 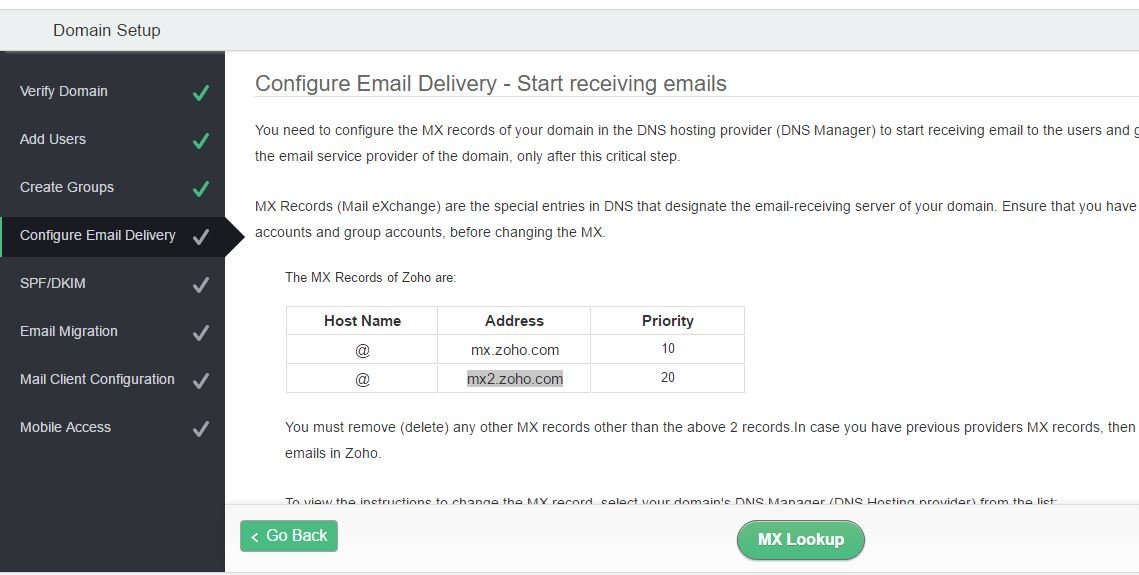
Configure MX Records for Email Delivery – GoDaddy
- Login to your GoDaddy DNS Manager >> My Account >> Domains.
- Expand Domains and click the Manage DNS button across the domain, which you want to verify by CNAME in Zoho.
- The DNS Manager page opens with the existing DNS records information.
- Scroll down to view and click the Add button to add a DNS Record
- In the Add DNS record, select ‘MX‘ from the DNS Record Type dropdown.
- In the Host field, provide the @ to denote the default domain for email delivery.
- In the Points To field, provide mx.zoho.com, and in ‘Priority‘ field select 10 and click Save.
- Click Add record again to add another MX record with value mx2.zoho.com and Priority 20.
- Similarly, repeat the steps to add the third MX record with value mx3.zoho.com and Priority 50.

You have successfully added MX records for your GoDaddy hosted domain. You can check the MX records for the third party tool www.mxtoolbox.com, a third party tool to check the DNS records of a given domain.
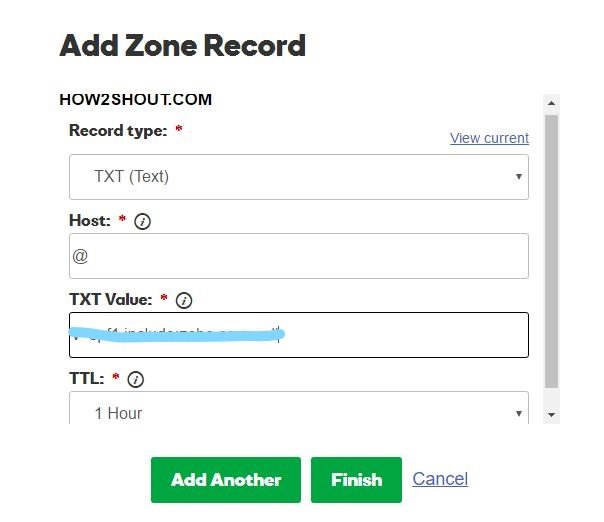
Step 6: After adding the Mx records, it may take a few minutes to 30 minutes to take effect. The next step SPF/DKIM, to set up SPF, copy the SPF record and add it to your domain DNS in the TXT records as shown in the screenshot.

The last two options are the Email migration which can be used to migrate your emails from your previous email clients and the other one is Mobile apps which give you link to download Zoho mail apps for Google Android and iPhone. Now you have completed all set up to get your free professional business email account address.
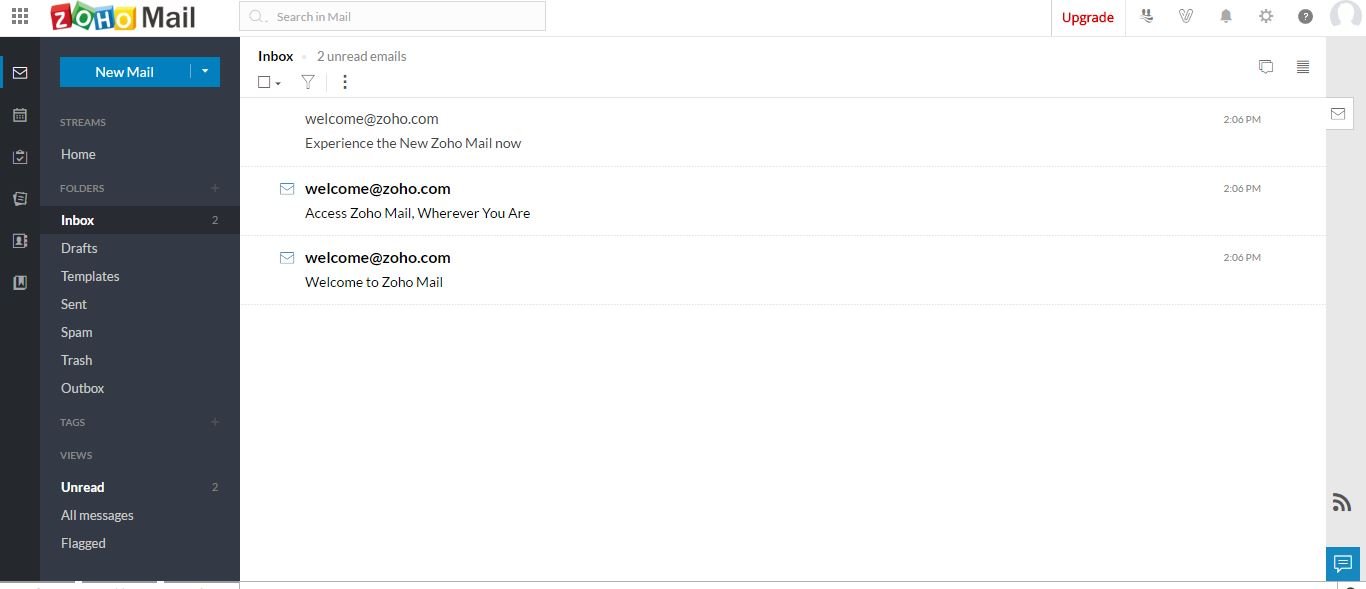
Step 7: The Zoho mail address will start sending and receiving an email from your new business email address.
We hope you like this tutorial on Free Business Email Address, to give a more professional look to your blog and business. Whether you are a blogger, small business, an e-commerce store or something else this method will help you. After setting up ZOHO mail you can forward your all emails to your personal Gmail account to manage all personal and business emails from a single Gmail account. For doing this please read the following article.
How to Forward All Zoho Emails to Gmail Account
If you stuck anywhere while setting up the free professional business email address, please comment, we will give you the best possible solution.
Other articles:

Thank you for providing such a useful info for small marketers like me.
Can you give me details on “How to Forward All Zoho Emails to Gmail Account” It’s not available below of yourspost.
Please give me that info too.
This is really nice, and it’s worth reading this blog. Thanks for sharing this information, keep sharing and keep updating us like this. Also you can check out the information about DMARC or email security on emailauth.io