
Blogger is one of the popular platforms for creating a free website but by default, the URL for the website or blog you created is on the domain of Blogspot; or should I say it is a subdomain whose main domain is Blogspot.com. But you can use the custom domain or third party URL with website or blog on Blogspot. This means you can redirect the blogger to a custom domain without letting the users know about it.
The biggest benefit of creating a blog or website on Blogspot is that you don’t have to pay for the hosting, maintenance, and security. This all managed by the Google. The only thing you need to make your website professional is the good theme and custom domain name.
By default the URL which used for Google Blogspot Blog is yourblogname.blogspot.com. Now what you want is only yourblogname.com.
You can use any domain name from any registrar whether it is Godaddy, BigRock, NameCheap, hostinger, Bluehost etc. the method of setting up the custom or top-level domain is almost the same.
Add custom domain to blogger with Godaddy
Here for the tutorial purpose, we are using the Godaddy as registrar to add the custom domain to the blogger.
- First of all, you need to buy a domain. For example, we bought the domain from the Godaddy. So, I am assuming that you already have bought a domain from some registrar. Only buy the domain which initially cost you around $5 to $10.
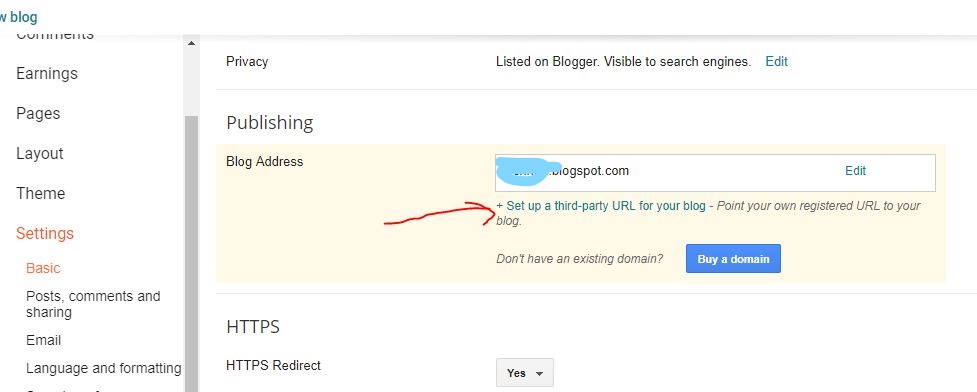
- Now Login to your blogger account and click on the Settings->Basic option given in the left side menu. Under publishing, you will find a Blog Address section, click on the +Set up a third-party URL for your blog link.
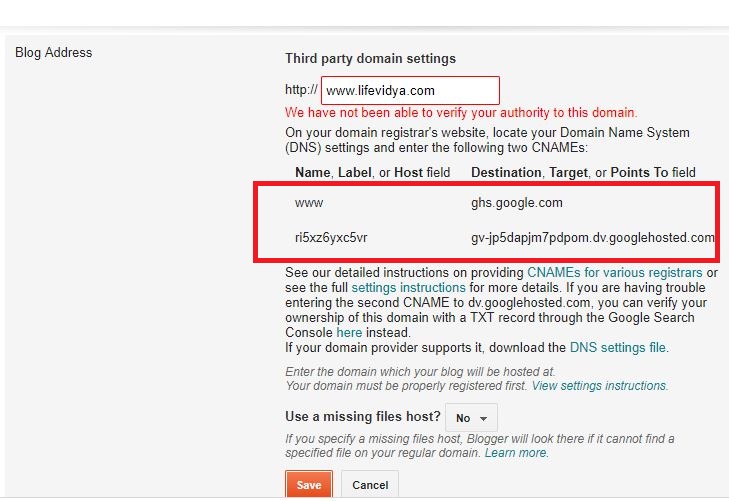
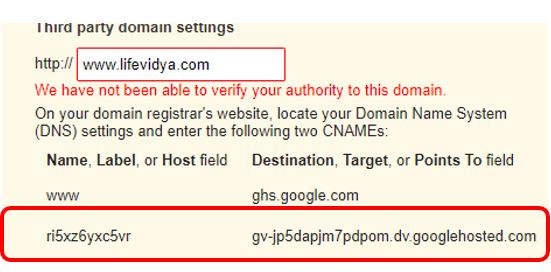
- Third party domains settings: Enter your custom purchased domain name. For example www.example.com. After that click on the SAVE button.

- When you click on the save button it will show an error that “We have not been able to verify your authority to this domain” it is because yet we haven’t updated the Godaddy DNS record of our custom domain with the ones provided by the Google Blogger.com. Leave this as it is and move to steps ahead.
- Login to Account (Domain Registrar): Once you bought the domain; log in to your account registered with a domain registrar in our case it is GoDaddy.
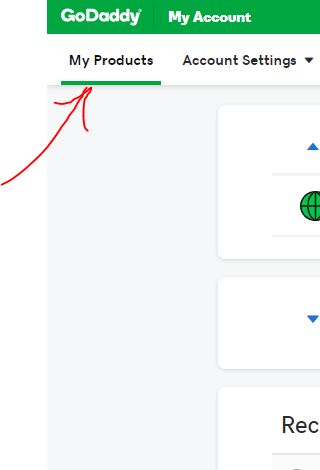
- When you log in to your domain registrar account find out the domain you purchased. For Godaddy users, you need to log in and click on the My Products option given at the left side in the menu.
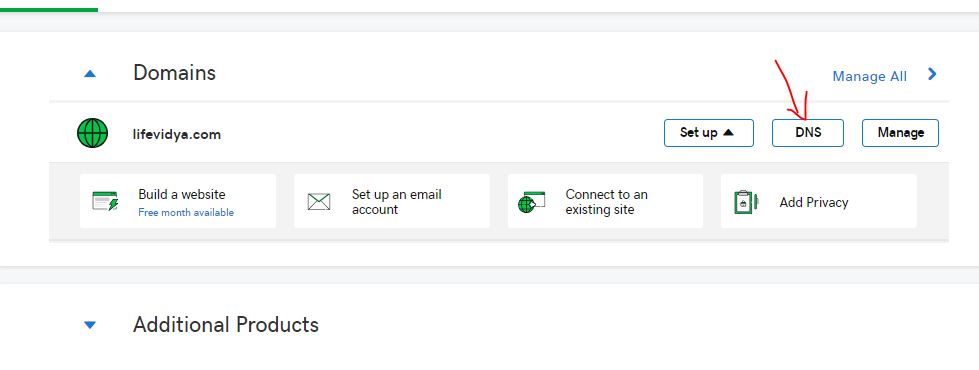
- Select the domain: In the front of the Domain which you want to use with the blogger, you will find the DNS option click on that.
- Add Blogger DNS records: Now get back to your Blogger’s blog backend (refer-step 4 of this tutorial) and add those CNAME records to your Godaddy Domain DNS file, as shown below.
- Click on the Add

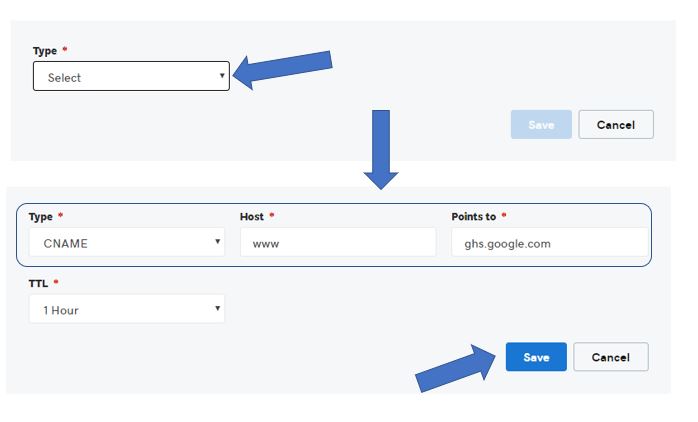
- Select the CNAME from the Dropdown box given under the Type. And then enter the Host=www and Points to=ghs.google.com and then click on the Save button.
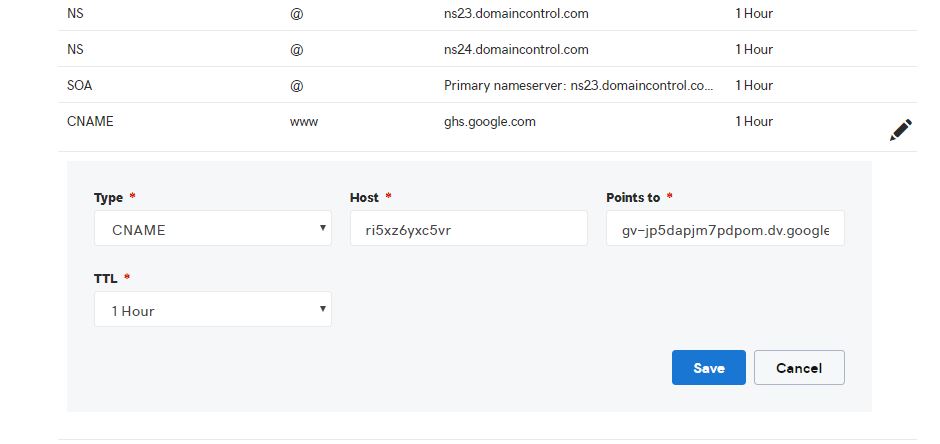
- Now copy the second CNAME record which is unique for every blog hosted on Blogspot that exactly tell the GoDaddy where to point the domain. For example in our case: the host record is: ri5xz6yxc5vr and Points to field is: gv-jp5dapjm7pdpom.dv.googlehosted.com. It must be different in your case and you have to use the one which appears on your Blogger’s Dashboard only.
- Now, I hope you know what to do. Again go to the Godaddy and click on Add button to add the CNAME record just like we did above.
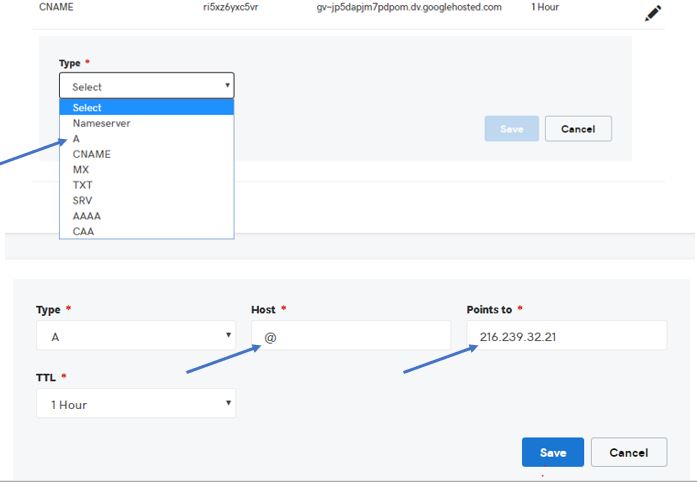
- After all above steps, its time to add the A-record to your Godaddy provided Domain DNS records. We need to add four A-records which point to Google IPs.
- 216.239.32.21
- 216.239.34.21
- 216.239.36.21
- 216.239.38.21 For that Just like you added the CNAME record, we add the A-records too but this time from the TYPE drop box we will select the A. In the Host field type @ and Points to will get the IP mentioned above. Repeat the step to add all Google’s IP given above to your Domain DNS A record.
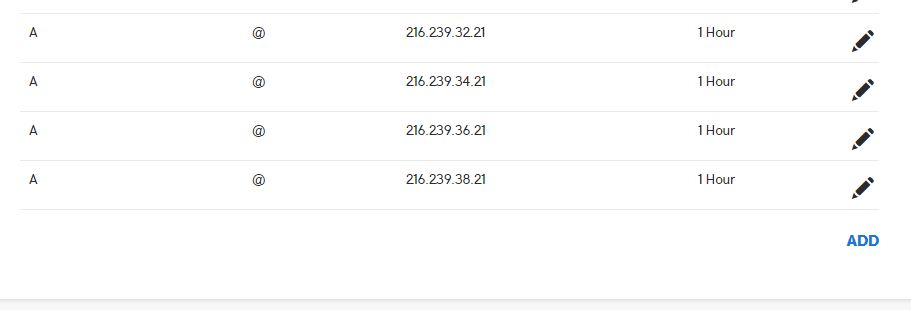
- Click on the Add
- After updating the DNS record of your domain wait for sometime because it may take 24 hours to get propagated. Then you just need to get back to the Blogger Settings and then Basic. Where again repeat the 2, 3 & 4 step of this tutorial.
- Once the propagation of the DNS records done, and also you saved it in your Blogger’s account then it will look something like as shown in the below image. Now click on the Edit option given in the front of your custom domain.

- Now click on the box given just below your custom domain in order to check it. We are doing this because by default your naked domain (example.com) will redirect to your blogger’s URL and we if someone tries to access your website with www prefix then he will get an error. So, we need to redirect it to make sure either example.com or www.example.com both the custom domain URL should redirect to your Blogger’s URL.

In this way, you can add and redirect the blogger to the custom domain. In case you find any difficulty, let us know, the comment section is all your, we will happy to help you.
You may like to know about:
- How do you start your own website for free on Google Blogspot?
- Know how to add Cloudflare to VPS/ Dedicated / Shared hosting servers?
- Free Business Email Address Account Using Zoho mail
- How to see & remove all devices connected to Google account
- Tutorial to create Windows Virtual machine on Linux (Ubuntu)

Very good post. explanation is very simple and nice way. Thanks for this valuable post.
Hi, after i followed your overall process.
24 hours later link was able to add, but now it is giving server not found error. please help
Please check your Domain A records