To run any file or program automatically immediately after Windows 10 starts, we can add them to the Windows 10 Startup folder. And if you don’t know how to do that then here is the tutorial on the same.
The Windows 10 autostart folder works exactly like its predecessor operating systems, however, finding and using it might be complicated to some people. Therefore, that’s why we thought why not to create a quick guide on this. The practical use of the startup folder is, as we turn on our computer whatever inside the startup will automatically get triggered and start running up. For example, you want to run a browser, email application, Cloud drive, or any other app, then simply add its shortcut in the Startup folder. Even if we want to run some script upon Windows startup then that can also be saved in the autostart folder.
How will I find the Windows 10 startup folder?
- To open the Startup folder on Windows 10, simply open the Run box.
- The shortcut key for the Run box is- [Windows] + [R] key
- In the box type:
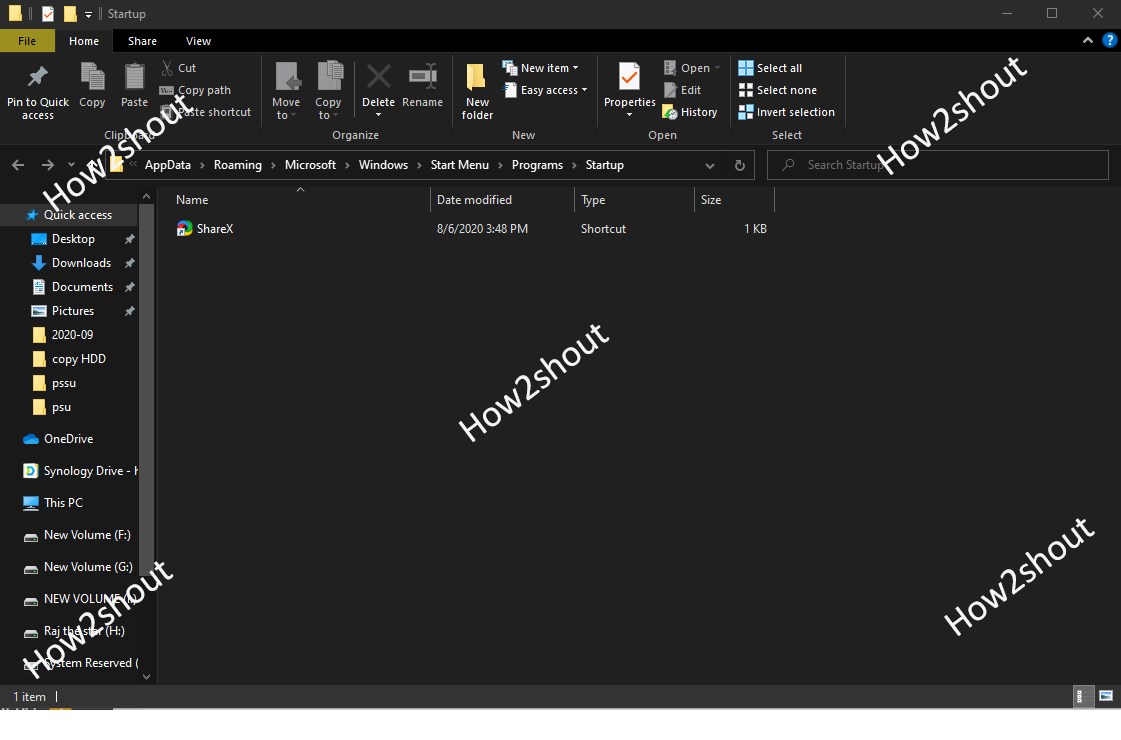
shell: startupand hit the Ok button. - The above command will automatically open the Auto Start folder.
- Now, whatever, script or app shortcut you place in it, will automatically get started with Windows 10 login.
In the autostart folder you will the shortcuts of the apps that are set to autostart, however, all the items will not show there. Nevertheless, if you want to see or disable all the Autostart apps of your Windows 1o then follow this tutorial further.
Here in the below screenshot, you can see the ShareX app shortcut to run automatically.
How to see, enable and disable Autostart Apps on Windows 10
To know what are the apps are running automatically with Windows 10 startup, follow the below steps.
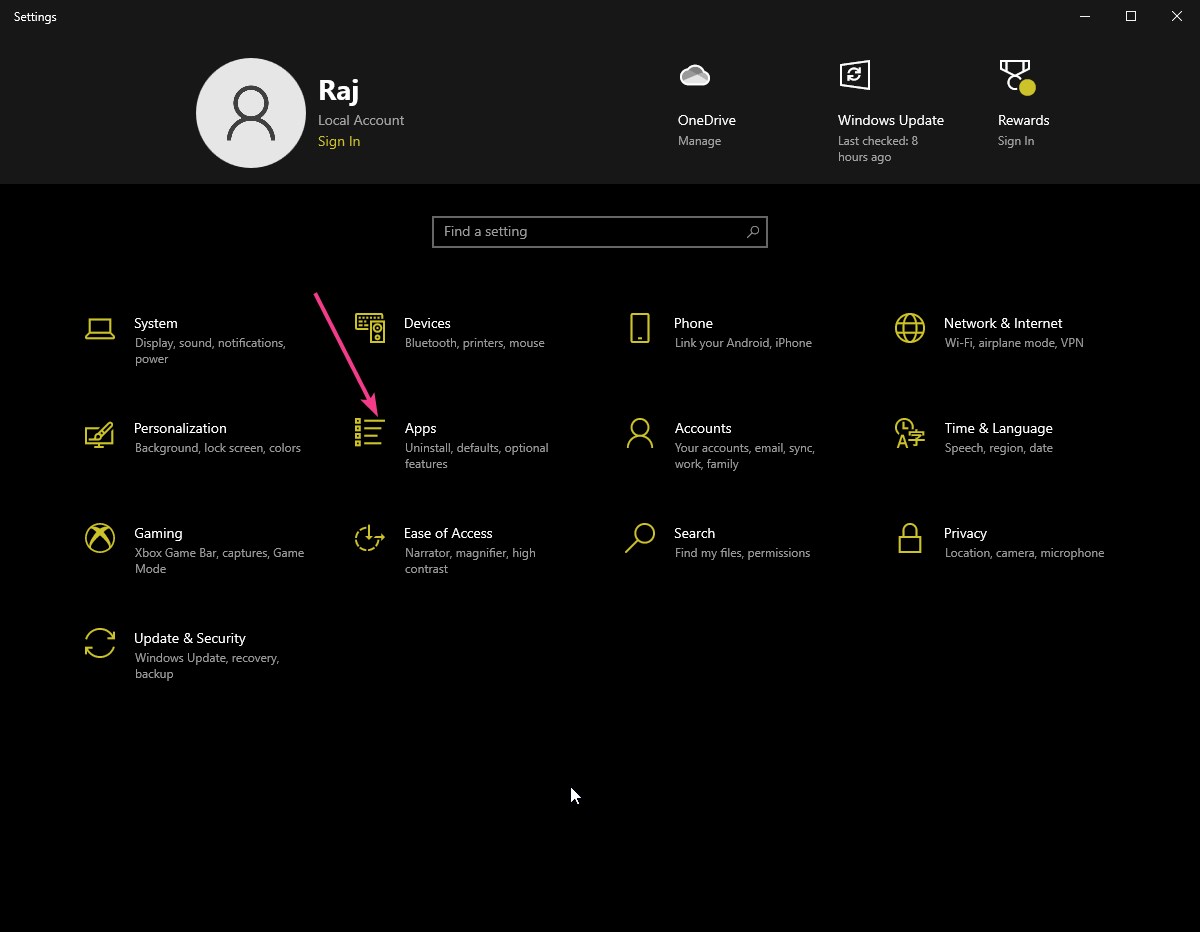
- Click on the Windows start button and select the Settings Gear icon.
- Select the Apps option.
- Now, from the left side panel, click on the Start-up menu.
- This will show all the apps enabled to autostart.
- You can disable them by using the toggle given in front of each app.
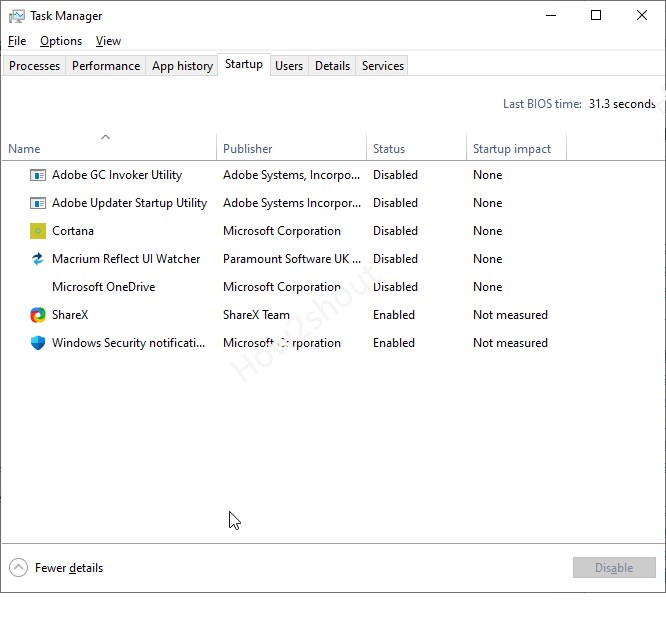
- Alternatively, the same can be accessed from the Task Manager.
- Right-click on the Windows Taskbar and select the “Task Manager” option.
- Click on the “Startup” tab and to disable any program, right-click on it select the option given for the same.
Remove programs in the autostart on Windows 10 & 8.1
To remove shortcuts stored in the “shell: startup” folder. Simply open it using the instructions given at the starting of the tutorial and delete the shortcut of apps you would like. Furthermore, you can prevent programs from starting automatically after booting by deactivating using the above-given methods.
Other Articles:


Related Posts
How to create email groups in Gmail? Send one email to multiple recipients in a matter of seconds.
Getting the right dashcam for your needs. All that you need to know
How to Install 7-Zip on Windows 11 or 10 with Single Command
Install Google Earth on Windows 11 or 10 Using a Single Command
How to install Gaming Services on Windows 11
How to Install Telnet Client on Windows 11 Using PowerShell