On this Page
show
Creating System Repair Disc can save your data and money in Future
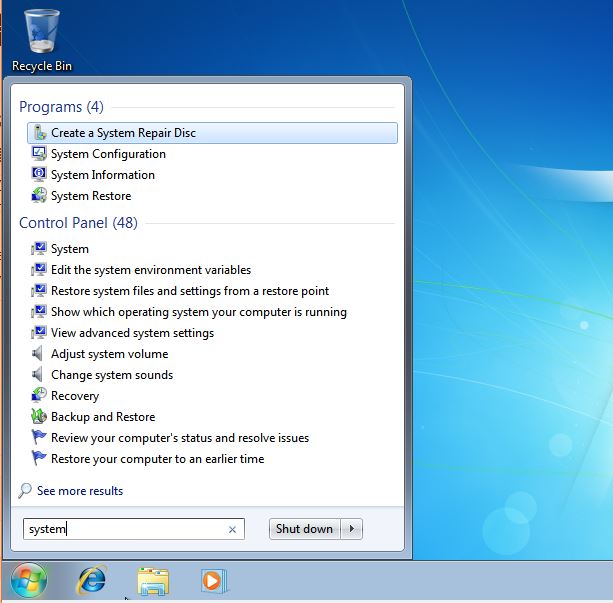
In some point of your life; if you are a Windows user then you definitely have seen a need for Windows recovery disc. After installing or purchasing a Windows 10 or 7 system, the first thing you need to do is create a system repair disc. The Windows system repair disc gives you the access of some useful system recovery tools such as:
- Startup Repair
- System Image Recovery
- System Restore
- Windows Memory Diagnostic
- Command Prompt
All these tools options are a part of Windows diagnostic tools.

How to Create A System Repair Disc In Windows 7 and Windows 10
The process of creating a System Repair disc is almost the same for Windows 7, Windows 8 and Windows 10. But make sure you have internal or external Optical drive or CD/DVD writer. However, if you are using the Windows 10 and Windows 8 you can also use the flash drives such as USB Pen to create a recovery drive.
- Press Win + R keys simultaneously to open the Run box.
- Type recdisc.You can also use the command prompt to run the recdisc command.
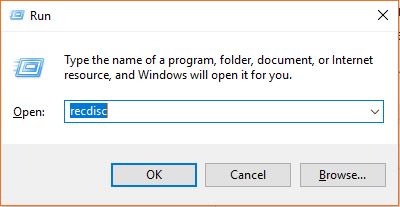
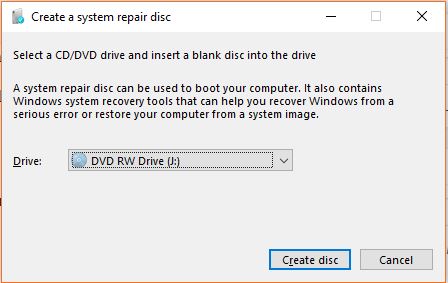
- After running the above command, the Create a System Repair Disc dialogue box will appear.
- Choose you optical disk drive from the drop-down where you have inserted your blank CD/DVD disk.
- Although Windows 7 system repair disc uses around 150 MB space, I would recommend using the DVD disk.
- Click on the Create disc button.
- Once you click on Create disc button the system will analyze and detect your inserted blank disc and start creating a System Recovery disc drive. You don’t require any special kind of software for DVD burning.

- Once the process of creating System Repair Disc complete, the Window 7, 8 or 10 will display a dialogue box that the burning process is complete, just close it by clicking the Close button.
- Now, if your system in future get any problem and need a recovery just simply put this created system recovery disk into your computer optical drive and boot it.
- Once your Windows 7 system will boot press any key for CD or DVD boot. If your default boot media is something else then you need to press keys according to your BIOS like F12 or DEL to get the Boot menu and select the CD/DVD for first booting.

- Once your computer detects the bootable Windows 7 system recovery disc; it will boot with that to give you access of various recovery tools.
You might also want to know about:
- How to Use the Rupee Symbol Keyboard shortcut in Windows 10
- Tutorial to Create self-extracting archives with 7zip SFX builder
- Instructions to edit videos on windows 10 for free using inbuilt Photos tool
- How to turn off sleep mode windows 7 & Windows 10
- A simple way to resize images on Windows 10, 8 & 7 with a single click
- How to get old Windows 7 Photo Viewer on Windows 10
Related Posts
What is ipconfig on Windows CMD used for?
How to find the IP address in CMD using hostname?
Windows 7 or 8 Users Can No Longer Upgrade to Windows 11 For Free
Top 10+ Email Clients for Windows 11 or 10 – Free and Paid Apps
How to create multiple folders in Windows command prompt?
Install Apache Tomcat on Windows 10 using Command prompt