Digital Assistants are becoming smarter day by day, and they are making our lives easier. Some of the most popular digital assistants are Google Assistant, Siri by Apple, Bixby by Samsung, Alexa by Amazon, and many others. While most of the digital assistants are available on portable devices and smartphones, Alexa by Amazon can be used on desktop PCs as well, which can be pretty helpful at times. Due to the immense popularity of digital assistants, numerous digital assistant based devices like the Google Home Mini, Alexa by Amazon are quite popular. Keeping the battle of digital assistants apart, I will be discussing the way to use Amazon Alexa on a desktop PC.
Though the performance of Amazon Alexa on desktop PCs might not be as good as a dedicated Alexa, it can be helpful to see the weather, listen to some songs, or do some other tasks easily on a computer. With the help of this tutorial, you can use Alexa for Windows 7 and other newer versions of Windows such as Windows 8 and Windows 10. So if your question is, can you use Alexa on a PC, you can surely do that and can control the Alexa from PC as well, when it is available on your system. To install Alexa for Windows 10 or older Windows versions, you will just need to download an app to get started.
So let’s get started with the tutorial.
Install Amazon Alexa on a Windows PC
The steps to activate Alexa
Step 1: You will need to download Amazon Alexa for PC from this link. If you are a geek, you can easily get started after downloading the program. This isn’t the Alexa web app, which means it is a desktop app, and you will not need a browser to use it.
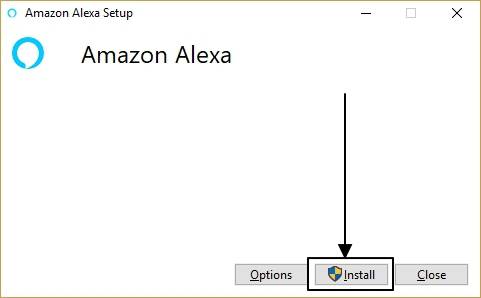
Step 2: After downloading Amazon Alexa from the Dropbox link, extract it to some location, and double-click on it to open. You will get the following screen. Simple and easy user interface. Just click on ‘Install’.
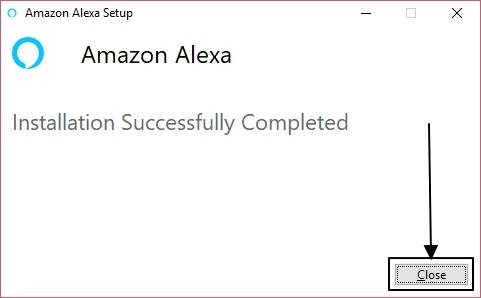
Step 3: Now to install Alexa on Microsoft Windows, it will take some time. After the installation is finished, click on ‘Close’.
Step 4: Once the installation is complete, you will not have to worry about how do I connect Alexa to the internet. Your computer should be connected to the internet, and Amazon Alexa will use the same network.
Step 5: Just open Amazon Alexa from the Start menu or from the desktop shortcut. You will get the following screen. Just click on ‘Set up Amazon Alexa’.

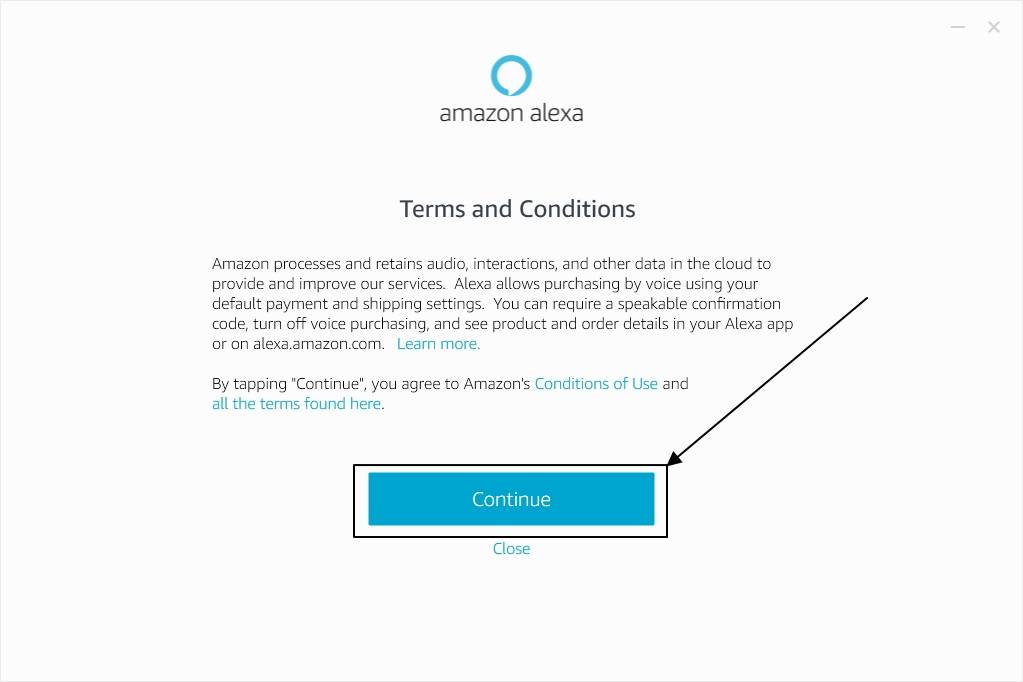
Step 6: Just click on ‘Continue’ in the terms and conditions, page. Yes, formality!
Step 7: Now there will be an option to automatically start Amazon Alexa on startup. You can enable or disable it as per your requirements. Click on ‘Finish setup’.

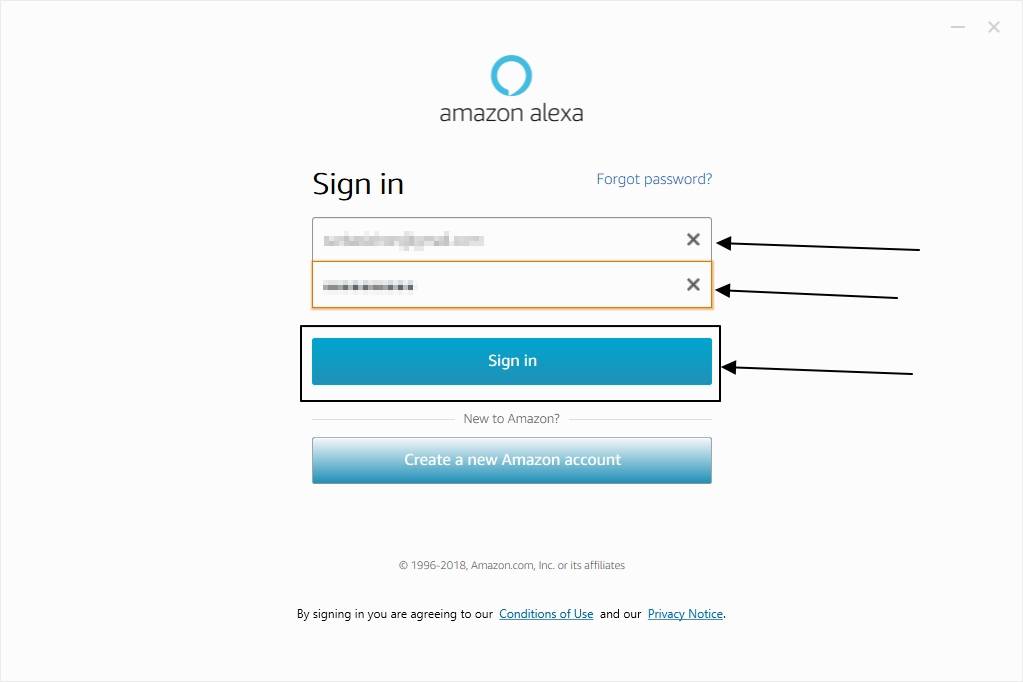
Step 8: Now you will have to sign up for Amazon with email or log in if you are already having an email account registered with Amazon.
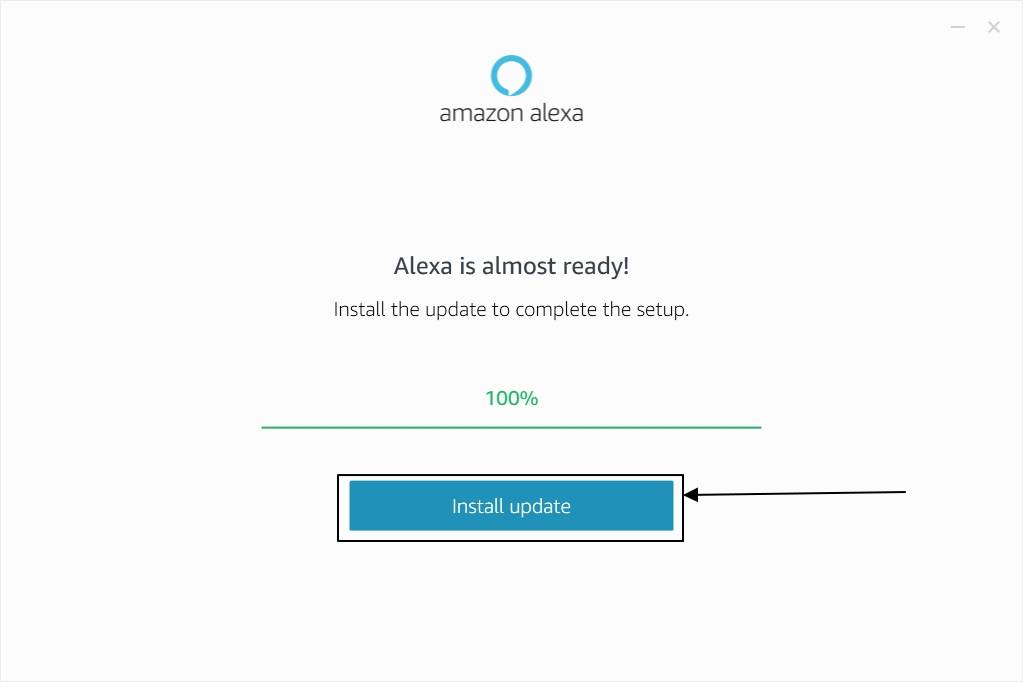
Step 9: Now an update will be downloaded, and once the installation is complete, click on ‘Install Update’.
Step 10: Now the things are ready and you can start enjoying your smart life for Windows 10, with the new Amazon Alexa digital assistant.
Step 11: You should get Amazon Alexa on the Windows taskbar. Just double-click on it to open. You will get the following screen. Just click on the small button to make Alexa listen to you.
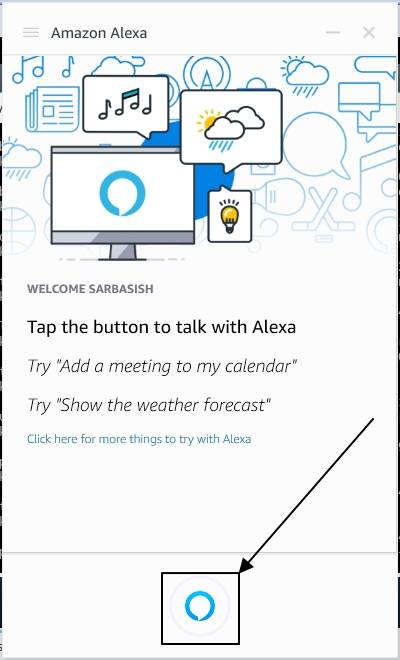
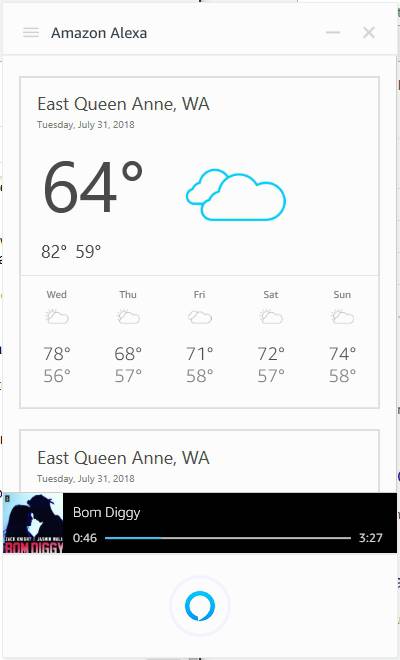
Step 12: You can listen to music, and do a lot of other things with Amazon Alexa now. Your default microphone will be used for listening. Thus, you should have a working microphone on your system to use Amazon Alexa.
You can even press the ‘Ctrl+Shift+A’ key combination to trigger Amazon Alexa when it is running in the background. Alexa will start listening to you when the key combination is pressed. You will not get any Amazon Alexa user interface in this case.
The points to remember
This is one of the best ways to access Amazon Alexa on your laptop, which is not having Alexa support. Thus the performance of the following Amazon Alexa will not be as good as the performance on Alexa enabled laptops or an Amazon Alexa, available for Rs. 4,000 or Rs. 8,000. So let’s find out some of the limitations.
- This is not an official Amazon Alexa app. This is a third party software. So if you are very too much concerned about your privacy, better go for an Acer Alexa enabled laptop or the Amazon Alexa.
- As Alexa is used here as a desktop program, you cannot use Alexa to turn on your computer. You can neither use it to turn off your computer.
- You cannot use Alexa app for troubleshooting purposes or do other tasks, which needs to be done manually on your PC. There isn’t a common API, which Windows can use.
This tutorial can be used to access Alexa on x86 based systems, apart from the x64 based systems, as well. You should also be able to sync your Alexa data by installing Alexa on PCs. As of now, I only have the tutorial to use Alexa if you are having a Windows system. I will even cover the tutorial about using Alexa for Linux if I find any such way. Enjoy using your Alexa computers with this tutorial.
Hope your question of how do I get the Alexa app on my PC is answered now. Did you face any troubles? Feel free to comment it down below.
You might also like to know about:
- How to install Audacity on Ubuntu Linux using terminal
- Machine Learning and Artificial Intelligence. The similarities and the differences
- How to compress and resize images on Windows easily
- What is Google Assistant and how to enable it on Android & iPhone
- How to change Google Assistant language on Android and iPhone


Now installed on any Windows 10 device become easy as we can download directly from Microsoft store,but if you are out of US region we need to use workaround to use Alexa on any Windows device.