Concept of containerization is not new however, the methods to deploy and manage could be to some extent. We already know a popular container virtualization platform called Docker. However, do you know? We can convert our native Ubuntu server or Desktop operating systems to run containers with the help of LXC (Linux Container) technology.
Linux -vServer and OpenVZ are very good examples of independent Linux containerized virtualization operating systems running LXC. Unlike VirtualBox or Qemu, the containers are isolated and don’t perform any kind of hardware emulation as they are directly running on the same core or kernel of the host operating system, thus very less performance loss and light in weight too.
Now, why we set up LXC on Ubuntu, Debian, RedHat kind of Linux distributions, well simple all of us do not need a dedicated OpenVZ LXC like platforms if you are a developer or student who is learning Linux, he or she also want to access other applications, thus, rather installing a dedicated bare-metal virtualization platform, we can use Docker or LXC (Docker is recommended for new users). Furthermore, we can also manage LXC container using libvirt interface or management tools such as Virt-Manager. But as compared to Docker, the pre-build LXC templates or OS images are limited, whereas Docker Hub has a wide range of options.
Let’s see how to install LXC on Ubuntu to run different virtual machines in container form.
Step to Install LXC on Ubuntu
Here we using Ubuntu 18.04, however, the steps will be the same for Ubuntu 19.10, 19,04,18.10,17.04, 16.04… or Linux Mint.
Step 1: Open command terminal, you can either use the shortcut keys CTRL+Alt+T or simply navigate to applications and search for Terminal.
Step 2: Update the system, so that all the installed packages can achieve their latest state.
sudo apt update
Step 3: LXC is available by default in the Ubuntu official repository, so no need to install any third-party stuff. Also, if you have SNAP installed on your system you can use that too. Both the commands are given below.
sudo apt install lxc
or
sudo snap install lxc
Note: The SNAP command will work for CentOS, Debian, Redhat and on any other Linux, those support SNAPD repo. Here is the tutorial to install SNAP on CentOS/RHEL.
Step 4: To test the LXC, run the following configuration check command:
sudo lxc-checkconfig

Step 5: Now, let’s see the bridge network of the LXC is working or not. For that, the command is
sudo ifconfig lxcbr0
If you get an error: lxcbr0: error fetching interface information: Device not found, then enable it.

To enable the bridge network type:
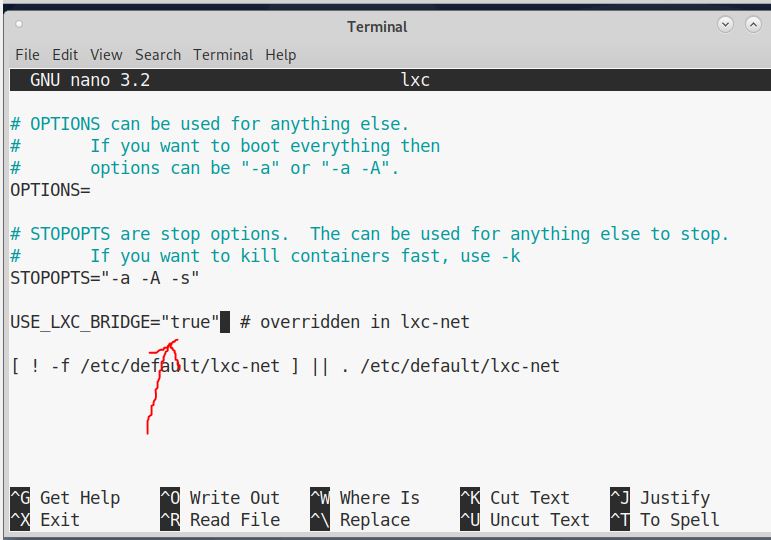
sudo nano /etc/default/lxc
Replace value false with true, given in the front of ” USE_LXC_BRIDGE=”
After that press Ctrl+X and then type Y and the Enter button to save the file.
Step 6: Restart LXC-net service: For that use systemctl, system and service manager command along with lxc-net. It will be like this:
sudo systemctl restart lxc-net
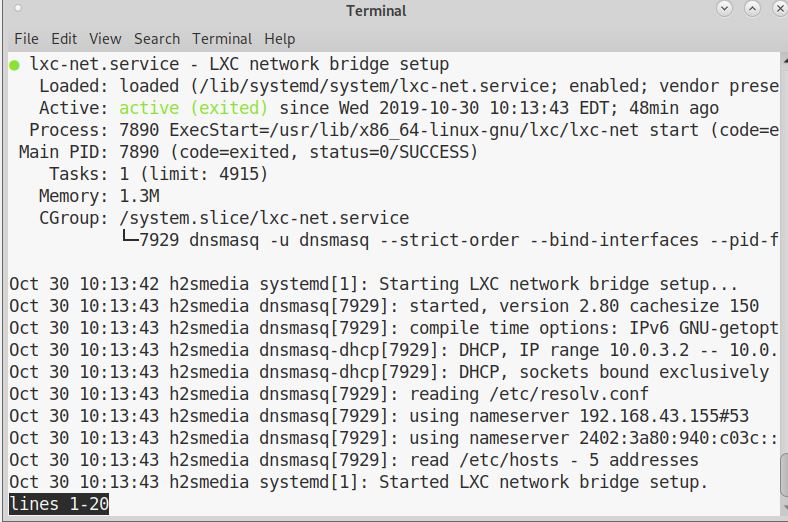
sudo systemctl status lxc-net
The output of LXC-net status would be look something like given in the below screenshot.
Now, let’s check the network interface details bridged and used for LXC:
ifconfig lxcbr0
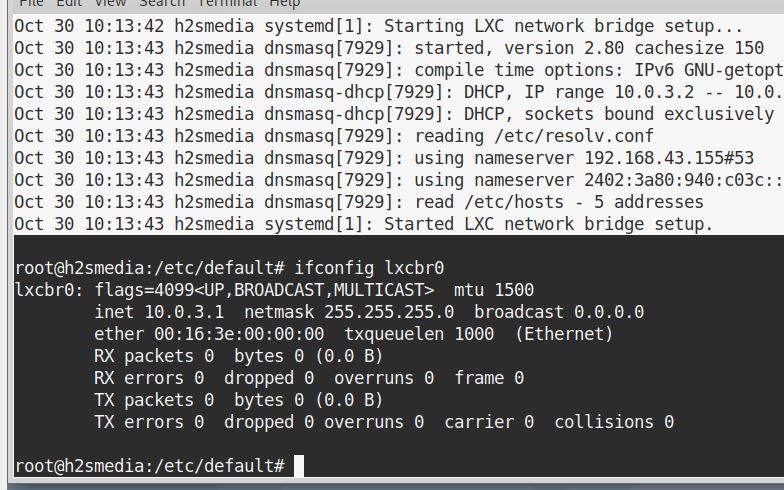
In the above screenshot, you can see that finally, we got the IP address for our Ubuntu install LXC-Linux containers.
Step 7: Create an LXC container: Everything is set up, its time to install some LXC templates, which are basically a script to fetch and install the OS images available on the LXC official website such as CentOS, Ubuntu, Alpine and more.
In order to be able to create an LXC container for a specific target environment (such as Debian 64-bit), you need a corresponding LXC template. Fortunately, the LXC userspace tool on Ubuntu comes with a set of pre-prepared LXC templates. You can find the available LXC templates in the /usr/share/lxc/templates directory.
ls /usr/share/lxc/templates/
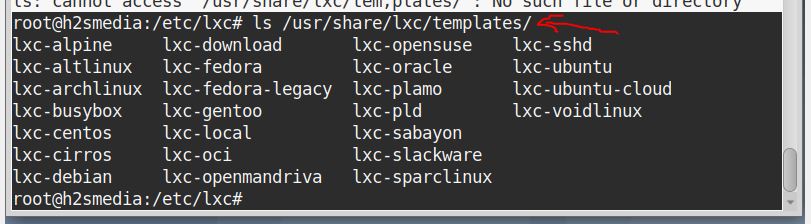
So, as mentioned above, the LXC template is actually a script that is used to create containers for a particular Linux environment. You need to use one of these templates when creating an LXC container. Thus, here we are installing Ubuntu and fedora, however, you any of the available LXC templates, the command to install will be same, the only name or value for the template need to be changed.
For Ubuntu:
lxc-create -n new -t ubuntu
Note: new is the name we have given to our newly create Ubuntu LXC container so that we can easily remember it. You can give whatever you want.
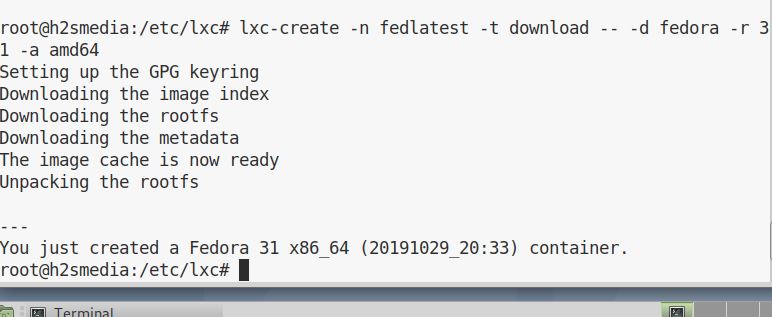
To install Fedora 31 template latest version on LXC (Linux container):
lxc-create -n fedlatest -t download -- -d fedora -r 31 -a amd64
In the above command fedlatest is our container name.
See all the created containers:
lxc-ls
To use any of them, we will use the below-given command along with the name of our created LXC container.
lxc-start -n name-of-container -d
Replace the name-of-container text with the name you have given to your container. For example, we have created Fedora container above with name -fedlatest, thus the command will be:
lxc-start -n fedlatest -d
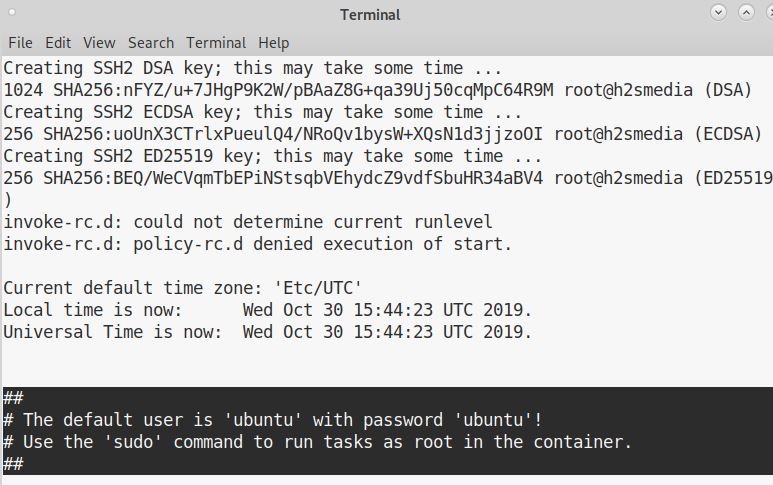
To get the console of the started Linux container, use this command along with container name.
lxc-console -n fedlatest
To change or set the root password:
lxc-attach -n fedlatest passwd
To Stop console:
lxc-stop -n conatiner-name
Example:
lxc-stop-n fedlatest -d
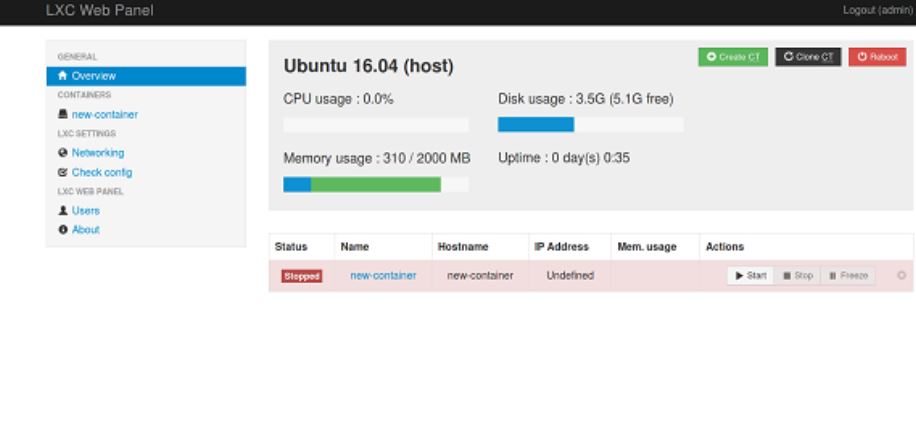
To access the LXC using graphical user interface, install LXC web panel:
wget https://lxc-webpanel.github.io/tools/install.sh -O - | bash
Once installed, in your browser type the URL http://your-server-ip:5000.
Login using username: admin and password: admin
Related Posts
How to enable Virtualbox nested VTX/Amd-V on Windows 10/11 or Linux
How to Install Sandbox in Windows 11 or 10 Home Editions
Top 8 Best Free Kitchen Design Software Options in 2024
How to install Redhat Podman on Windows 10 or 11 via CMD
Install Docker Desktop on Windows 11 or 10 via PowerShell
How to Install Minikube on Windows 11 or 10 using CMD or PowerShell