The Ubuntu distribution of Linux doesn’t need an introduction, and it is the favourite Linux distribution of many users, including me. If you are planning to make your switch to Linux, Ubuntu can be the best distribution to start with, for the handful of apps and features you can get, which is backed by a large community, who are always ready to help you, if you face the smallest of the trouble. But one thing, which I don’t like about Linux, is the user interface, or the default desktop environment, which is something, most users will not get familiar with until a few days. After all, it is Linux, and you can install any desktop environment at any point in time, but most users don’t find it easy to switch to a new desktop environment.
But Ubuntu Cinnamon Remix is a new Linux distribution that brings the power of Ubuntu, with the Cinnamon flavour, which can be the solution for most users. But, the Ubuntu Cinnamon Remix is a new project, and I don’t know, whether it is going to be a successful one, even though I am pretty optimistic about exploring the new distribution. So here, I will talk about, how you can install the Ubuntu Cinnamon Remix 19.10 that is based on Ubuntu 19.10 on VirtualBox or a physical machine. However, as this is a new project, I will better recommend you to install it in a virtual machine, so that you can have an idea about, whether it is your cup of coffee.
Installing Ubuntu remix 19.10 Virtual Machine on VirtualBox
So, without any further delay, let’s get started with, how you can install Ubuntu Cinnamon Remix 19.10 on a virtual machine, using VirtualBox, or a physical machine.
Download Ubuntu Remix
Before you can get started, you can download Ubuntu Cinnamon Remix 19.10 from here.
Initializing the virtual machine
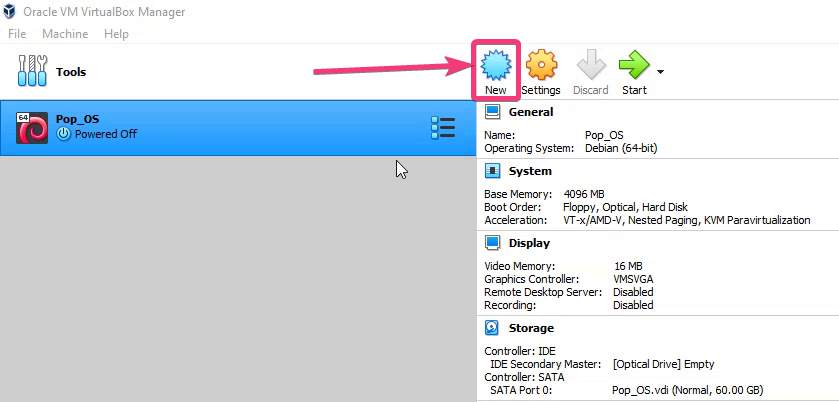
Open VirtualBox, and click on the ‘New’ button.
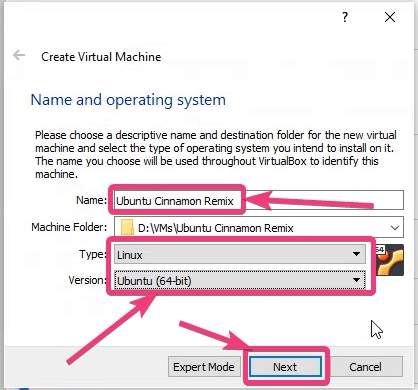
Choose a name for the Ubuntu Cinnamon Remix virtual machine
Now, choose a name for the virtual machine, which you can easily understand later on. Choose the virtual machine folder, set the ‘Type:’ to ‘Linux’, and the ‘Version:’ to ‘Ubuntu (64-bit)’. Finally, click on ‘Next’.
Select the amount of Memory
Now, you will have to assign the memory or RAM size, which I am setting to 4096 MB of 4 GB. Then click on ‘Next’. If you don’t have enough RAM, you can just assign any value equal to more than 2 GB or 2048 MB, as it is after all Ubuntu.

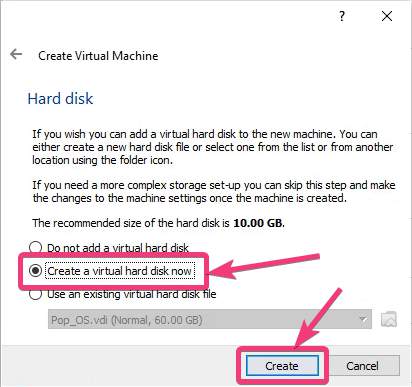
Create a virtual hard disk now
Now, you will have to choose the hard disk. Just select ‘Create a virtual hard disk now’, and click on ‘Create’.
Choose the Hard disk file type
In the next step, you will have to choose the Hard disk file type. You can happily go with the default settings, or the ‘VDI (VirtualBox Disk Image)’, and click on ‘Next’.

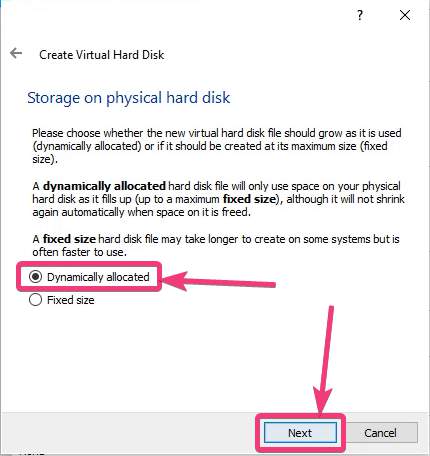
Choose Dynamically allocated
Now, you will have to choose, how the disk will be stored on the virtual machine. Just choose ‘Dynamically allocated’, and click on ‘Next’.
Assign the amount of storage
You will have to assign the amount of storage, in the next step. I am choosing 40 GB. You can select any value at least more than or equal to 20 GB, and click on ‘Create’.
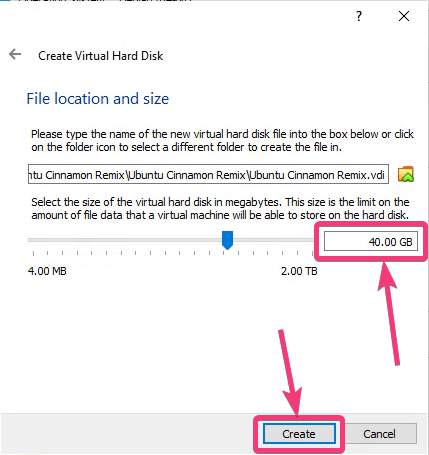
Well, now the virtual machine has been created and is ready to boot.
Create bootable Ubuntu Cinnamon Remix Bootable USB (optional)
From here onwards the steps to install this Linux distro is the same for both PC and Virtual Box Virtual Machine, however, for PC you have to create a bootable USB drive. Follow this article: How to create an Ubuntu bootable USB, in which we have shown using Rufus to create bootable pen drive. Follow them for Remix too.
Installing Ubuntu Cinnamon Remix
The installation process is going to be the same, no matter whether you are using a virtual machine or a physical machine. In case of a virtual machine, choose the virtual machine created by you, and click on ‘Start’.
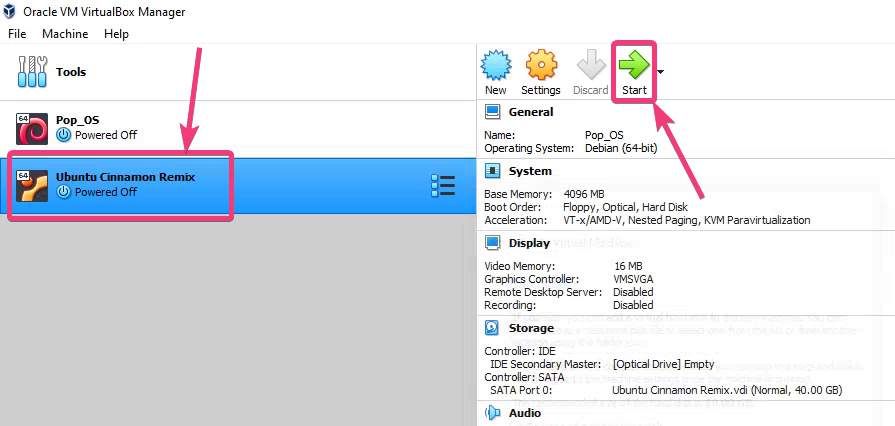
Start Ubuntu Cinnamon Virtual Machine
In the case of a virtual machine, you will have to choose the start-up disk. Just click on the browse button, or click on ‘Start’, if the boot media is present in the selected host drive.
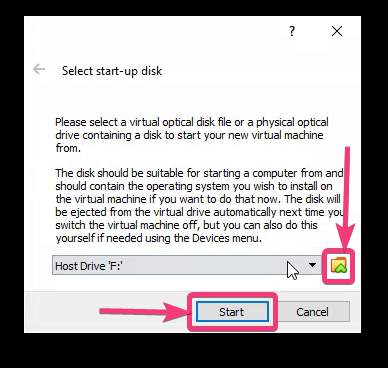
Select the ISO image
In the next step, click on ‘Add’ in the ‘Optical Disk Selector’ menu, after which, you will have to select the ISO image containing Ubuntu Cinnamon Remix 19.10.
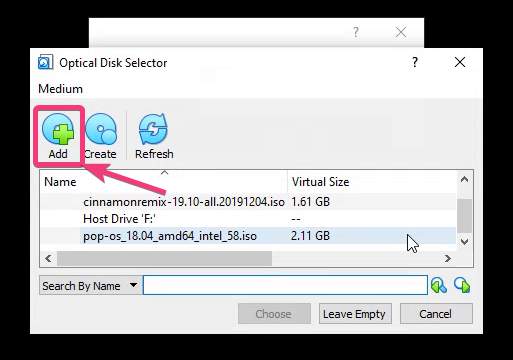
After you have added the ISO, click on ‘Choose’ in ‘Optical Disk Selector’ menu.
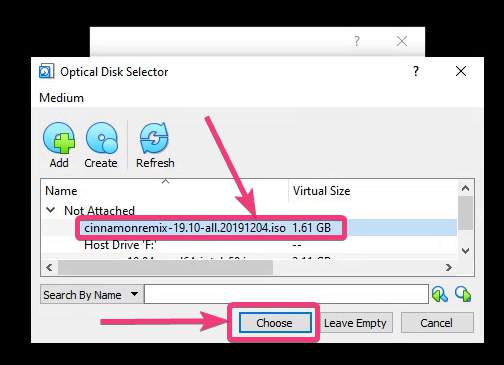
Select Virtual optical disk booting
Finally, click on ‘Start’.
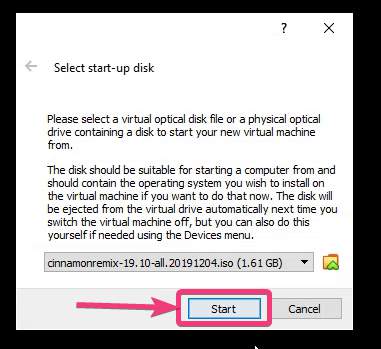
Now your computer will start booting, and you will find the regular Ubuntu boot screen.

After it boots into the OS, you will find the user interface with a neon background, which looks cool.

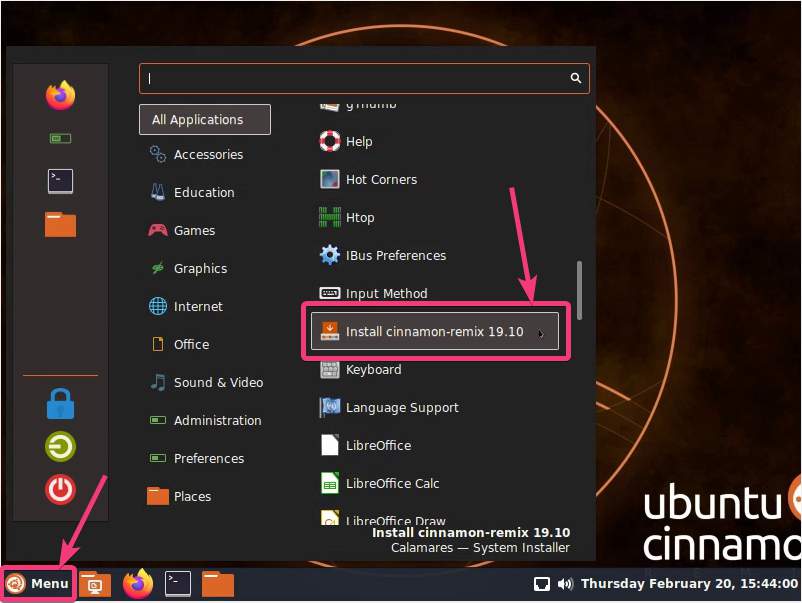
I am pretty surprised to not see the option to install, right on the desktop. To install Ubuntu Cinnamon Remix, just click on ‘Menu’ as in the screenshot below, and scroll down a bit to find the option that says ‘Install cinnamon-remix 19.10’. Just click on that.
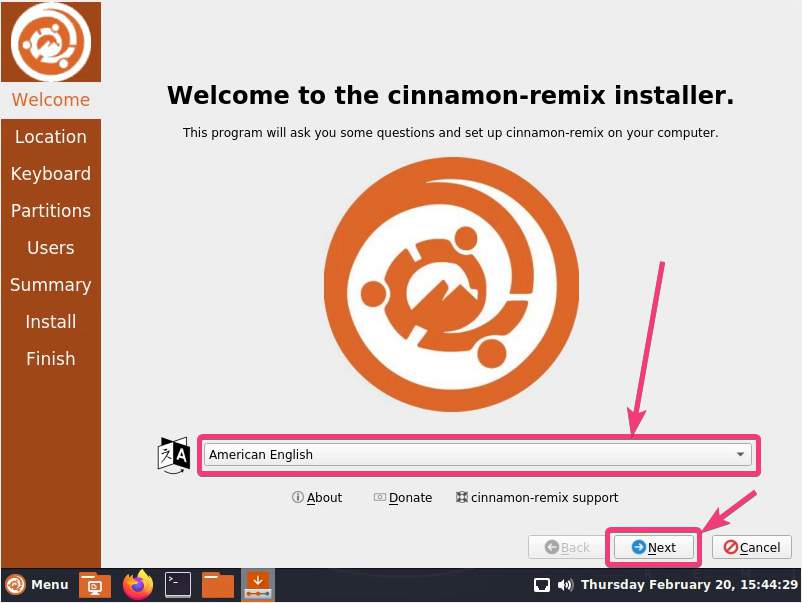
Just select American English or British English from the drop-down menu, and click on ‘Next’. Don’t worry, if the characters show as square blocks initially.
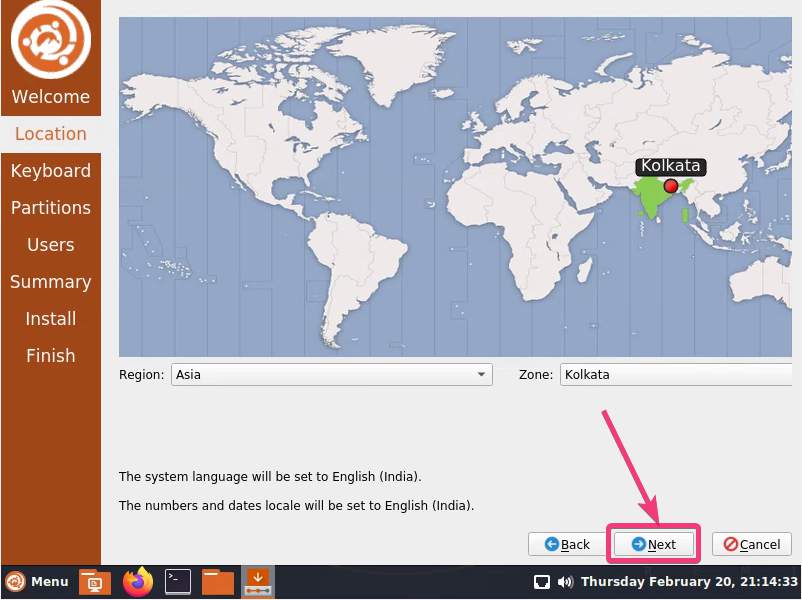
In the next step, you will have to choose the time zone. It should be detected automatically. In case, it doesn’t, just select your location in the world map, and click on ‘Next’.
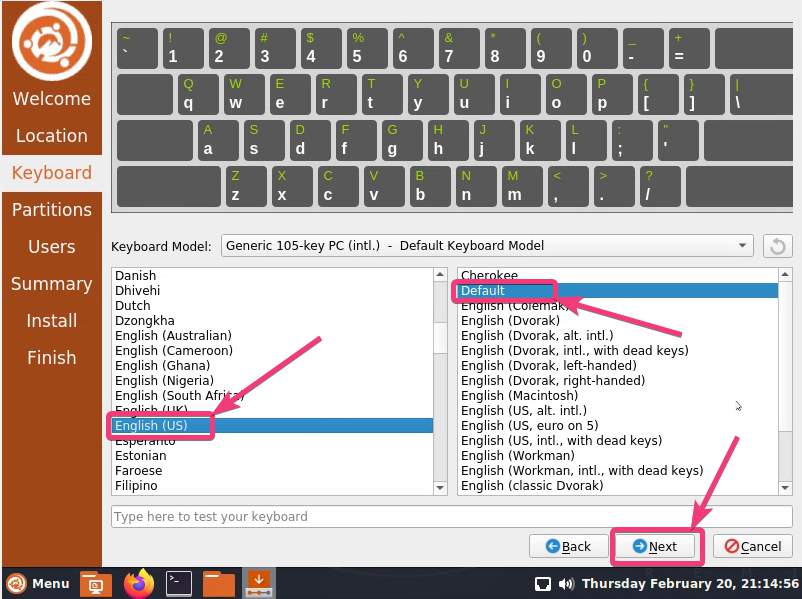
You will have to select the keyboard layout in the next step. You can also find everything in blocks. Just select ‘English (US)’, in the first margin; ‘Default’ in the second margin, and click on ‘Next’.
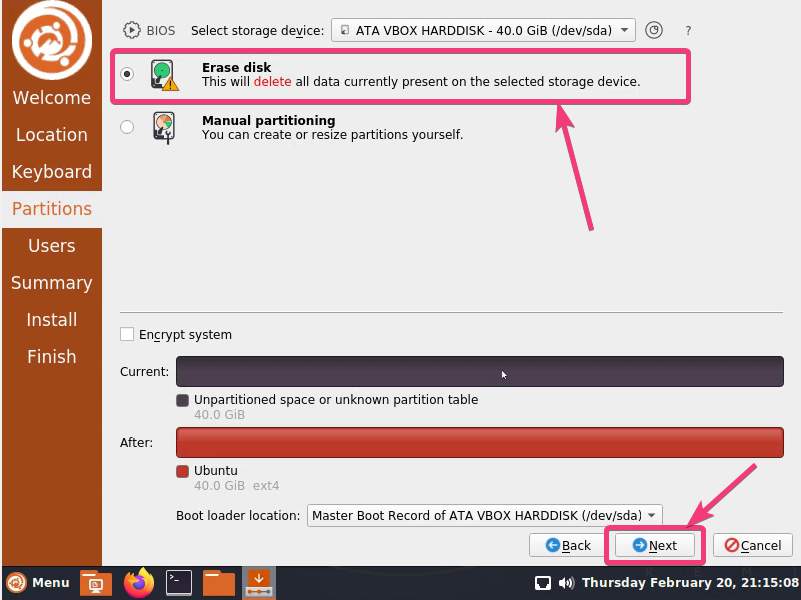
Now, you will have to configure the partitions. Just choose ‘Erase disk’, if you are installing it on a virtual machine, or you can even select ‘Manual partitioning’ if you are doing it on a physical machine. After you are done, click on ‘Next’.
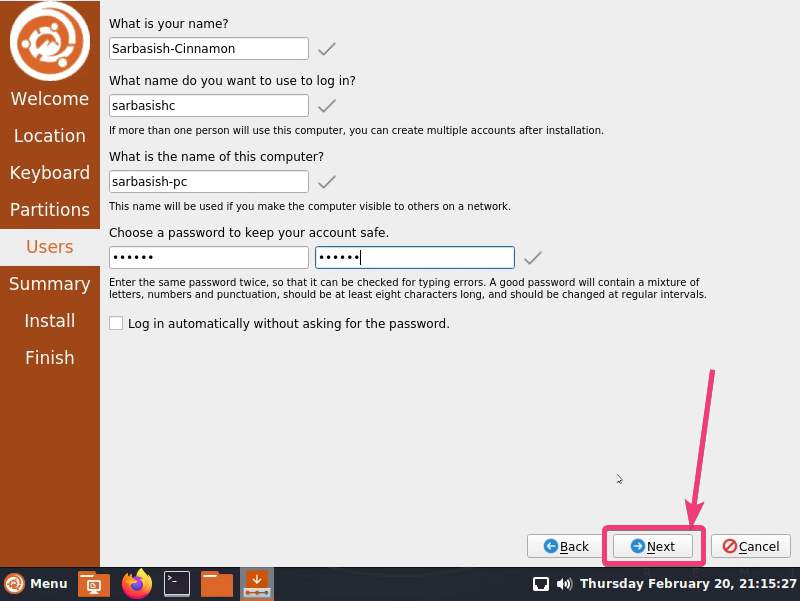
In the next step, you will have to choose the user name. Just enter your name, password, and other details, and click on ‘Next’, when you are done.
Now, the ultimate step. Click on ‘Install’, and then ‘Install now’ in the warning that appears.
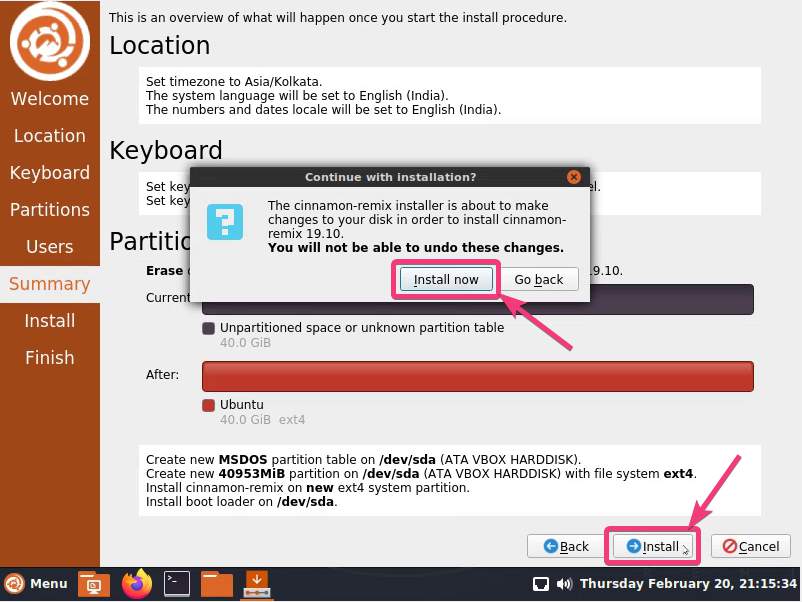
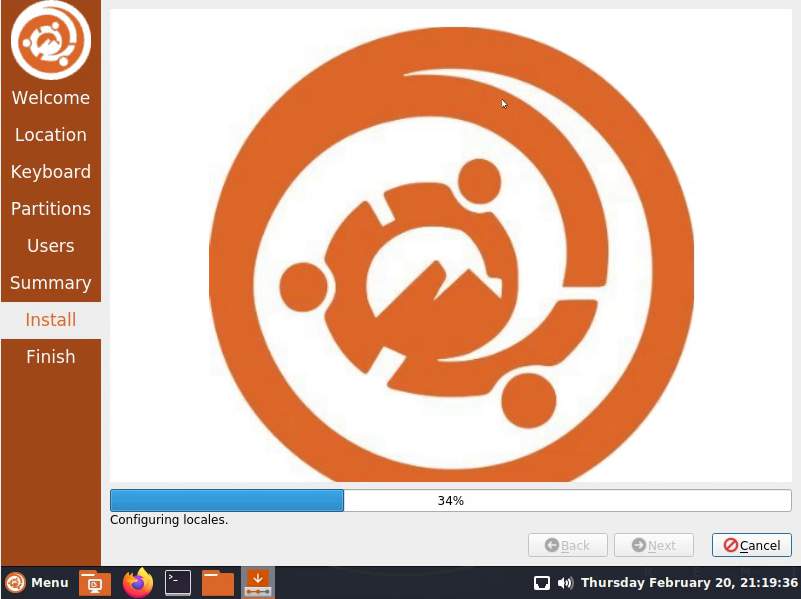
The installation will instantly start, and the good thing, it doesn’t download updates during the installation, so that you can be on the launchpad very soon. You can keep exploring the operating system by the time, the installation is complete.
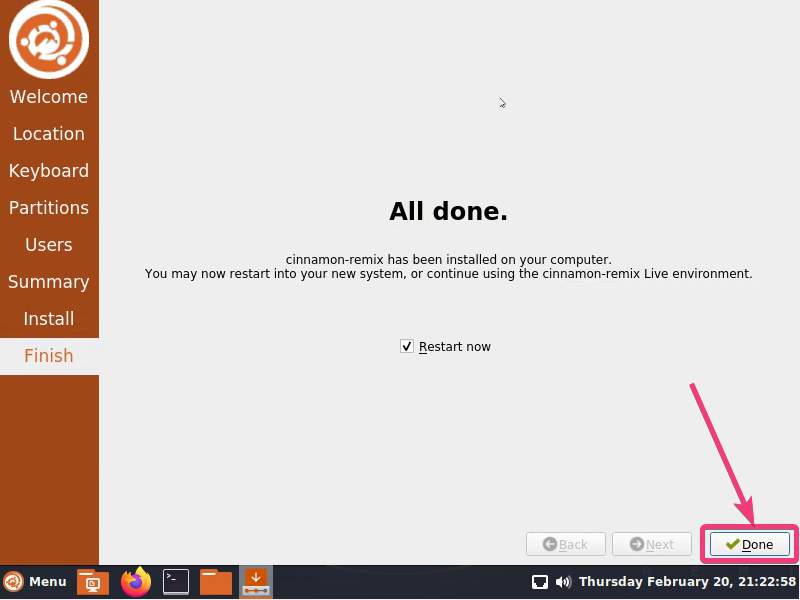
After the installation is complete, you can restart your computer or the virtual machine, by clicking on ‘Done’.
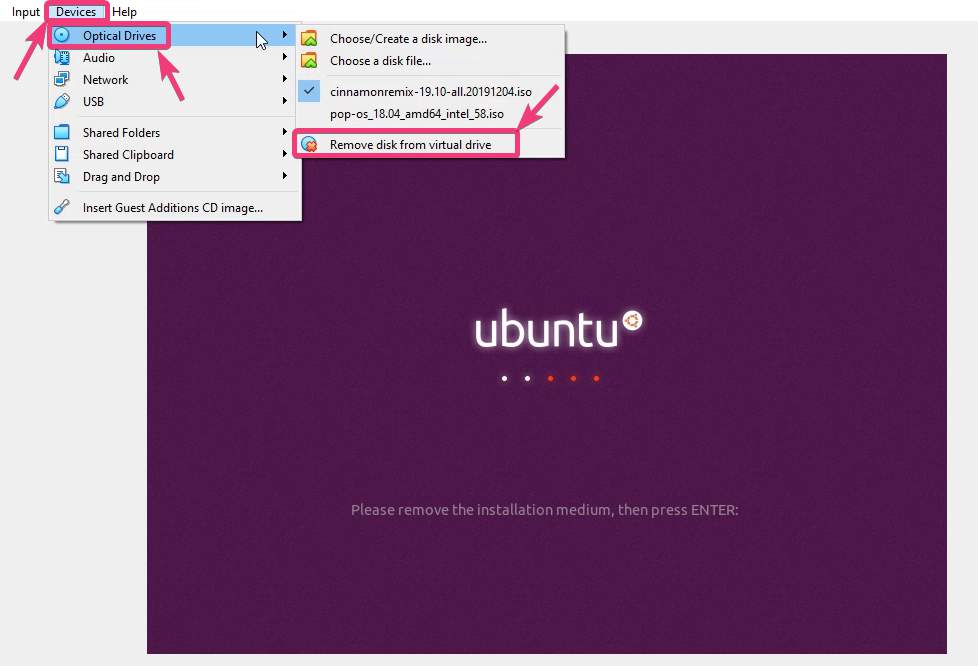
You will be asked to remove the installation media. Just eject the DVD, flash drive on a physical machine, or click on ‘Remove disk from virtual drive’, under ‘Optical Drives’ in the ‘Devices’ menu.
Now Ubuntu Cinnamon Remix is ready, and you can now use the operating system. Here are a few screenshots of Ubuntu Cinnamon Remix 19.10 LTS.

I tried installing a few applications, and they all worked perfectly. But, the question that might come is, should you install Ubuntu Cinnamon Remix right now? Well, here a few things, which I think, you should think about, before installing Ubuntu Cinnamon Remix.
As I just said, at the time of installation, you can see some square blocks instead of the actual characters. This is easy to get rid of, by choosing the language you want, but this might make certain users ponder on, how stable Ubuntu Cinnamon Remix is, at this point in time.
The user interface is cool, with darkness everywhere, but I felt, there are still some places, the team should work on, to deliver the best environment.
Talking about stability, it is too early to comment on that. However, considering it is Ubuntu, this should be stable enough for most users, and I didn’t face any problems running most programs on Ubuntu Cinnamon Remix.
I just want to see Cinnamon Remix as an official flavour of Ubuntu after it is optimized in the different ways I just mentioned.
So, that was all about, how you can install Ubuntu Cinnamon Remix 19.10 on a virtual machine, or your desktop, which I will not recommend at this point. Do you have anything to say? Feel free to comment on the same below.
Other Articles:
Related Posts
How to create email groups in Gmail? Send one email to multiple recipients in a matter of seconds.
Getting the right dashcam for your needs. All that you need to know
How to Install 7-Zip on Windows 11 or 10 with Single Command
How to Install ASK CLI on Windows 11 or 10
How do you install FlutterFire CLI on Windows 11 or 10?
How to create QR codes on Google Sheets for URLs or any other text elements