Are you not satisfied with Ubuntu’s Unity Desktop environment? Then tries out lightweight XFCE on your Ubuntu running Linux PC, here is the command and tutorial on it.
When it comes to Linux distributions for personal use, the first one that comes to our mind is Ubuntu, which is undoubtedly the most popular Linux distribution available for desktops and laptops out there. With a huge community of users and developers, you can get solutions to almost all problems that you might face while using the Ubuntu distribution of Linux. Even after being the most popular distribution of Linux, and being lightweight at the same time, obviously if compared to Windows, Ubuntu can also be installed on computers with less powerful hardware. But even after that, your computer might not perform as expected.
Most modern distributions of Ubuntu comes with the Unity desktop environment, which is very user-friendly but is resource-heavy at the same time. If you are running a new version of Ubuntu on an old computer, the performance might not be satisfactory, and in such cases, most users switch to different distributions of Linux. But not all distributions have a large community, and that’s when users start facing problems. But if you ditch the Unity Desktop, you can always find a lot of lightweight desktop environments, instead of the Unity Desktop Environment that can run on Ubuntu. XFCE Is one of the most lightweight desktop environment that comes with most useful programs, and it is worth using if you want to keep using Ubuntu for the large community of users, but want good performance at the same time.
So, show without any for the delay, let’s get started with how you can install the XFCE Desktop Environment on Ubuntu to get the best of both worlds.
Installing XFCE on Ubuntu
- Open the Linux terminal on your Ubuntu distribution, and Type in the following command to start the installation of the XFCE desktop environment on your computer. Here weareusingUbuntu 19.10, however, the steps will be the same Ubuntu 18.10/18.04/17.04/16.04/LinuxMint.
sudo apt-get install xubuntu-desktop

- The download and installation will start immediately, and after some time, a list of dependencies that will be downloaded and installed, will be displayed to you, and, after installation is complete, it will consume around 700 MB of disk space.
- To agree with all these terms, type ‘y’, and hit the enter key to keep the installation going.
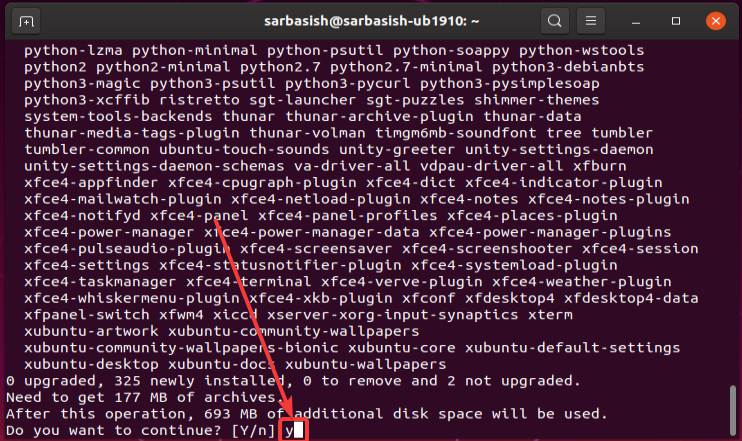
- The download and installation will take some time to complete. Yes, it will take a good amount of time, and thus, I will recommend you to do some other work as long as the download and installation continues.
- After the download and installation are almost complete, you will have to choose the default display manager. A message will be displayed to you, and you have to click on ‘Ok’.
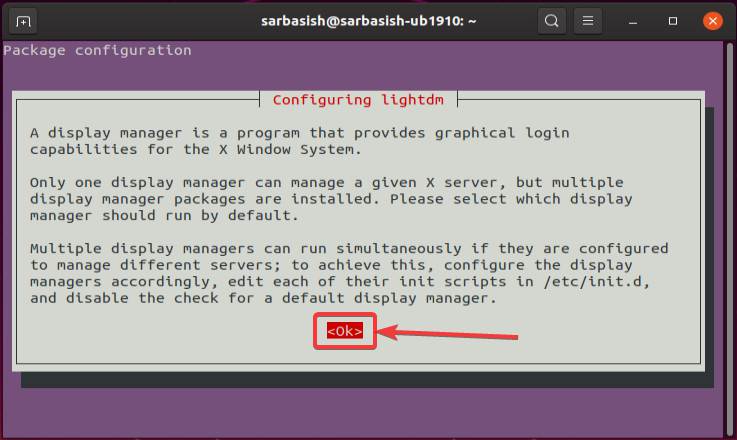
- Next, choose the default display manager, you will have to choose the one between GDM3 and lightdm. I will recommend you to go for gdm3. just select it using the up and down navigation keys, and hit the enter key.
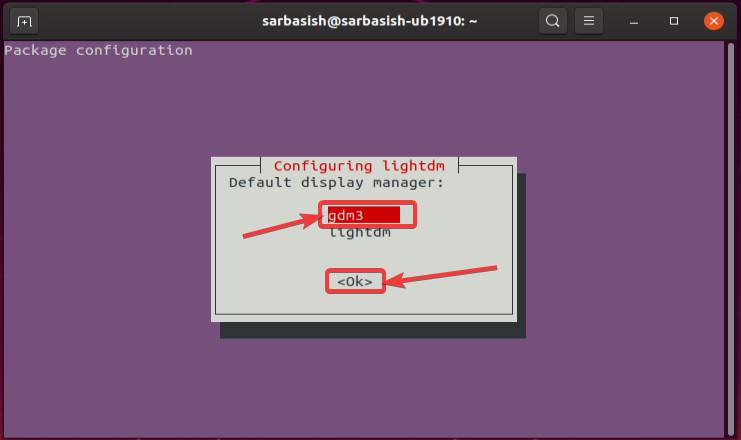
- Even after this, the installation will take quite some time, and you will have to hold patience till then.
- After the installation is complete, just log off from the current user account, By clicking on the power button on the top right corner of the screen, and then by clicking on ‘Log Out’, Corresponding to the username.
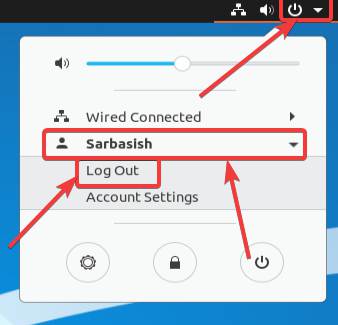
- Now, click on the small drop-down menu corresponding to the username, and click on ‘Xubuntu Session’.
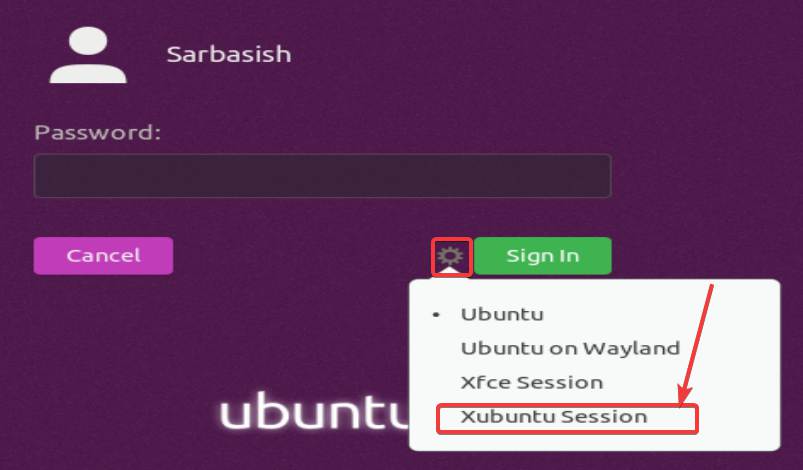
- Now, login with your existing credentials, and you will be landed in the Xubuntu Desktop Environment of Ubuntu.
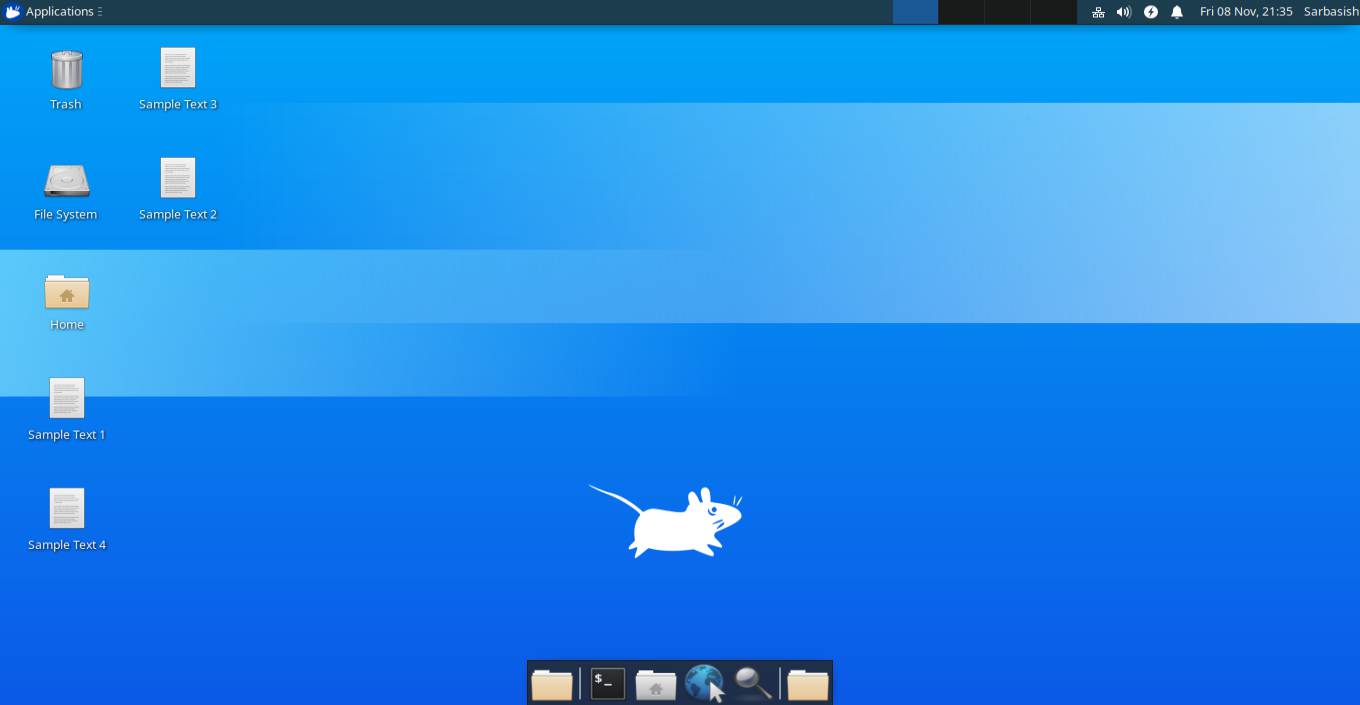

- After using it for some time, you can understand, the Xubuntu desktop, which is based on XFCE is much lightweight compared to that of Ubuntu’s own Unity desktop. Alternatively, instead of the Xubuntu desktop, you can also use the ‘Xfce Session’. Now you can enjoy Ubuntu with a lighter desktop environment, which will surely help you get your work done with hardly any trouble at all. XFCE might not be the most elegant and good looking desktop environment, but it is not bad or dumb, as well. You can at least get your work done, without switching to a new distribution, which isn’t a piece of cake, if you are using Ubuntu on your everyday driver.
So, that I was all about how you can install the XFCE Desktop Environment on your computer running Ubuntu. I have tried it on the latest Ubuntu 19.10, However, the process is going to be the same even on the older versions of Ubuntu. Do you have any questions? Feel free to comment on the same below.
Other Articles to read:
- How to install Pitivi Video Editor on Ubuntu and CentOS
- 11 Best Linux Distro for hacking and programming
- How to install Deepin desktop environment on Ubuntu
- 14 Best Lightweight and Fastest Linux Distros
Related Posts
How to create email groups in Gmail? Send one email to multiple recipients in a matter of seconds.
Getting the right dashcam for your needs. All that you need to know
How to Install 7-Zip on Windows 11 or 10 with Single Command
How to Install ASK CLI on Windows 11 or 10
How do you install FlutterFire CLI on Windows 11 or 10?
How to create QR codes on Google Sheets for URLs or any other text elements