To set up a File Transfer Protocol (FTP) server on Windows 10, we don’t need to enable the inbuilt one, this can be done using the robust FileZilla Server application. It one of the easiest solutions to quickly up the FTP server on Windows 10, 8, 7 including the Windows server.
The main idea behind creating an FTP solution is to provide a quick way for uploading and downloading files remotely or locally using some FTP client software. For example, you want to upload files to your home machine using a smartphone, Desktop, or Laptop, and the same for downloading stuff such as documents, and other items when you need them. This gives you full control over your data, however, the backend maintains will be on your shoulders. Moreover, there would not any limitations on data transfer or on what type of file you want to upload.
Furthermore, we can add multiple users (friends & family) to access any common data with the help of user and password credentials to share things securely.
Here in this Windows 10 FTP server setup guide, we will install FileZilla server, create an FTP user & groups, and then let you know how to access the same via local network and remotely over the internet on a PC or Android smartphone.
If you still want to use the inbuilt FPT server option of WIndows 10 then here is the tutorial on that- How to enable an inbuilt FTP server of Windows 10 to access it locally and over the internet
How to download FileZilla Server
- It is open-source software and available free to download.
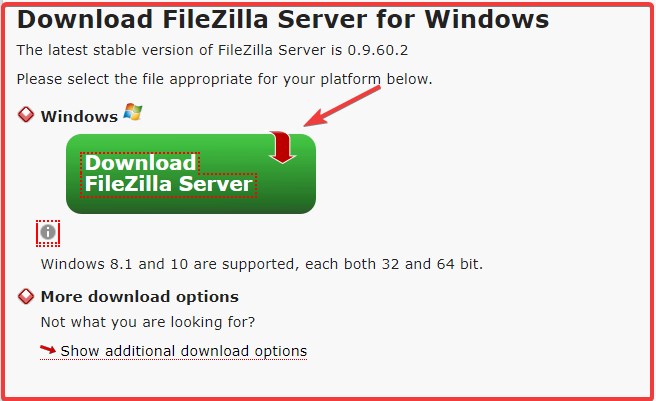
- Therefore, go to the official website or use this link.
- Click on the green color button saying “Download FileZilla Server“.
- It supports both 32-bit and 64-bit versions.
- A pop-up window will open, click on the Download button.
- Save package on your Windows 10/8/7 system
How to Install FileZilla Server on Windows 10
Once the executable setup file is on your system follow the below steps to install it on your OS.
- Double click on the FileZilla_Server setup file.
- Click on the Yes button, when it will ask your permission to run the setup.
- Next, select the “I Agree” to accept the terms and conditions of the software.
- By default, the Standard packages will be selected to install. The one item which will be unselected is “source code”, if you are a developer or want to go through the code of FileZilla you can select that one as well. However, normally we can leave that be unchecked.
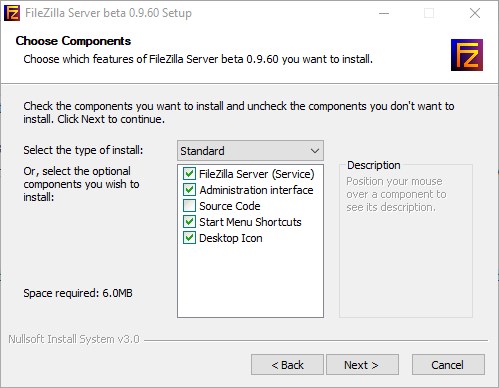
- Select the Next button
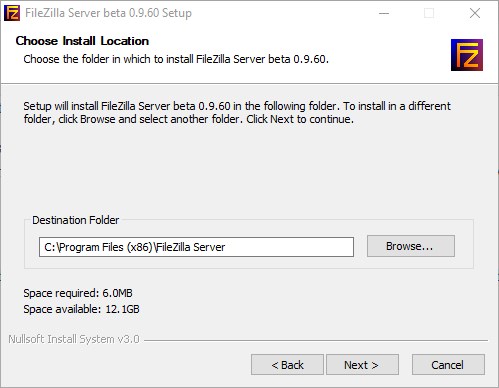
- The destination folder will set to use the C drive, in case you don’t want to install it there, you can change it. Otherwise, click Next.
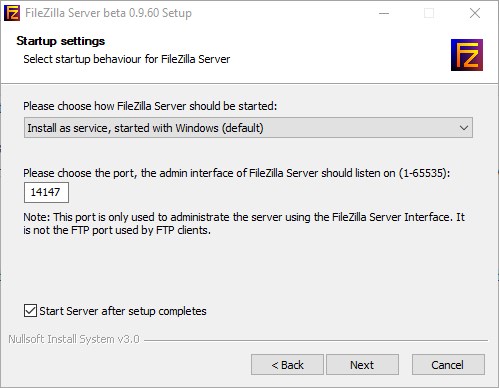
- To make the FileZilla server start automatically with Windows leave the default option “Install as a server, started with Windows“. If you want to start it manually then you can choose that one.
- Move forward, follow the wizard and wait for few seconds the FileZilla server will be on your Windows 10 system up and running.
Connect to localhost FTP server
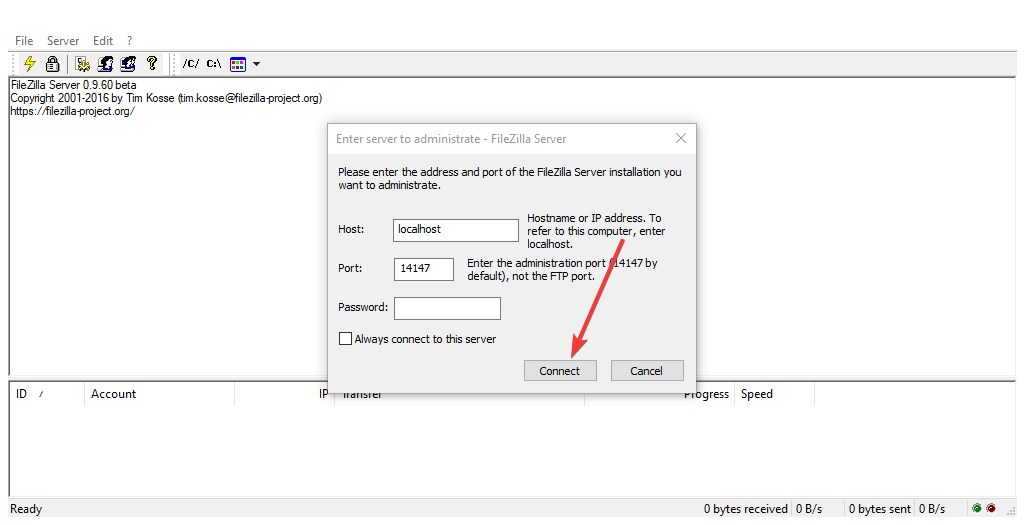
When we open the FileZilla, it will ask us to connect to the local FTP server created by this program on Windows 10, 7, or server. Simply click on the Connect button.
Remove errors
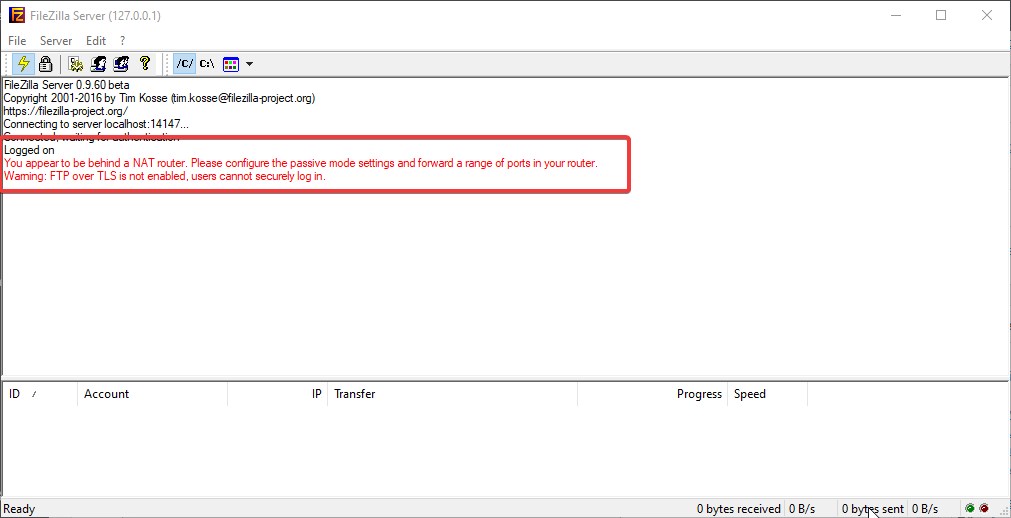
After starting the server, in the log section it will give two errors:
- You appear to be behind a NAT router. Please configure the passive mode settings and forward a range of ports in your router.
- Warning: FTP over TLS is not enabled, users cannot securely log in.
FTP over TSL- Generate a new certificate
- Let’s first resolve the Warning: “
FTP over TLS is not enabled, users cannot securely log in“. - Go to FileZilla Menu.
- Click on Edit and select the Settings option
- From the left side panel, select FTP over TSL Settings.
- Check the box give for the option “Enable FTP over TLS Settings“.
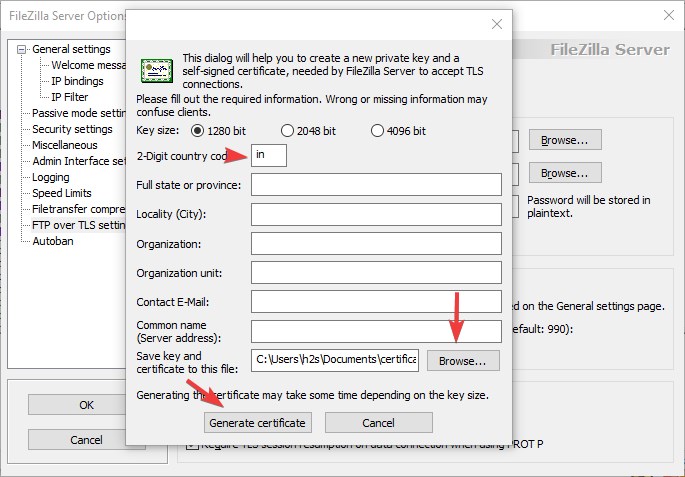
- Click on the Generate new certificate… button.
- Add the first two letters of your country.
- Select the browse button and choose the folder where you want to save the generated certificate.
- After that simply click on the “Generate Certificate” button.
- Hit the OK button and the Warning will not be there on the log screen.

Passive Mode FileZilla FTP server
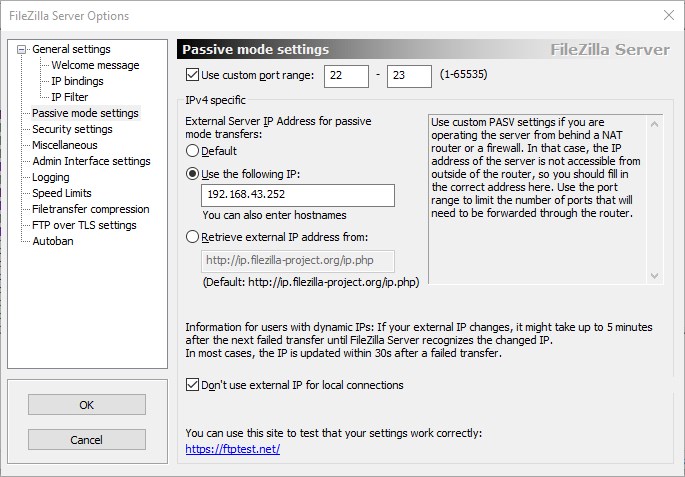
The error showing the server is behind the NAT and need to enable passive mode. To remove this error, in the Settings, select Passive Mode Settings.
- Check the custom port range box.
- Enter 21 to 23 in the port number box or any custom port you want to use.
- Next, select “Use the following IP” and add the IP address of your system that should be static.
- Click on the OK button.
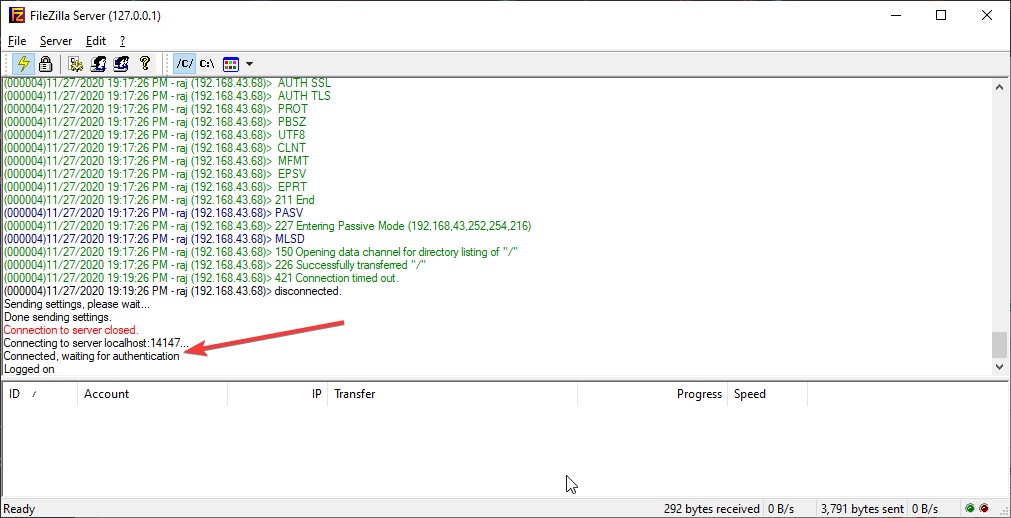
- Now, on the FileZilla server, click on the File option in the menu and select Connect to Server…
- And this time none of the above errors will appear.
Create FileZilla server Groups
We can create groups in the FileZilla to allow a particular group user to access some folder or file which other group users cannot.
Here we let you know the step to create a single group but you can use the same to create multiple as per the requirements.
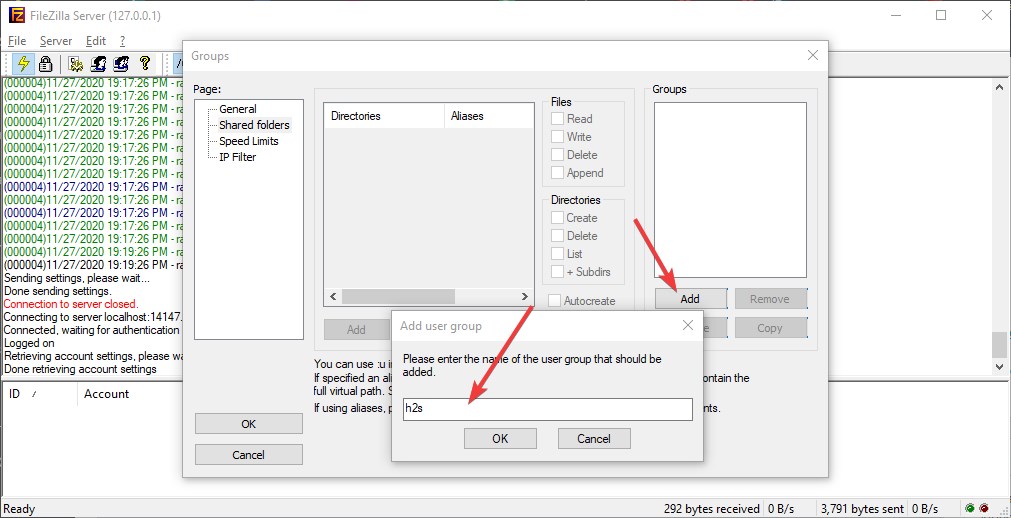
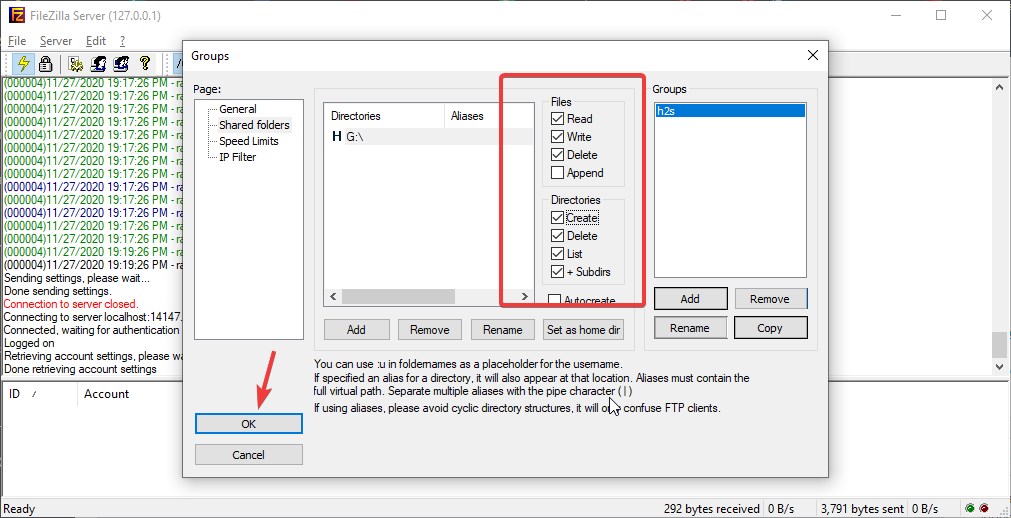
- Again go to the Edit menu and select Groups.
- From the left side panel, select “Shared folder“
- Click on the Add button and give some name to your group.
- Now, assign the folder/partition which all the users inside that group can access.
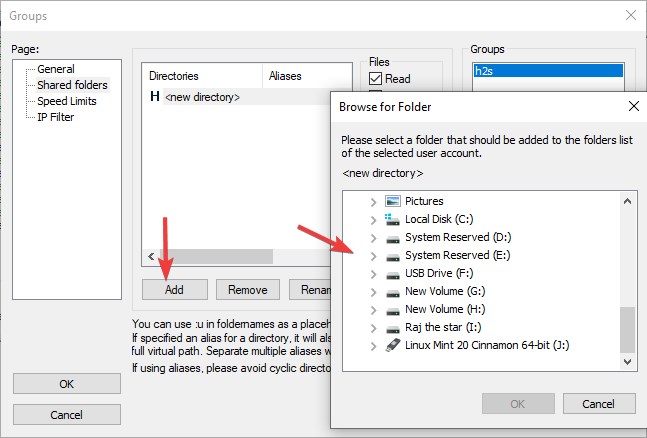
- Choose what kinds of writes over the folder such as Write, Read, Delete; the users of that group will have.
- Finally, Click on the Ok button to save the settings.
Create FTP users
Now, let’s create and add some users to our FTP server group so that they can access the folders locally and remotely.
- Well, again go to the Edit menu of FileZilla.
- This time select Users.
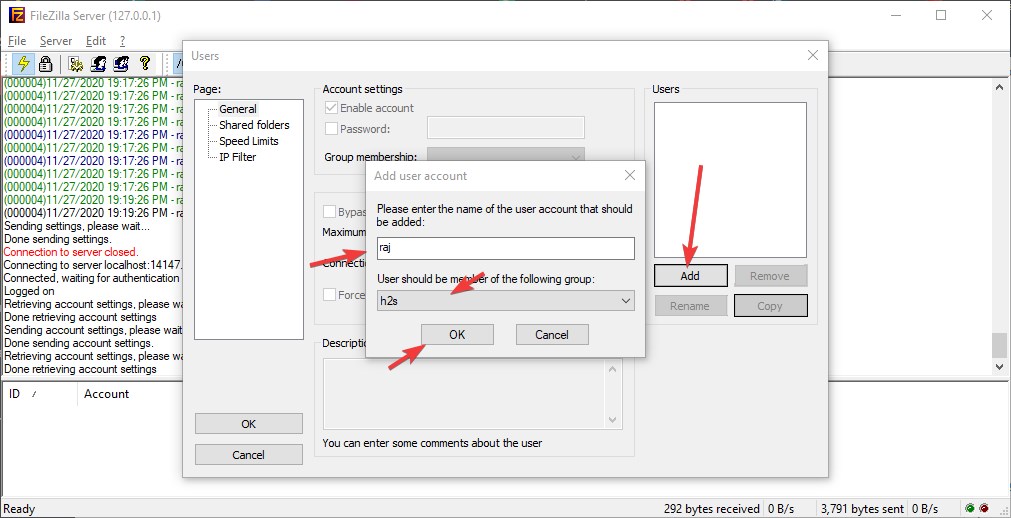
- Click on the Add button
- Enter some user name and select the Groups you have created from the drop-down box.
- Hit the OK button.
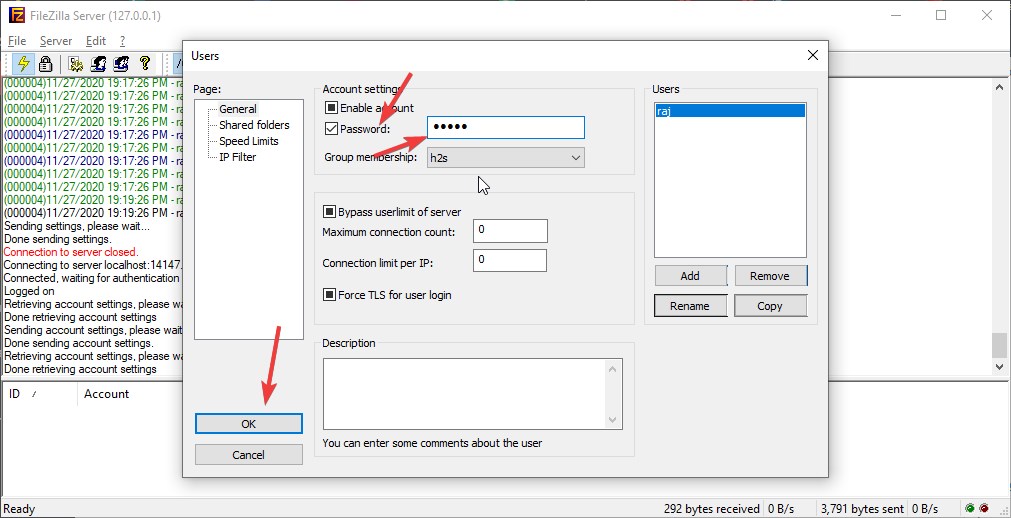
- Now, check the password box and assign one to secure the user account. And again press the OK button.
Access FTP server Locally or Remotely
The key thing which we need to access the FTP server is the client application, you can either use FileZilla’s client app or simply add it as an FTP site via MY PC or Computer section of Windows 10 or 7.
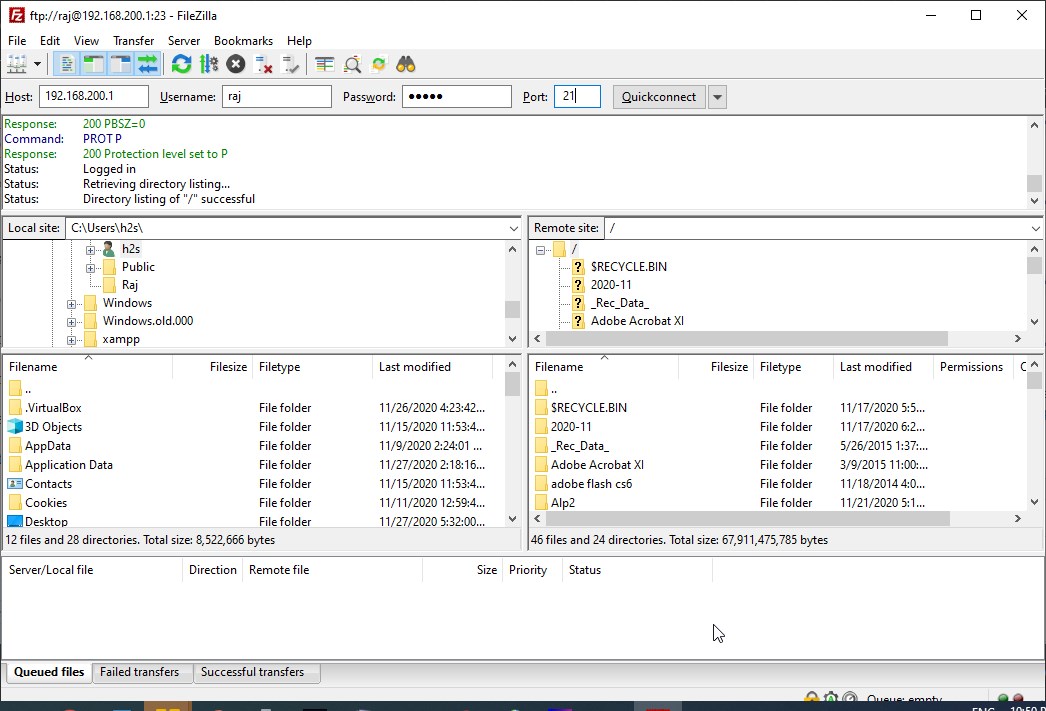
- Well, to access it using FileZilla client, just open it.
- Enter the IP address of your PC where you have created or installed FileZilla’s FTP server.
- Enter the username and password we have created in this tutorial.
- 21 is the default port or use the custom one if you have assigned any and then click on Quick Connect.
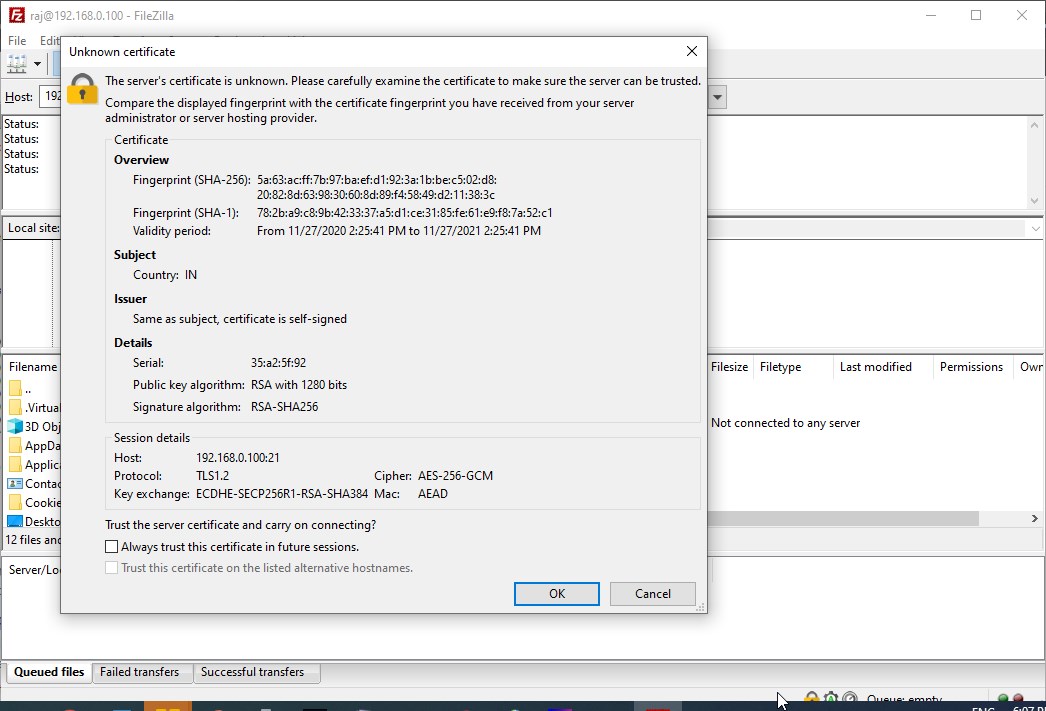
- Accept the Certificate
Note: To access the FTP server remotely, you have to open the router and forward the FTP port of your system IP address to the static IP address of your router. Once that is done, the remote user or you will need to use the public IP address of yours, to access the server.
On Android access the FTP server
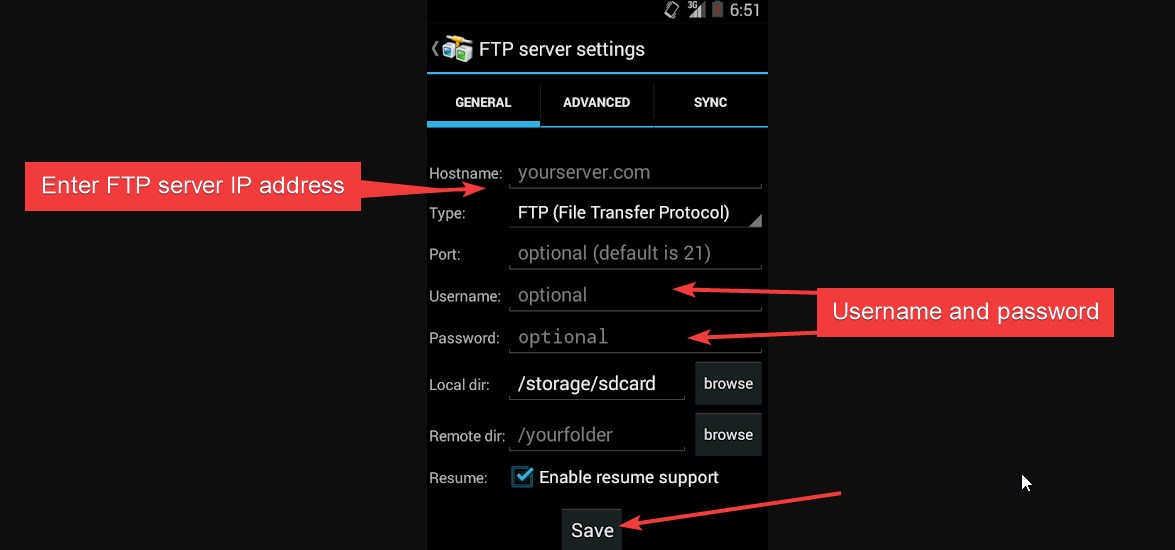
Go to the Play store and download some FTP client app. Here is the link to one such app which we are using.
- Open the FTP client App
- Enter the FTP server or your system IP address. If you are accessing remotely then your public IP.
- Furnish the Username and password of the FTP server user.
- Save it.
- Tap on the created server settings folder icon and it will automatically get connected if everything is fine.
Other released tutorials or articles


thanks you for the inforamtion