
Windows XP used to be one of the most popular operating systems till April of 2014, after which the official extended support for the operating system from the developers, i.e. Microsoft ended. But that did you stop most users from using the operating system even though it made their system vulnerable to the latest threats due to lack of security patches. Windows XP required very low-end specs and you can run it on almost every computer of this millennium. So, if you are having an old school computer, Windows XP can be the perfect operating system for that however, there is no guarantee all the latest programs will run on a computer running Windows XP.
Even though I will not recommend anybody to use Windows XP in 2019, but I know there are people who so use Windows XP if they want to run legacy applications that not supported on the later version of Windows. Just like the modern versions of Windows, the Windows XP also had a Windows Firewall and today, it can really be useful to protect your computer from the latest threats and stop internet access for the applications that you don’t trust anymore or don’t have enough requirements to connect to the internet. However, a computer with the Windows Firewall turned on, and good antivirus software can somehow help your Windows XP computer to be safe from the latest threats. Today I will discus, how you can turn on Windows Firewall on XP and stop some applications from accessing the internet.
So without any further delay, let’s get started with how you can stop certain programs from accessing the internet by turning on Windows Firewall on Windows XP.
Enabling and disabling Windows Firewall on Windows XP
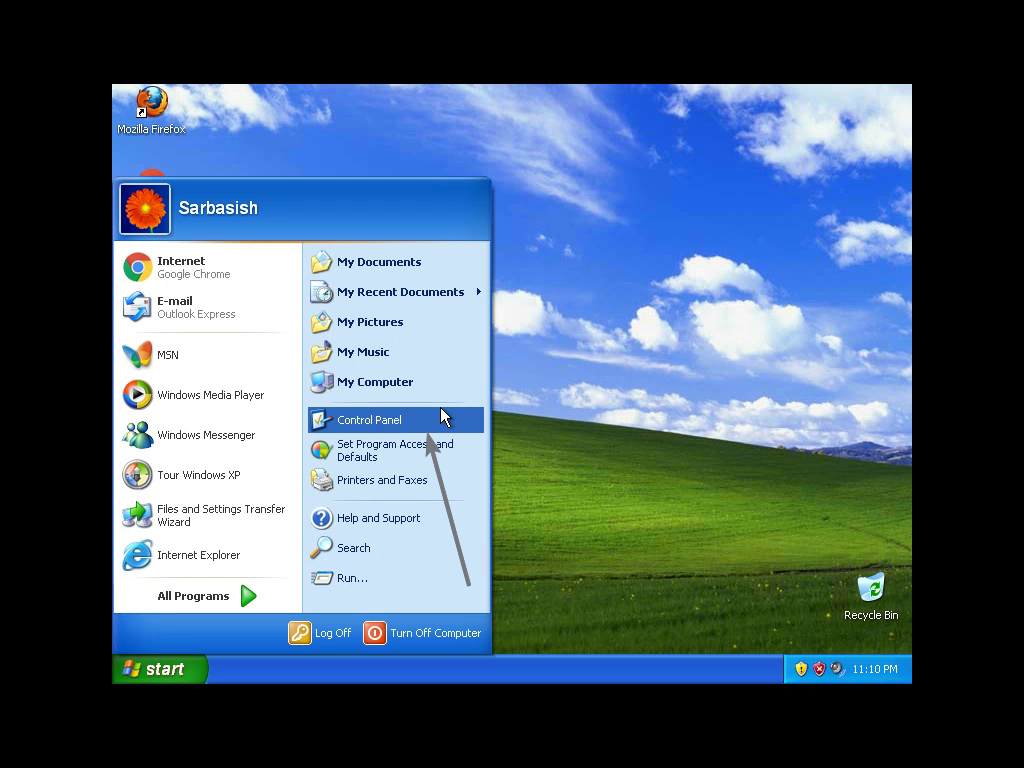
- Open ‘Control Panel’ on Windows XP, either directly from the start menu or from ‘My Computer’, whichever is convenient for you.
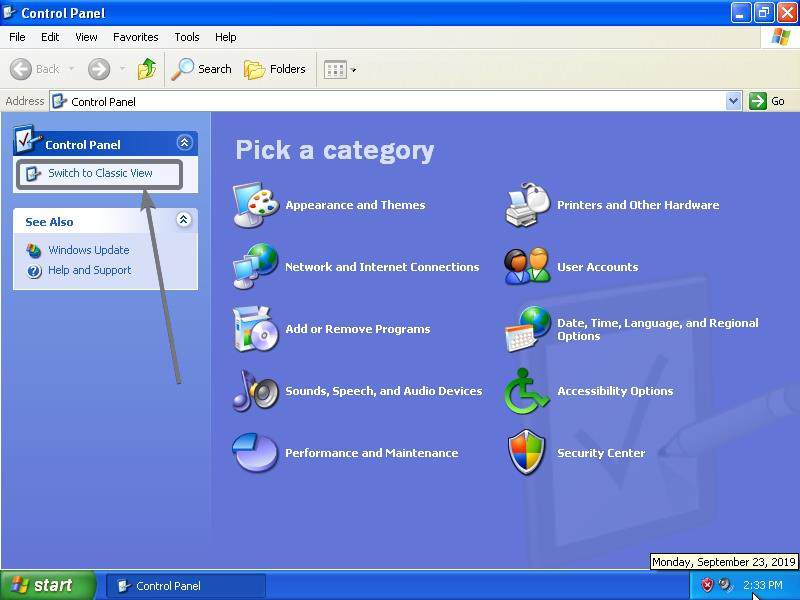
- Click on the option to get the classic view of the Control Panel, if you are using the new Control Panel view introduced in Windows XP.
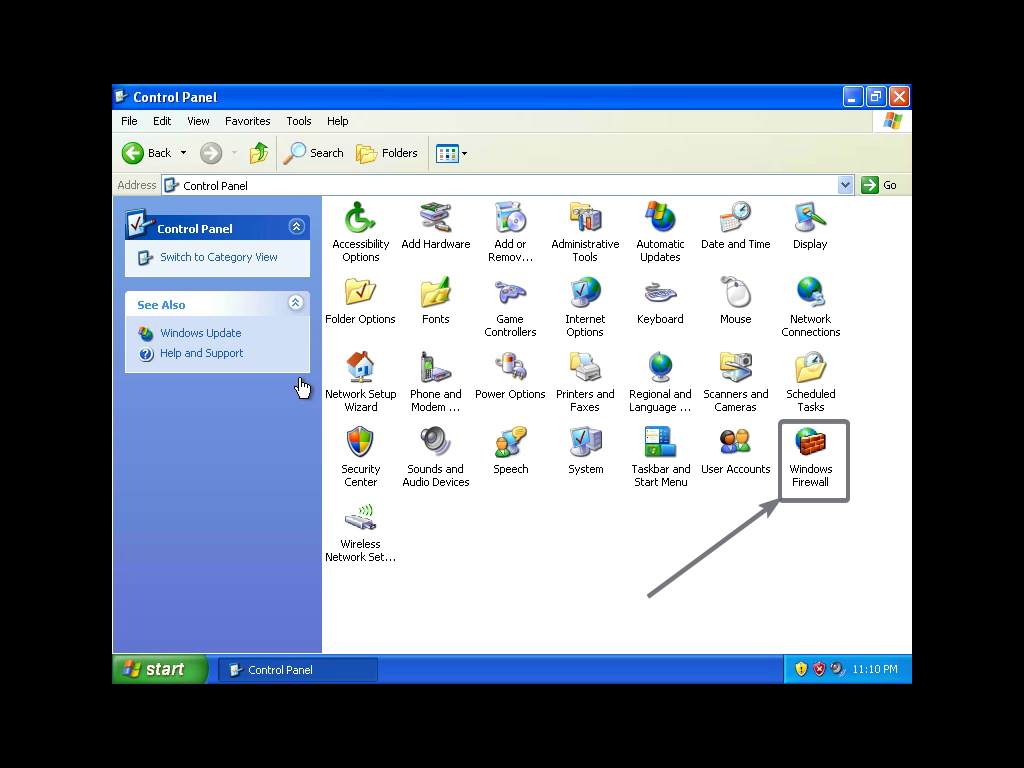
- Now, double-click on the ‘Windows Firewall’ icon that is available within the Control Panel.
- By default Windows Firewall should be turned on, but just in case it is turned off, simply click on the ‘On’ the button and click on ‘OK’ to start using the Windows Firewall on your window XP computer.
- Just like on Windows 10, you can even block internet access for programs, when you connect to a public network like Wi-Fi in the airport or coffee shop.

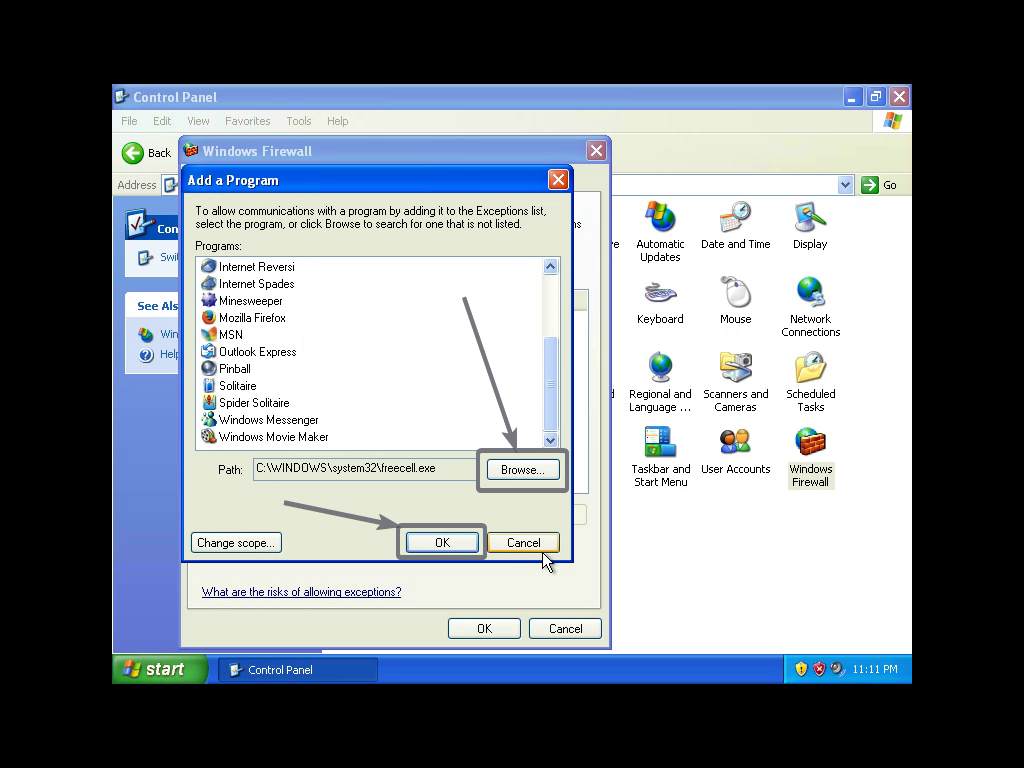
- If you want certain applications to not get access to the internet or add some exceptions, so that they can get access to the internet, simply click on ‘Add program…’ under the ‘Exceptions’ tab on the Windows Firewall window.

- Now choose the program to block access to the internet for that particular program or allow access for that program. Just click on ‘Browse…’ to select the program that you want to block or allow access using Windows Explorer. Besides adding programs, you can even add a port to block, if you want to block certain protocols using Windows Firewall on Windows XP.
- Windows Firewall used to work almost the same way it works on Windows 7, 10. Windows Firewall is important security element to keep your computer safe from common threats that come the way if you access the internet on a Windows XP computer.
So, that was all about how you can turn on Windows Firewall on Windows XP and configure the same. Do you have any questions about the Windows XP Firewall? Feel free to comment on the same below.
Other Articels:
Related Posts
How to create email groups in Gmail? Send one email to multiple recipients in a matter of seconds.
Getting the right dashcam for your needs. All that you need to know
How to Install 7-Zip on Windows 11 or 10 with Single Command
Install Google Earth on Windows 11 or 10 Using a Single Command
How to install Gaming Services on Windows 11
How to Install Telnet Client on Windows 11 Using PowerShell