
Whenever we attempt to open our favorite websites on our computers or smartphones or search for something on the internet, the DNS plays an important role to connect our computers, smartphones, or simply our terminals to the websites we want to visit. The internet is a kind of useless wired mesh network without DNS, the backbone of the internet. The internet without DNS is comparable to a human body without its soul. Yes, DNS is that important. All the websites on the internet have its own unique IP addresses, and due to our limited memory, it is easier to remember those sweet names like How2shout.com, Facebook.com, instead of the IP addresses associated with them.
So each time we try to visit a website of our choice, a DNS lookup is carried out to find out the IP address associated with that website. Yes, just like we tap on the call button corresponding to a name to dial the number, that person owns. While the ISPs have their own DNS servers, it can be quite useful to use a third-party DNS server for better speed, reliability, and security obviously. While it is quite easy to configure a third-party DNS on a computer, router, it might not be equally easy to start using a third-party DNS on an Android device.
Well, I have already written an article on how to configure a third-party DNS on Android using a VPN app, that might not be useful for you, if you are using a real VPN service to encrypt all the traffic on your handset.
So this tutorial can help you apply system-wide DNS changes, and that too over TLS, if you are using the latest Android 9.0 Pie.
So without any further delay let’s get started.
The steps to follow
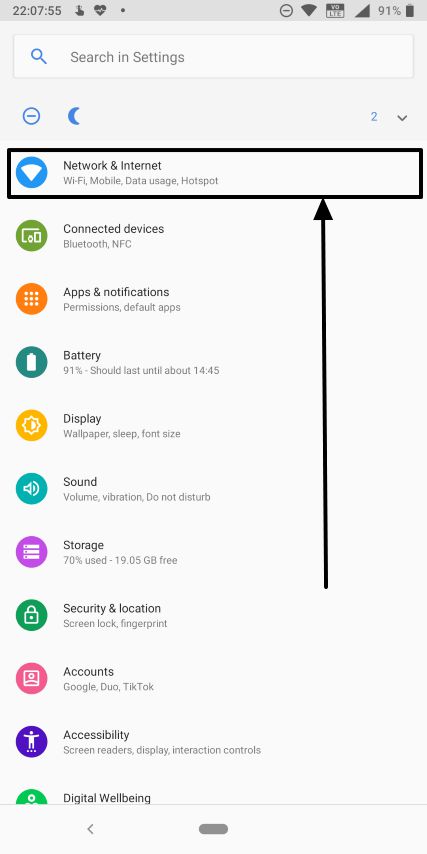
Step 1: Open System Settings on your Android, and tap on ‘Network & Internet’.
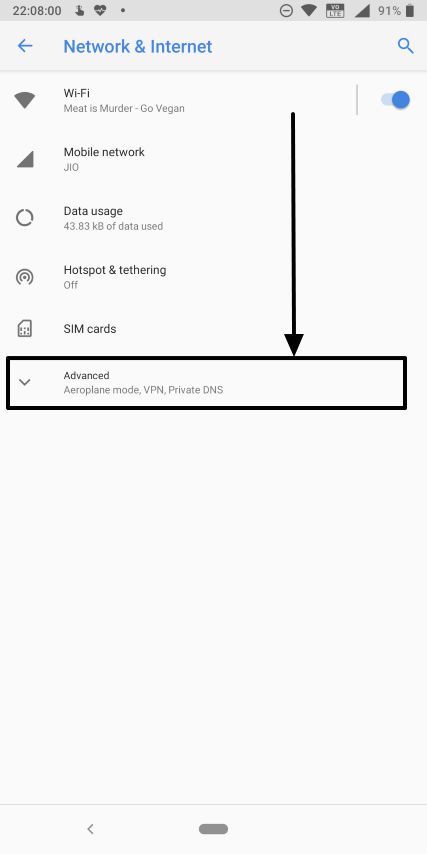
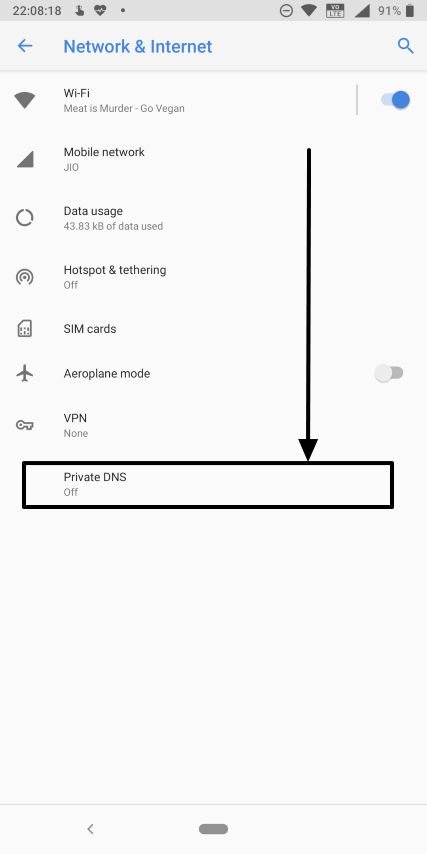
Step 2: Now tap on ‘Advanced’ in the ‘Network & Internet’ menu and then tap on ‘Private DNS’.
Step 3: Here, tap on the radio button corresponding to ‘Private DNS provider hostname’ and enter the DNS address. Tap on ‘Save’ when you are done.
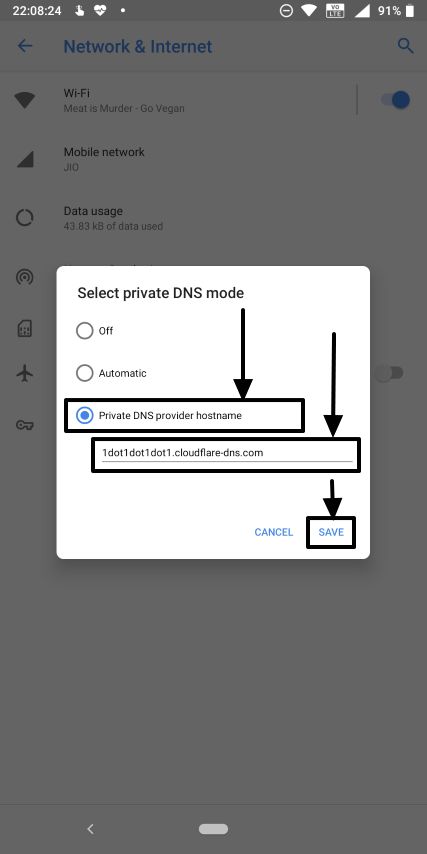
*The options for entering the primary and secondary DNS addresses are not available here. So you will have to enter the address of the hostname.
Here are a few of the popular hostnames, which you can enter.
Cloudflare DNS: 1dot1dot1dot1.cloudflare-dns.com
Google DNS: dns.google
Adult Filter DNS: adult-filter-dns.cleanbrowsing.org
There are other DNS providers, which are available as well, and you should choose the most appropriate one that will fulfill your needs.
So that was it. This is the implementation of DNS over TLS, which means the DNS traffic is always encrypted, no matter, even if you are connected to the internet, via your mobile network. The only drawback is that, if any app that is installed in your handset, has its own DNS query mechanism, this won’t work. But, hopefully, the newer versions of Android will get the drawback removed, but it is still a matter of time.
Hope the information was helpful for you. Do you have any questions in your mind? Feel free to comment the same down below.
Related Posts
How to Download Firefox for Android Without Google Play
How to set Gemini by Google as the default Android assistant
12 Best Free Substitutes for Adobe Photoshop in 2024
What is stopping smartphone gaming from becoming the next big thing? The problems, and the possible solutions
How to turn off call recording announcements on Android Google Dialer
Top 8 Best Free Kitchen Design Software Options in 2024