The 7Zip is open-source software available to compress and decompress files and folders into various formats. It can be easily installed on Windows 10 or later operating system because of the .exe file availability but when it comes to Linux like Ubuntu, Red Hat, or other versions, it is not that much simpler for newbies. On Linux, you have to use the command line with some particular commands to install the 7-ZIP.
But why we install the 7-zip, as I told you it is an open-source and free, and also one the best open source file archiving software with the highest rate of compression ratio better than WinRAR. The compressions formats it can support are GZIP, TAR, ZIP, 7z, XZ, BZIP2, and WIM formats. According to the 7-zip official website, the compression ratio of 7Zip is 2-10% better than any other compression tool. It also supports the AES-256 encryption and self-extracting feature. Besides this 87 language support is also there. If you don’t want to install the command-line version of 7ZIP then go for the graphical user interface one. Here is the tutorial on that install p7Zip Desktop GUI on Ubuntu Linux using SNAP.
Here, today, in this tutorial we let you know how to install P7-zip on Ubuntu Linux via command line plus how to use the 7-zip on Ubuntu.
- First of all, go to your Ubuntu operating system.
- Open the command terminal either searching manually through app search or just use the shortcut key Ctrl+Alt+T.
- Once the Command Terminal on Ubuntu opens. Use the update command given below.
- sudo apt-get update
- After updating run the 7zip installation command on Ubuntu.
sudo apt-get install p7zip-full
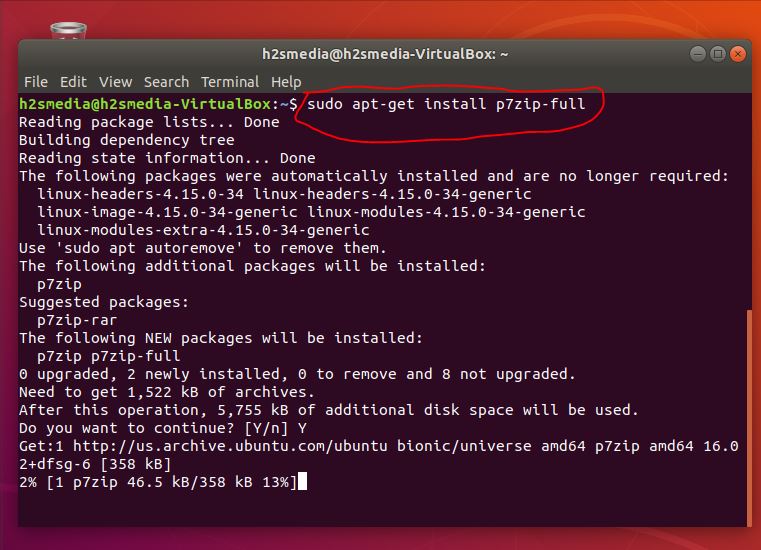
- The above command will instantly install the 7zip compression tool on Ubuntu from the Debian package sources.
- Now it’s time to see how to use the 7Zip to compress and decompress the files and folders on Ubuntu Linux. Follow the below-given steps.
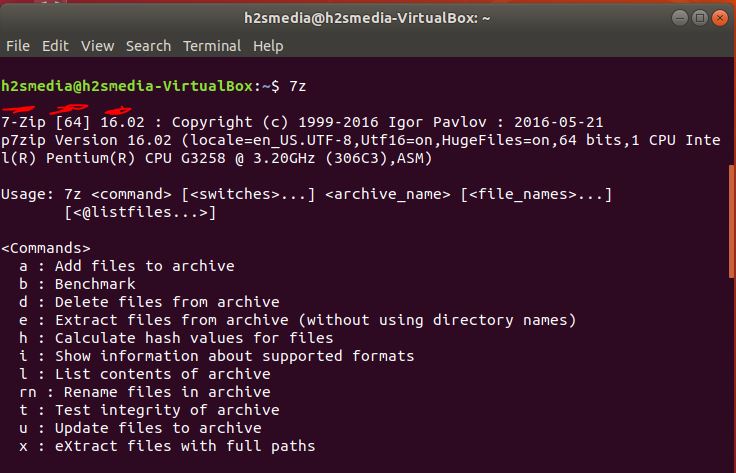
Step 1: Check the 7Zip installation
First of all, we confirm, whether the 7Zip compression tool is successfully installed on our Ubuntu system or not. For that just on the Command Terminal type:
7Z
If you get output something like shown in the below screenshot then it means 7Zip is successfully installed and ready to work on your Ubuntu or Debian operating system.
Step 2: Compress file with 7-Zip using Ubuntu command line.
To use the 7Zip on Ubuntu to compress some files or folders we can use both the command-line interface and graphical user interface. First I let you know how to use the command line.
For example, I have a folder called eclipse-installer in my Downloads directory. So, I switched to that directory using the CD Downloads command.
So under the Downloads directory, I run the command ls -la which can show all available files and folders available under any directory. You can see that in the below-given screenshot.
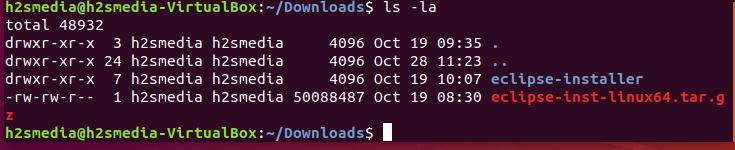 +
+Now, I got the folder that I want to compress. So, the command which we use to archive or compress folder is:
7z a folder name.7z folder name
Replace the folder name with the name of the folder which you want to archive, just like we did. In the above command, the ‘a’ stands for the archive.
7z a eclipse-installer.7z eclipse-installer

In the same way, if you want to archive some file, let’s say pass.txt is the file and we want to compress it; then the command will be:
7z a pass.7z pass.txt
It is very simple you just need to mention the 7z a command along with the file name with .7z extension and the original filename that you want to compress.
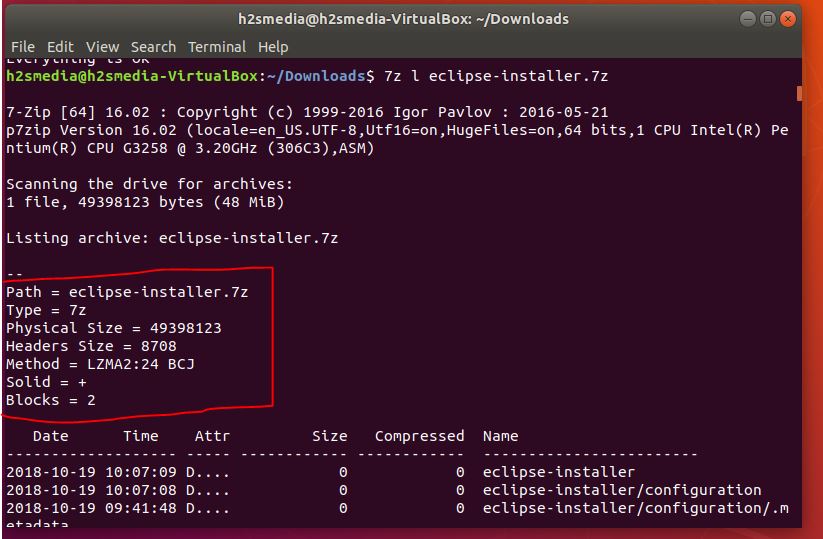
Step 3: Check the compressed file information.
After the compression of the file or folder, if want to check that 7z archived file information then run the below command along with the file name:
7z l file name
For example, here we compressed the folder named eclipse-installer and after archiving it became eclipse-installer.7z, so that command to see the information of this file will be:
7z l eclipse-installer.7z
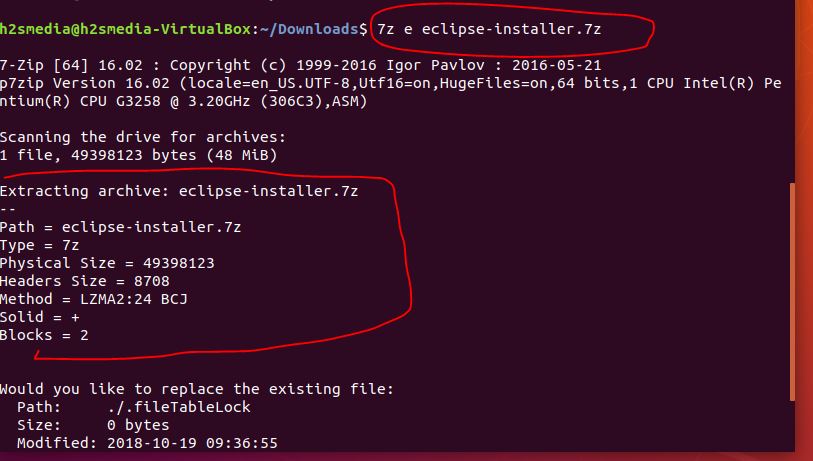
Step 4: Decompress file using 7Zip on Ubuntu command line
Now above, we have successfully compressed a folder and also told you the way to archive the file. Here, we will Decompress the same file.
For decompression or extraction of any compressed file, the command is very simple
7z e filename
– ‘e‘ stands for extraction
– filename: mention the compressed file need to extract using 7zip.
So, if we want to extract the file which we compressed in this tutorial above then the command will be like this:
7z e eclipse-installer.7z
If you want to extract the file along with a full path or folder then use the x instead of e in the above command:
7z x foldername
so, in our case it will be:
7z x eclipse-installer.7z
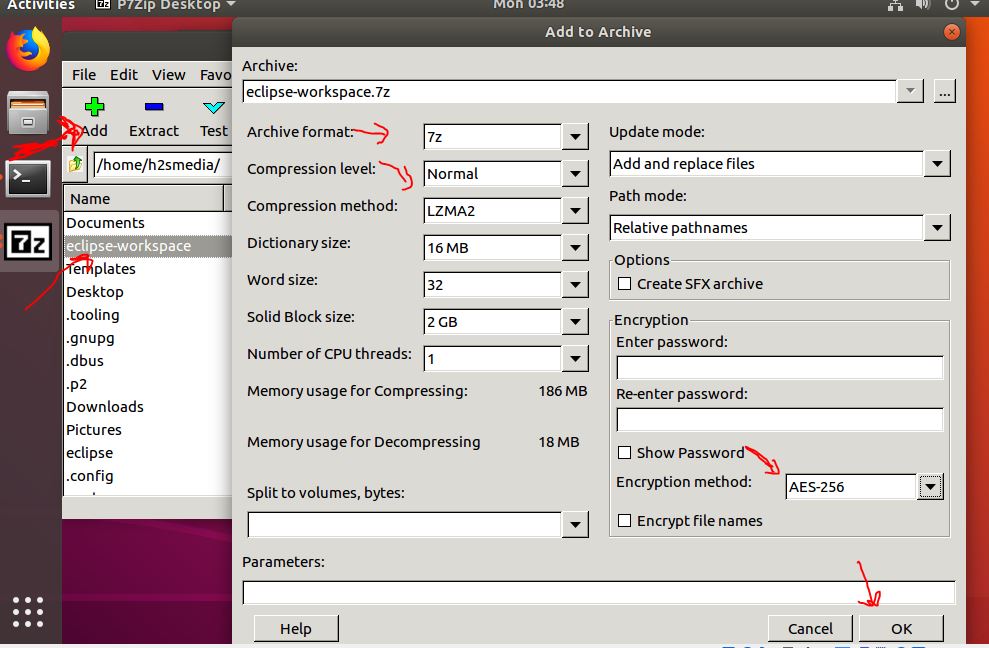
Step 5: How to compress file & folder using Ubuntu 7zip GUI (Graphical user interface).
Yes, besides the command line interface the 7zip also supports the Graphical user interface on Ubuntu. In case, you are not using the minimal Ubuntu server with only a command-line interface then you can use this simple method of archiving the files and folders on Ubuntu or Debian using 7-Zip compression too.
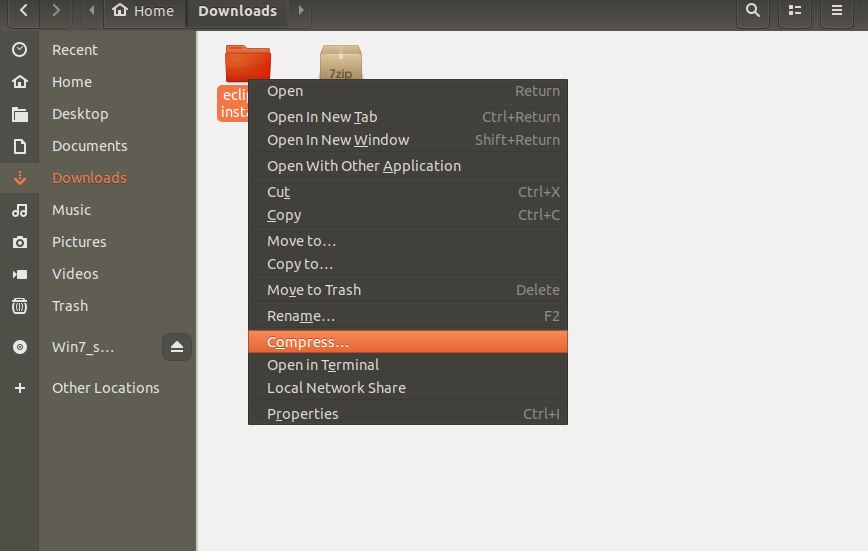
1. Open the File Manager on your Ubuntu Linux machine and go to the folder or file you want to compress and right-click on it. And select the compress.
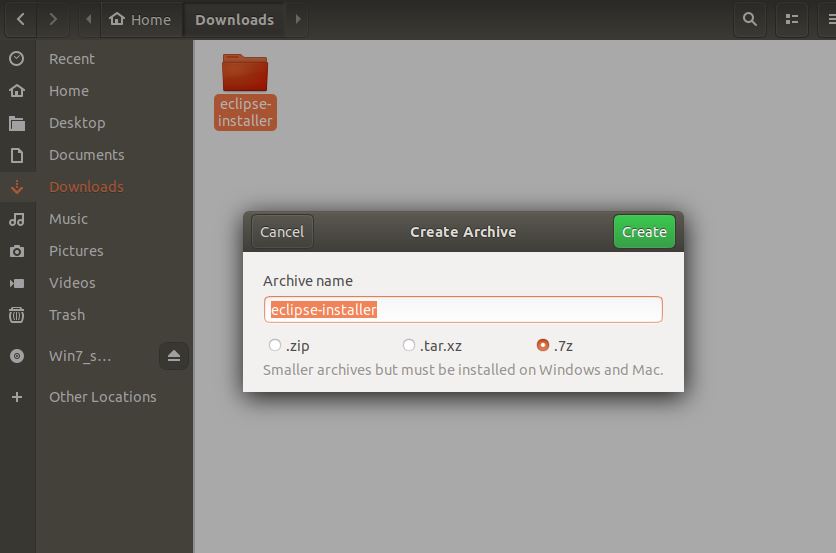
2. Select the .7z format and then click on the Create button. Besides the .7z you can also use the .Zip and .tat.xz compression formats to archive your file and folders.
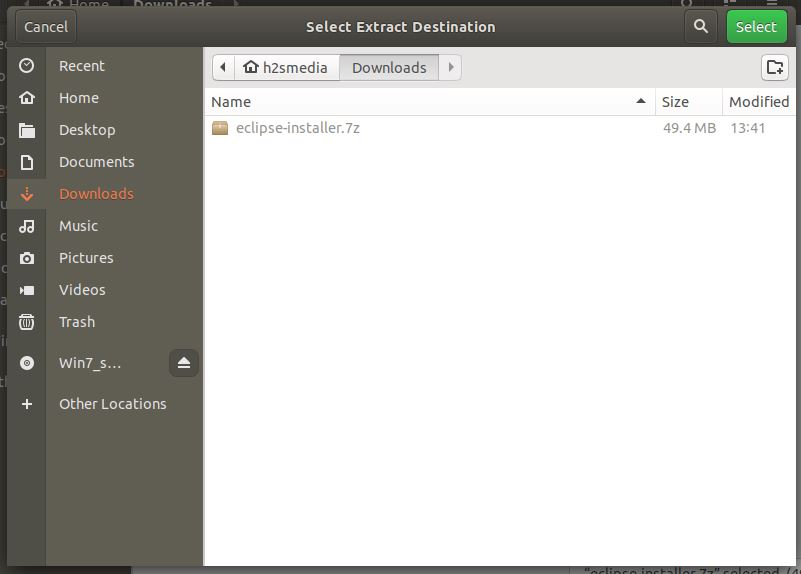
Step 6: Extract files on Ubuntu using 7zip GUI
To extract the compressed the right click on that and click on the Extract to… option.

Select the Destination, if it is other than the location of the file where already it is, otherwise just click on the Select button, and the archived file of yours will automatically get extracted/uncompressed.
So, in this way you can install the P7Zip or 7-Zip on Ubuntu or Debian Linux to compress & extract the files/folder both by command line and graphical user interface (GUI).
If you faced any problem while performing this tutorial, let us know, the comment section all yours!!
Other Useful Resources:
- How to Create self-extracting archives with 7zip SFX builder
- Top free and open source alternatives to WinZip and WinRAR, and the best for you
- How to encrypt personal files with 7-zip encryption
- 11 Best Opensource Backup Software For Server: Linux, Unix, Mac, and Windows
- How to search for files, directories, with certain criteria on Linux terminal
- How to edit, save, exit Vi (VIM): A Complete Vi Cheat Sheet for Linux users
Fantastic info but if I have a file say 7zip or any other archived file .tar, or whatever, what is the command to INSTALL said file to Ubuntu OS, so I can run said app form menu?
This info was best of the 5 other pages I reviewed, but I want to install the file, not just install an already installed unzipper app! I be running Ubuntu with Xarcriver, and Acrive Manager but do like 7Zip installed so thank you for this HowTo!
There is one error in the instructions. The screenshot shows case correctly, but the instruction does not.
4. After updating run 7zip installation command on Ubuntu.
sudo apt-get install P7zip-full
should be:
sudo apt-get install p7zip-full
The upper case P in P7zip-full results in an error on Ubuntu 20.10