If you are into web development, you must have heard the term XAMPP, which is widely used for the purpose of testing websites, which are designed using Marina DB, Perl, and PHP. XAMPP is cross-platform in nature, which means, it is available for a number of platforms, apart from Windows. You should know how to use XAMPP and how to install XAMPP; if you want to test your web development skills, on a local network, if you do not want to invest initially on a hosting and domain, which might cost you a few pennies.
While you test your websites and the web development skills using XAMPP, with the help of the XAMPP Web server, you can get the same experience on the local website, with the help of a browser, as it will be on a hosted network. Thus, XAMPP is really a helpful yet lightweight tool, which you should download right now to improve your web development skills. XAMPP is developed by Apache software group, which means it is open source and you can even develop it in your own way, provided, you have appropriate coding skills for that. XAMPP is available for Windows 7, and a number of other platforms.
Install XAMPP Windows 10/8/7
Without further discussion, let’s move on with the process of downloading and installing XAMPP on a Windows computer.
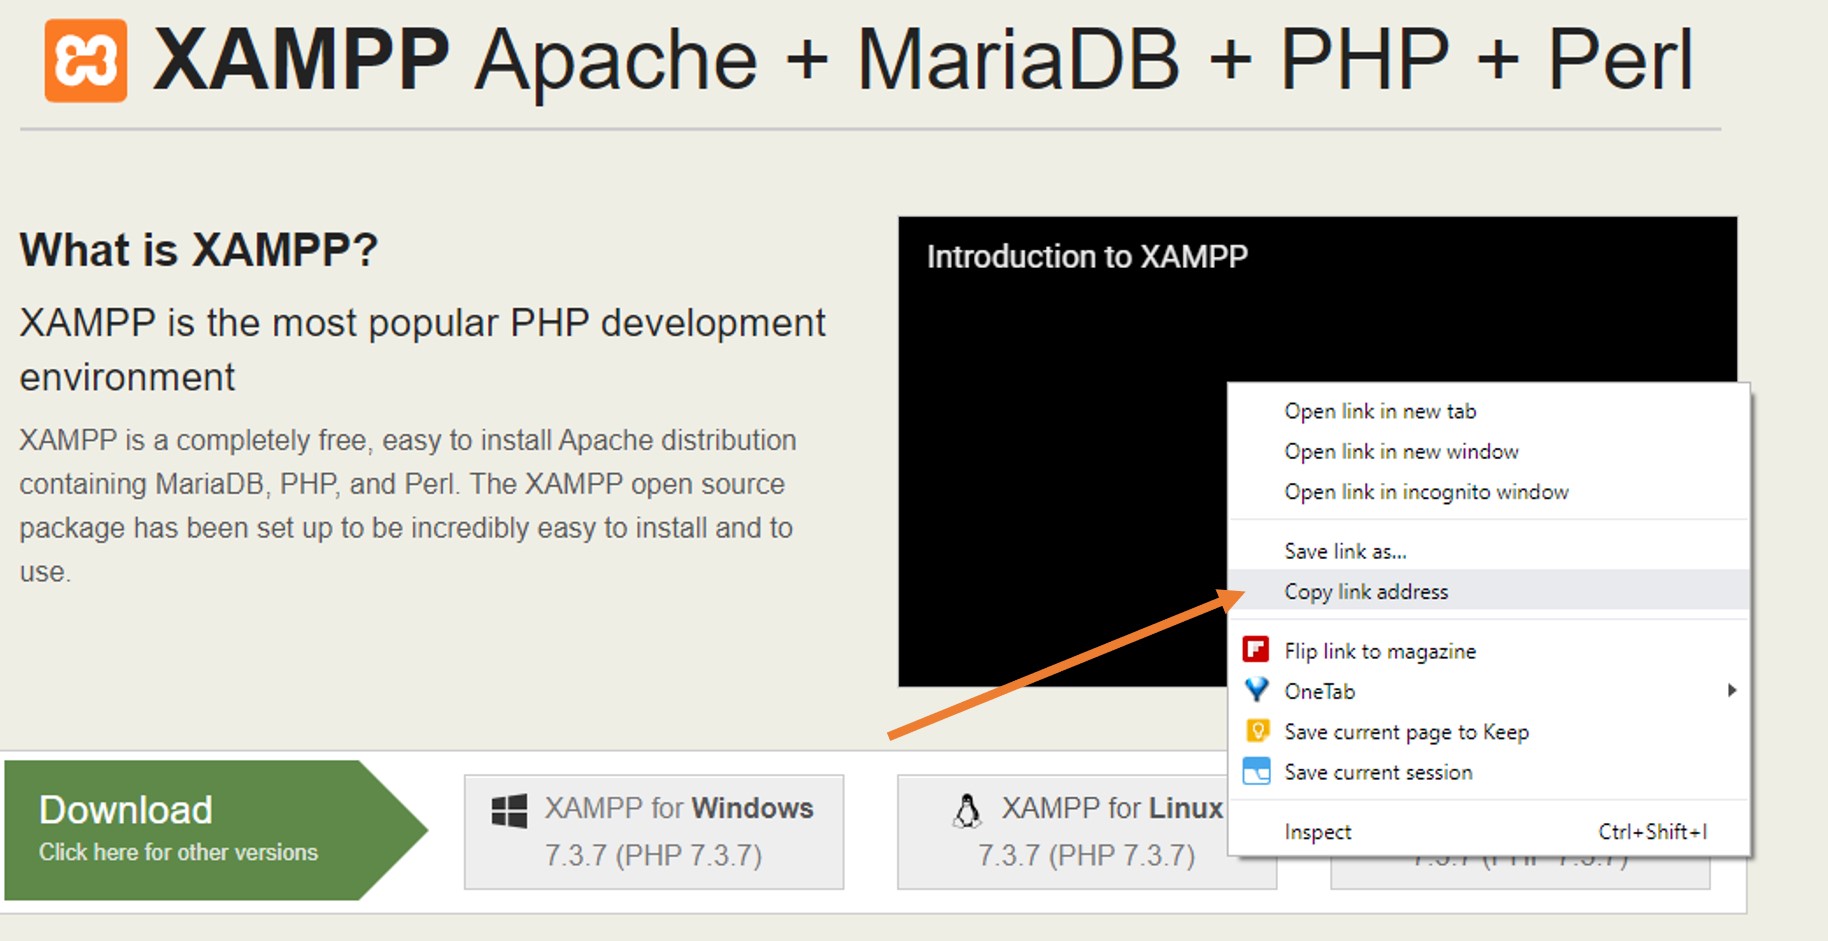
Step 1: Download the latest version of XAMPP from this link, or you can visit ‘https://www.apachefriends.org/download.html’, to find the other versions available. There is no XAMPP download 64-bit option, but the XAMPP for 32 bit works perfectly on all the 64-bit editions of Windows.
Step 2: Locate the setup file, which will probably be present in the ‘Downloads’ folder, and double-click on the installer to open it. You might see the following message. Just click on ‘OK’.
Step 3: After that, just click on ‘Next’ to proceed with the remaining steps.
Step 4: Now, you will have to choose the components, which you want to keep. By default, all the components are selected, and you should uncheck those components, which you do not need.
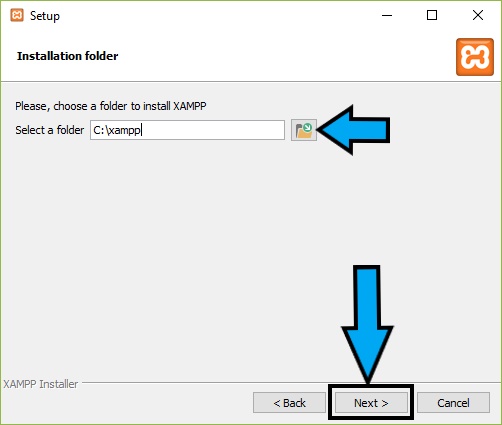
Step 5: Next you will have to choose the location, where you want to install XAMPP. By default, the location is set to ‘C:\xampp’. You can change the default installation location, but that is not recommended.
Step 6: Next you will get the option to find the ways to add other elements to your XAMPP installation. It includes other web development elements like Drupal, Joomla and others using Bitnami for XAMPP. Just check the option saying ‘Learn more about Bitnami for XAMPP’ to open a webpage, where you can learn more about it. If you do not need that, just uncheck it, and click on ‘Next’.

Step 7: Now the installation will start, and you will find a similar screen.
Step 8: At the time of installation, you will be asked to give Firewall permission. Just click on ‘Allow Access’ and click on ‘OK’.
Step 9: It will take some time for the installation to be complete, and you will see the following screen. You might check or uncheck the option to launch XAMPP after installation, depending upon your requirements and click on ‘Finish’.
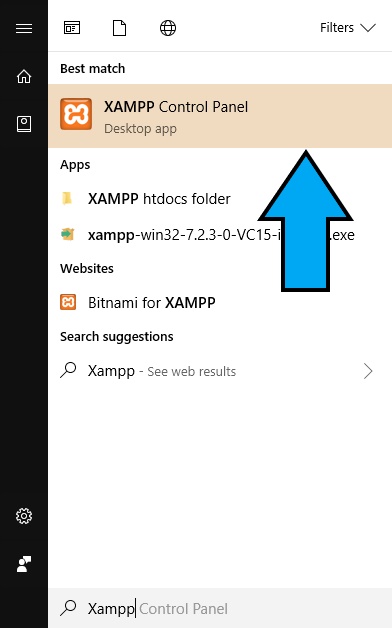
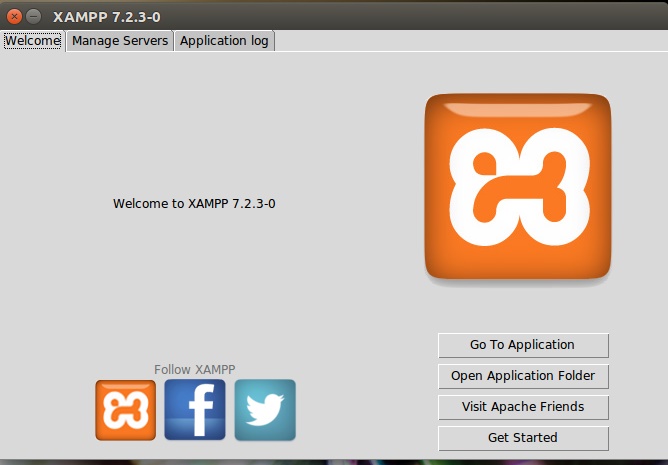
Step 10: Now the installation is complete. Now go to ‘Start’, and search for XAMPP. Just click on ‘XAMPP Control Panel’ to start configuring it.
Step 11: You will be asked to choose a language, and once you do that, you will find the following screen.
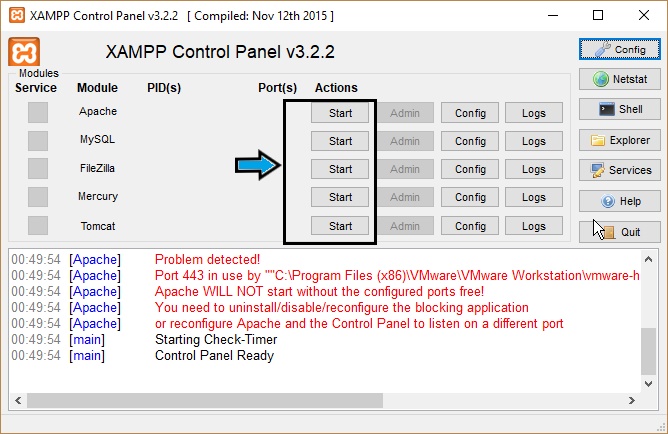
Step 10: Now just start or stop the services which you need, and you are done with it. You can also configure the settings, according to your requirements, for all the modules available to you like XAMPP MySQL, XAMPP Apache, XAMPP Filezilla, XAMPP Mercury, XAMPP PHP, & XAMPP Tomcat. You can access everything on the XAMPP server by typing ‘localhost’, and then the path of the local webpage or website.
How to Install XAMPP in Ubuntu 16.04 Using Terminal
Here we are showing the Xampp installation on Ubuntu Linux using the terminal but it is same for rest of the Debian Linux OS too.
The installation of XAMPP Control Panel, or simply XAMPP on Linux is very easy and is quite similar to the process of installation on Windows. There are just a few initial steps, which should be followed in order to install XAMPP on Linux. Let’s proceed with the basic steps for the installation of XAMPP on Linux.
Step 1: Just download the latest version of XAMPP for Linux, from the following link, or you can even download other versions, for some specific purposes by visiting ‘https://www.apachefriends.org/download.html’. But I will not recommend that.

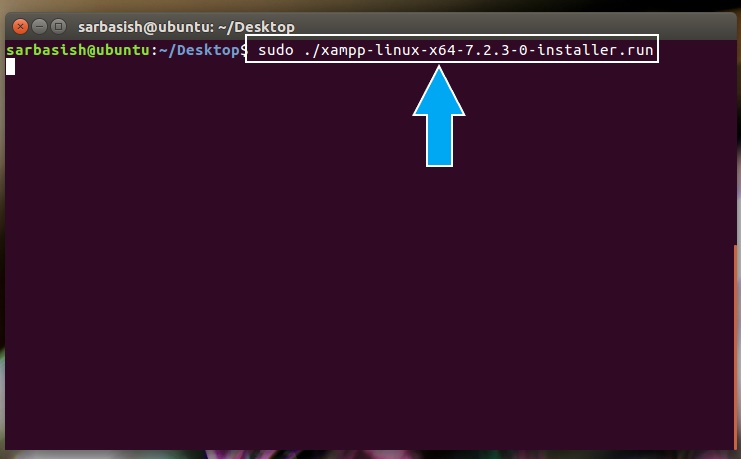
Step 2: After the download is complete, open the Command Line or ‘Terminal’ on your Linux, and type the following commands.
Command: ‘chmod 777 xampp-linux-x64-7.2.3-0-installer.run’
Step 3: The filename can be different in your case, depending upon the version you install. In such cases, you will have to type ‘chmod 777 <filename.run>’. It will set all the permissions for the installation file.

Step 4: Now type ‘sudo ./ xampp-linux-x64-7.2.3-0-installer.run’, or the filename of the installer. You might have to enter the administrator password for it.
Step 5: Now the installation will start with GUI, and you can configure the same things during the process of installation, as you can do, in case of Windows. You will also get the option to install Bitnami for XAMPP, the same way you can do it on Windows. Once you are done with the installation, you can launch the program.
On starting the XAMPP control panel, you will see a screen similar to this.
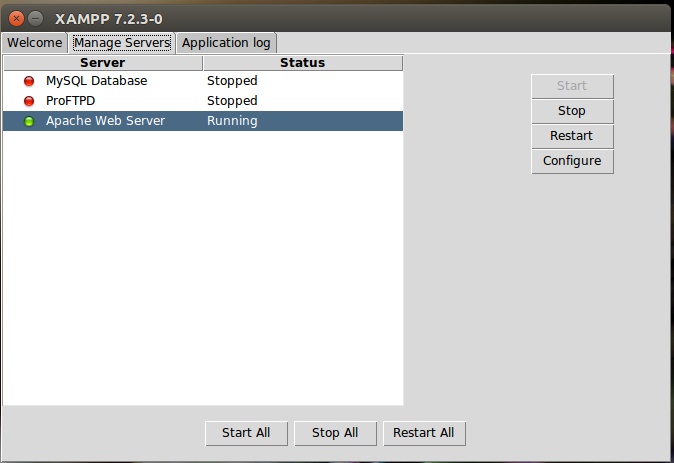
Step 6: On the welcome screen of the XAMPP control panel, you can check, open your websites and web pages on your default browser, view the folder and do other basic tasks.
In order to start or stop services, you can go to the ‘Manage Servers’ tab. You can also configure the settings of the services, with the help of the tab.
Bitnami for XAMPP
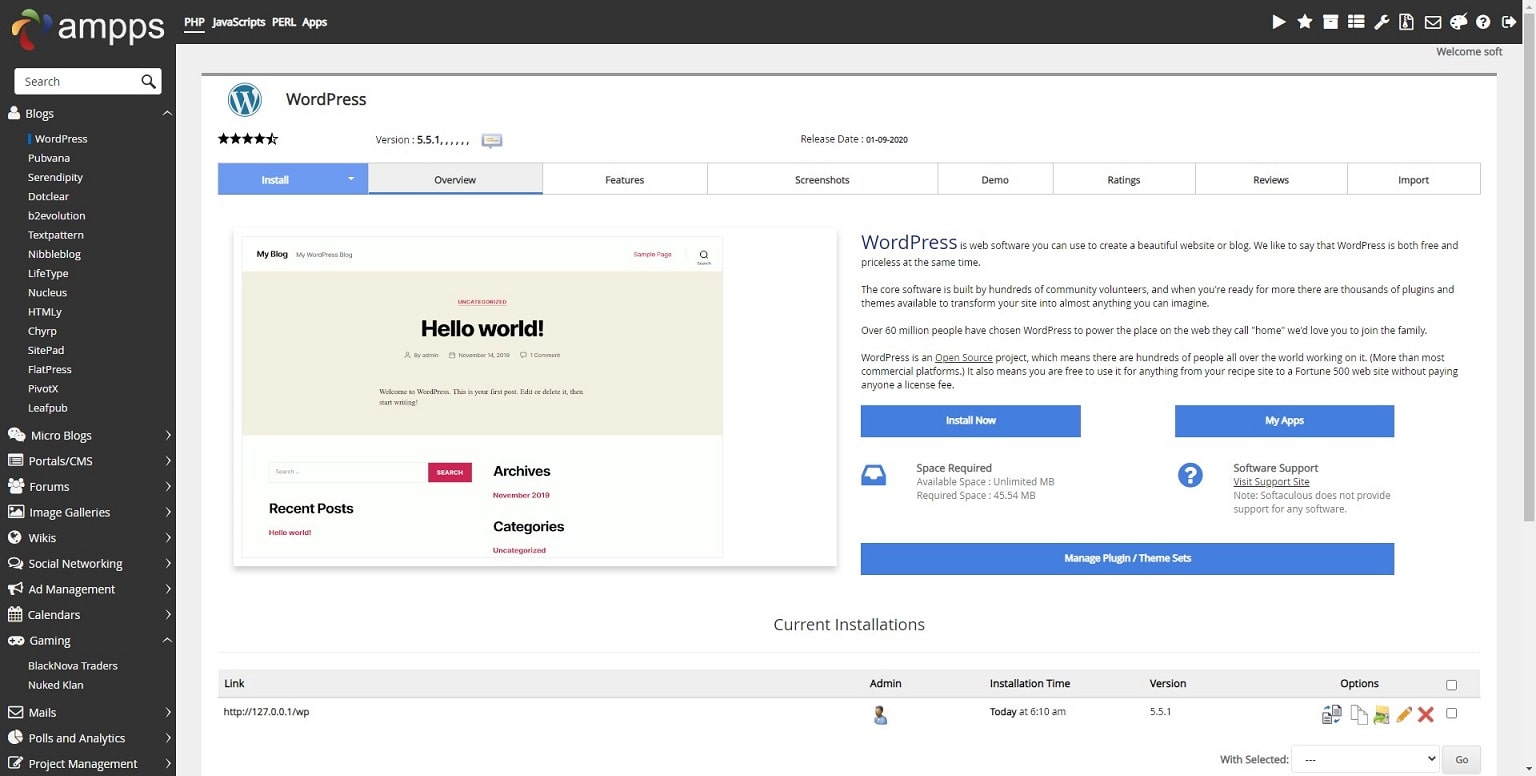
XAMPP is a full-fledged web development tool, and you can even install a number of other open source plugins on top of XAMPP, and they include Joomla extensions, along with free Joomla 1.5 template, and many other free Joomla templates. Apart from that, once you come to know, how to install XAMPP, you can even install Drupal, WordPress, Magento, and a number of other plugins, using Bitnami. I will always recommend you to install Bitnami on your XAMPP, if you want to get the full advantages of XAMPP, on a local host.
XAMPP is also available for Mac OS, and the process of installation should not be any different. If you haven’t used XAMPP in the past, you can find a number of great XAMPP tutorial pages on the internet, where you can learn various things associated with XAMPP. You can also get XAMPP MySQL, just like WAMP. If you compare XAMPP vs WAMP, with the help of WAMP, you can even check websites designed using WordPress, and there are no other major differences, between the two.
I did not find any XAMPP portable on the official website, and thus, I will not recommend you to go for the same, if you find it from other places. Hope the small tutorial on, how to install XAMPP on Windows and Linux helped you. If you have queries in mind, get it solved, by commenting it down below.
ALSO SEE:
- How to install ADB on Windows 10,8, 7 and Linux, the easiest way
- How to install Owncloud 10 on Ubuntu 16.0.4 Server
- How to proceed with the Python Canopy installation steps, on Windows and Linux?
- Install WordPress on Windows Computer Using WAMP
- Step by Step Tutorial Guide to Install WAMP server for windows 10

I have enjoyed reading a number of your “How To`s”, thank you. My reason for visiting your website today was my search for a “How To” install and run your own Webserver managing Websites that are accessible from the Internet. I primarily use WordPress but have used Joomla to hobby build websites and now using a spare Windows 10 machine that I normally use as a fileserver/store accessed via mapped network drives and normal network shares. I know how to set up and run various localhost servery such as WAMP. I currently use Local by Flywhere to build sites on. I am also looking to install a file sharing system to share audio books and ebooks with members of a group i belong to. Any suggestions you may like to make would be very welcome