
Portable Virtualbox is a fork of the main Oracle Virtualbox which is also free and opensource software to run Virtual Machines. However, there is no change in the files used from the original Oracle Virtualbox software. So, now the thing why we need the portable Vbox version when the original one is there… The main reason for using the portable applications is they allow you to carry them along with you anywhere and use it on any computer you want. It means you just need to put them on a USB stick without any separate installation.
In the same way, the Portable Virtualbox tool just also need to put in a USB stick or drive and plug it on any Windows PC system to run different operating systems such as Ubuntu Linux, Fedora, Windows etc. in a virtual environment. It also allows you to take all your Virtual Machines installed using this software on a USB drive without any hassle of installing them again; when you want to use them on some different computer.
Note: The Portable VirtualBox is only available for the Windows-based system and doesn’t work on Linux or MacOS.
How the Portable Virtualbox Works?
The Portable Virtualbox is worked like a container in which the developer of the Vbox saved the original Virtualbox files. So, whenever you run the saved Portable Vbox from an external USB drive on any Windows-based system it installs the driver and system services need to run the Virtualbox on Windows and also uninstall the driver automatically as soon as you switch off and exit the Vbox.
However, in the case of original VirtualBox, you need to install it properly on the system to run Virtual machines as it needs to install the Windows Kernal drivers and other system services.
Install and Run Portable VirtualBox Using External Drive on Windows 10 PC
Note: Be sure that you have administrator access because without that it won’t able to install the drivers and other services
Step 1: Downloading the Portable VirtualBox
To start with Portable Vbox go to its official website vbox.me and download the latest version.
The downloaded software will be in the Zipped file and you need to extract it on your PC or USB drive in which you want to carry the Portable VirtualBox. If you want, you can also extract it on PC and move it to USB external drive when you need it, later.
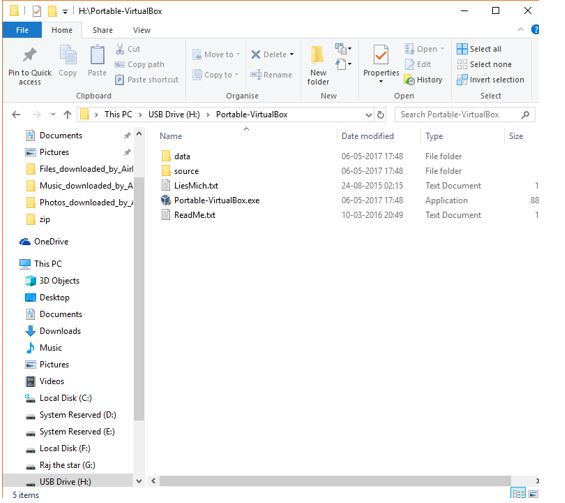
After extracting, you will see a couple of files and folder as shown in the below-given screenshot.
Now double click on the Portable-VirtualBox.exe file and run it as administrator.
Step 2: Download and install VirtualBox Files
Now the thing is if the full version of original Oracle Virtualbox is already installed on your system; this portable Vbox will automatically be launched without any prompt in order to set up and use on the different system.
So, what you can do uninstall the installed version of Virtualbox from the system control panel to set up the portable version on the USB drive.
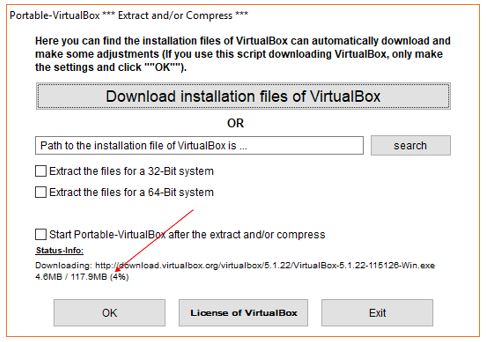
After uninstalling or if your system doesn’t have any pre-installed version of VirtualBox then the “Portable-VirtualBox Extract and /or Compress” windows will prompt.
You will see a big button “Download installation files of VirtualBox” click on that and the software start downloading the original Virtual box files.
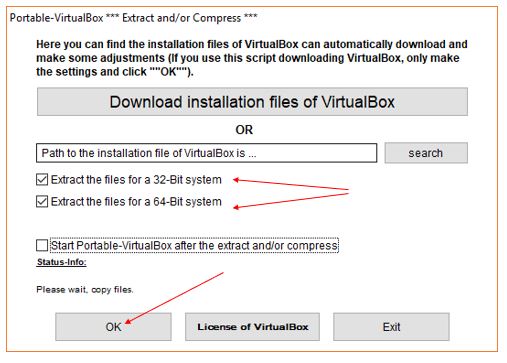
After downloading, you need to extract the Virtualbox files, and for a that check the two box given at the front of options: Extract files for a 32-bit system and Extract the files for a 64-bit system and then click OK.
Once the files of VirtualBox get extracted, you will see some extra files in the Portable Virtual box folder.
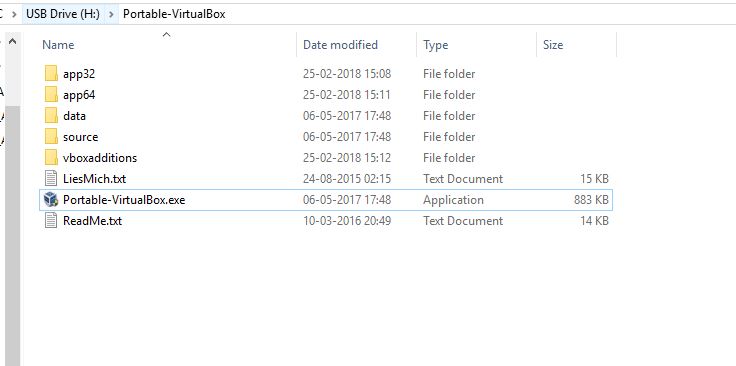
Now again double click on the Portable-Virtualbox.exe file to run it.
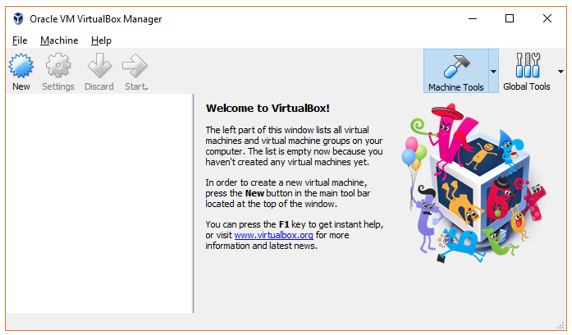
When the Portable Vbox runs successfully, a shortcut icon will appear in the system tray of Windows 10, 8, or 7. Right-click on that to access the settings and other shortcuts.
Select the Settings or you can also use the Keyboard shortcut to access it –CTRL+6.

Step 3: Portable VBox settings and Hotkeys
Under the settings, several options will appear those are used to control the behavior of the portable VirtualBox such as:
VB- Manager: By default, the portable VirtualBox is started without any VM. If you want to start the VirtualBox with a virtual machine, you can do it from here using this option. Just choose the virtual machine that you want should be loaded at the start of Portable Virtual Box. By configuring it, you will get immediately to the folder where your virtual machines are stored. Also, you can start the Virtualbox with a virtual machine as well by typing “Portable-Virtual.exe “VM-Name” via command line.
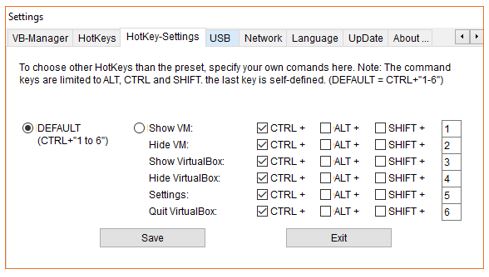
Hot Keys: This tab’s option will allow you to start the VirtualBox with or without Hotkeys. By default, the Hokeys are ON.
Hotkey settings: You can change the preset Hotkey configuration. The Hotkey is available for different options such as Show VM, Hide VM, Show VirtualBox, Hide VirtualBox, Settings and Quit VirtualBox.
USB: If you want to start the Portable Vbox with additional USB support then you can use this tab options to switch the USB interface on or off.
Note: By default, the USB support is OFF and you need to ON it if you want to use the USB inside the virtual machine.
Network: Same As the USB, if you want to get additional network support you need to enable it from the Network tab.
By default the Network support to VirtualBox is disabled.
Language; To change the language of the VirtualBox. It supports English, German, Portuguese, Spanish, French, Italian, Chinese, Japanese, Polish, Russian and Ukrainian.
Update: To update the VirtualBox, when the updated are available.
Step 3: Create and Run Virtual Machines on Portable Virtual Box
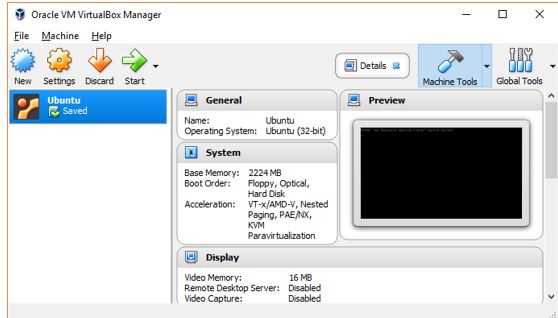
To create Virtual Machine you just need to click on the NEW button and start creating a Virtual machine like you do on the normal system with a fully installed version of Virtualbox.
The things to note while creating a Virtual Machine on Portable Vbox is your all VM file will save on your USB drive in which your main folder of Portable Vbox resides. This means you should have enough space on your USB drives to install heavy operating system’s Virtual machines.
The path where the software save your VM files is– Portable-VirtualBox\data\.VirtualBox\Machines directory
After finishing your work, be sure to properly shutdown the Virtual machine and exit the Portable VirtualBox and also safely remove your USB drive; because plugging out it suddenly while the Virtual machine running on the Portable Vbox may corrupt your VM file.
I hope this tutorial on installing and setup of Portable VirtualBox may help you somehow; if you have any question the comment box is all your!!
You may want to know:
- How to install VirtualBox extension Pack on Windwos, MacOS & Ubuntu Linux
- Install Rockstor NAS On Ubuntu/Debian in Virtual Machine
- Install Hyper-V to create Virtual Machine on Windows 10 natively
- Install Ubuntu on Windows 10 using Virtualbox Virtual Machine
- Install Ubuntu From a USB Stick on Windows 10 PC


Hello, I’ve manage to install portable virualbox onto USB and created a new OS but I can’t get it to run, it keeps showing that there is an error as shown below.
Any help gratefully recieved,
Karen
Failed to open a session for the virtual machine XP Professional 64.
The virtual machine ‘XP Professional 64’ has terminated unexpectedly during startup with exit code 1 (0x1). More details may be available in ‘D:\Portable-VirtualBox\data\.VirtualBox\Machines\XP Professional 64\Logs\VBoxHardening.log’.
Result Code: E_FAIL (0x80004005)
Component: MachineWrap
Interface: IMachine {b2547866-a0a1-4391-8b86-6952d82efaa0}
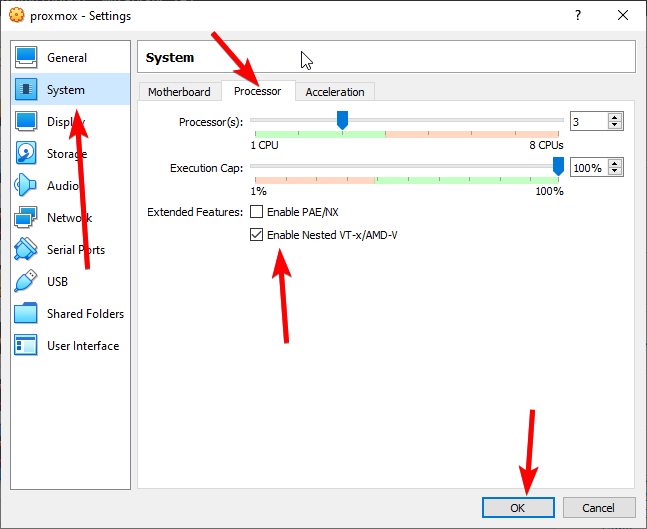
First check the Virtualization is enabled in your BIOS or not. If yes then go to the VirtualBox VMs where you have saved your created VM while creating it and look for two files named “VM_NAME.vbox-tmp” and “VM_NAME.vbox-prev”. First, rename VM_NAME.vbox-prev file to “VM_NAME.vbox” and run your XP profession 64 virtual machine. If you’re still getting an error, restore its name to “VM_NAME.vbox-prev” and try renaming VM_NAME.vbox-tmp to “VM_NAME.vbox”. And then try again.
Note: VM_NAME will the name of your virtual machine
If your are using some older version of VirtualBox then these files will be VM_NAME.xml-prev and VM_NAME.xml-tmp, in that can just rename them to VM_NAME.xml and VM_NAME.xml.
Error:
“This app can’t run because it causes security or performance issues on Windows. A new version may be available. Check with your software provider for an updated version that runs on this version of windows.”
VirtualBox 5.2.x is no longer supported!
But I had to uninstall VirtualBox to install Portable-VirtualBox. So how do I proceed?