We are living in the age of smart home gadgets, where we can get several of our activities done by just ordering those little gadgets to make it do whatever we want. From changing the temperature of the air conditioner to changing the channels on our smart TV, our life today is a hell lot easier with smart home gadgets. But even if you don’t have a smart home, but has a computer or laptop solely for the purpose of entertainment or whatever, you might feel like controlling it by sitting at one corner of the couch. Yes, that is way more pleasurable to control the music volume, change tracks or do any other tasks, without leaving your comfy spot on the couch.
You can control your computer or laptop effortlessly from the smartphone on your palm with a small yet mighty piece of app. Not only music but also basic input like controlling the mouse cursor and other tasks, you can accomplish almost everything with the Unified Remote app. Unified Remote is a piece of swiss knife, which can even help you control a slideshow that is being played on a computer, which can be super handy at the next meeting in your office. Unified Remote comes with numerous plugins to control different programs and websites on your computer, all from your smartphone.
You can use Unified Remote to control your computer either through Wi-Fi or Bluetooth. But Bluetooth connectivity isn’t that satisfying, and thus, I will recommend you to use a Wi-Fi connection for a satisfying performance if you have one. Both your computer and smartphone should be on the same Wi-Fi network though.
Just in case you are having an old smartphone, this is going to be one of the top 10 ways you can reuse your old smartphone for something useful.
So without further delays, let’s get started with the tutorial.
Downloading and installing the Unified Remote server
Step 1: First, download the Unified Remote server for PC and the app for Android. Unified Remote is also available for Mac, iOS, and other platforms, which you can find here.
Step 2: Second, you will have to install the Unified Remote server on your PC. The installation is just like the installation of every other Windows program.
But here are some things during the installation process, which you should pay attention to.
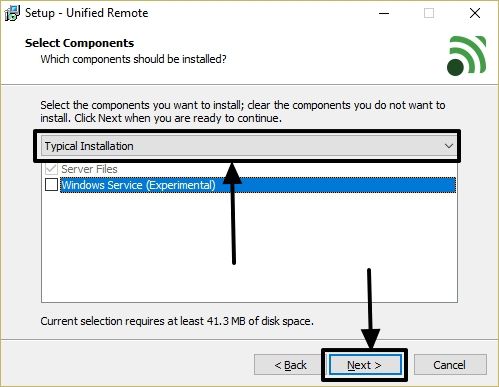
Step 3: In the middle of the installation, you will be asked to choose the type of installation. Just carry on with the ‘Typical Installation’ method, and it should work perfectly for you.
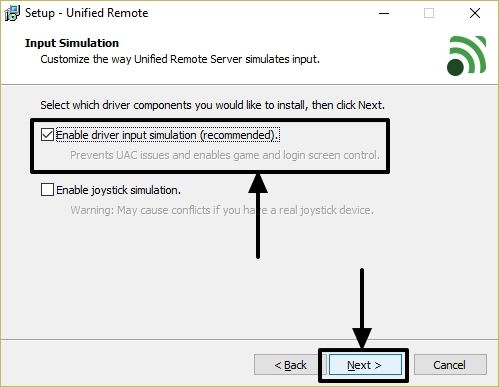
Step 4: Now you will have to choose the driver simulator to install. You can go with the recommended settings, or can even install joystick simulation if you want to do that.
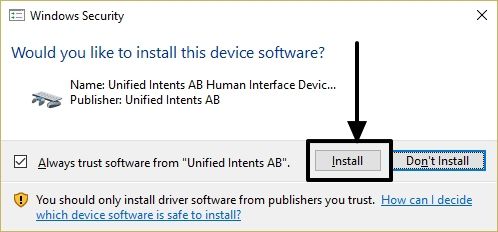
Step 52: At last, the installer will ask you for permission to install a driver. Just click on ‘Install’ to complete the installation.
Step 6: After the installation is complete, the Unified Remote Server should start running, and you can exit the server, or configure it with the following icon in the taskbar.
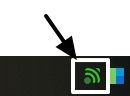
As long as the icon is green, everything is fine. Now you will have to install the Unified Remote app on your Android or other devices from the links given above.
Downloading and using the Unified Remote app
Step 1: After the installation is complete, open the Unified Remote app, and tap on ‘Sign in with Google’. You can even skip the step if you wish to.

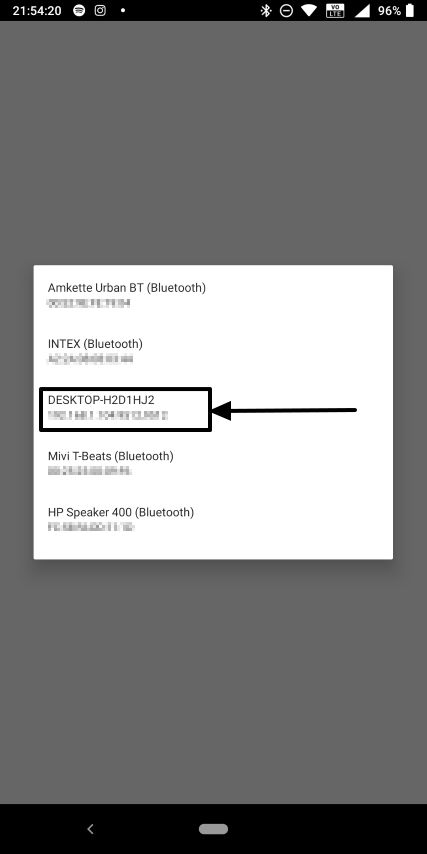
Step 2: After login is successful with your Google account, Unified Remote will search for the available devices to control. Unified Remote will bring the list of all the previously connected Bluetooth devices along with the other devices, where Unified Remote Server is installed.
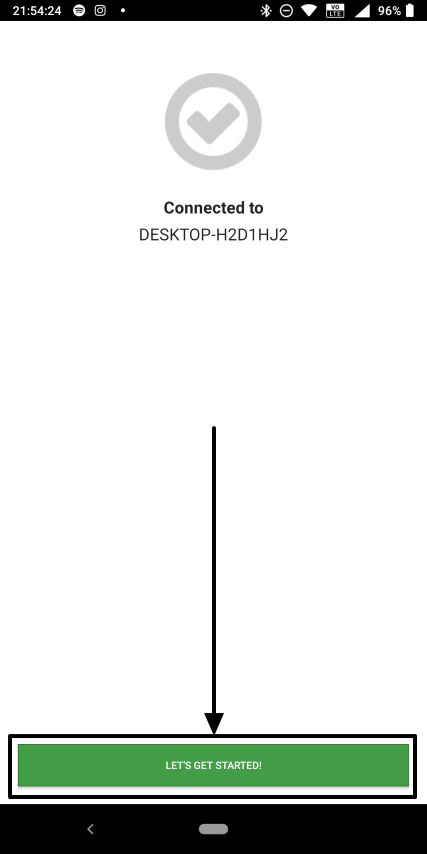
Step 3: Just find the name of your computer in the list. Tap on the name of your computer to connect to the computer. Tap on ‘Let’s Get Started’ in the new screen that appear.
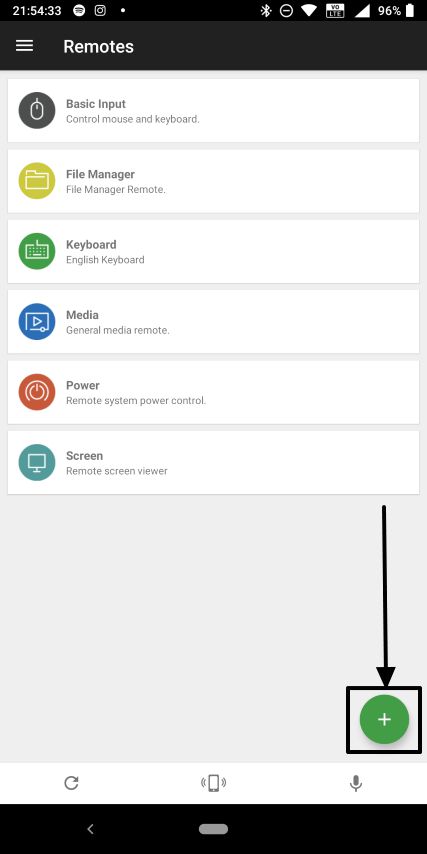
Step 4: Here you will find some basic remote controllers, viz. The basic input remote, file manager, keyboard, basic media controls, power options remote, and screen control remote.
Step 5: Just tap on the ‘+’ button to add more remote controls to the existing list.
Step 62: Here you can find several categories, under which there are multiple remote controls. You can either open each category and select the remote controls you want to add, or you can directly tap on ‘Select All’ to add all the remote controls.
Step 7: You can go to either of the two. But I will recommend you to select all the remote controls to prevent adding individual remote controls each time you start using a new service on your computer.

Step 8: After adding all the remote controls you can comprehend the true potential of Unified Remote. You can find remote controls for a plethora of online and local services. From controlling the music that is being played on your computer’s media player, to Amazon Prime Music or Kodi, you can control everything sitting comfortably on the sofa with the Unified Remote app from your smartphone.
There are even some advanced remote controls for different service like Kodi, VLC Media Player, to help you have full control over your computer.

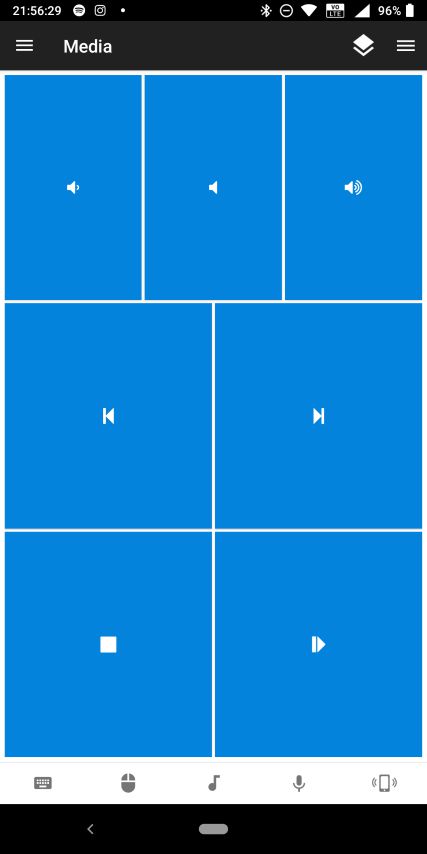
Here is the basic input keyboard, where you can control the movement of the mouse pointer, type something from the keyboard or enter text, and change the music volume, play or pause tracks directly.

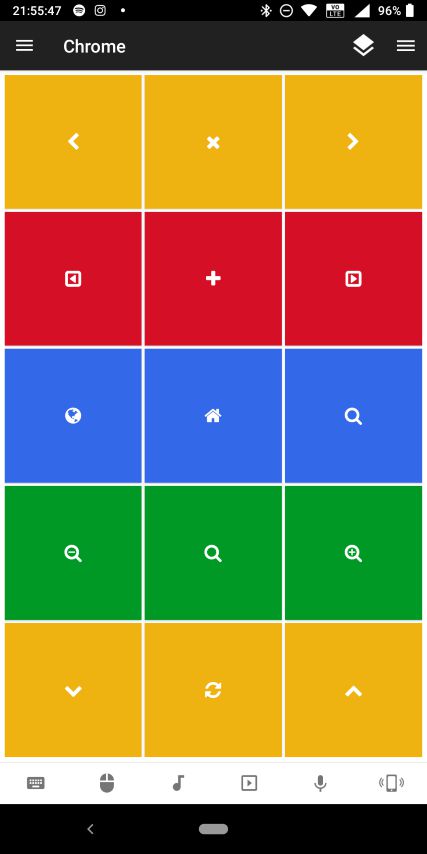
Here is the Chrome and media control remote to control Google Chrome, and media playback respectively.
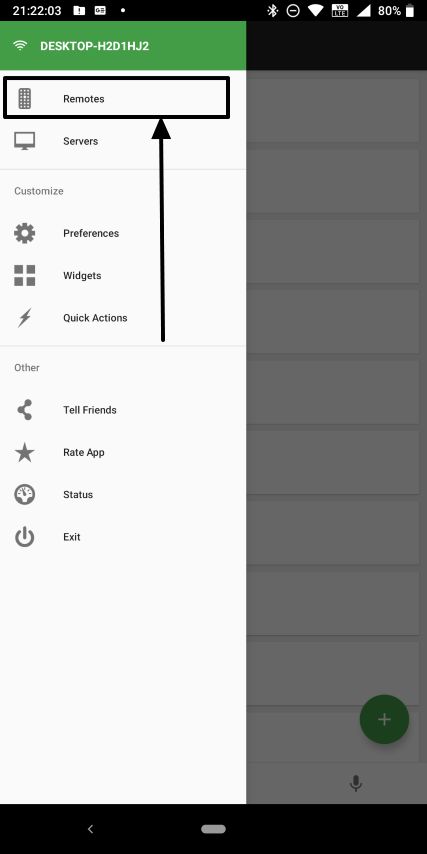
To see the list of remote controls again from the current remote control, just tap on the hamburger icon, and tap on ‘Remotes’ to find all the remote controls, which you can use.
From basic to advanced controls, Unified Remote will help you get almost everything from it. There are several keyboard controls for different purposes like navigation, function keys, number pad, apart from the most basic alphabetical keyboard for the purpose of typing.
So, needless to say, Unified Remote is really a powerful app and is a must have to control your computer in the most effortless way ever.
Unified Remote even has support for widgets, which can help you control multiple programs and services on your computer directly from the home screen. You just need to map the blank keys in the widget with the different keys from various remote controls within the Unified Remote app.
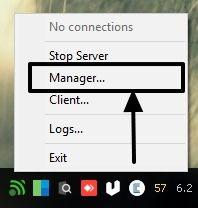
Just right-click on the Unified Remote icon in the taskbar, and choose ‘Manager…’ to configure different settings associated with the Unified Remote server and app.
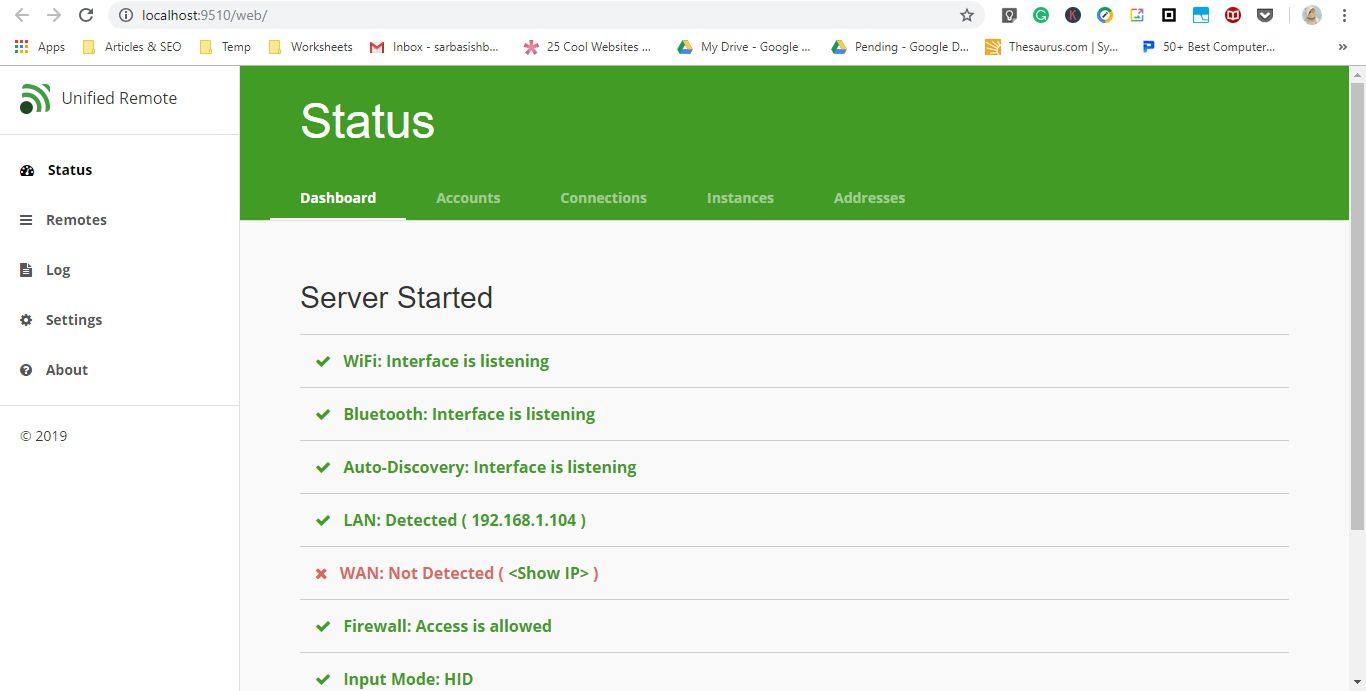
A new browser tab will open, where you can configure a number of things customize Unified Remote as per your requirements. In the configuration window, you can even stop or configure remote access or remote controlling activities for certain apps and programs from the Unified Remote app on your smartphone.
Don’t change any random settings in the configuration tab as that might lead Unified Remote to malfunction.
Unified Remote has two versions, one free, with a limited number of remotes, while the paid one offers you the controls for everything right from your smartphone. I have used the Unified Remote full app for this tutorial. Unified Remote costs Rs. 270 on the Google Play Store, and it will be worth every penny if you go for the full version to control everything on your PC. There is also the Unified TV app, I haven’t tried, but I expect it to be equally good.
Among the other advantages of Unified Remote, you can even configure NFC tags to control different elements on your computer effortlessly by scanning the tag.
So that was it. Hope you will enjoy Unified Remote. Do you have any questions in mind? Feel free to comment the same down below.
Other Resources
Related Posts
How to Install 7-Zip on Windows 11 or 10 with Single Command
Install Google Earth on Windows 11 or 10 Using a Single Command
How to install Gaming Services on Windows 11
How to Install Telnet Client on Windows 11 Using PowerShell
How to Install ASK CLI on Windows 11 or 10
How do you install FlutterFire CLI on Windows 11 or 10?