To connect and access any system locally running on a Windows operating system is very easy using Remote Desktop connection tool. Windows 10/8/7/XP all come with the RDP by default. However, only the Professional, Enterprise or Ultimate edition of Windows have the full version of Remote Desktop rest of the editions can only use the RDP client. However, by default the user can access the Windows-based computer available in its local network only and connect over the internet, he/she has to use a VPN or port forwarding method. Actually to connect with some friends or someone computer over the Internet remotely you can use the easiest method of installing some third party software like Team Viewer. It is one of the best software to access the computer remotely over the Internet. Team viewer is a cross-platform software that means its work on Windows, MacOS, Linux, iOS, and Android too. Even you can use the Chrome App of the Team Viewer to connect remotely any computer with help of a browser. However, here we are going to talk only about how to use remote desktop to connect to another computer on Windows 10/8/7 locally using the IP address:
- First of all, we need to enable the Remote Desktop connection.
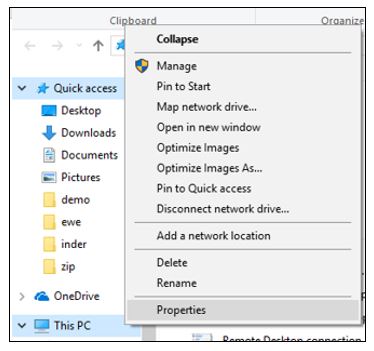
- Go to the My Computer or This PC icon and right click.
- Select the properties.
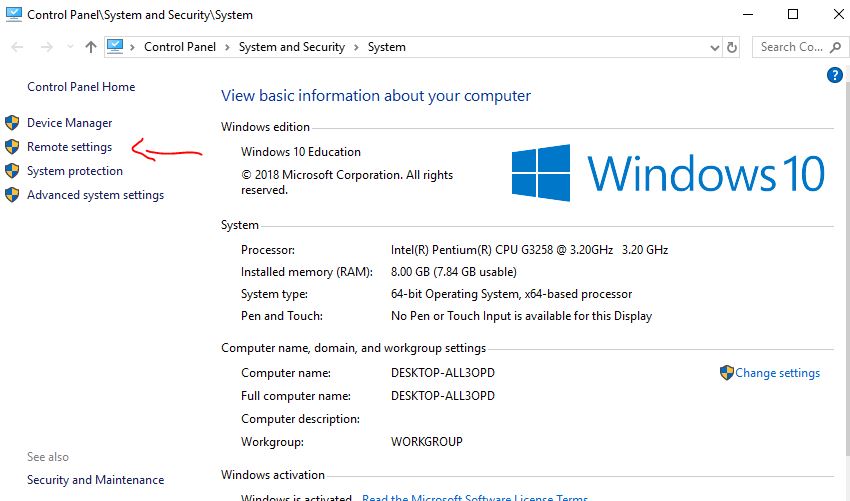
- Click on the Remote setting option given on the left side of the screen.
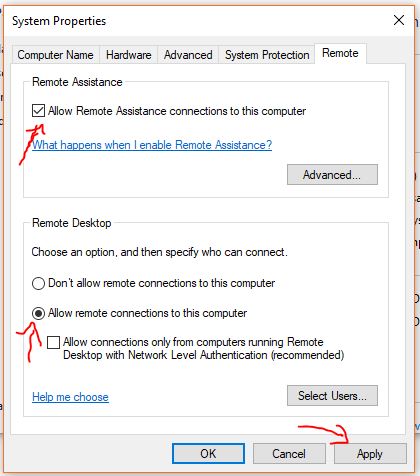
- Check the Remote Assistant box for option “Allow remote Assitance connection to the computer“.
- From the Remote Desktop option, check the option “Allow remote Desktop connection to this computer“.
- You can also select the option Allow connection from a computer using the Network authentication.
- Click on the OK button to save it.
- Note: Follow the same steps on the other Window system that you want to access remotely in your local network.
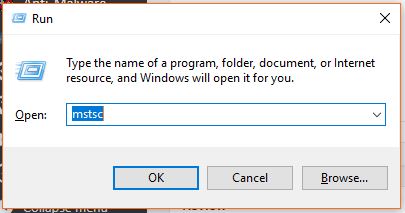
- Now go to start bar or search for Remote Desktop. Or just simple press Win Key + R and in the RUN box type mstsc and hit the enter button. It is shortcut command to open the Remote Desktop.
- Type the IP address of the computer running on the Windows OS. To see the IP address of the system you can to access you can use the CMD, where you need to type ipconfig and you get the IP address of that particular system where you’re running this command. Another way to find out the IP address is to go to Network Connections-> select the network adapter (connected to a network) -> double click on that -> click on the Details to see the IP address of the system.
- Enter the credentials- Username and password of the remote computer you want to access.
- Accept the certificates and click OK button.
- You will get the remote display.
Tutorial in detail with a screenshot to remotely access other computers on Windows 10/8/7
Step 1: By default, the Remote Desktop feature is disabled in Windows and to enable it, go to the My computer (for Windows 7 & XP) or This PC (Windows 10 & 8) and right click on it. A pop-up menu will appear, select the properties option.
Step 2: From the computer properties window select the Remote settings.
Step 3: Check the two options: Allow Remote Assistance connections to this computer and Allow remote connections to this computer as shown below in the screenshot.
Note: Remeber these options should be enabled on the remote computer too which you want to access.
Step 4: Go to the search box of the Windows start menu and type Remote Desktop connection to access the RDP client. You can also use the shortcut. Just press the Win key + R and type mstsc and press enter button.
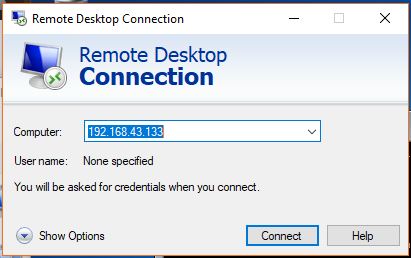
Step 5: Type the IP address of the computer you want to access remotely. And then click on the Connect button.
Step 6: The RDP will ask for the credentials: Type the Username and password of the other computer which you want to access remotely on your own system. You can remember the login information by checking the Remeber me box for future usage and then click on the OK button.

Step 7: If it shows the certificate error then nothing need to do just click on the YES button and that’s it.

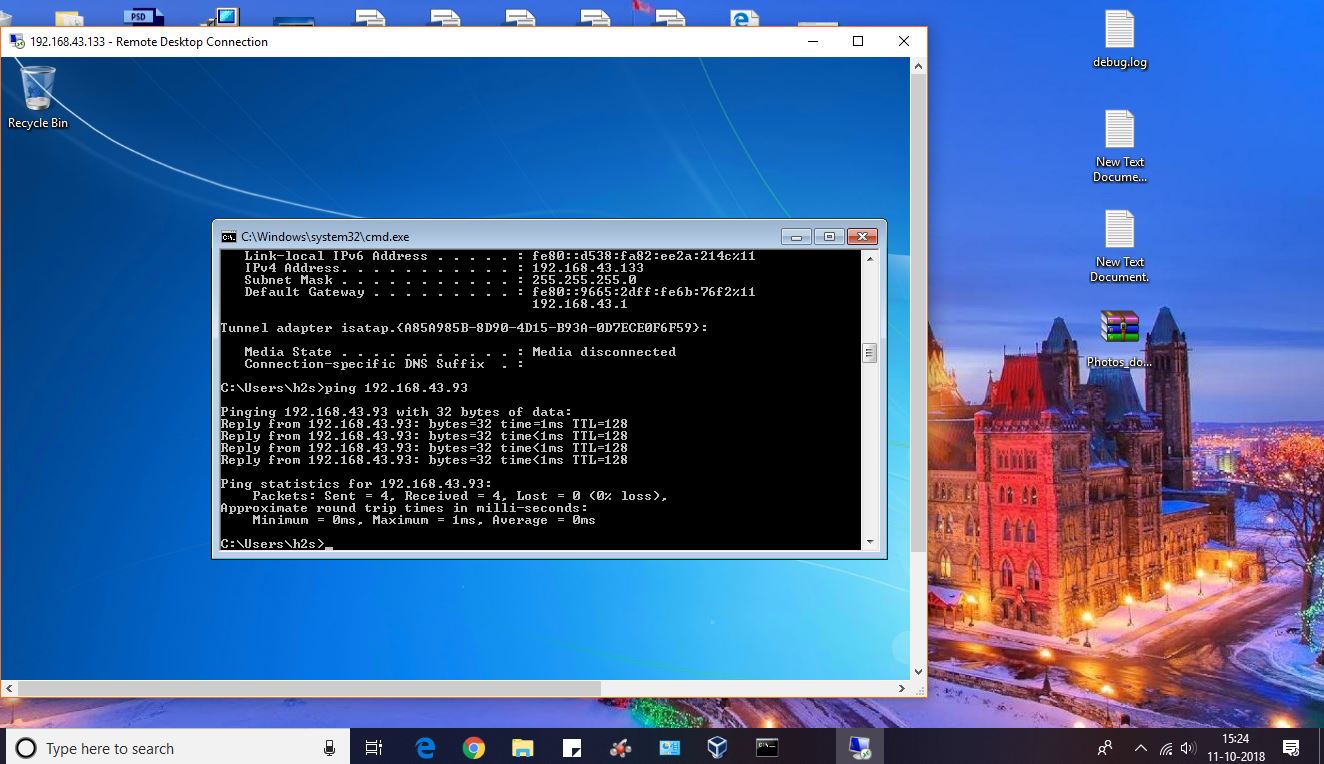
Step 8: You successfully able to establish a Remote desktop connection. Here for the tutorial, we established the remote desktop between Windows 10 to Windows 7 systems
Further tips:
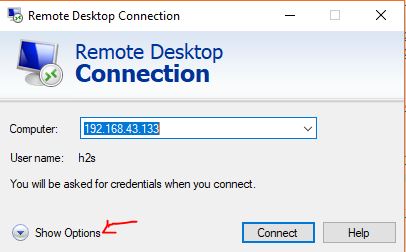
If your connection is slow or wants to save the credentials of the remote user or more then you can play with settings of the Remote desktop tool. For that just click on the Show Options before connecting the RDP.
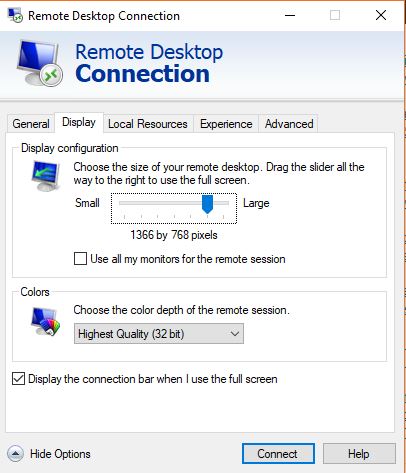
Under the General Tab, you will get the options to save the remote user login information. In the second tab which is the Display, you can adjust the remote desktop display size and the color depth of RDP during the remote session.
To configure the local resources available during the remote session such as Remote Audio, Keyboard, Local devices and resources.

If your Internet connection is slow then the Experience tab will help you to optimize the performance on different connection speed.

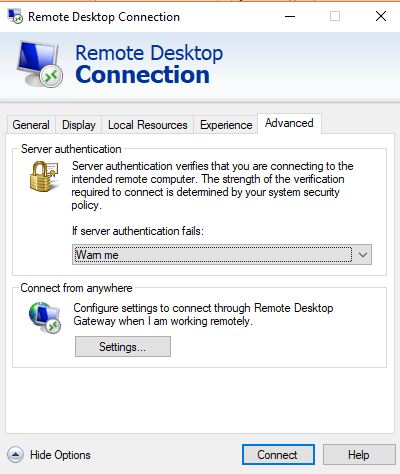
The last one is the Advanced to set up the server authentication and Gateway settings. However, you can leave them as it is.
Other Useful Resources
- How to Use WhatsApp on Desktop Computer Using Chrome Browser
- Tutorial to create Windows Virtual machine on Linux (Ubuntu)
- A way to connect and share files between two computers using an Ethernet cable
- How to play those old PSP games on Windows, Android, and other platforms
- Know how to Setup FTP Server in Android To Share files
Related Posts
How to RDP AWS Windows server from Windows 10 or 11
How to allow RDP in Windows 10 firewall: GUI & Powershell command
How to send key combinations to a remote computer using TeamViewer
How to Install AnyDesk on Ubuntu 20.04 LTS via Command terminal
How to access Linux desktop GUI from Windows 10 remotely
How to use Remote Desktop MSTSC command