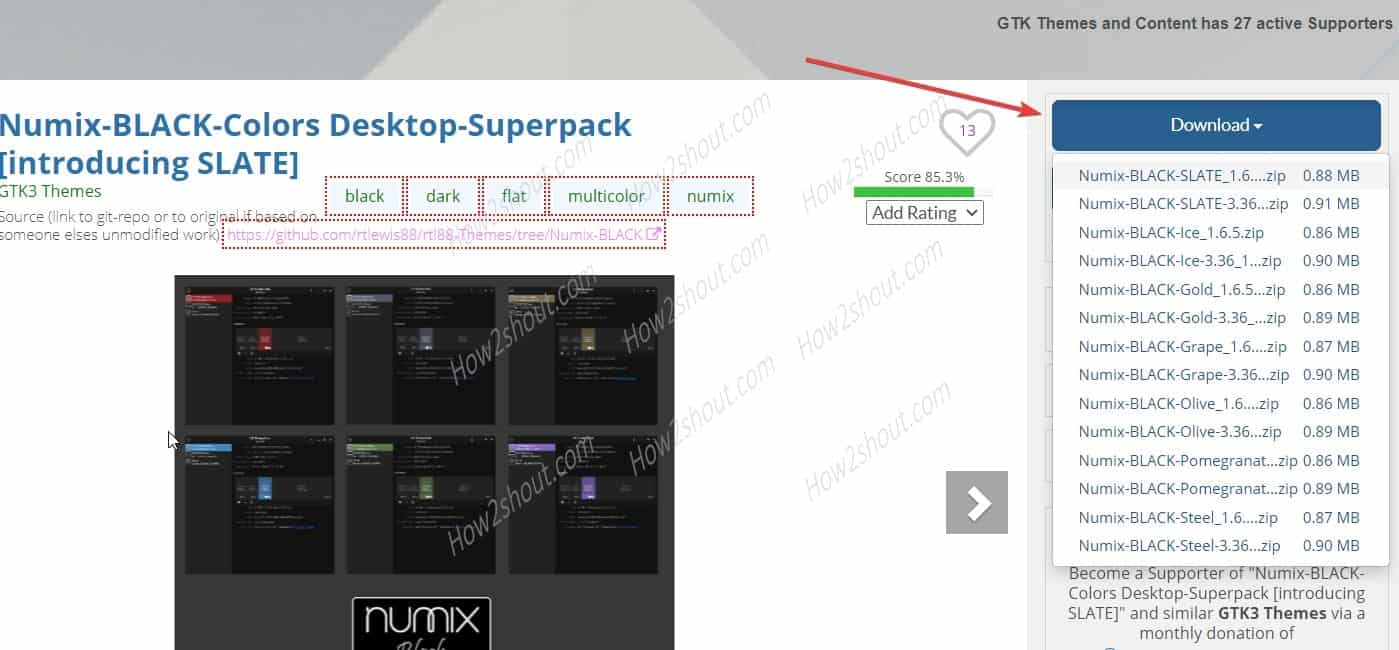
Get bored with the default theme of Ubuntu, then install Numix Black Colors. It is a dark mode theme just like Yaru available in different color schemes to make sure the text is highly readable along with other attractive elements. Numix comes with two packages one is to change the Theme and other for icons.
It supports GTK, xfwm4, openbox-3, GNOME-Shell, and Cinnamon and offers a FLAT look and rounded corners. Apart from dark other color variants are also available such as Gold, Grape, Ice, Olive, Pomegranate, and Steel. All Icons & Folder colors are available in both standard Numix and FLAT variants.
Here we will learn:
- How to download themes for Ubuntu
- How to install Gnome Tweak
- Enable Gnome Shell Theme manually
- Steps to apply custom themes and icons on Ubuntu.
Numix Black theme and icons Installation on Ubuntu
Step 1: Get the Gnome Tweak tool
Before downloading anything, let’s first set up the Tweaks tool that we will require to easily apply the theme/icons on Linux running with GNOME. For that, you should have access to non-root users with sudo access. The best thing is, we don’t need any third-party repository as it is available on the official one.
sudo apt install gnome-tweaks
Step 2: Download Numix Black theme and icons package
The Numix black color package is available for free. So, to download it here are the links Numix-BLACK-Colors Icon-Superpack and Numix-BLACK-Colors Desktop-Superpack. Open these pages, click on the Download button given on the top right side. Select the file with color or look you want such as FLAT, Olive, Gold, and more… Here we are using a FLAT one.
Step 3: Switch to Downloads Directory
By default whatever we download from the browser will go to Downloads directory, thus switch to that:
cd Downloads
ls
Step 4: Extract the Numix theme & icons and copy it
Don’t get confused between the files, the one which starts with “Numix” is a theme package and will go to Themes directory of Ubuntu. While the one starts with “BLACK” is an icon package.
First, extract and copy the Theme zipped file:
unzip Numix-*.zip
Copy to the global theme folder of the system.
sudo cp -r Numix-* /usr/share/themes
Next turn is of icons package:
unzip BLACK-*.zip
Copy to Global icons folder
sudo cp -r BLACK-* /usr/share/icons
So, everything is done and at its place, let’s implement the theme.
Step 5: Open Gnome Tweak Tool
Go to Applications and search for “Tweak“. When its icon appears, click to run it. This will open the application which we can use to customize the look and feel of Ubuntu Linux that appeals to our eyes…
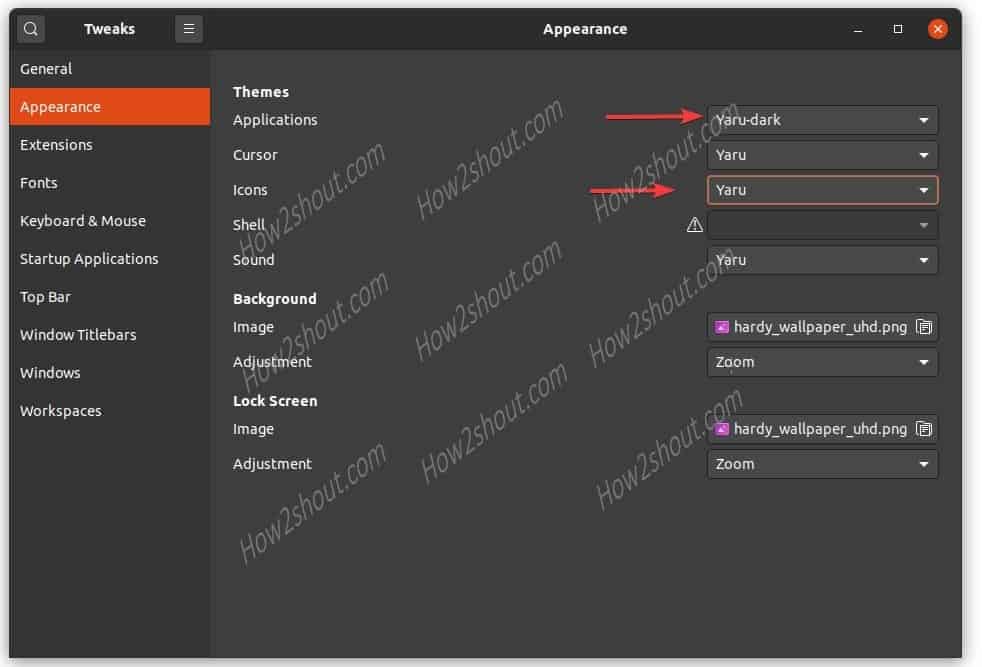
Step 6: Apply Numix Black theme & icons
On the Tweaks under Appearance, you will see a section Themes with multiple options and their corresponding drop-down boxes. On Applications drop-down select –Numix BlACK and in icons “BLACK-Slate” or whatever the package you have downloaded.
This will only change the icons and theme but not the Shell, for that we have to get its extension. See the next step.
![]()
Step 7: Download and enable Gnome Shell Extension manually
By default, you would not be able to access the Shell corresponding drop-down box option. It will say the shell extension is not enabled. So, to enable, simply install the shell-extension package and then run the command to enable the same.
sudo apt install gnome-shell-extensions
List all the available extensions:
gnome-extensions list
Enable the extension “[email protected]“. The command for that is:
gnome-extensions enable [email protected]
Restart the Gnome:
Press Alt+F2 and type r and then hit the Enterkey on the keyboard.
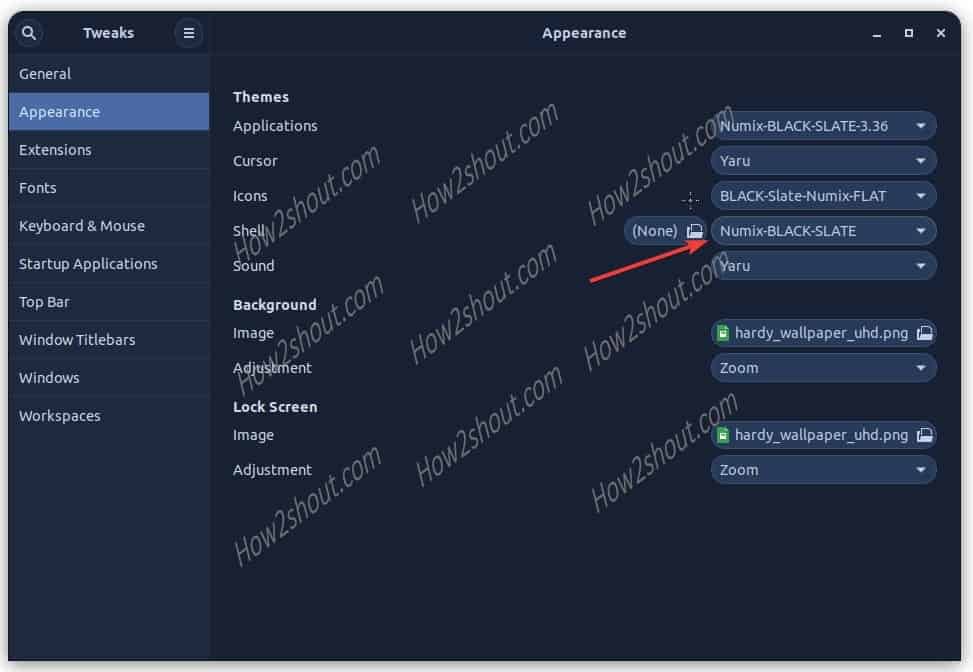
Close and reopen Gnome Tweaks Tool-> Appearance -> Shell and select Numix-Black.
Changed icons and interface
So, here is the change you will get after applying the themes and icons on your Linux OS.
![]()
![]()


