Are you skeptical about your privacy and policies of Dropbox, Google, and other similar public cloud services to store your personal data such as photos and videos? Then you should think about a budget-friendly NAS system like Synology DS120j to set up your private cloud storage at home. The best thing is the one-time investment associated with NAS devices, moreover, the modern operating systems of Network storage devices have further removed the complication associated with storage devices.
Well, when it comes to home data storage boxes Synology is one of the popular brands, of course, there are others but it all depends on personal choices and budget; yes budget is a big factor that refrains home users to go for NAS devices. And here today we let you know our experience after using Synology DS120j for more than a month.
Design and setup
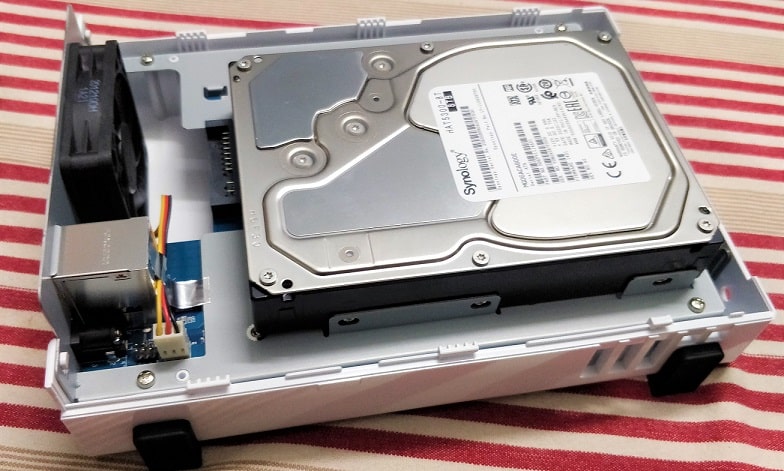
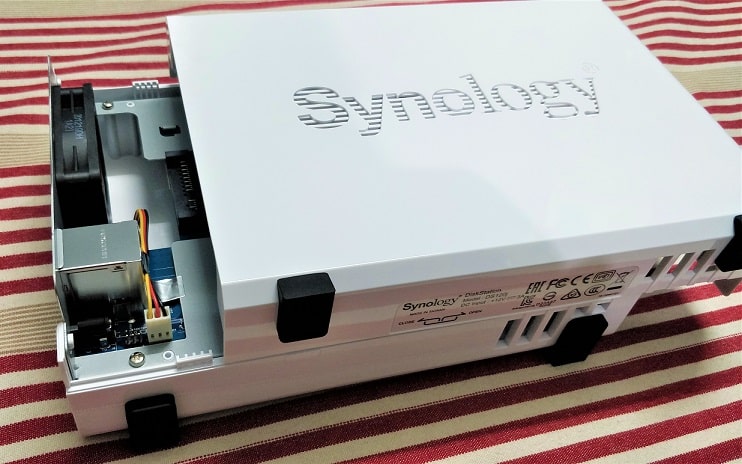
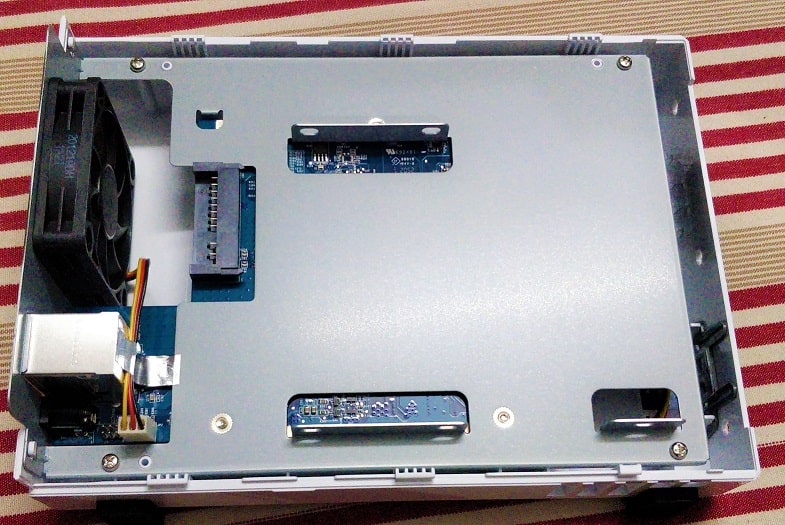
Synology DS120j is a Single Drive NAS and being a budget one, it doesn’t have a bay that can easily be pulled out to insert disk drives. Instead of that, we have to slide out one portion of the NAS box to get the bracket, meant to fit a hard drive of exactly 3.5-inch. However, if you already have some SSD or 2.5 HDD and want to use that then you need to buy an adapter for 2.5 inches drives.
We have used a 3.5″ Seagate NAS drive and setting it up was really easy. Just need to put the drive in the bracket and fix it with five screws, and no special technical skills required for this.
After that close the cover and tight it as well with the help of two screws. Once done you are ready to get started with the NAS box to store data.
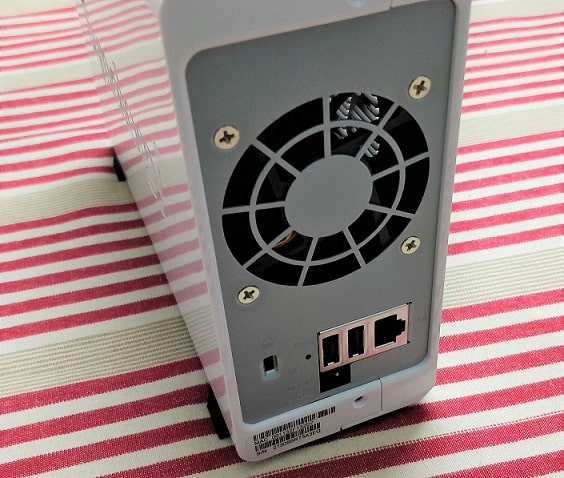
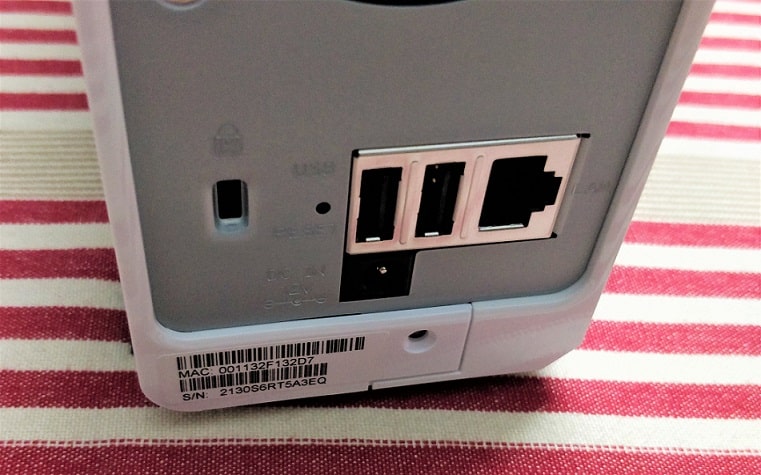
On the backside of Synology DS120j, RJ45 port is given, use the LAN cable that comes with the NAS box and connect it with your network or router. For more information, you can refer to the Quickstart guide available inside the NAS box…
How to find Synology NAS device connected over the local network to setup:
- Visit the Synology web device finder tool called – Web Assitant, here is the link
- The webpage tool will automatically find and give you the IP address of Synology NAS available in your local network.
- Click on the Connect button.
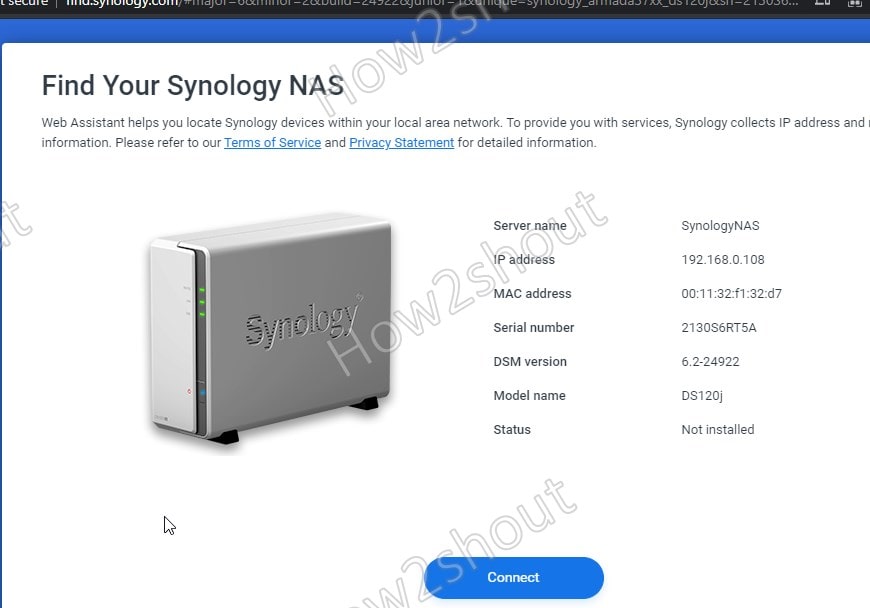
- On the next page hit the Setup button to start the OS installation process into the Hard drive. Actually, Synology does not generally offer onboard storage! The operating system is stored on a separate partition of your HDD.
- Use the Install Now button to set up DiskManager Station -DSM (NAS operating system).
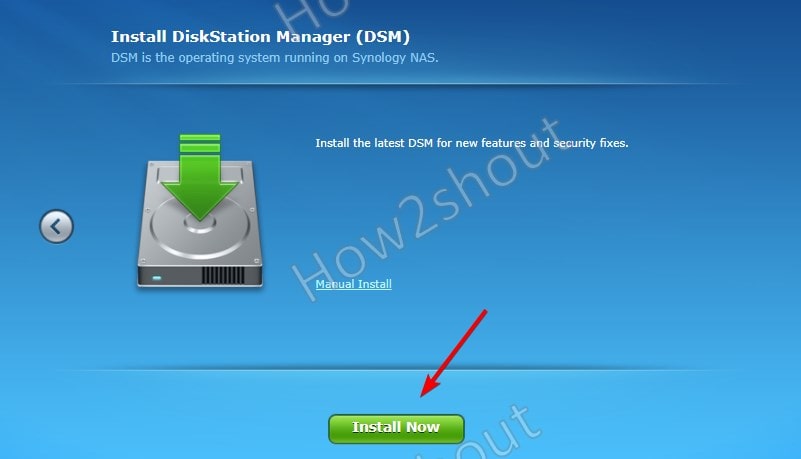
- Create Administrator account
- Setup Quick connect to easily access the NAS from anywhere using the Internet. However, you need to have a Synology account for this, if not then create one.
- And then add QuickConnect ID as per your choice.
DSM Software and user interface
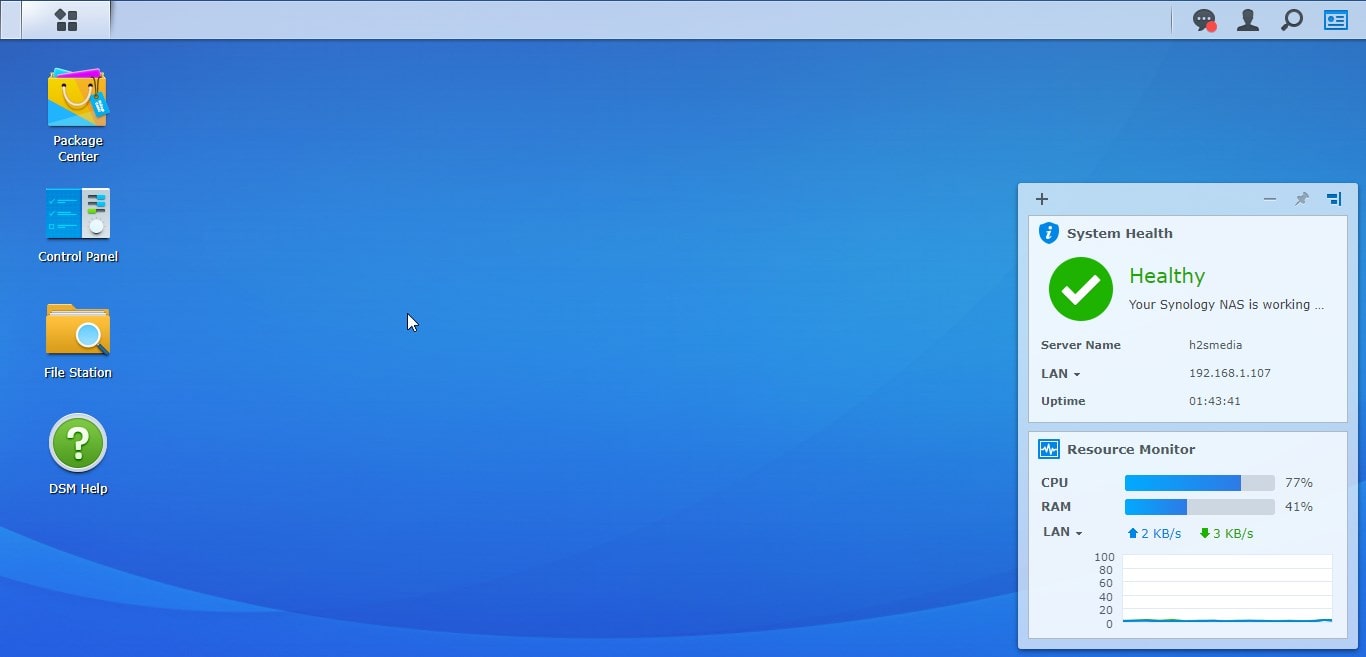
Immediately after installation, the Synology DS120j operating system web desktop will appear containing the most essential functions. In the DSM Desktop, there are initially three “apps” that you should visit. These are Control Panel, the Storage Manager, and the Package Center.
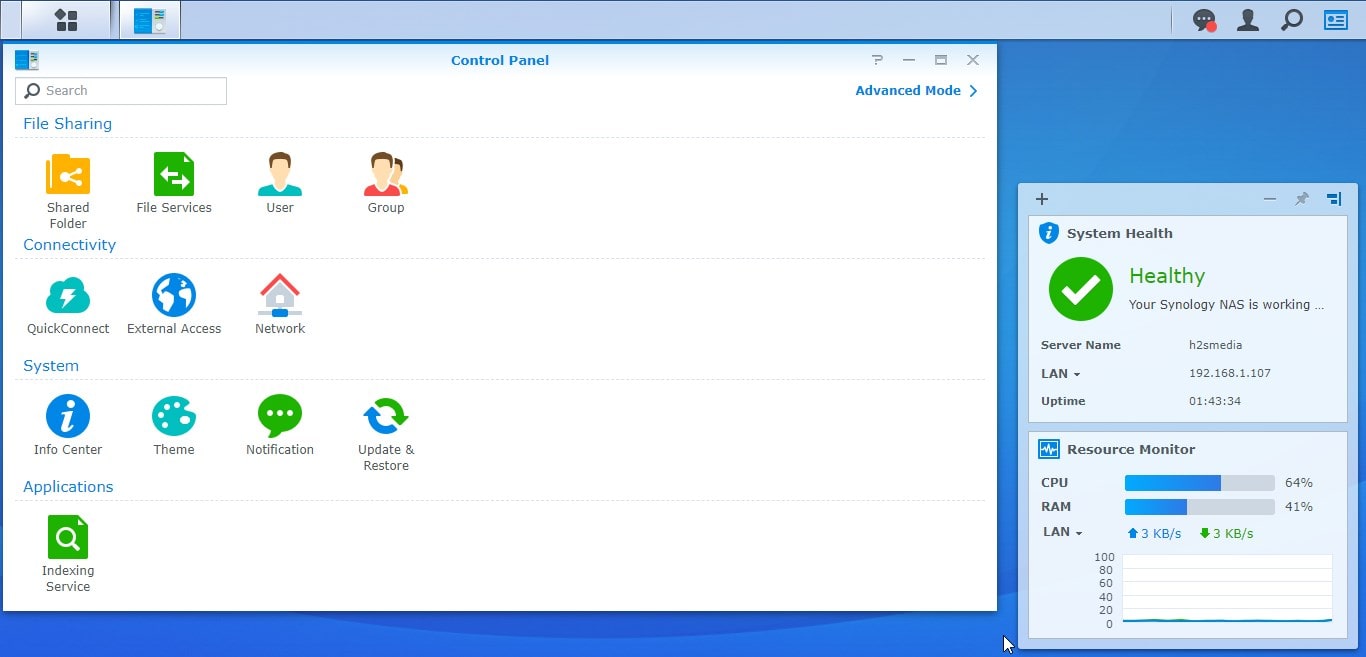
All basic settings can be found in the Control panel. Using which you can create new users, create shared folders and manage the general settings of the NAS. Apart from that other settings such as IP addresses, QuickConnect (for remote access), managing file services, etc. are also there.
Well, the Storage manager is also there by default among the pre-installed applications to manage the installed drive, however, as the NAS supports only a single drive, thus there is not much to do except checking drive health, status, and configuring alerts.
Using Package center, the user can extend the NAS functions, we can install various apps such as Plex Media Server, Antivirus Essential, Cloud sync, Apache web server, WordPress, and more. There are also dedicated apps for audio, a photo, and a video station for streaming music, photos, and videos as well as tools for calendars, mails, and Synology Drive server for the exchange of data.
Apart from all other interesting apps, one more is there called Note station that is meant to replace Evernote or OneNote kind of apps. You can create notes with images, tables, etc. in the web browser or using its dedicated app available for Windows desktop app or as DS Note smartphone app, which is then synchronized based on the user.
Furthermore, you can have your own personal Spotify using Synology Audio station, it can store your music which later can be listened via a web browser or smartphone app, locally or remotely using the Internet. Music is neatly divided into artists, albums, etc.
As I said in the beginning Synology Ds120j NAS can be your private cloud, so it is not just limited to media. We can use it as Google Drive, OneDrive, DropBox, or other similar apps. In the package center, there is an app called Synology Drive and the same is available for smartphones, Windows, Mac Os as an app that allows folders to be synchronized across multiple devices.
Well, Synology DS120j only has space for one hard drive. This makes it – unlike a NAS with several hard drives – a maximum of one component in a backup system, but it is certainly not suitable as the sole backup. Its purpose is rather to collect data centrally and make it available from one point for several devices.
How to use Synology DS120j to backup photos & videos like the Google Photos app
Apart from saving the Data using your computer system, we can also use the Synology DS120j NAS as a cloud to remotely save our pictures and videos into it. This makes sure our phone storage will not run out of space. Plus you can access them using your PC as well, in case you misplace your smartphone. Here are the initial steps to set it up.
Synology offers multiple apps for smartphones to enhance the user experience such as Moments. It helps you to replace Google photos while maintaining your privacy and keeping all your photos & video data with you only.
Install Moments of NAS
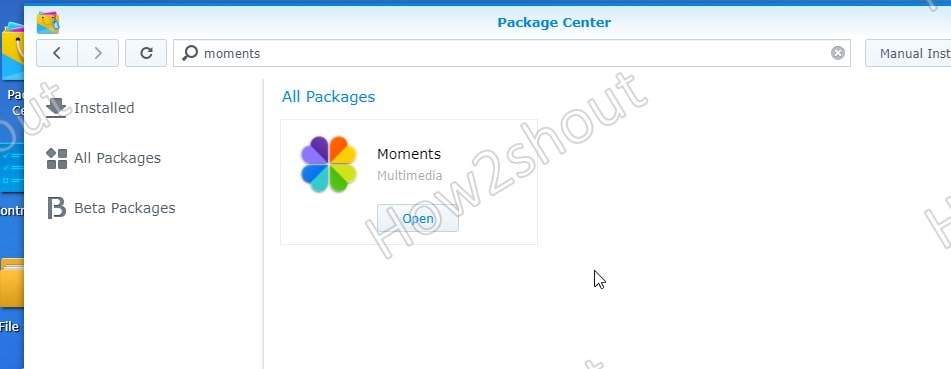
- Go to Package Center
- In the Search box type- Moments to find it.
- As the App appears click on the Install button.
- Now, go to Control Panel > Select Users > Advanced and check the “Enable user home service” and “Recycle Bin”, hit the Apply button.
- Open Moments App from the Synology Desktop.
- Now, you can upload photos directly to NAS that will get synced with the smartphone’s Moments app. To install it on phones see the further steps.
Install Moments app on Smartphone
- Go to your respective App store and install Synology Moments. Here are the links- Android and iOS.
- Open App. It will ask for your Quick-Connect ID which you have created while setting up the Synology DS120J NAS. Well, if you have not then can create it now from the NAS Control Panel. However, if you have forwarded your port to connect remotely, then can use the IP address as well.
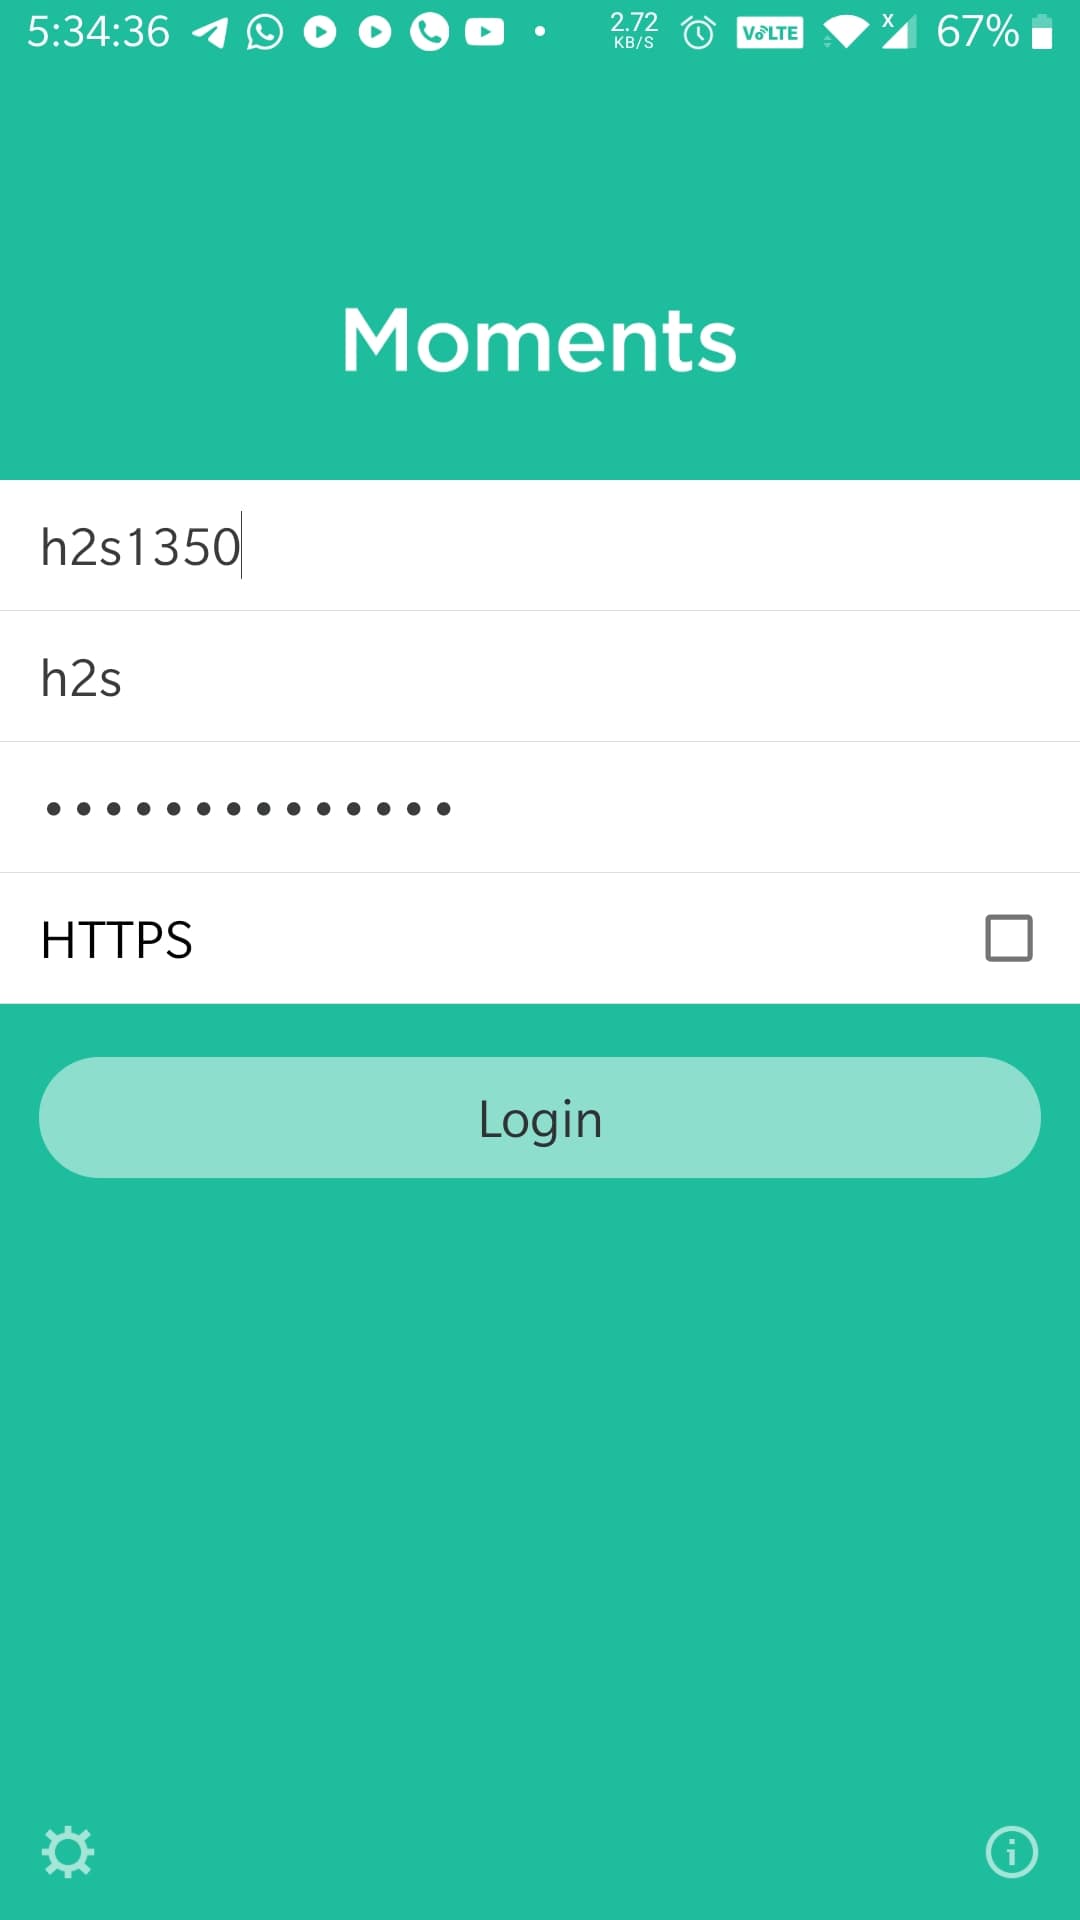
- Enter your Synology NAS Login Username and Password.
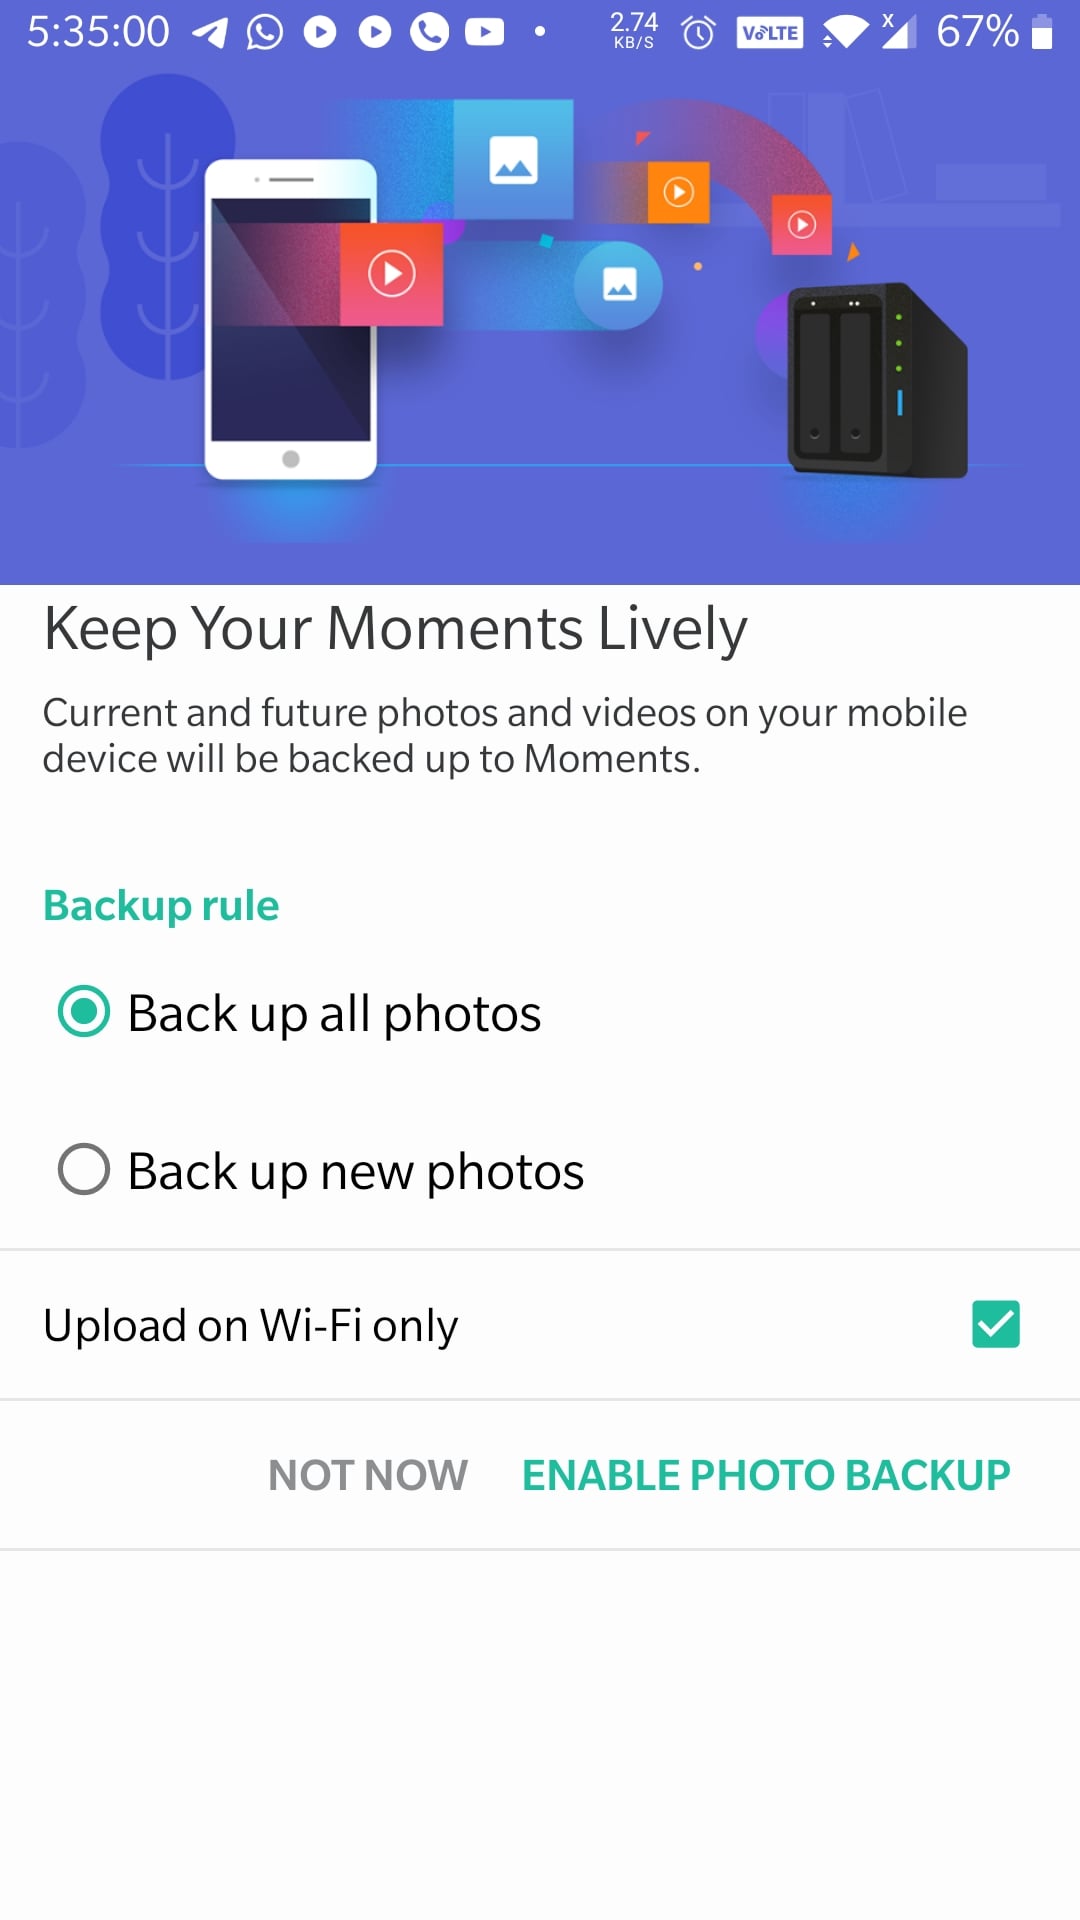
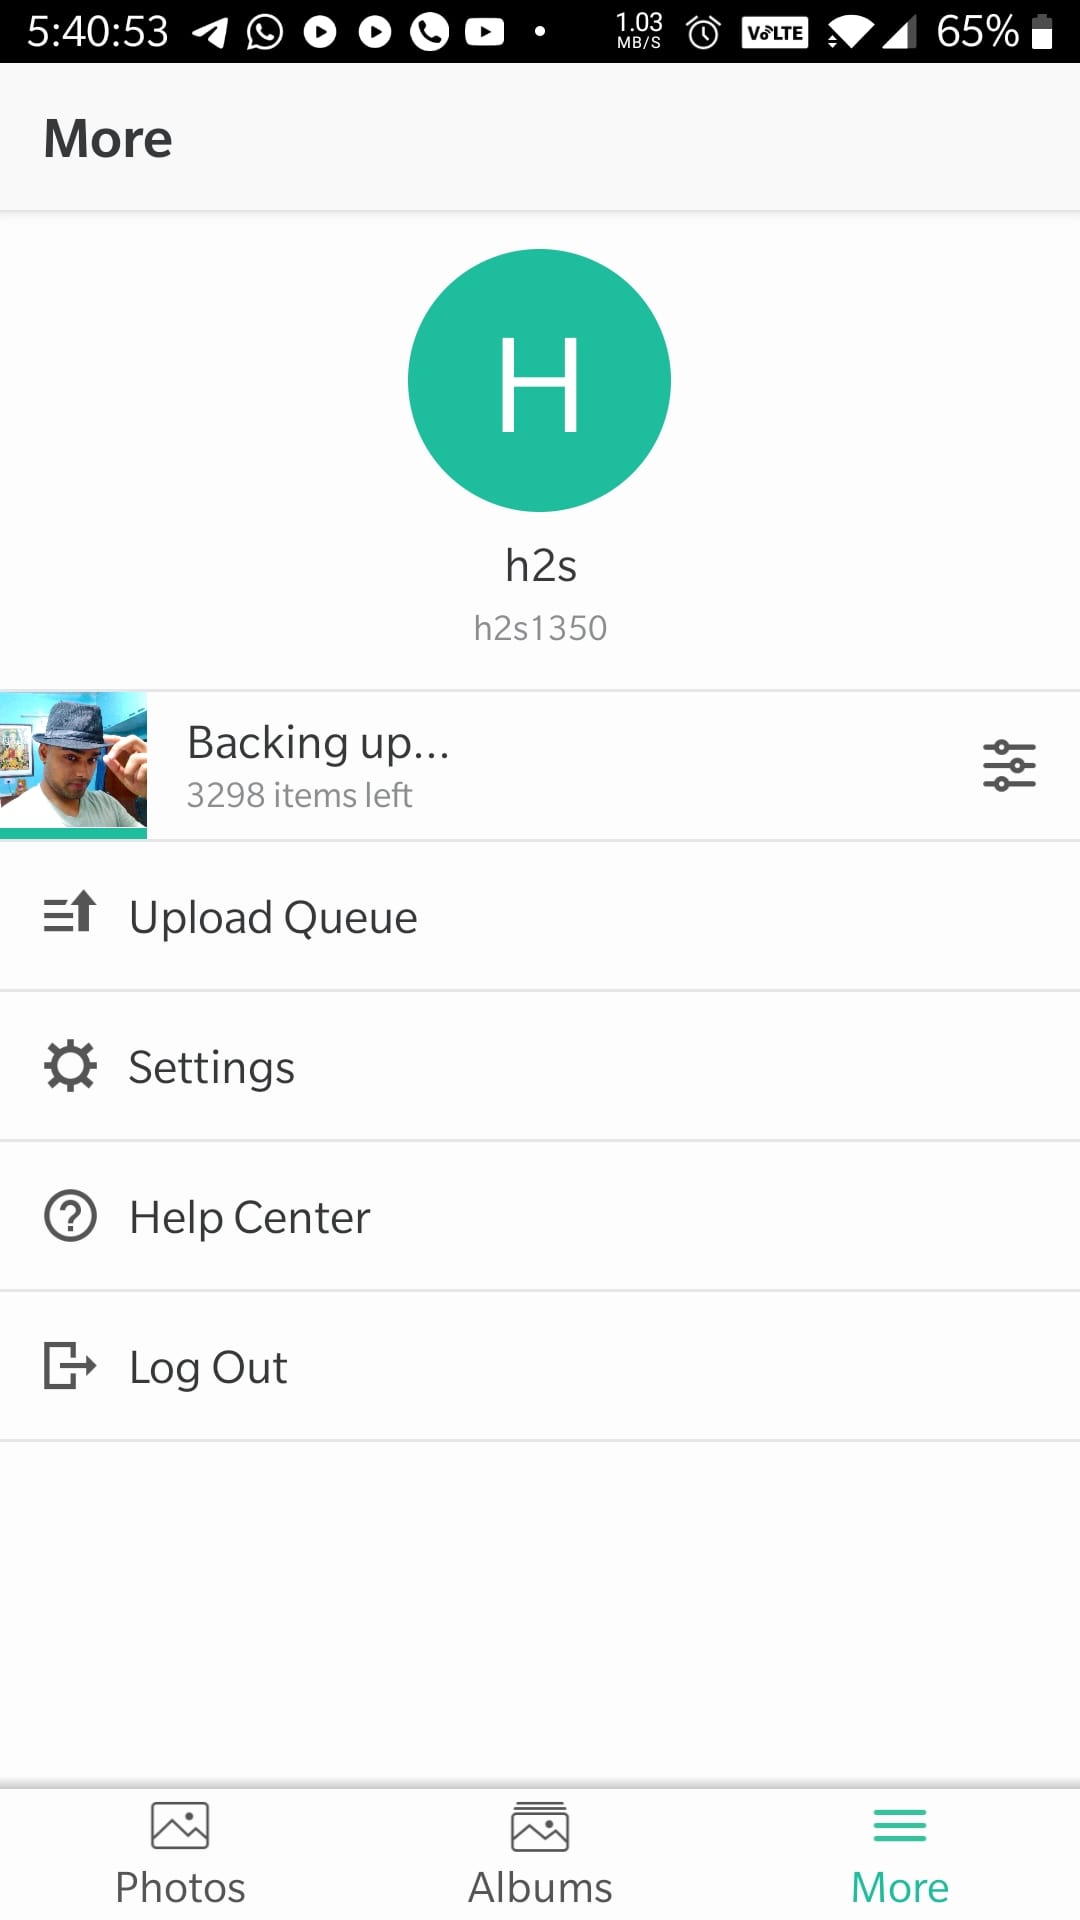
- Select Backup all Photos and if you want it to upload photos only while using Wifi network then select that and tap on “Enable Photo Backup”.
- Now, you can upload photos manually to the Moments app, if you want. Whereas, if you have selected Auto backup then it would have already started backing up all smartphone photos to the NAS box.
Synology DS120J NAS Performance and Data transfer
Synology DS120j NAS is powered by Marvell Armada A3720, 2x 800MHz CPU, and 512MB RAM. Well, the CPU is not some high-performance one and the same goes for the amount of memory it comes with. However, being a budget NAS, the user who is thinking to buy it, his/her requirements will also be basic – backing up data at one central point.
While our usage there was no lag in accessing Synology DS120J NAS’s interface and various apps & settings. However, as you start running various services in the background, creating files, and more, then you will definitely notice the CPU weakness. Furthermore, in an ideal condition, you will find around 40% of the CPU will be in a busy state and the same goes for RAM. Still, we have enough room to run all the needy applications and other things.
Usually, we bought NAS to back up our data and it should have more than one drive slot, why? Because of Data security. Being a one drive NAS, we cannot create Raid (mirroring multiple drives) on DS120j thus, if your HDD/SSD gets failed due to any reason your all data will be gone although the chances for that are less, and also remember to get multiple slot NAS you have to shell out more bucks.
However, to ensure data security, we can use external HDDs to automatically place backups of NAS including configuration, etc. We can also schedule backup hourly, daily, weekly…
The Data transfer speed of Synology Ds120j is not some performance monster. In our test benchmark, we were able to achieve reading 105Mb/s and 57MB/s writing over local network Gbit LAN.
Whereas the users who want to use the Synology NAS as a private cloud can easily get 3 to 4MB/s uploading speed depending upon the internet connection. Thus, we can easily use the use of the NAS to backup and sync photos, videos, and other files remotely to NAS. I would not say it can replace public cloud storage completely because they have their own benefits and features. But if you are worried about your privacy and also see it price-wise the Synology DS120j NAS which is available at the price of ₹ 9,999 is cheaper than Google’s 2Tb plan that would cost you around ₹6500/ year, because NAS is a one-time investment.
Who should buy Synology DiskStation DS120j?
People who are looking for Entry level NAS hardware and rich software (home & small offices) that can easily turn into private cloud storage to replace some popular apps such as Google Photo, Dropbox, Evernote; without burning a hole in their pocket but at the same time ready to go for low computing power and average read/write speed, they can happily purchase DS120j. However, a wide range of features on the Synology DSM will always let you churn out every single penny you have invested in it.
Pros
- Low price
- Compact housing
- Fast Setup
- User-friendly operations
- Lightweight
- Lots of Apps to use NAS as an optimum private storage cloud
Cons
- Only 1-Bay thus no Raid is possible
- Multitasking hurdles
Synology DS120j Review rating ₹ 9,999
-
Setup - 9/109/10
-
Features - 9/109/10
-
Performance - 7.9/107.9/10
-
Value for money - 9/109/10
Summary
For people who are looking for Entry level NAS hardware & Software (home & small offices) that can easily turn into a private cloud, Synology DS120J is for them.

Related Posts
11 Best Free and Open source NAS or SAN software
Synology DS120j NAS Review- Your Private Cloud in budget
Synology DS720+ Review: SSD Cache enabled NAS Box for Home and SMBs
NAS vs. Cloud Storage- Which one to opt and when is what useful?
How to connect & access Asustor NAS Drives on computer
4 Best Open Source NAS Software for DIY server in 2021