We already have done the detailed review of the Synology DS318j NAS Box and in case you to know about that then you can refer to our article: Synology DiskStation DS218j NAS Box Review. However, if you just looking for a guide to set up and install the Synology NAS box drive and DSM operating system then here is the guide:
First of all, you need to set up the drive in the NAS box.
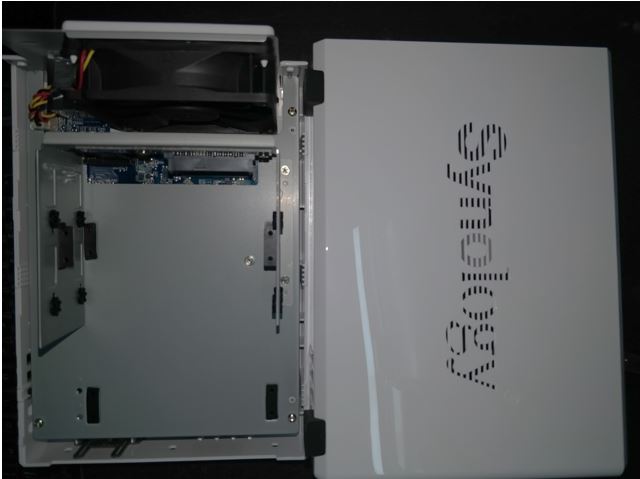
- Put the NAS front facing towards you.
- Hold the NAS from the left and right side to hand it between your palm.
- Push the right one backward and left one forward.
- The NAS housing will slide and divided into two part.
- The right side contains the drive bay while the left side is just for covering it. See in the below image:
- A drive bay can hold two disk drives, on both side of it, and you will find the hole to insert the screws to firmly attach the drives.

- Inside the bay, you will see two connectors to connect the 3.5′ SATA hard drives. However, you can also use the 2.5′ drives but for that, you need to buy a 2.5 inch to 3.5-inch bracket.
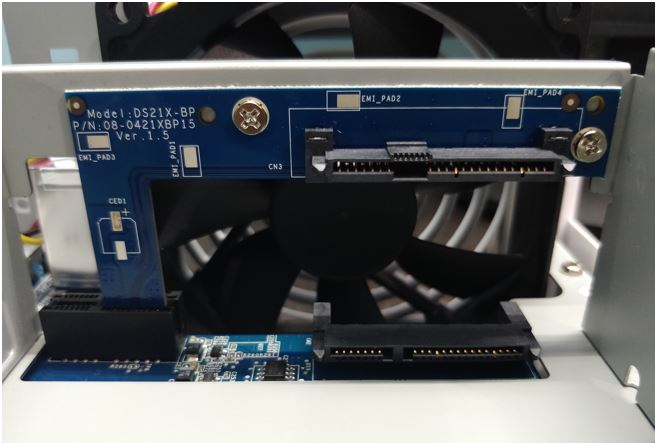
- The drive bay is divided into two sections- upper and lower. If you have two hard disks then attach the one in the lower bay and the other in the upper.
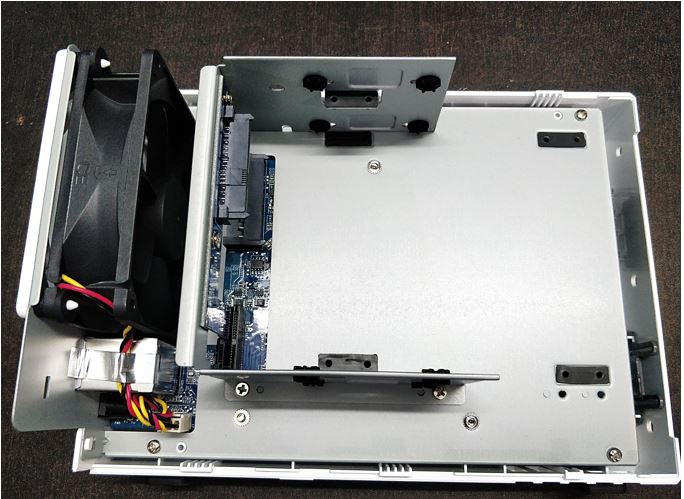
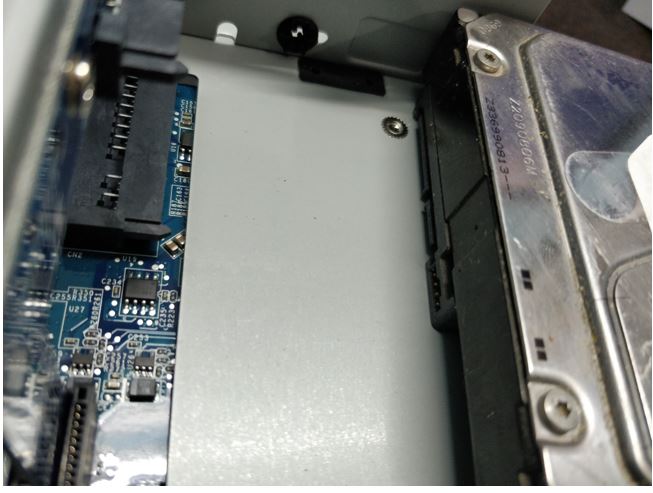
- To set up the drive, you just need to put the drive into the bay and slide towards the SATA port. When it is successfully attached; make it tight, using the screws that come along with the NAS.
- After inserting the drive, close the opened lid of the NAS box and insert the RJ45 cable at the back in the Ethernet port that comes along with the Synology DS218j box.

- Now attach the other end of the LAN cable to your router.
- Note: If you don’t have a router and want to directly connect the Synology NAS to Computer then here is the tutorial on that: How to connect Synology NAS directly to pc without router & external DHCP

- Note: If you don’t have a router and want to directly connect the Synology NAS to Computer then here is the tutorial on that: How to connect Synology NAS directly to pc without router & external DHCP
- Give the power supply to the NAS using its AC power adapter.

- Switch on the Synology DS218j NAS box and you will get a beep after some time which indicates that the NAS is booted successfully and ready to use.
- Now open your browser and type: find.synology.com or diskstation:5000 to find the Synology NAS on your local network.
- After performing the above step, if you are still unable to find the Synology NAS then download the Synology Assistant using this link.
- After installing the Synology Assistant, it will automatically find the attached NAS box by Synology. It will also show the IP address bound with your NAS via the router.

- Now Double click on the IP address given on the Synology Assistant or type it manually in the browser with port 5000. For example, in the above screenshot, our NAS IP is 192.168.1.101 and when we type it in the browser it should be like this: 192.168.1.101:5000
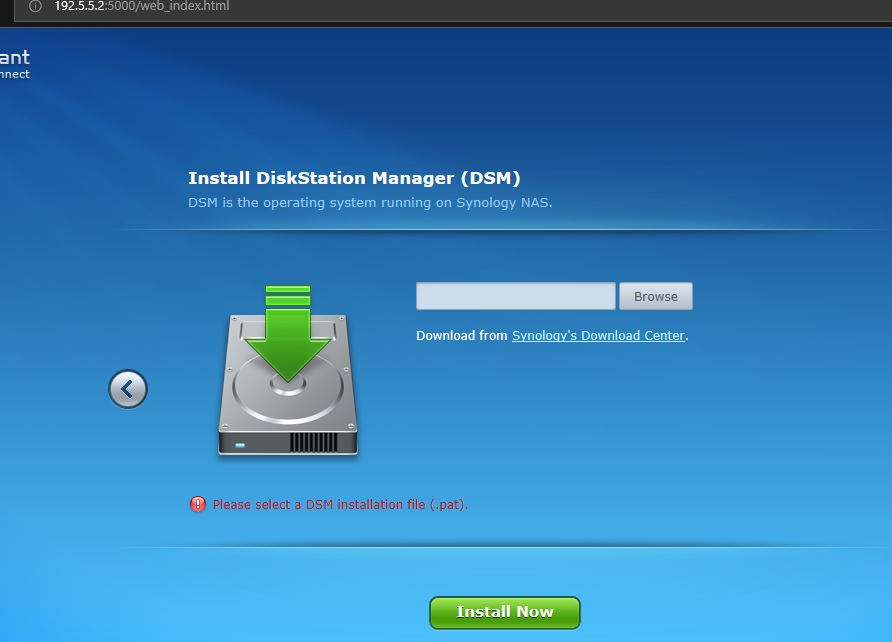
- Once the Web interface of the NAS opened its time to set up the Synology DS218j. Click on the setup button.

- Your newly bought NAS is without DSM OS and you need to download it. Click on the Synology’s Download center link given on the screen and download the DSM operating system file DS218j PAT.
- After downloading, click on the browse icon and select the downloaded DSM PAT file. Now click on the Install now button. Make sure that the attached drives to NAS are empty otherwise this process will remove all the files and folders stored within the drive.
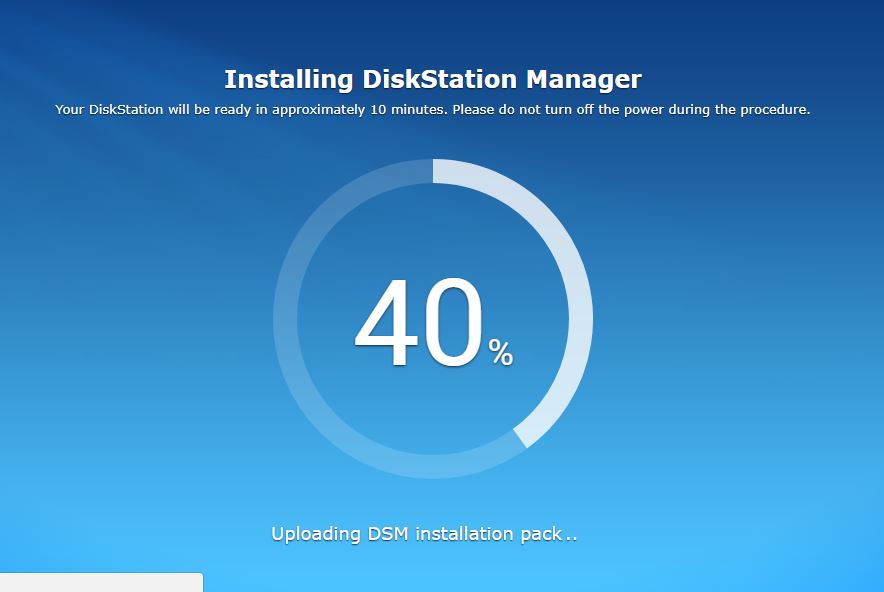
- The NAS starts installing the Diskstation Manager and approximately takes 10 minutes.

- Once the installation of the DSM operating and setup of the disk is done, you will get a screen to create an administrator account for the NAS box. Type some name which you want to assign to your Synology NAS server including a password to protect it.

- You can skip this step and can configure it later. However, you can do it right away, if you don’t want to perform port forwarding tasks in your router which is a bit techie process. So, better keep away from the port forwarding task as Synology offers a Quickconnect feature that allows you to remotely connect the NAS box that resides in your home or office connected to an Internet. Just create a Quickconnect ID with Synology account and click on the Next button.

- Agree with terms and conditions; Click on the Next button. Just follow the guide screen and you will get to the main screen for NAS management.
Related Posts
11 Best Free and Open source NAS or SAN software
Synology DS120j NAS Review- Your Private Cloud in budget
Synology DS720+ Review: SSD Cache enabled NAS Box for Home and SMBs
NAS vs. Cloud Storage- Which one to opt and when is what useful?
How to connect & access Asustor NAS Drives on computer
4 Best Open Source NAS Software for DIY server in 2021