Arch Linux is another Linux distribution that is free and open-source based on the x86-64 architecture. It is a highly customizable Linux distro which comes with a minimal base system for installation to allow users to install their favourite desktop environment and perform customization. Arch Linux is based on KISS principle design means Keep It Simple and Stupid. Also, because of lightweight, it can be installed on older and low configuration systems.
It uses the Pacman package manager to install various software packages. Arch Linux provides documentation in the form of a community wiki called ArchWiki, which is often up-to-date with specific topics and is widely recognized by the Linux community. If you want to learn Linux from scratch, Arch Linux is one of the best options.
So, if you want to try it without compromising your existing Windows 10/8/7 or Linux system then VirtualBox or Vmware workstation player are few of the best options to try Arch Linux virtually. Here we will show you how to download and install Arch Linux on VirtualBox which would not be much different than installing it on real PC.
Minimum Hardware Requirements to install Arch Linux on the Real system:
- 64-bit support CPU
- 512 MB of RAM minimum, however, 2GB is recommended
- Hard disk space is required minimum 1GB but 20 GB is recommended
- Internet connection (necessary)
Download and install Arch Linux on VirtualBox or PC
The steps of installing Arch Linux on VirtualBox will the same for Windows 10/8/7, Linux and macOS.
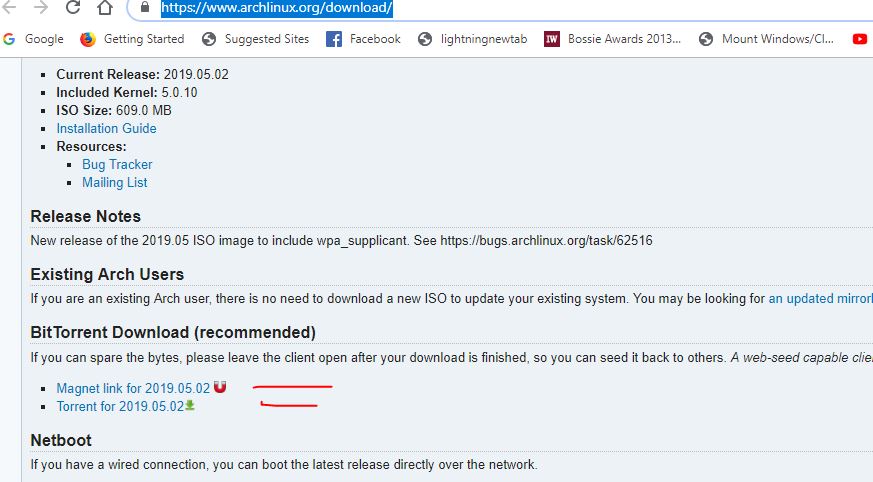
Step 1: Download Arch Linux ISO file
To install Arch Linux on Virtual box, the first thing we need is the ISO file. For that we have to visit the official website of Arch, here is the link. On the download page scroll down and either click on the torrent link or direct HTTP links, those are given here to download this Linux distro.
Note: For physical PC installation you have to create an Arch Linux bootable pen drive or CD drive after that move to Step 5 of this article.
Step 2: Install VirtualBox
If you already have the VirtualBox then skip this step otherwise go to www.virtualbox.org and download it according to your host system. For windows, it is very easy to install like any other application, however, for Debian based such as Ubuntu and Linux Mint you can simply type sudo apt-get install virtualbox, to know more about it see: how to install Virtualbox on Ubuntu.
Step 3: Create an Arch Linux Virtual machine
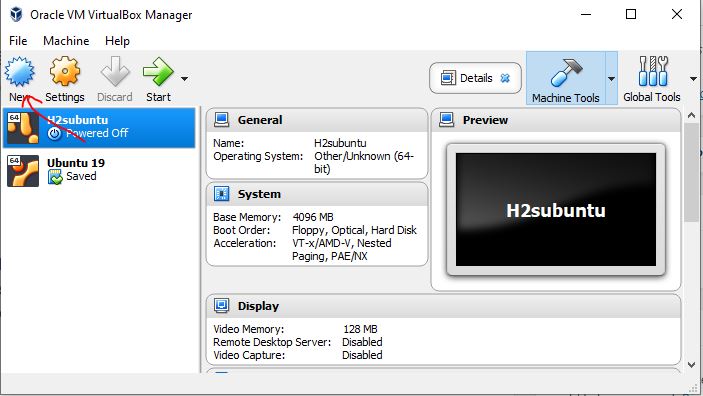
1. Open VirtualBox and Click on New button given in the Menu.

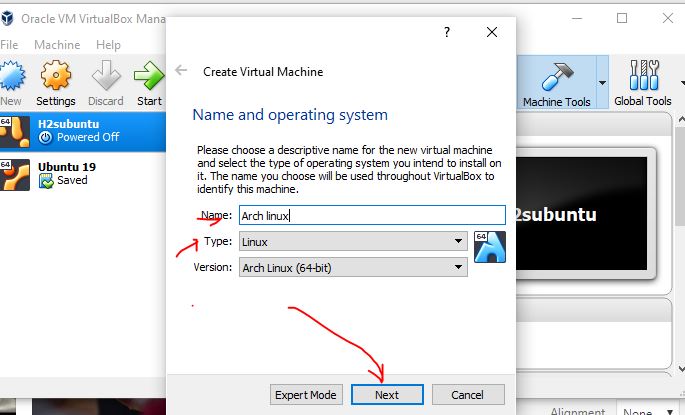
2. Name and Operating system
In the Name section, type Arch Linux and VirtualBox will automatically select Type and Version. Or else you have to do it manually.
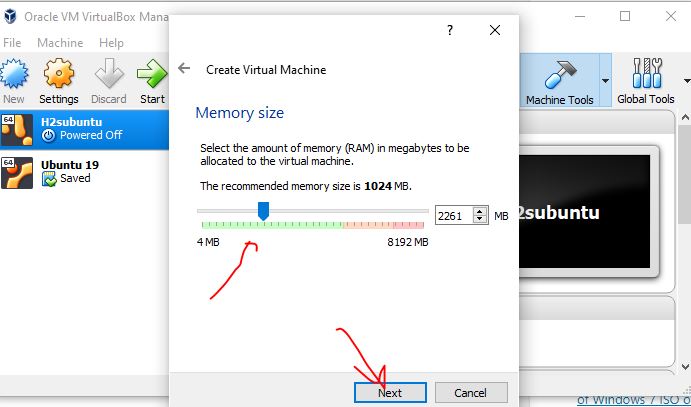
3. Assign RAM to Arch Linux
Now, use the slider to set amount of RAM you would like to assign it. The recommended is 2GB or more depending on what kind of applications you want to run on it and how much does your host can offer to it.
4. Create Virtual Hard disk to Arch Linux
Leave the default option “Create a Virtual Disk right now” and click on Create option. On the next screen, you will get three types of virtual disk options VDI, VHD and VMDK. You can choose any of them, however, by default it will be VDI, and you can leave it as it is and click on NEXT button.
Now, what kind of hard disk space allocation pattern you would like to have, here also you can leave the default option “Dynamic allocated” as it is and click on NEXT option.
File allocation and size.
The minimum storage space required by the Arch Linux to install minimal base is 1GB, however, if you are planning to install GUI Linux environment with other software packages then assign at least 10 GB. Here we are giving it 30GB. Finally, click on the Create button.

Step 4: Assign Arch Linux ISO file to VirtualBox
Now on your VirtualBox screen, you will see your newly created Arch Linux Virtual Machine on the left side panel. Select that and then click on the Settings button.
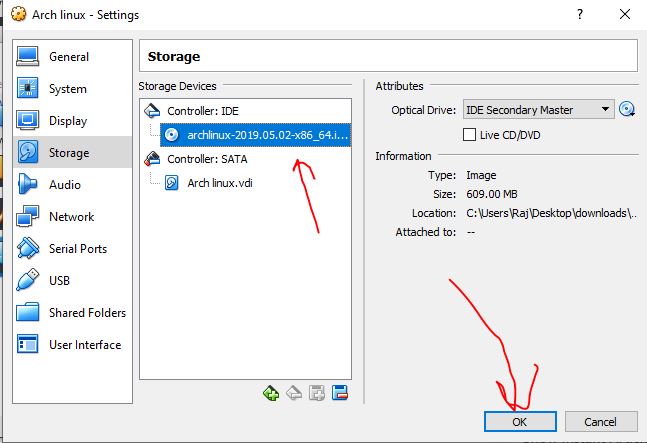
Under settings click on Storage. Then form Storage Devices select EMPTY CD icon and then from Attributes again select CD icon which will give you a pop-up option from where the thing which you have to select is “Choose Virtual Optical File…” option. And select the downloaded Arch Linux ISO image.

After selecting the Arch ISO image file it will show under the Storage device, now just click on the OK button.
Step 5: Boot Arch Linux on VirtualBox
Here we are doing Arch Linux legacy installation on VirtualBox, select your created Arch Linux VM and click on Start button given in the menu section. It will automatically show you the Arch Linux boot menu, select Boot Arch Linux (x86_64) and press Enter button.
Note: For PC installation simply boot it with your bootable Arch Linux USB or CD drive and then follow the below steps.

Step 6: Arch Linux partition tutorial on VirtualBox
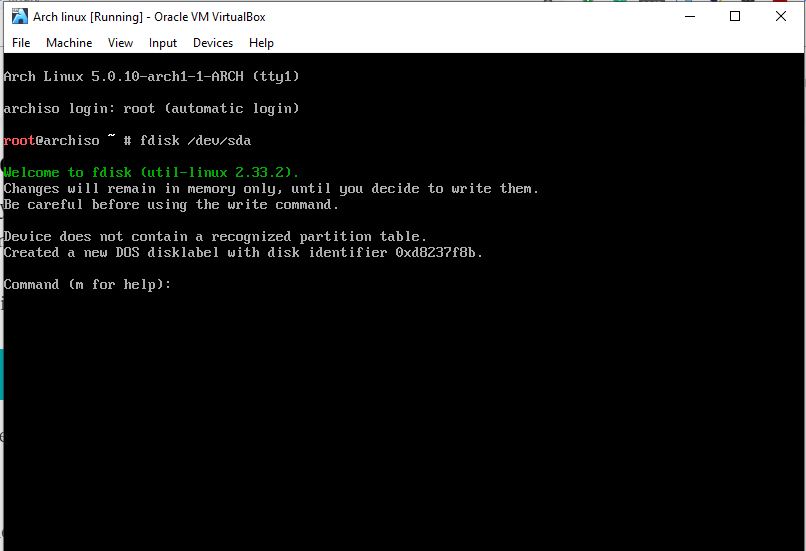
After booting Arch Linux you will get a screen with root access. Now what we need to do first is the creation of partition of the hard disk, so that we can install Arch Linux into it. We need three basic partitions for root, home and Swap.
So type:
fdisk /dev/sda
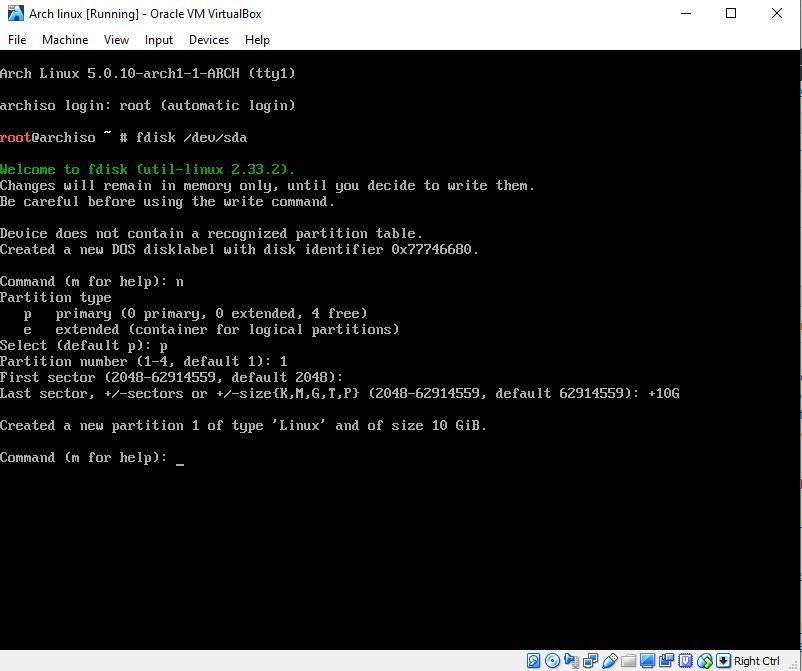
Type ‘n‘ for creating a new partition and then ‘p‘ for primary partitions. Press Enter button and for the first sector again press Enter key and then define the amount of size you want to give your first partition using + sign followed by the amount along with size in K, M, G, T, P ( Kilobyte, Megabyte, Gigabyte, Terabyte and petabyte).
For example, here we have total 30GB of hard disk for Arch Linux and we are going to create three partitions. The first partition is of 10GB, so for that, we can define it with +10G.
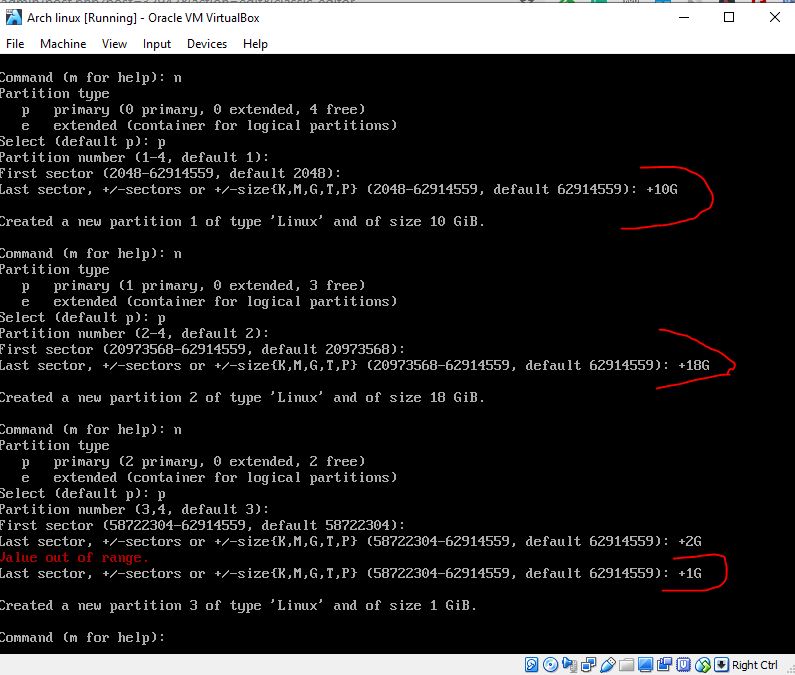
Repeat the same steps we used above to create other partitions; press‘n‘ and then ‘p‘ after that two times Enter key and the size of partitions. So, we have created two more partitions one is of 18GB for home and 1GB for Swap. We have only 30GB of the hard drive that’s why we have created the main partitions of 10 and 18 GB, you can add more size if you have storage space.
Important: After creating all partitions type w to write the partitions to the hard disk.
See all partitions created on Arch Linux
So, after creating partitions its time to see them for that type:
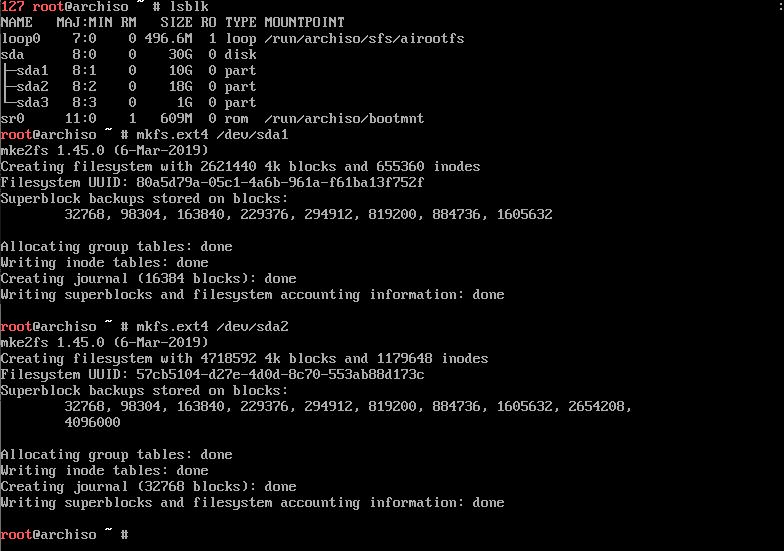
lsblk
You can see in the below image that we have three partitions named sda1,sda2,sda3, let’s see in the next step how to format and mount them for installation purpose of Arch Linux.

Step 7: Format Arch Linux partitions
First, we format our regular two partitions one is for root and other for the home directory: sda1 and sda2.
mkfs.ext4 /dev/sda1
mkfs.ext4 /dev/sda2
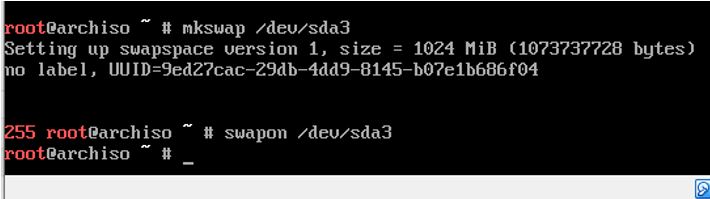
After formatting and creating the above two partitions, let’s create a SWAP one. The minimum swap space needed is 512M and for better performance more, that’s why we have given 1 GB.
mkswap /dev/sda3
swapon /dev/sda3
Now, mount the sda1 for root and sda2 for the home directory. For that use the below commands
Mount root partition to /mnt:
mount /dev/sda1 /mnt
Create Home Directory and mount sda2 for it.
mkdir /mnt/home
mount /dev/sda2 /mnt/home
Step 8: Start the Arch Linux Installation
In this step, we use pacstrap script (Arch Linux install-script) to install the base package group. The base package along with base-devel (x86_64) contains all packages that necessary to set up and make Arch Linux work. It contains tools which we need after that installation such as Bash shell, compression tools, system utilities, Linux kernel m text editor, USB device, system and service manager, C library and more.
So run the following command to begin the installation process:
pacstrap /mnt base base-devel linux linux-firmware nano
Note: Make sure you have internet connection in working condition for VirtualBox or Physical system where you are installing the Arch Linux.
Step 9: Configure the system- Fstab
Generate a fstab file which is the configuration file for a system which holds all the crucial information that is necessary to make the system to automatically mount all partitions. Otherwise, we have to do it manually. This file commonly found at /etc/fstab on Unix and Unix-like computer systems.
genfstab -U /mnt >> /mnt/etc/fstab
Step 10: Check chroot is working fine or not
A chroot is an operation that changes the apparent root directory for the current running process and their children. In such environment running applications can access the cannot access files and commands outside that environmental directory tree. This modified environment is called a chroot jail.
arch-chroot /mnt

exit
Step 11: Configure Time-Zone on Arch Linux
Now we set the time zone of our Arch Linux:
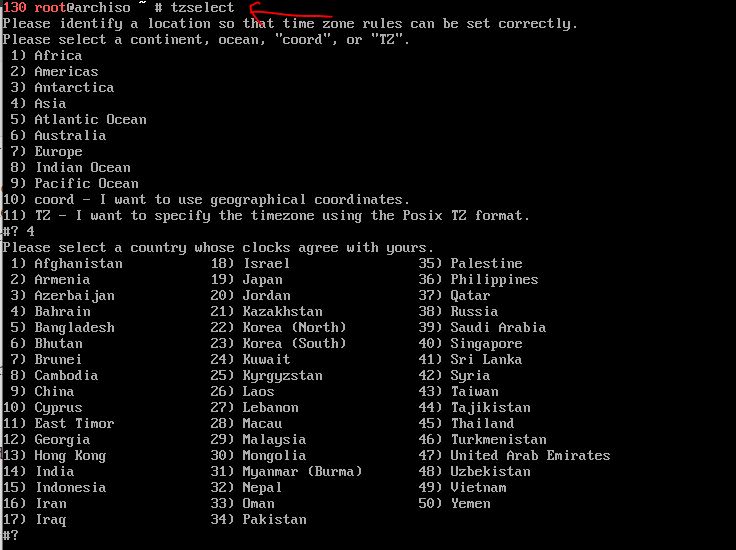
Type below command and follow the interactive method to configure time according to your country on Arch.
tzselect
To check the current zone defined for the system use the below command:
timedatectl status
Optional step: You can also set the time zone manually using below commands:
timedatectl list-timezones
timedatectl set-timezone Zone/SubZone
For example: timedatectl set-timezone Asia/Kolkata
Run hwclock command to set the hardware clock
hwclock --systohc --utc
Step 12: Local settings and system language configuration of Arch Linux
Before setting up language and other localization settings for Arch Linux, we need to uncomment the language which we need from the file /etc/locale.gen. It contains all the languages supported by the Arch Linux.
Note: By default, US English – en_US.UTF-8 UTF 8 is already enabled for the system. So, in case you don’t want any other language, you can move to the next Step 13:.
To open the local.gen use the below command:
vi /etc/locale.gen
Use the arrow key to navigate the language list, when you find the one you want to select for your system uncomment or remove the hash given before that language name. After that save your selection to file by typing :qw and pressing enter button.

So, after uncommenting the language define that in locale.conf file using below command;
There are two methods of doing this one is using the editor and second by command, both are given below:
#1: Using editor
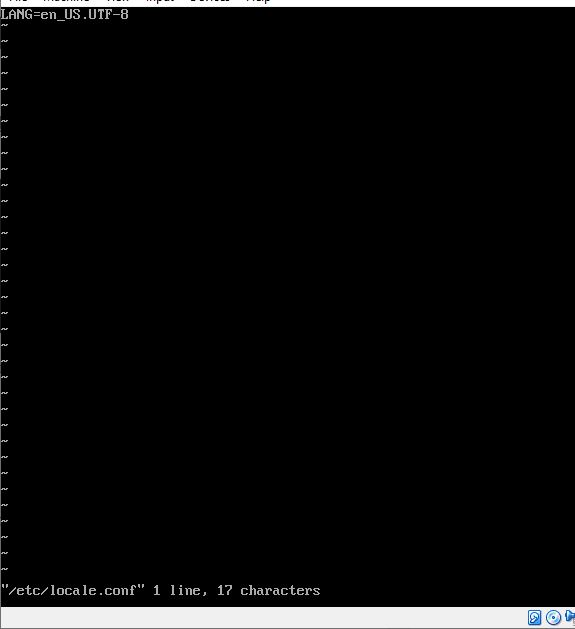
vi /etc/locale.conf
Type the Variable of that language in the format:
LANG=variable
Note: Change the variable with language variable that you have uncommented above.
After defining the language that you uncommented and type :qw for save and exit the file. You can see below screenshot for an idea.
#2: Using purely commands:
If you don’t want to use the editor to define language in locale.conf then you can use alternatively the below commands:
In this you don’t need to open editor, you can directly push your language to /etc/locale.conf
echo LANG =variable >/etc/locale.conf
export LANG= variable
For example, I want to push some language then simply note its variable that you uncommented and then use that with this command:
echo LANG=en_US.UTF-8 > /etc/locale.conf
export LANG=en_US.UTF-8
Step 13: Set hostname
Create the hostname file – /etc/hostname and add the name you want to assign to you Arch Linux host.
For that use the following command and replace the green colour text with your hostname
echo h2smedia > /etc/hostname
Now add following entries to your hosts file:
echo 127.0.1.1 h2smedia.localdomain h2smedia > /etc/hosts
Note: Replace h2smedia with your hostname, you set above.
Step 14: Configure the network
To see the network adapter interface type:
ip link
In our case, it is enp0s3 and could be different in yours.
Edit
vi /etc/systemd/network/enp0s3.network
Add the following lines:
[Match]
name=en*
[Network]
DHCP=yes
Restart your systemd network
systemctl restart systemd-networkd
systemctl enable systemd-networkd
Edit /etc/resolv.conf file.
vi /etc/resolv.conf
Add following nameserver or DNS entries:
nameserver 8.8.8.8
nameserver 8.8.4.4
To save and exit VIM editor, press Esc button and then type :wq and hit the Enter button.
Step 15: Set Grub bootloader for Arch Linux
Note: Users those are getting error “/usr/bin/grub-probe: error: failed to get canonical path of ‘airootfs‘.” Can also follow the below steps to install grub bootloader on Arch Linux.
Switch to chroot
Note: If you already in chroot then move to the next step of this step.
arch-chroot /mnt /bin/bash
Install the grub package inside the chroot.
pacman -S grub
Note: If the above command gives an error that Core, extra, community… packages for this are not installed then use the command:
pacman -Sy grub
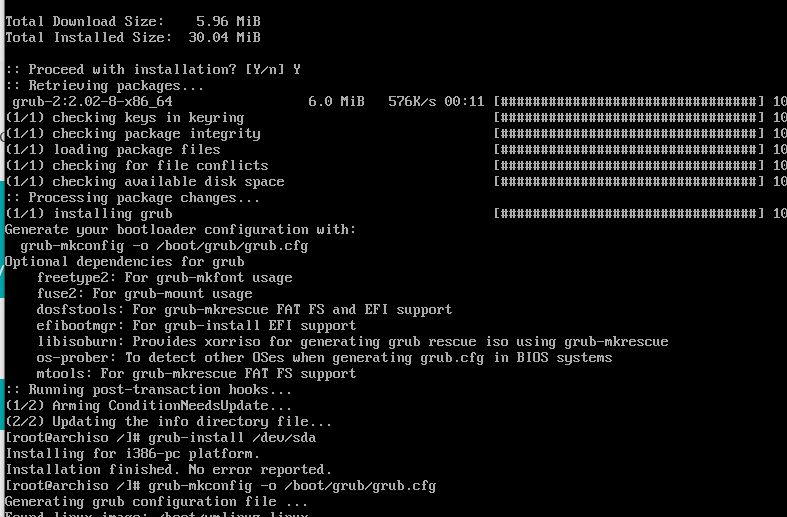
Now install the Grub
grub-install /dev/sda
grub-mkconfig -o /boot/grub/grub.cfg
exit
Step 16: Set Root password
Finally, secure your root user by adding a password to it.
passwd
Step 17: Finally Update your Arch Linux System
As Arch Linux developed by a very active community, so even after downloading the latest ISO file there are very many chances to have some new updates for the system. Thus, run the following Arch Linux system update command:
pacman -Syu
Now, if you are on VirtualBox then move to next otherwise simply reboot your system.
Step 18: Installing GNOME Linux Desktop environment
If you want to have Graphical user interface on Arch then follow this otherwise simply move to next.
pacman -Sy xorg xorg-server

pacman -Sy gnome gnome-extra

systemctl start gdm.service
systemctl enable gdm.service
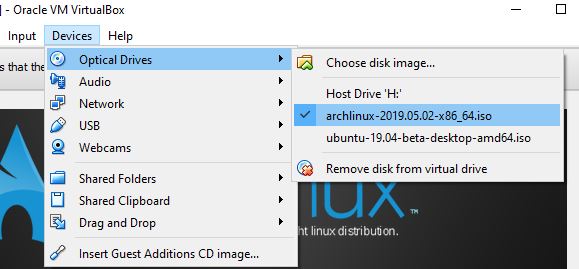
Step 19: Remove the Arch Linux ISO from VirtualBox
Now, before restarting our Virtualbox installed Arch Linux VM, we need to remove inserted ISO file of that. For that just click on the Devices option given in the menu of VirtualBox and then Optical Drives->Arch Linux ISO file. VirtualBox will give you a pop-up that asks you would like to forcefully unmount the ISO file, Yes, go for Force UnMount option.
Step 20: Reboot Arch Linux system
Finally, reboot your system, the command is:
reboot
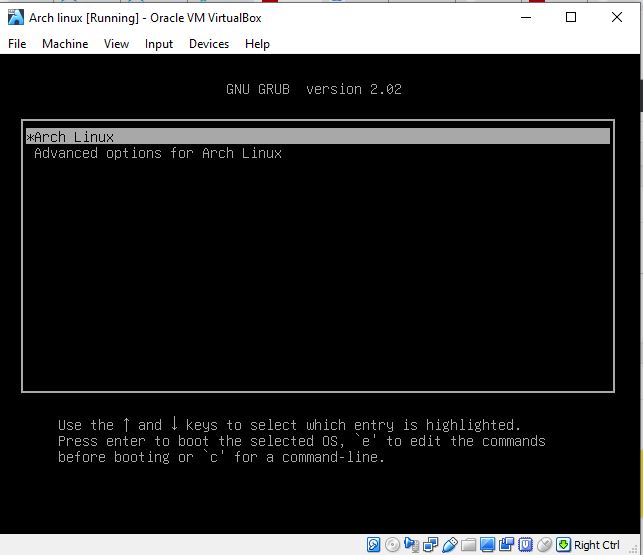
After rebooting the first boot screen of Arch Linux will appear like shown in the below screenshot. Select Arch Linux and login as root.
Other articles to see:
- How to get Windows Sandbox on Windows 10?
- Install Bliss os X86 on PC and VirtualBox
- 10 Best file managers for Linux to get an alternative option
- How To Install Ubuntu From a USB Stick on Windows 10 PC
- How to make VirtualBox virtual machine boot from USB?
Related Posts
How to install Winget package manager in Windows 2022 Server
How to View Listening Ports Using Netstat
How to Install Pygame Zero on Windows 11
Single Command to install Android studio on Windows 11 or 10
How to Install DoXygen in Windows 11 or 10
Google Rolls Out Android 14 Beta 4.1 to Fix Bugs for the Pixel Fold and Tablet