Just like Ubuntu and Linux Mint, CentOS is yet another popular distribution of Linux, which is quite popular in the Linux community out there. CentOS is forked from Red Hat Linux, which is an enterprise-friendly distribution of Linux, and you can even install CentOS on your computer if you are planning to switch to Linux. The programs on CentOS don’t get frequent updates, which is a great bet for users who prioritize stability over anything else. However, CentOS isn’t the best operating system for beginners, as there aren’t many online forums, as there is, for Ubuntu or other Debian-based distributions, where you can get assistance from a large community when you face some troubles.
Installation of CentOS isn’t that complicated either, and you can install CentOS on your computer, with or without the GUI, which can be useful for a good number of users, if not for all. Besides that, you can choose your own flavour of CentOS 7, which is the latest version of CentOS right now, as you can choose your preferred desktop environment at the time of downloading CentOS 7. If you haven’t used CentOS ever, I will recommend you give CentOS 7 a shot, on a virtual machine, before proceeding with the same on a dedicated computer.
Install CentOS 7 on PC
The process is going to be similar for both PC and Virtual installation and the only difference is, you will have to configure the virtual machine first if you are planning to install it on a VirtualBox, Hyper-v or VMWare Workstation. So, let’s get started with the downloading and installation of CentOS 7 on your computer.
See: How to Create CentOS 8 bootable Pen drive
Download CentOS 7
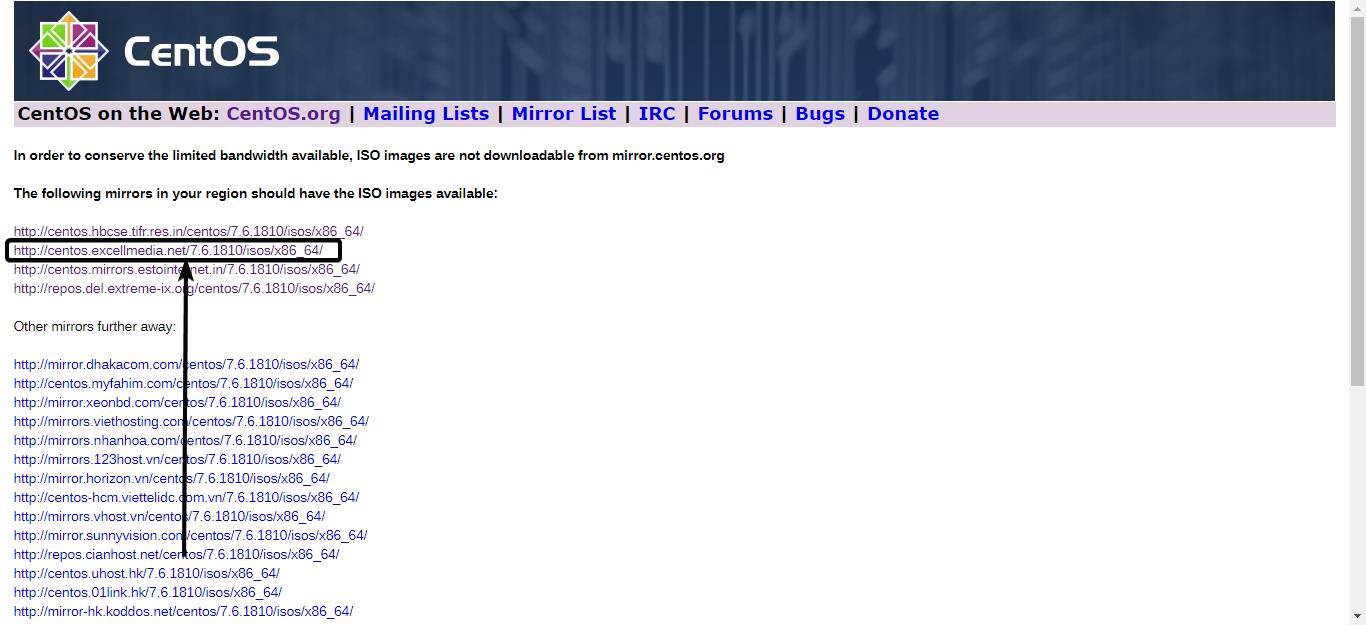
Open the following link, where a list of mirror servers for downloading CentOS will be shown. Just click on the appropriate mirror server depending upon, which one is nearest to your location.
The Excell Media mirror server is an Indian server, which, needless to say, is my nearest server.
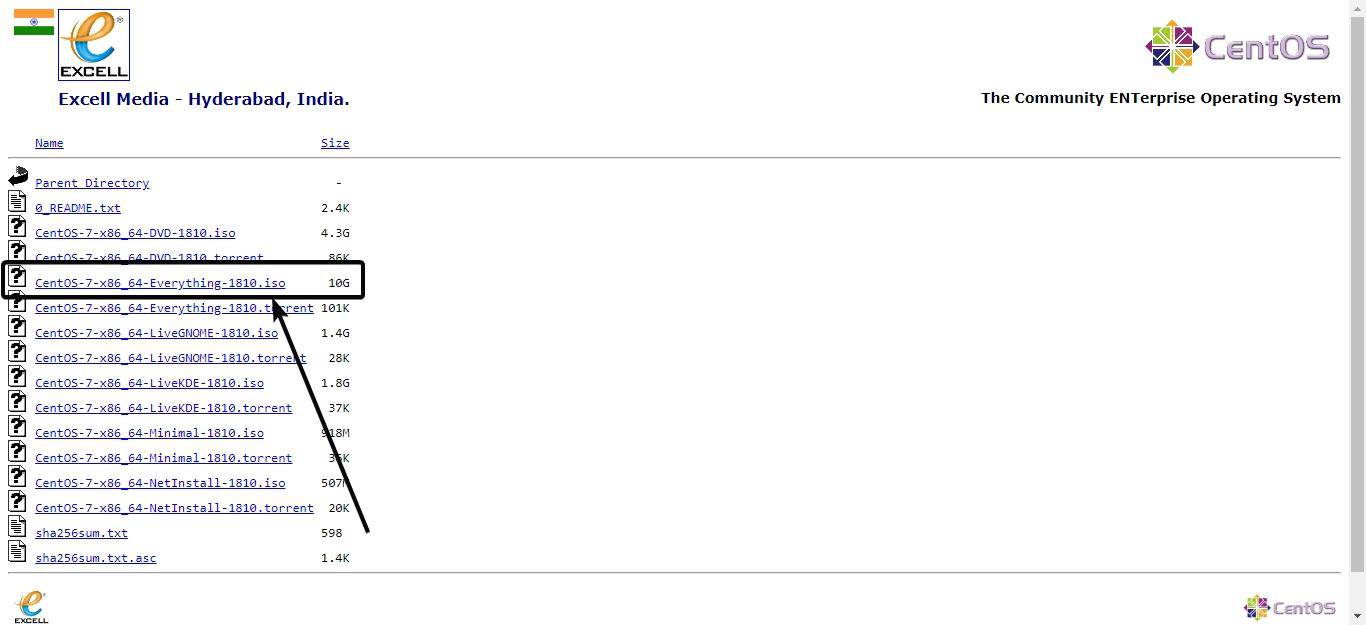
In whichever mirror server you choose, you can find the direct or torrent download link for CentOS with GNOME, KDE desktop environment, along with the minimal ISO and the net installer. You can even get the CentOS 7 with all the desktop environments. The size for each of the downloads is mentioned just beside the links, as shown in the screenshot below. Just choose the appropriate link depending upon which desktop environment, you are comfortable with.
Here I am choosing CentOS 7 Everything ISO file to download and install, which comes with all the supported desktop environments, along with a set of additional packages that you might find useful.
Create CentOS 7 bootable USB
After the download is complete, which might take several minutes, you can burn the same to a DVD, or create a bootable disc image with CentOS 7.
Installing CentOS 7
*If you are planning to install CentOS 7 on a virtual machine, I will recommend you to assign at least 20 GB of space, and 2 GB of RAM for it to run properly.
Insert the boot media containing CentOS 7 on your computer, and start booting from the same.
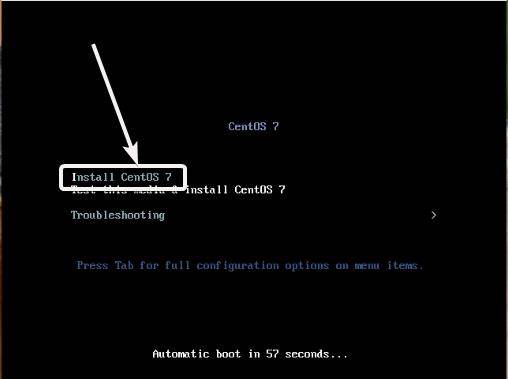
After your system boots up from the installation media, choose ‘Install CentOS 7’ from the boot menu, and hit the enter key.
Select installation language
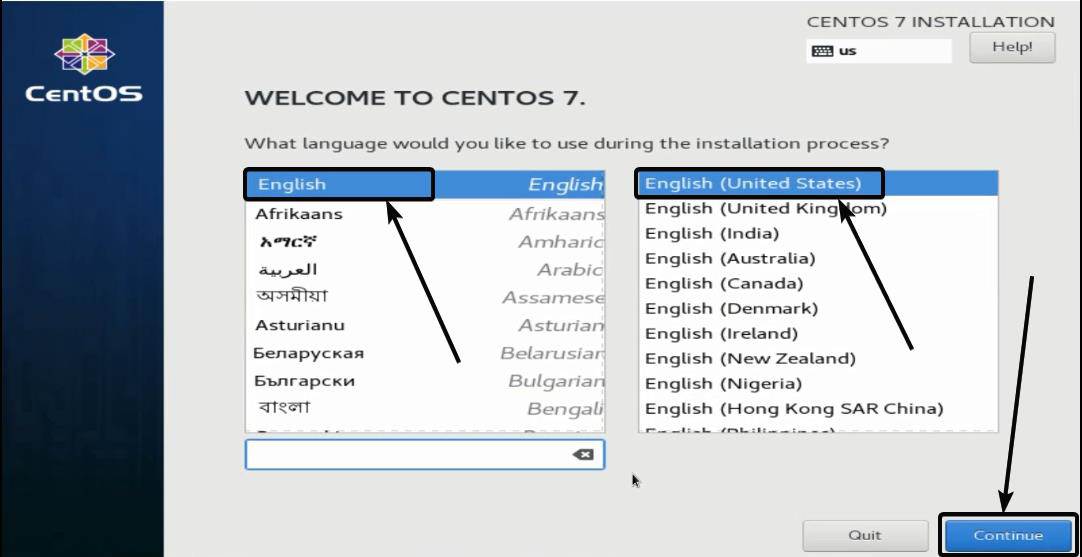
Let the installer complete the basic steps for the installation, and now you will have to choose the installation language. I am choosing English in the first menu, and the English US, in the second menu. After you choose the preferred language, click on ‘Continue’.
CentOS installation summary
Now an installation summary will be displayed to you. In the installation summary, some icons will be marked with an exclamation mark, which requires your attention.
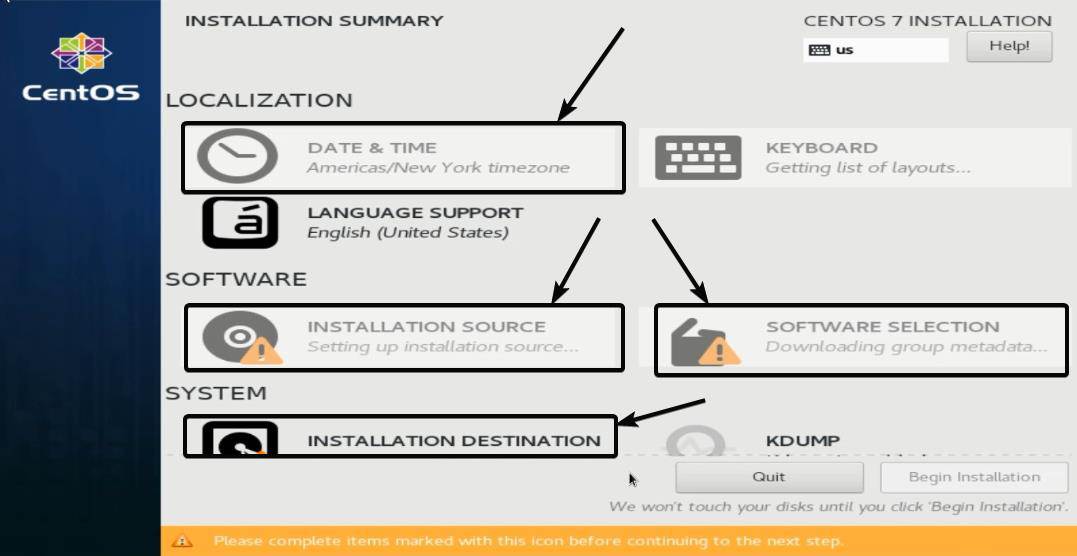
Besides that, you will have to choose the time zone, by clicking on ‘Date & Time’.
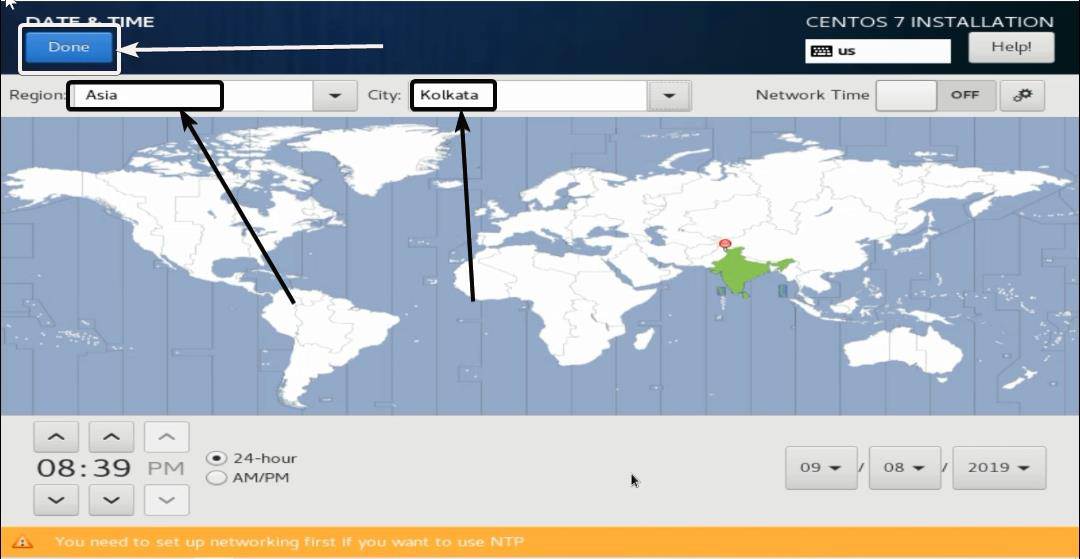
Set Region for Date and Time
In the region drop-down menu, choose ‘Asia’, and choose your preferred city, which is ‘Kolkata’ for my case. Finally, click on ‘Done’.
Installation Destination and configure partitioning
Now select ‘Installation Destination’ to choose the appropriate disk to start the installation, and manage partitions. I am choosing ‘Automatically configure partitioning.’ After that, click on ‘Done’.

Software Selection such as desktop environment
Next, you have to select the software and the desktop environment that you want to install. By default, the minimal installation will be carried out, which might not be the one that you are looking for. Just click on ‘Software Selection’ to start that.
As I have downloaded the CentOS 7 with everything in it, I have the GNOME, KDE, Server environment, and a number of other important tools. As I am quite comfortable with the GNOME desktop environment, I am choosing that. Besides that, you can even select or deselect the optional components for the GNOME desktop environment. Once you are done, click on ‘Done’.
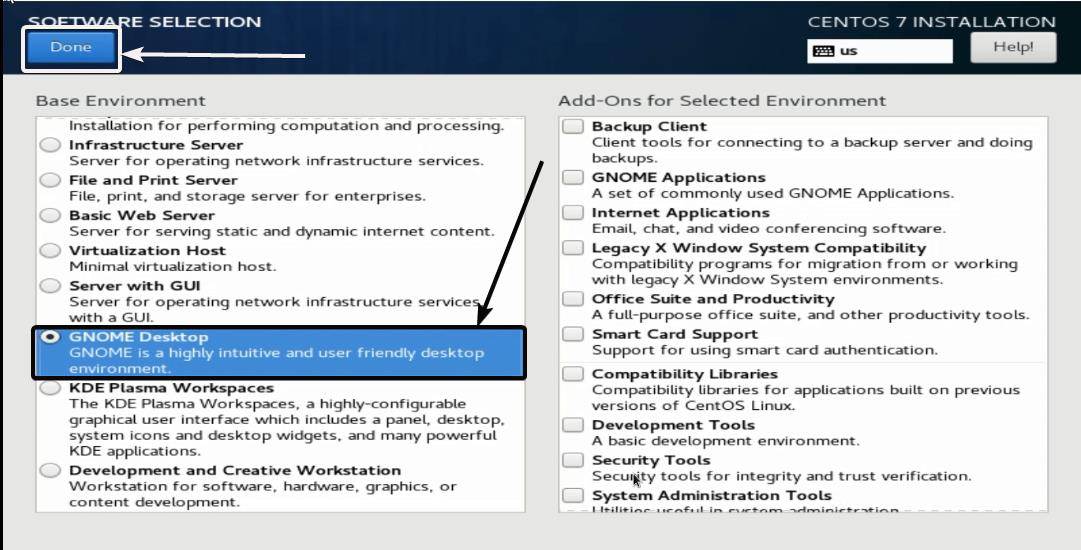
Unfortunately, LXDE, LXQT, which are two of lightweight desktop environments are not available for CentOS 7.
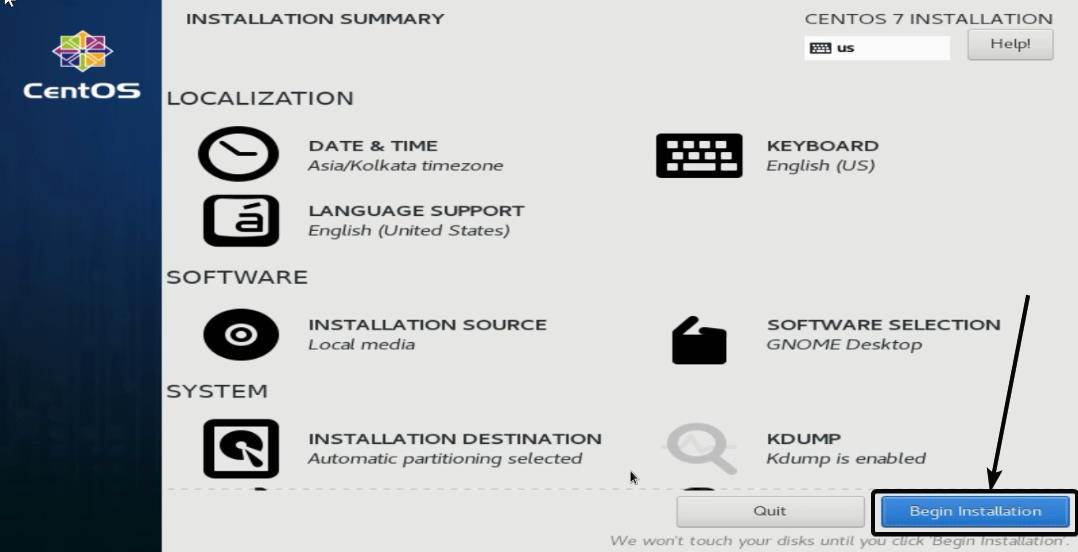
Start Installation process
Finally, click on ‘Begin Installation’, once you configure all the settings. Before starting the installation process, it isn’t necessary to configure the settings in the order I have mentioned here. You can configure the settings in a different order, as well.
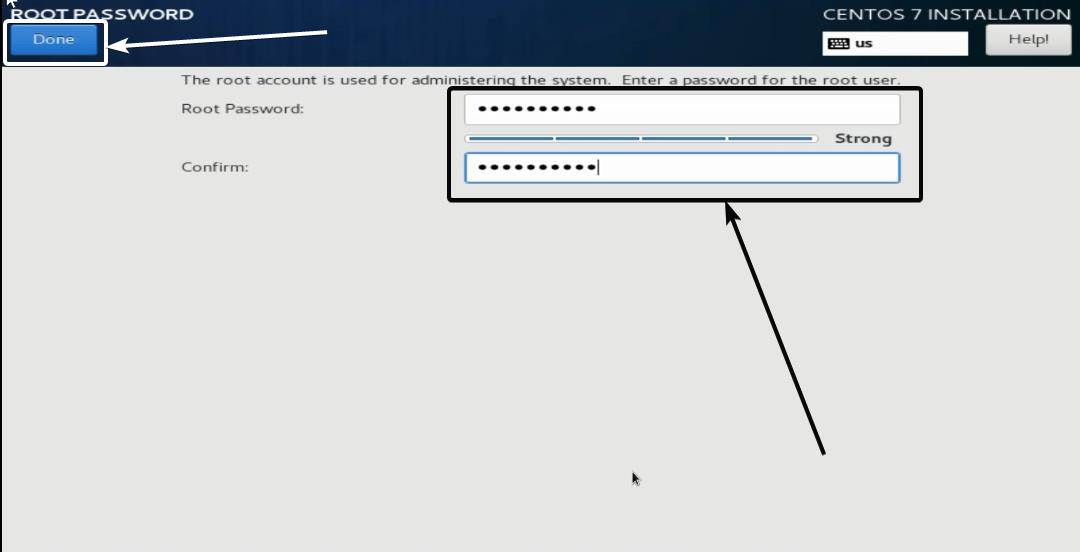
Root Password
After the installation starts, you can assign the root password, and create users.
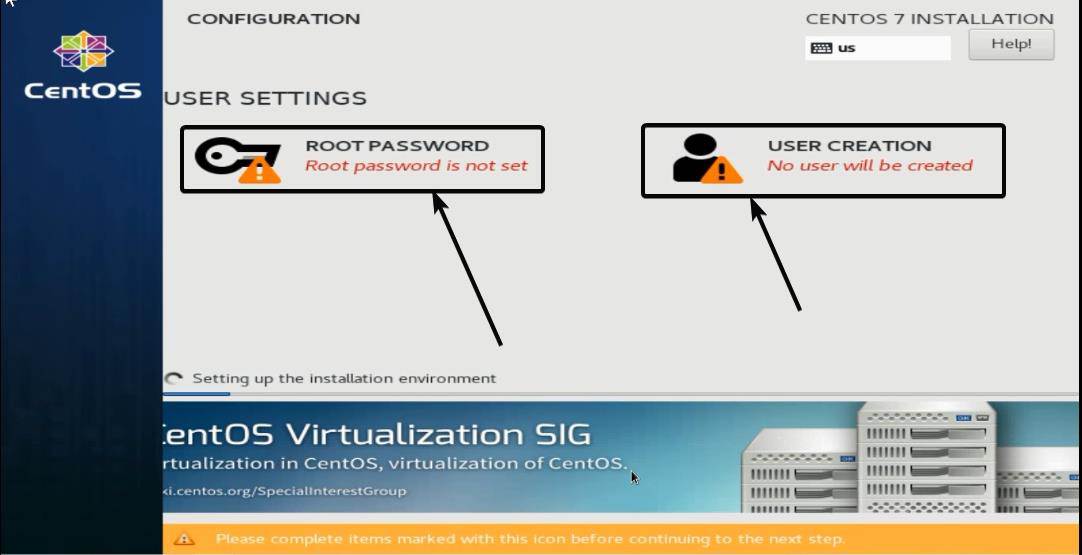
Just choose the root password, and finally click on ‘Done’.
Create a User for CentOS
Next, click on ‘User Creation’, to create a user, and assign a password. You can even make the user an administrator. If you choose to make the user an administrator, the user will be added to the ‘wheel’ group. Finally, click on ‘Done’.
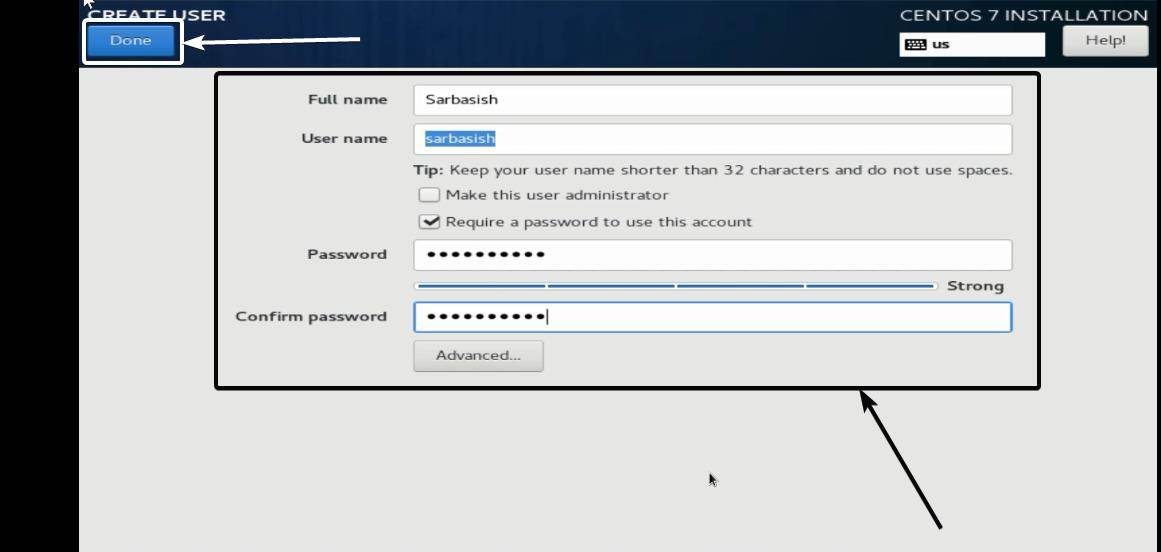
*While creating a password, make sure it has 8 characters, a special character, a letter in upper case and lower case, at least.
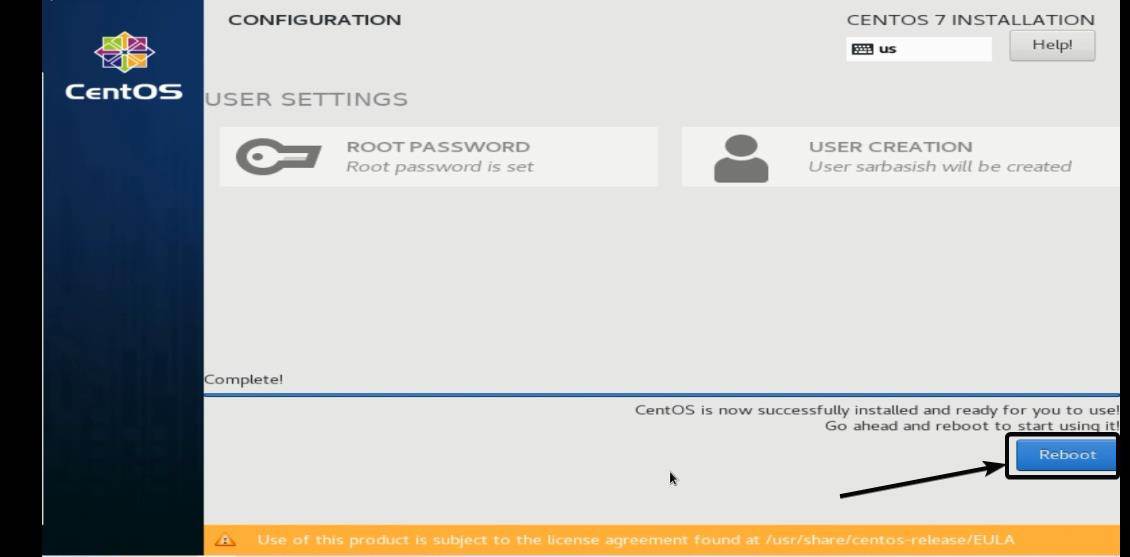
The installation will take several minutes, so better do some other work meanwhile.

Reboot CentOS installer
Once the installation is complete, click on ‘Reboot’.
Remove Installation media
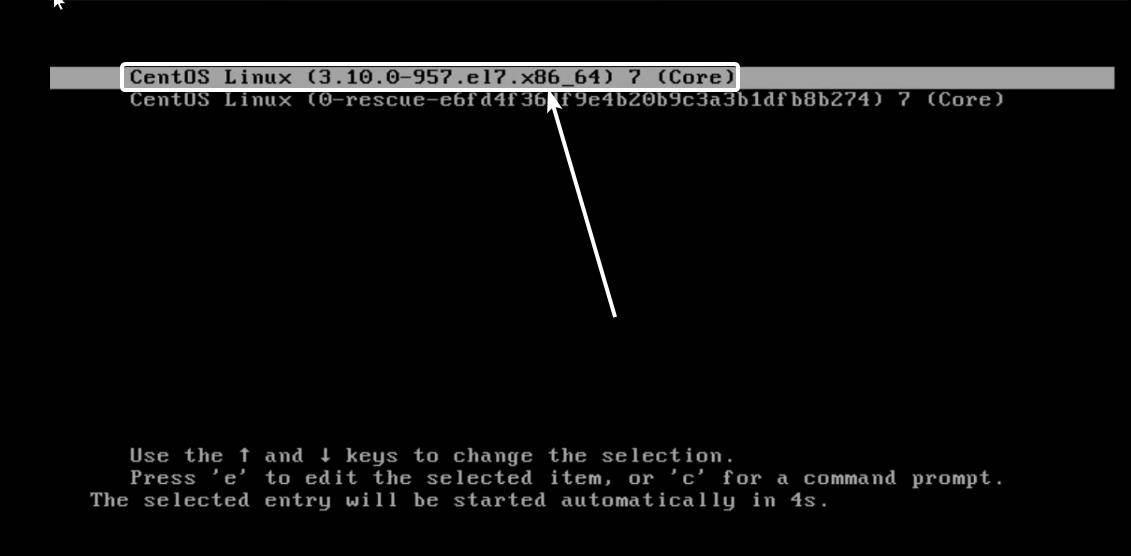
Now remove the installation media and after a while, the CentOS 7 boot menu will be displayed to you. Just choose CentOS Linux 7 Core and hit the enter key.
License Information
Now click on ‘License Information’, accept the license, and finally, click on ‘Done’.

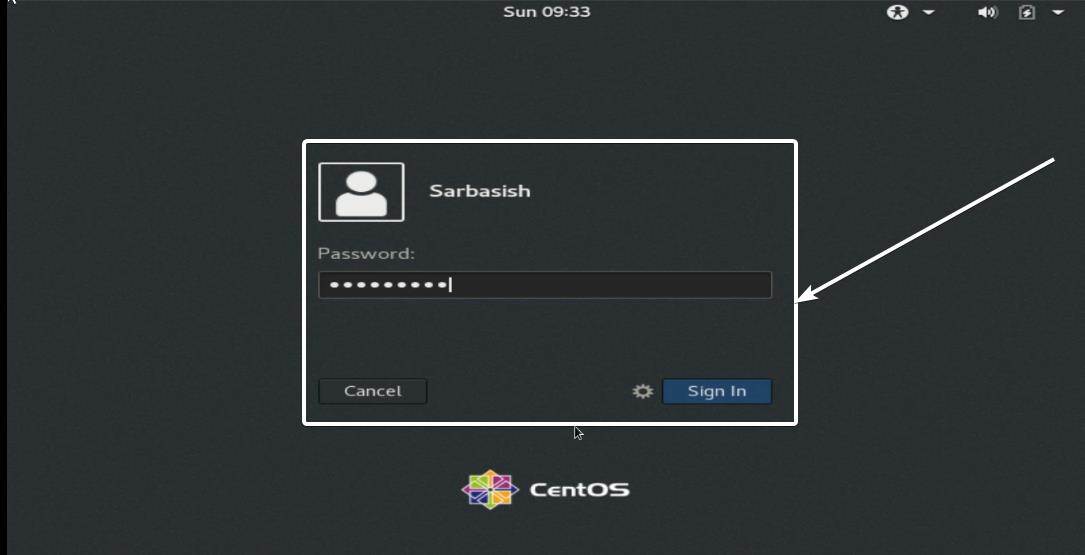
Login to CentOS
Now choose the user, and enter the password.
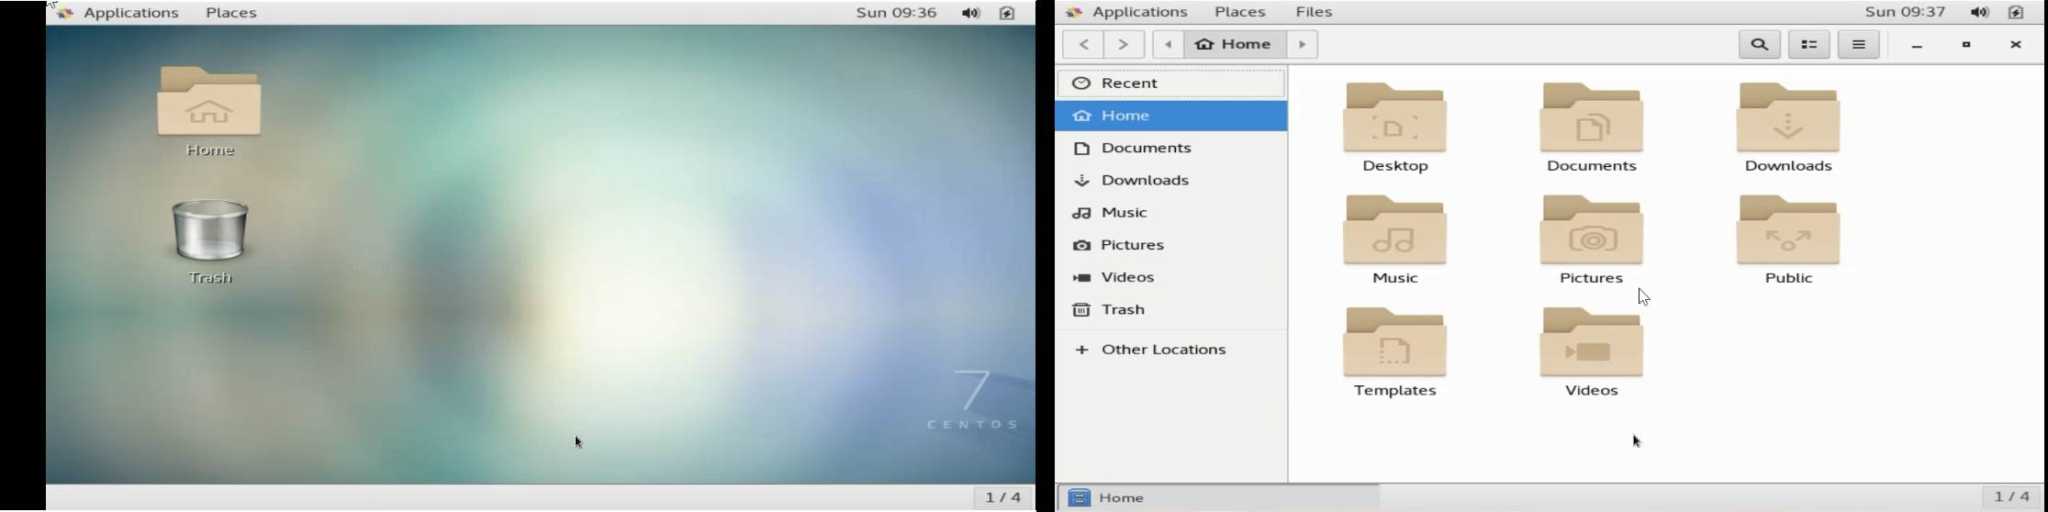
Now the CentOS desktop will open in front of you in its full glory.
Before you finally start using CentOS 7, a little more housekeeping. You will have to go through the initial setup of GNOME. Choose your language, which is English (US) for me, and then click ‘Next’ choose the input method, which is English (US), as well. Now click on ‘Next’, and you can either turn location services on or off. On the last page, you can set up your online accounts, as well, or simply click on ‘Skip’. After setting up everything, finally, click on ‘Start Using CentOS Linux’.

Everything is ready, and you can now start using CentOS 7.
The following version of CentOS 7 comes with great stability, and you can use it on your computer if you don’t want that update notification to bother you each time you turn on your computer. However, if you want to install the latest version of some program, and it isn’t available in the YUM repository, you have to install it manually from the developer’s website. But the bottom line is, CentOS 7 can be a reliable operating system that you can use on your PC.
That’s all about how you can install CentOS 7 on your computer. Do you have any questions? Feel free to comment on the same below.
Other Articles:
Related Posts
How to create email groups in Gmail? Send one email to multiple recipients in a matter of seconds.
Getting the right dashcam for your needs. All that you need to know
How to Install 7-Zip on Windows 11 or 10 with Single Command
How to Install ASK CLI on Windows 11 or 10
How do you install FlutterFire CLI on Windows 11 or 10?
How to create QR codes on Google Sheets for URLs or any other text elements