Puppy Linux is a lightweight open source and free operating system that can be booted from or installed on a USB drive/pen drive. And because of its lightweight, many people want to install the Puppy Linux on their old Laptop or PC but unfortunately, most of the OLD laptops’ CD drive did not work and in such situations, the USB port come handy to install the Puppy Linux.
Puppy Linux is designed to run even without hard disk using the removable devices such as DVDs and USB drives. This means in Live Environment.
Puppy Linux has a number of flavours few of them are Puppy Xenial, Slacko Puppy and Puppy Tahr Linux. Puppy Xenial and Tahr are Ubuntu based and support its repository too. So, if you want a lightweight OS with Ubuntu familiarity then Xenial and Tahr are there.
As I said, it is a lightweight Linux OS which means one can install Puppy Linux on a USB drive or even can use Live on laptops, netbooks, and computers those are without hard drives. Basically, it was designed to use in an only live environment where we don’t have the hard disk, however, still, if you want, you can install it on the hard drive too. The steps to install Puppy Linux on the hard drive will be same as the USB drive just instead of Pen drive select the Hard disk.
Puppy Linux minimum System Requirement:
- A 233MHZ processor or Pentium III processor or above.
- 128MB RAM (512 recommended for smoother operations)
- 512MB free hard drive space to create an optional save file. (recommended 1GB)
- If you want to test without a hard drive, the Live boot option is also available.
- CD-ROM or USB port for the installation.
Create Bootable Puppy Linux USB drive/Pen Drive
First of all, we create a bootable pen drive for Puppy Linux which can be used to run the Puppy in a Live environment or to install it on Physical hard disk or USB drive.
Step 1: Download Puppy Linux ISO
As mentioned above, the Puppy Linux has multiple variants, so download the one you would like to use. For the tutorial, we downloaded the latest 64-bit version of Puppy Xenial. Here is the Download page link.
Step 2: Get the Unetbootin Linux USB creator
Unetbootin is the free Linux bootable pen drive creator software available for Windows, Linux and MacOS. As Windows is the common platform, so we are downloading the Windows Unetbootin version. Here is the Link to download Unetbootin.
Step 3: Install Puppy Linux on USB
After downloading and installing the Unetbootin, run it on your Windows/Linux/MacOS which you are using to create a bootable Puppy Linux USB.
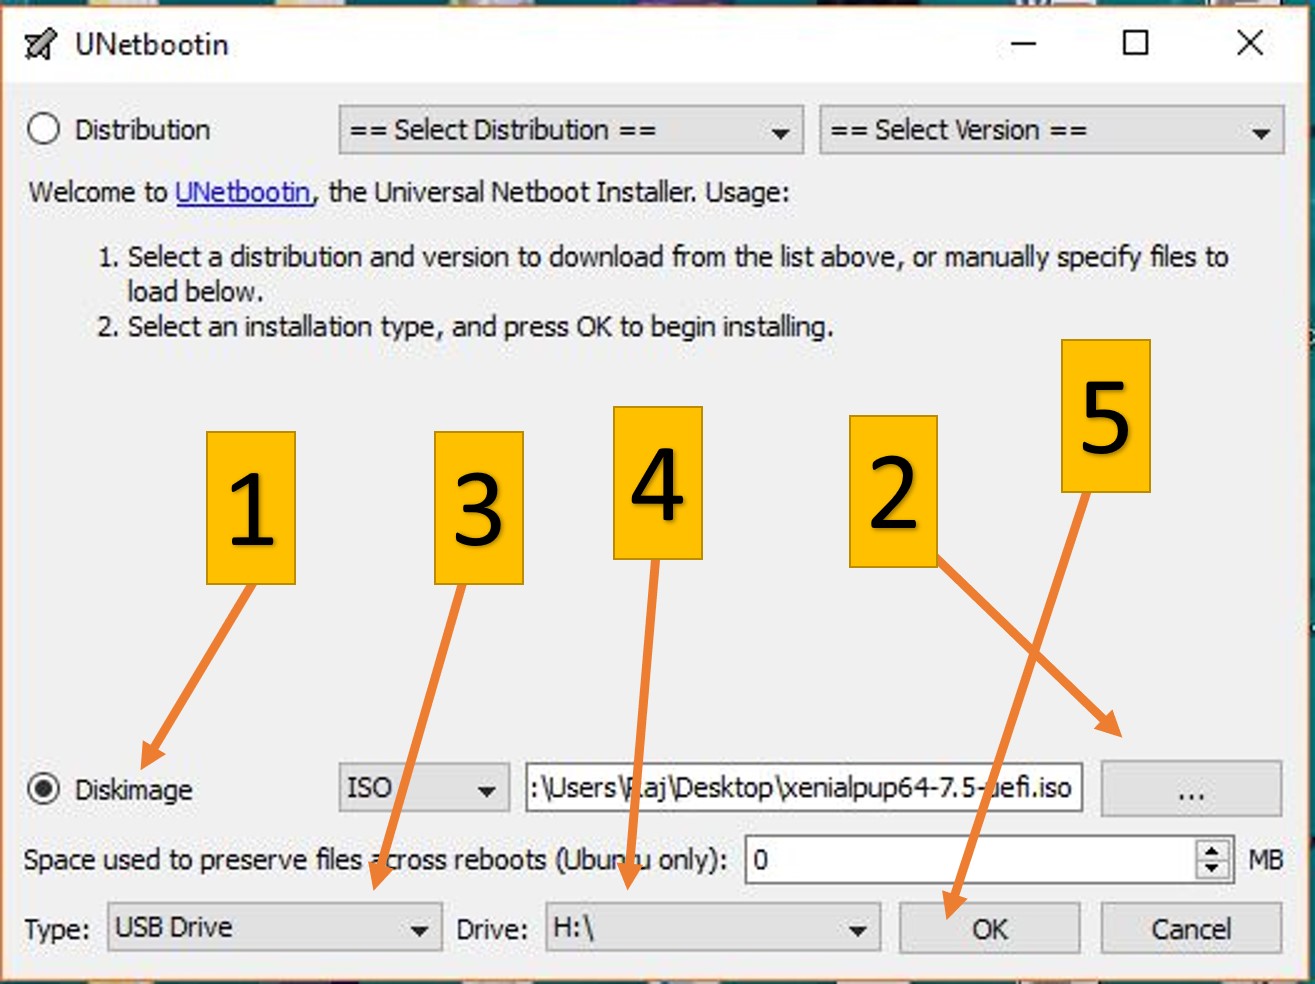
As you open the Unetbootin you get something like shown in the below screenshot:
- Select the Disk Image option.
- Browse the downloaded Puppy Linux ISO file image and select that.
- Select the USB drive option
- Now if you have multiple drives in your system then select the USB drive letter which you want to use to install Puppy Linux.
- Press the OK button to trigger the process of creating Puppy Linux bootable drive.
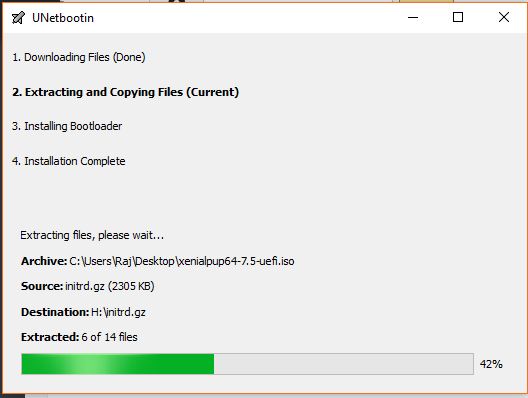
Step 4: Exit the Unetbootin
In few minutes this Linux USB creator software will make the Puppy Linux Pendrive and show an option EXIT. Click in that.
Step 5: Boot the System with bootable Puppy Linux pen drive
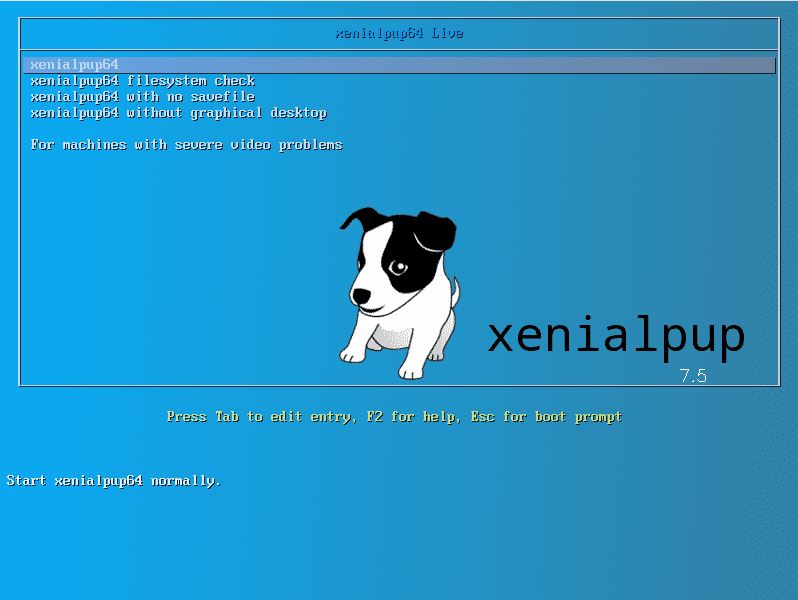
Once you followed all the above steps you will get a bootable pen drive. Now just insert that in a system where the Puppy needs to be installed and restart that. At the system, BIOS select the bootable medium to a USB drive.
Select the Xenialpup64 and Press the Enter button. The Puppy will load the whole system in RAM and give you Live Linux environment where you get the benefit of the full-fledged OS. Even you can save your work in Live running; when you exit the system, the Puppy OS will ask you whether you want to save your work or not. Just save it. In this way, you can use the Puppy Linux without installing like a traditional OS; directly from USB drive.
Install Puppy Linux on Hard drive or USB drive from its Interface
Note: To install Puppy Linux permanently on Hard drive or USB drive it is recommended to create a bootable Puppy Linux CD/DVD. However, if you have technical knowledge then you can do it with the bootable pen drive created above too.
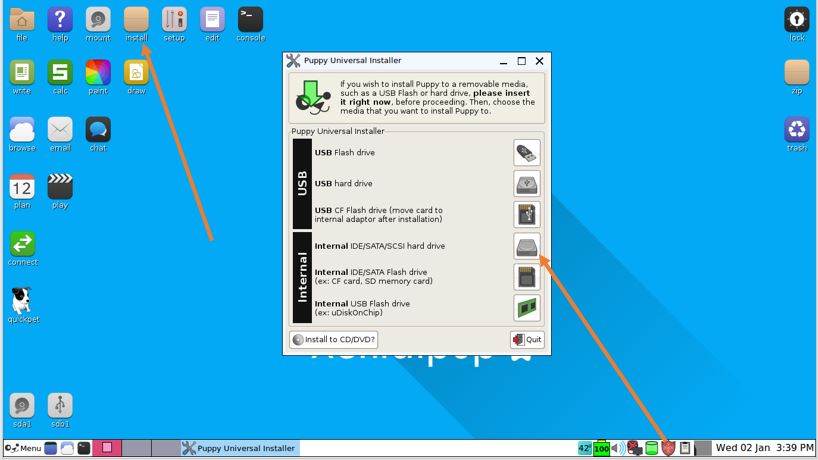
If you want to install puppy on the local hard drive of the system then click on the Install icon given on the live screen of the Puppy.
The Puppy Universal Installer will open, multiple options will be there, select the one where you want to install the OS.
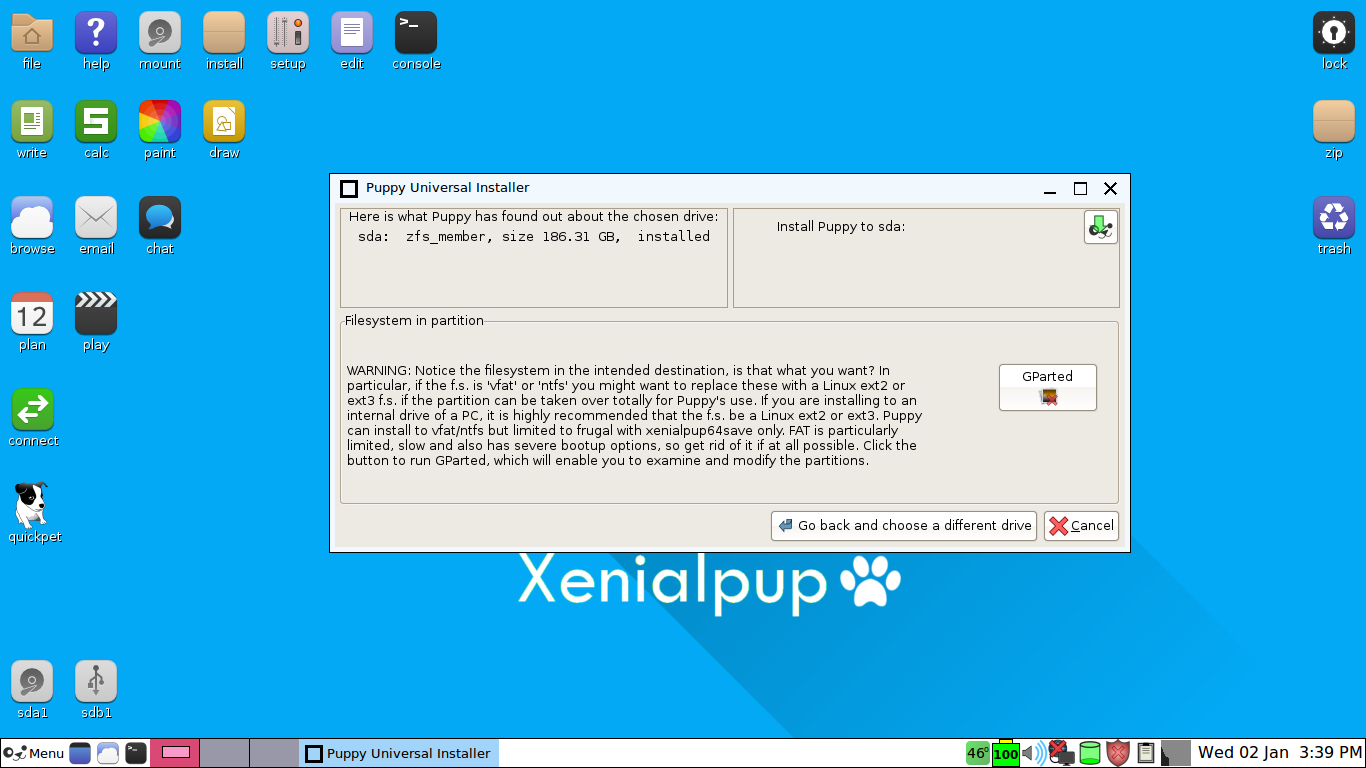
For example, here to install it on Hard drive, we had chosen Internal hard drive. You can select the USD flash or hard drive too.
If you want to use the whole drive for Puppy then just select the button given in front of Install Puppy to sda and it will give you guided steps for installation. To create a partition use the Gparted and then use the Install Puppy option.
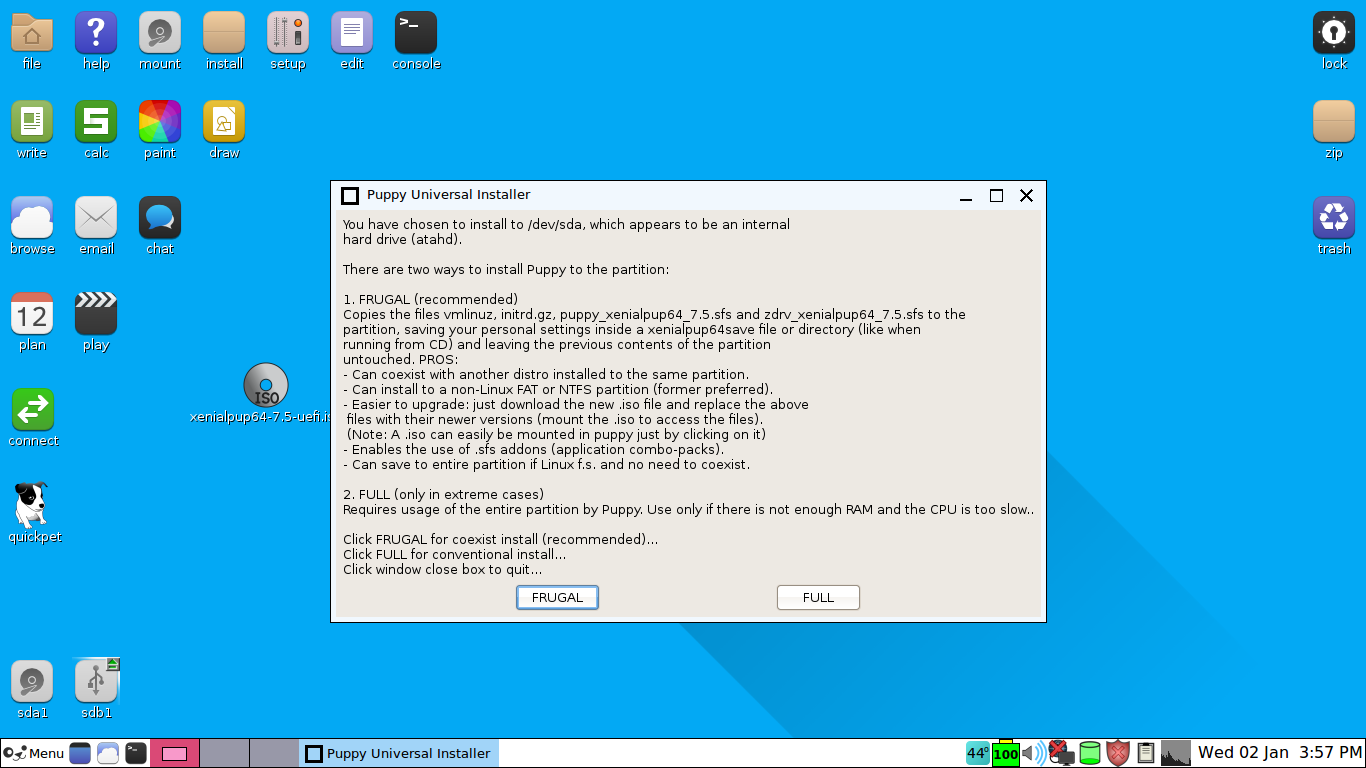
If you are not using the Puppy CD/ DVD then you need to copy two files Vmlinuz and puppy_xenial64_7.5.sfs manually from the ISO image to Live Desktop because while installation the Puppy Universal installer will ask for it.
Choose the Full option for conventional installation like other operating systems. With Frugal, it only creates a partition which will use by the Puppy to save files and settings but still you need to connect a Puppy bootable CD or Pen drive into the system.
You can also check the Puppy Wiki page to know more about its installation. Here is the Link.
Other Useful Resources:
Related Posts
How to install Winget package manager in Windows 2022 Server
How to View Listening Ports Using Netstat
How to Install Pygame Zero on Windows 11
Single Command to install Android studio on Windows 11 or 10
How to Install DoXygen in Windows 11 or 10
Google Rolls Out Android 14 Beta 4.1 to Fix Bugs for the Pixel Fold and Tablet