If you want to safeguard your privacy on the internet, using Tor Browser is the way to go, if you do not want to invest in a VPN connection. Using Tor Browser, you can bounce your traffic through multiple nodes, before it eventually reaches the destination server, which makes it practically impossible for the monitoring authorities to track you down through your online activities. Tor is open-source and is available for all the major platforms including Linux. Even though it is a piece of cake to install the Tor Browser on a Windows computer, the installation of it on a Linux computer can be a hurdle for some uses.
The Tor Browser is not available on any of the official repositories available for Linux, which means, you will have to sideload the installer from the official website, and then proceed with installing the same on your Linux computer. The process of installation of the Tor browser is going to be almost the same for all the Linux distributions out there, but today I will discuss how you can install it on a computer running Manjaro Linux and CentOS. After you get your hands on the Tor Browser, you can enjoy better privacy. Learn more about Tor here: Difference between Tor and VPN, and how it can help you to go anonymous on the internet.
So, without any further delay, let’s get started with how you can install the Tor Browser on a PC or Laptop running Manjaro Linux, CentOS 7/8 or other Linux.
Downloading and installing Tor browser
- The first step is to go to the official website of Tor Browser and download the Tor Browser for the Linux platform.
- You can simply follow this link to download the Tor browser for Linux, in the default download directory of your system.

- Alternatively, you can even execute the following command within your Linux terminal to initiate the download the Tor Browser on your computer.
wget https://www.torproject.org/dist/torbrowser/9.0/tor-browser-linux64-9.0_en-US.tar.xz
- After the download is complete, you will have to open the Linux terminal, if it is not already open, navigate to the directory, where the downloaded file is present, and type in the following command to start decompressing the tar.xz installer of the Tor browser.
sudo tar xf tor-browser-linux64-9.0_en-US.tar.xz

- The decompression process shouldn’t take long, and once it is complete, you will have to navigate to the folder where you downloaded the Tor Browser, using your default file manager.

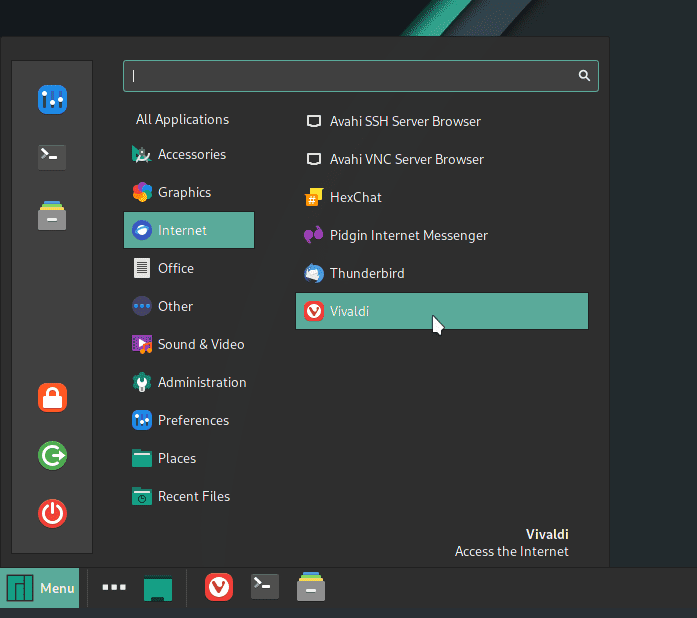
- Now, you will find a folder with the name ‘tor-browser_en-US’ Just, open the folder and you can find a file that says ‘Tor Browser Setup’.
- Lastly, double-click on that file to open this secure Browser on your Linux computer. The icon will change, and the filename will also change into ‘Tor Browser’.

- After the Tor browser is open in front of you, you will have to establish a connection by clicking on ‘Connect’.

- It will take some time for the connection to take place, and once the connection is established, you can start using this secure Browser to go almost completely anonymous on the internet.
I have carried out the complete installation on Manjaro Linux, however, the process is going to be exactly similar on other Linux distributions. You can be using CentOS, Ubuntu, Fedora, Debian, or any other Linux distribution, but the process of installing the Tor browser is not going to be any different.
So, that was all about how you can install the Tor Browser on your Computer running Manjaro Linux or CentOS. Do you have any questions in mind? Feel free to comment on the same below.


tor browser intaller is available in official manjaro repositories no need to sideload anymore
indeed, i have just tested on Manjaro. “sudo pacman -S torbrowser-launcher”
then click Manjaro menu, type “tor” click the launcher and it will downlaod tor browser and launch it. Nice