SSH which is a Secure shell protocol allows the users to connect the Unix and Linux based operating systems running on servers or desktops remotely. We can run all commands on remote servers like Ubuntu, Debian, Centos, RedHat etc. using the lightweight piece of SSH software. To know more about it see our article: What is SSH (Secure Shell)?
Well, running SSH on Linux using SSH server to connect and login some other Linux system is pretty easy but how to do it between Ubuntu (Linux) and Windows 10/8/7. In this article, we focus on this and let you know the simple way to SSH into Ubuntu from Windows 10.
Note: This method will be the same for Ubuntu 18.04,170.4, 16.04, 14,04… to log in using Windows 7, Windows 8 or Windows 10.
How do I SSH into Ubuntu from Windows?
Step 1: OpenSSH-server on Ubuntu Linux machine
To connect & login the Ubuntu using the SSH first of all we need to install the same on Ubuntu. For this purpose use the command:
sudo apt-get install ssh
Step 2: Enable the SSH server service
After installing the SSH server, enable it on Ubuntu by using the command:
sudo service ssh start
Step 3: Check the SSH status
Once you enabled the SSH service, its time to check whether it is running in the background or not. Use this command:
sudo service ssh status
If you output for above command is * sshd is running then everything is fine and move to the next step.
Step 4: Download the Putty on Windows 10/9/7
To connect or log in the Ubuntu via SSH, we need an SSH client for Windows. The Putty is a free and easy way to login Ubuntu and other Linux servers remotely from Windows using SSH. However, there are numbers of other free SSH clients available online those ones can be used too. Here is the Putty Download Link.
Step 5: Install Putty SSH client on Windows
We can install the Putty.exe downloaded file just like any other software with few clicks. There is no special configuration or setup. Double click on it and follow the guided steps.
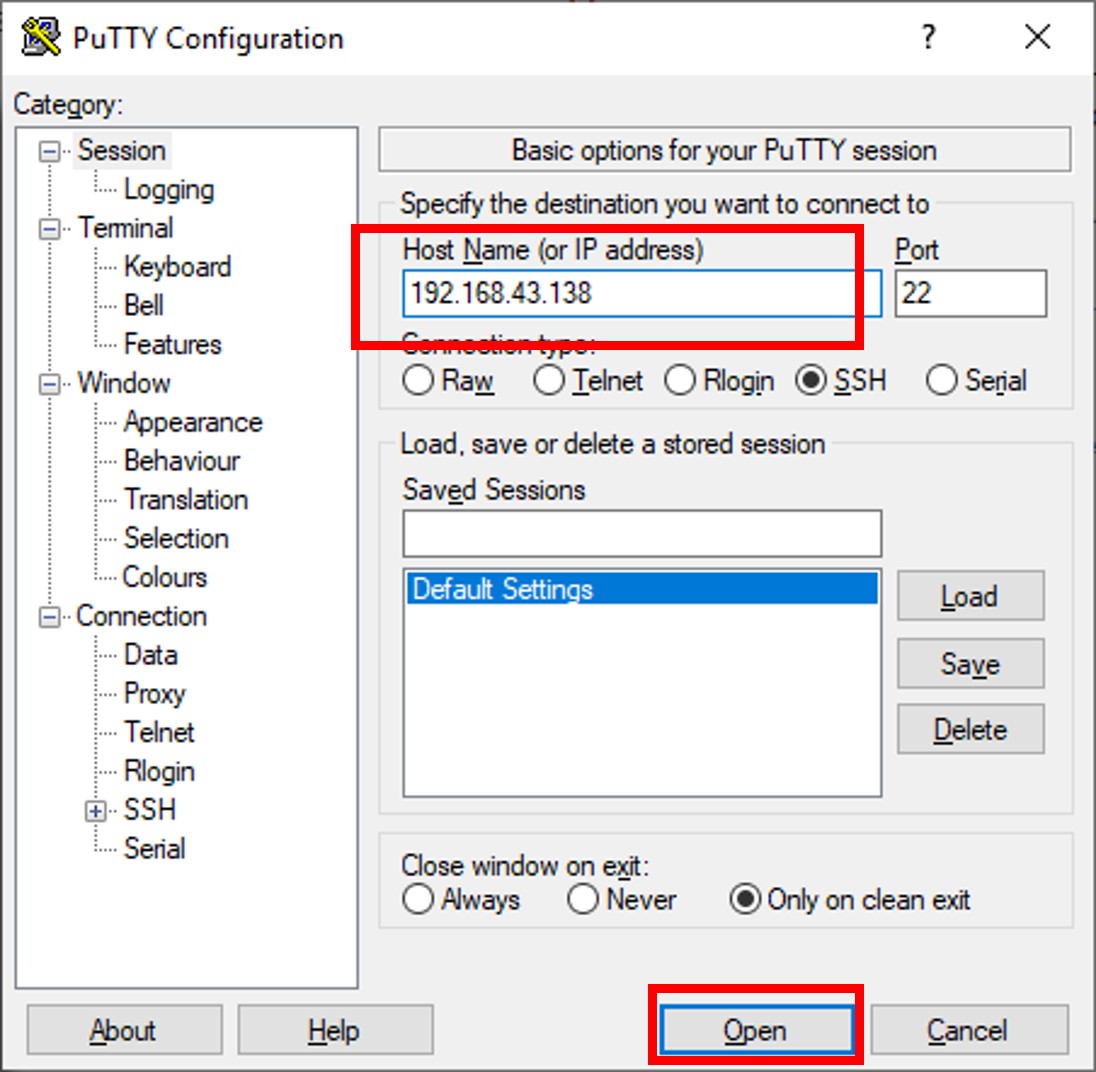
Step 6: Run and configure Putty
As we open the Putty, the first screen will be something like shown in the below screen. Now in the Host Name (or IP address) box type the Ip address of the remote Ubuntu server which you want to connect using the SSH protocol.
After adding the right IP address just click on the Open button.
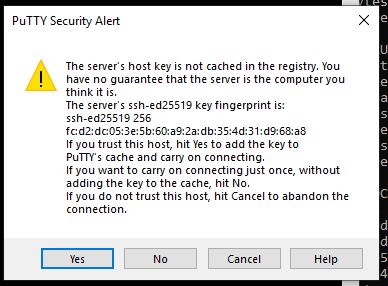
Step 7: Login to Ubuntu server via Putty SSH client
As we click on the Open button, the putty will ask whether you trust the server you about to connect or not, click on YES button.
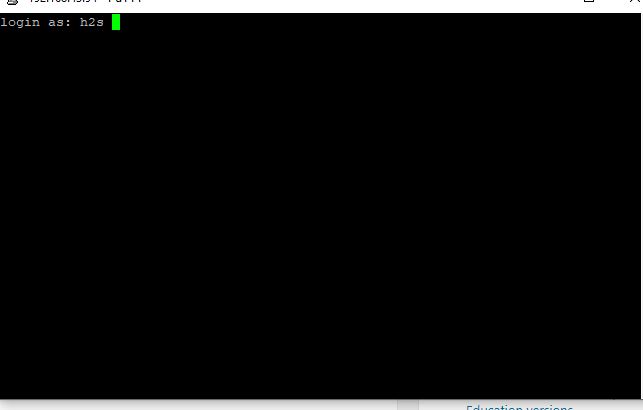
The black colour command terminal window of the Putty will appear along with login as: text. Enter the username and password of the remote server you want to login. That’s it.
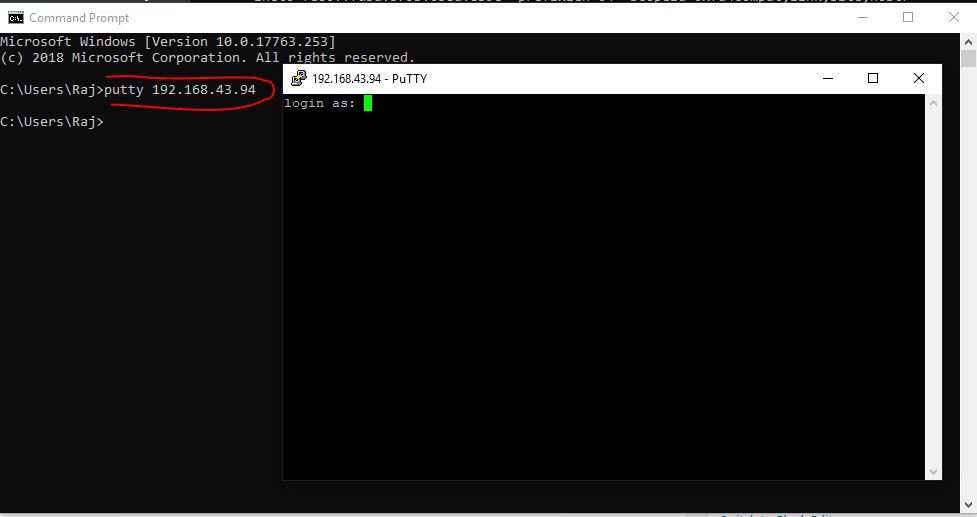
You can also use the command prompt to use the SSH after installing the Putty. Go to Command prompt or PowerShell on Windows 10 and type: putty [ipaddres] and hit the enter button.
For example– putty 192.168.43.94
In this way, we can connect and login remote Ubuntu server or any other Linux or Unix machine over SSH from Windows 10/8/7.
Other Resources to read:
- In Ubuntu enable ssh to connect and manage the server remotely
- How to install Overgrive on Ubuntu – A Google drive desktop client solution for Linux
- How to Install Ubuntu Minimal Server 18.04 “Bionic Beaver”: Just 64 MB
- How to install & use the Google Backup and Sync on Ubuntu
Related Posts
How to install Winget package manager in Windows 2022 Server
How to View Listening Ports Using Netstat
How to Install Pygame Zero on Windows 11
Single Command to install Android studio on Windows 11 or 10
How to Install DoXygen in Windows 11 or 10
Google Rolls Out Android 14 Beta 4.1 to Fix Bugs for the Pixel Fold and Tablet