What is Bitvise SSH client? Bitvise is a free SSH client available for Windows to connect SSH server enabled Unix or Linux operating systems. It is a graphical based SSH client just like Putty with more features. It supports the command-line SFTP, FTP-to-SFTP bridge including tunnelling features such as dynamic port forwarding through an integrated proxy.
Beside this remote login using SSH, the Bitvise can also be used to transfer files from one server/desktop to another like FTP clients.
You can say that the Bitvise is one of the best SSH client available for Windows 10/8/7 and an alternative to PUTTY. The developers of the Bitvise also offers Bitvise server meant for Windows desktop or Windows server to enable the system remote control by other SSH client software. However, the server version of the Bitvise is a paid solution and comes with 30 days trial.
In this article, we let you know how to install and use Bitvise SSH client to connect some remote computer via SSH.
Step 1: Download the Bitvise SSH client on Windows
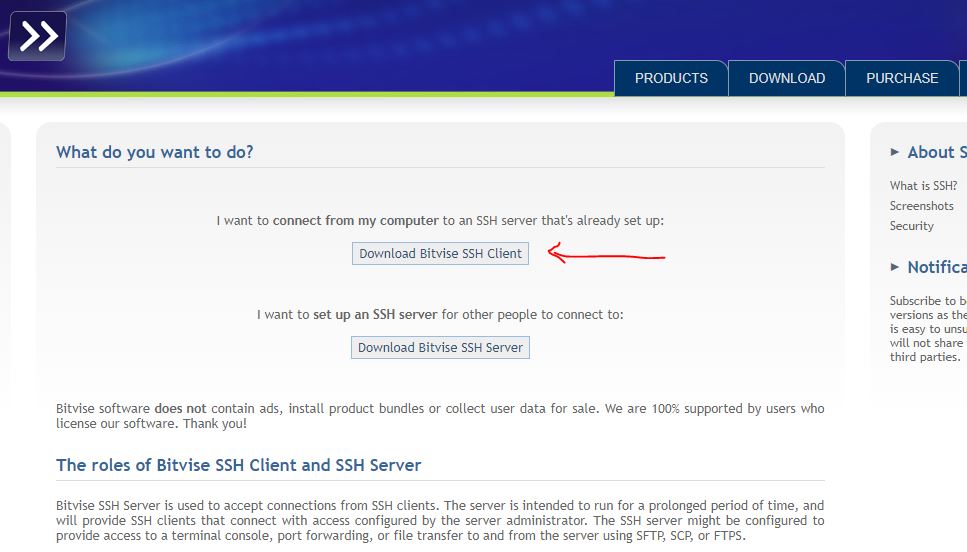
Go to the official website of the Bitvise and click on the Download menu given on the top right side. Under that, we will find two options: Bitvise SSH client and Bitvise SSH server. Select the SSH client and download its executable file. For convenience here is the link to download Bitvise.
Note: To download Bitvise ssh server select the SSH server (In case you want to experience that).
Step 2: Install Bitvise SSH client on Windows
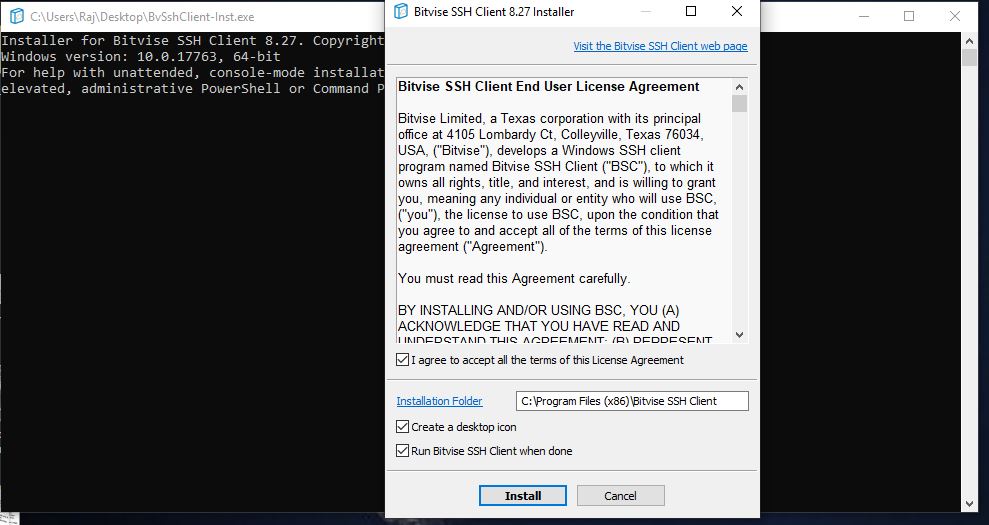
Double click on the downloaded executable file of the Bitvise to start the installation wizard.
First, accept Bitvise terms and conditions by checking the box given at the front of text “I agree to accept all the terms of this License Agreement” and then click on Install button.
Step 3: How to use Bitvise SSH client on Windows
Steps of using the Bitvise SSH client to login remotely on some server is the same for all Windows versions such as Windows 10, 8,7 or Vista.
Here we are trying to login into Ubuntu server from Windows using the Bitvise SSh client.
So, open the Bitvise client and the first screen which you will see will be like given below.
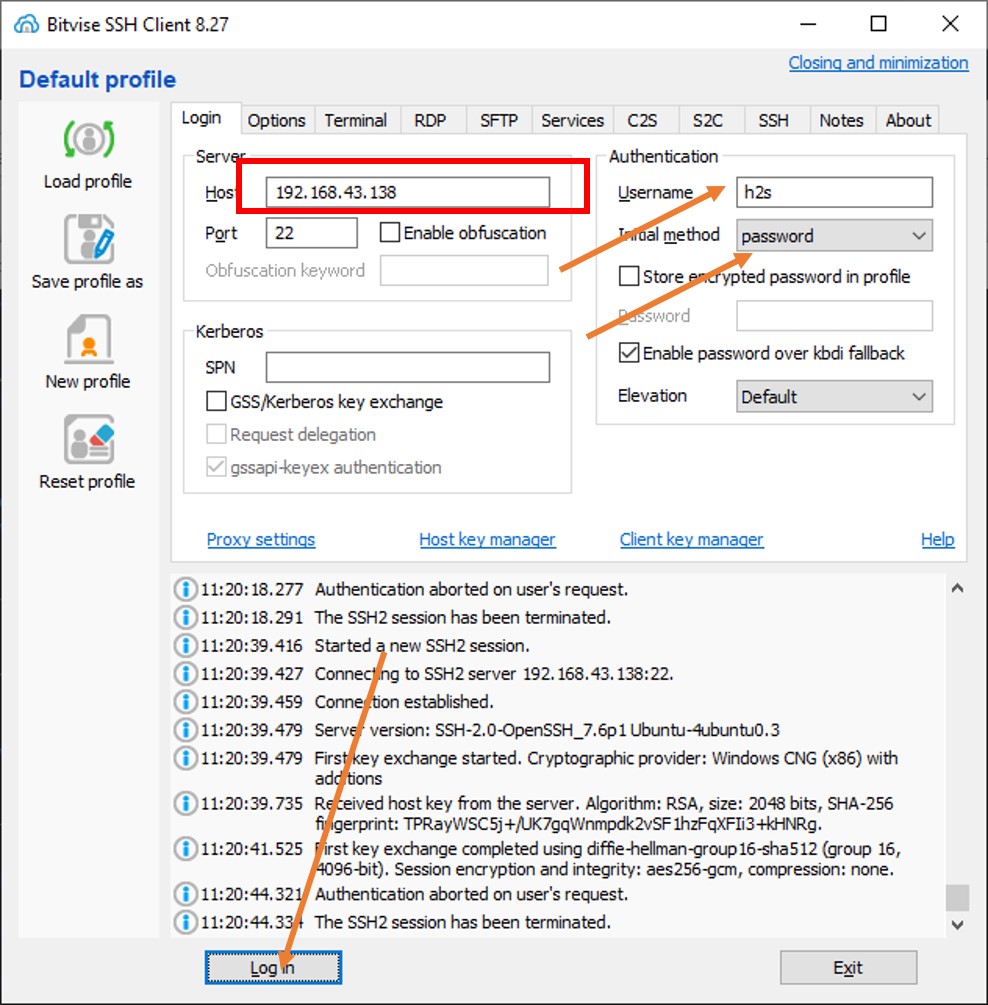
- For using or to connect some server click on the Login tab given at the top of the software.
- Click inside the Host box given under the server section.
- Type the IP address of the remote server. In our case, we want to access Ubuntu-based server that’s IP address 192.168.43.138.
- After adding the remote server IP address go to the Authentication side.
- Where add the username of the remote machine which you want to access.
- Just below that, you will see the Initial method to authenticate. There are many methods generally we select only the password. If you want to connect the SSH with high security then you can choose public key or Publickey+password or other suitable methods but for such method, the public key should be with you. However, here we are selecting the password.

- Now click on the login button.
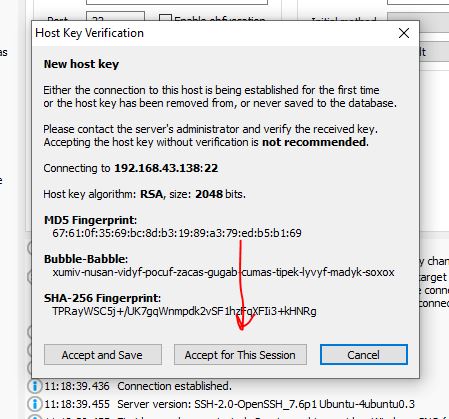
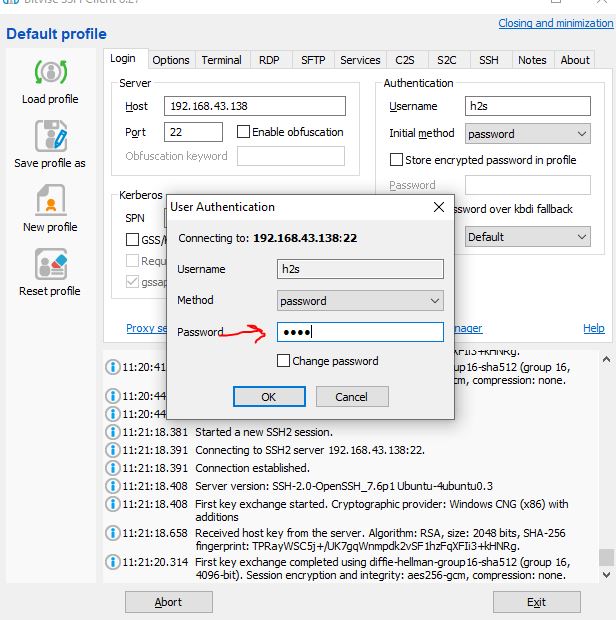
- As we hit the Login button, the Bitvise SSH client starts establishing a secure connection with the server… Once that happens successfully.
- The Bitvise will ask you to accept the host keys to establish the connection. If you just want to connect the host only once then select the Accept for this session and for the users those interact to access the remote server on daily or intermittently basis and don’t want to enter the host address and perform all this again and again can click on the button Accept and Save.
- Then it will ask to enter the password of the remote machine to authenticate.
Step 4: SFTP session on Bitvise for file transfer
Although immediately after logging in the Bitvise SSH, it automatically opens the Console terminal and SFTP windows for entering the commands and transferring the files from local machine to the remote, respectively. However, we here going to show how you can use them after closing them.

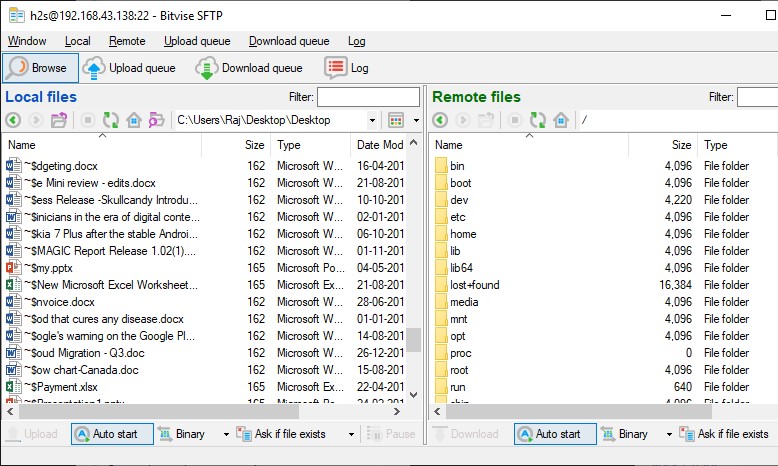
To open a new SFTP session window go to the Bitvise client and click on the “New SFTP Window” option given on the left side panel.
On the Bitvise SFTP SSH client window right panel will show all the files of the remote server while the left side meant for local files of the machine where the Bitvise has been installed. To transfer the files the user can simply drag and drop them.
Bitvise ssh client command line
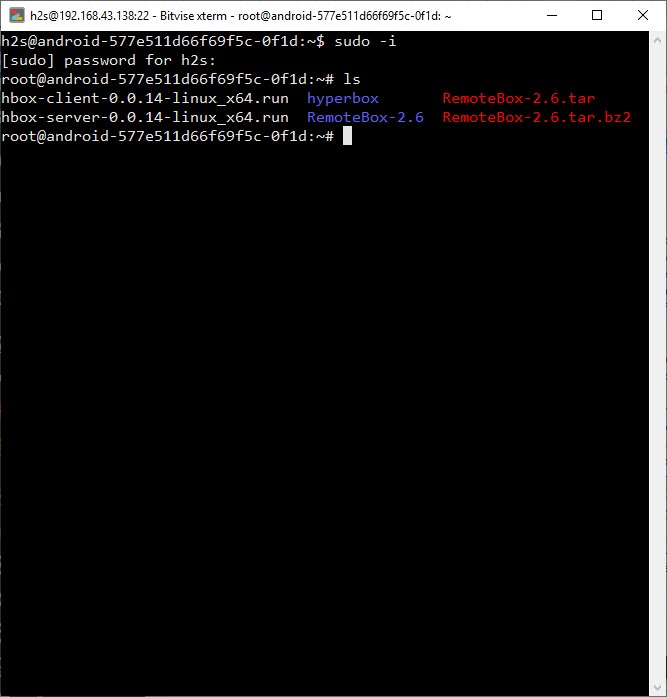
To access the new Bitvise SSH client command line terminal, click on the “New Terminal console” option from the left side of this SSH client. Once the terminal opened, we can execute all the commands as a proxy for the remote server.
Update Bitvise
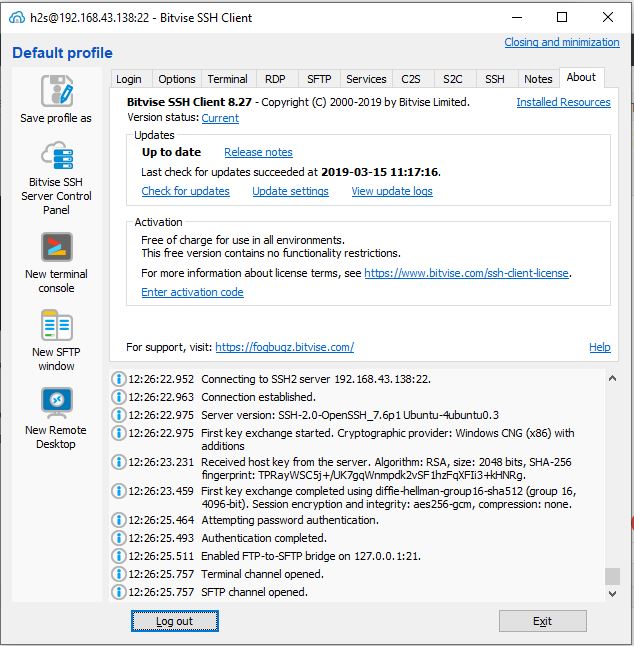
To update the Bitvise, if you are on its older version, simply click on the About tab from the client interface and click on the Check for updates.
Other Useful Resources:
- How to add Cloudflare to VPS/ Dedicated / Shared hosting servers?
- Unified Remote: How to remote control your computer with the help of a smartphone
- How to login into Ubuntu using SSH from Windows 10/8/7 using PUTTY
- How to enable Opcache php extension in Cpanel

hi
thanks for sharing
I need who can I create country proxy with username and password
thanks
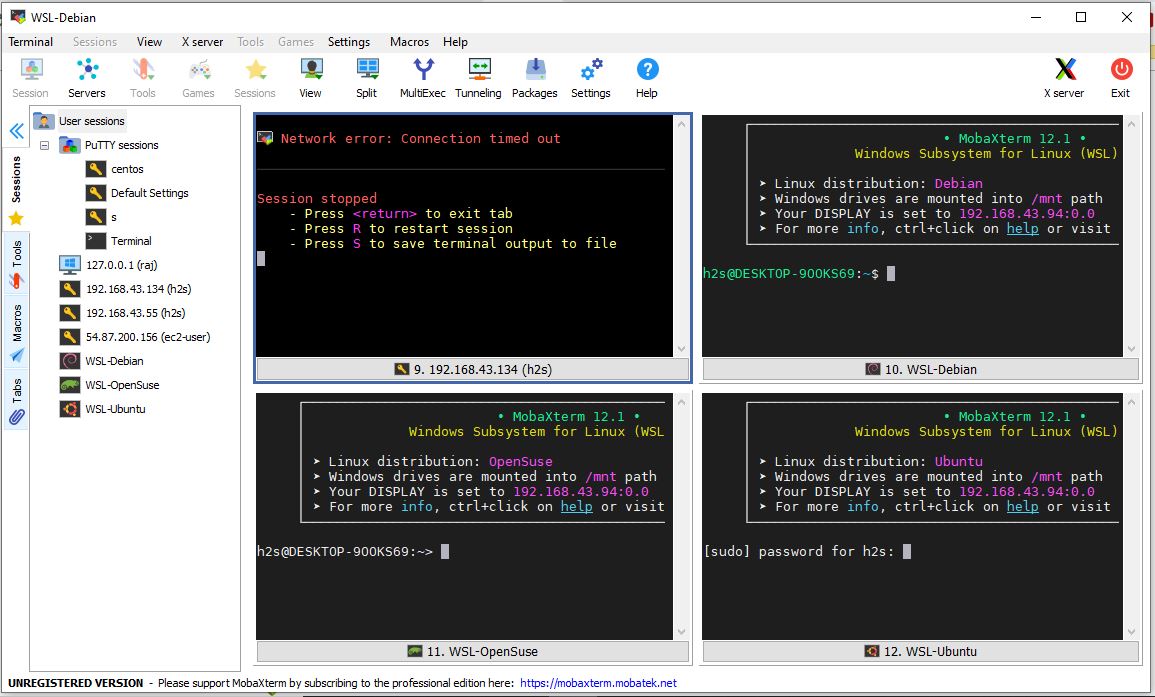
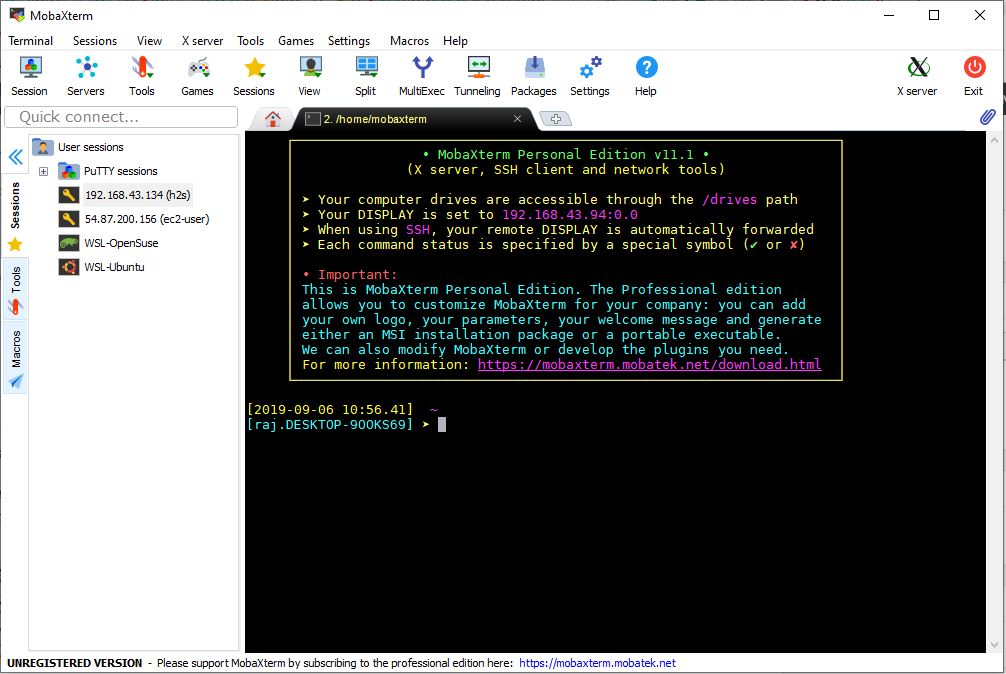
Bitvise is a disappointment. I was looking for a tabbed alternative to MTPUTTY or MobaXterm