Installing Ubuntu operating system is not a big deal but sometimes you don’t need a pre-installed Graphical user interface or software; just a minimal base OS is required, especially in case of servers. Because the administrators or users those using Linux on servers for some specific task don’t require extra stuff; those not only waste the storage but also RAM. And in server environment both are costly. So, here in this article, we will show you how to install the Ubuntu 18.04 LTS minimal server which is of just 64MB along with screenshots. For showing the tutorial, we are using the open source Oracle Virtual Box to create the Ubuntu virtual machine server.
The following tutorial is applicable to:
- Ubuntu 18.04 “Bionic Beaver” 64MB ISO
- Ubuntu 17.10 “Artful Aardvark” 58MB ISO
- Ubuntu 16.04 LTS “Xenial Xerus” 54MB ISO
- Ubuntu 14.04 LTS “Trusty Tahr” 37MB ISO
Prerequisite:
Internet connection to download few packages while installing.
Minimal Ubuntu Server Installation
Step 1: Download Minimal Ubuntu Server
Go to https://help.ubuntu.com/community/Installation/MinimalCD and download the minimal Ubuntu server ISO image you want to install on your server. For this tutorial, we are using the 64-bit version of Ubuntu 18.04 LTS.
Step 2: Either burn the ISO image on CD or USB drive.
-
- Note: For creating Ubuntu USB drive you can see our article: Create bootable Ubuntu USB Stick on Windows PC
Step 3: Once you get the Ubuntu bootable CD/USB drive boot the PC or server with that.
-
- Note: If you are using the Virtual Machine then you directly use the ISO image no need of bootable CD/DVD.
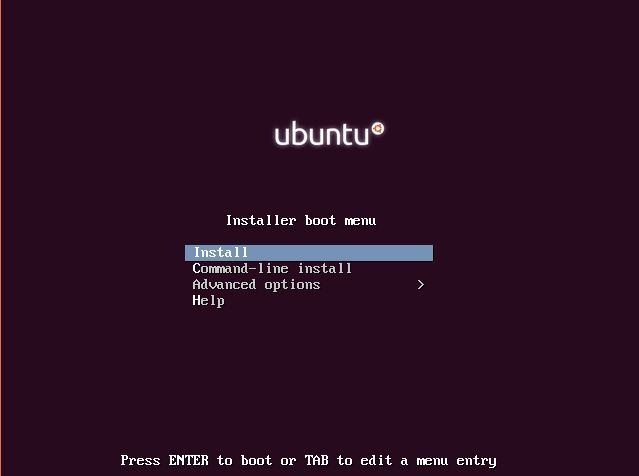
Step 4: Installing a minimal Ubuntu server
After booting you will get four options: Install, Command-line Install, Advance options and Help.
Choose the Install option. It will give you a kind of graphical environment for the easy installation of a minimal Ubuntu server.
Step 5: Select Language
The language selector will appear. Select the language you comfortable in. For this, you can use the arrow keys on the keyboard and for selecting the almighty “Enter” key.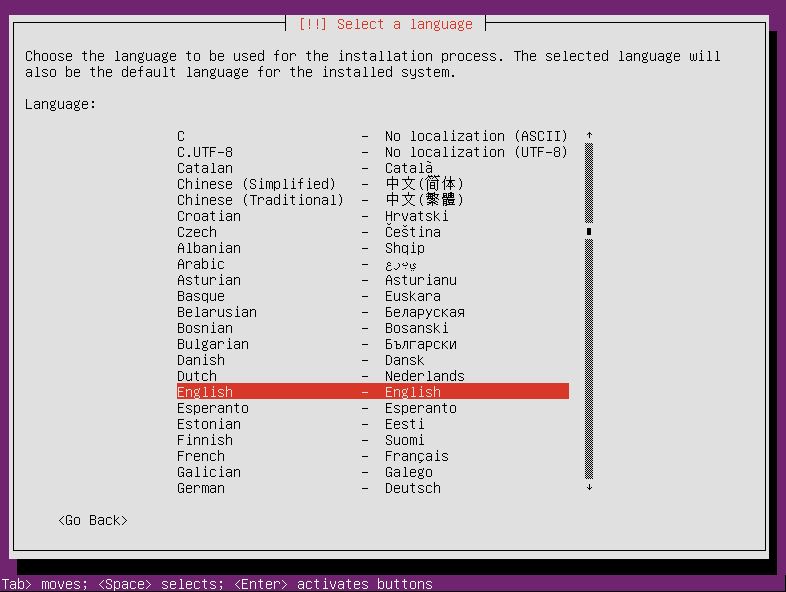
Step 6: Select your location
Choose the location where you live that will help Ubuntu to set the local time zone.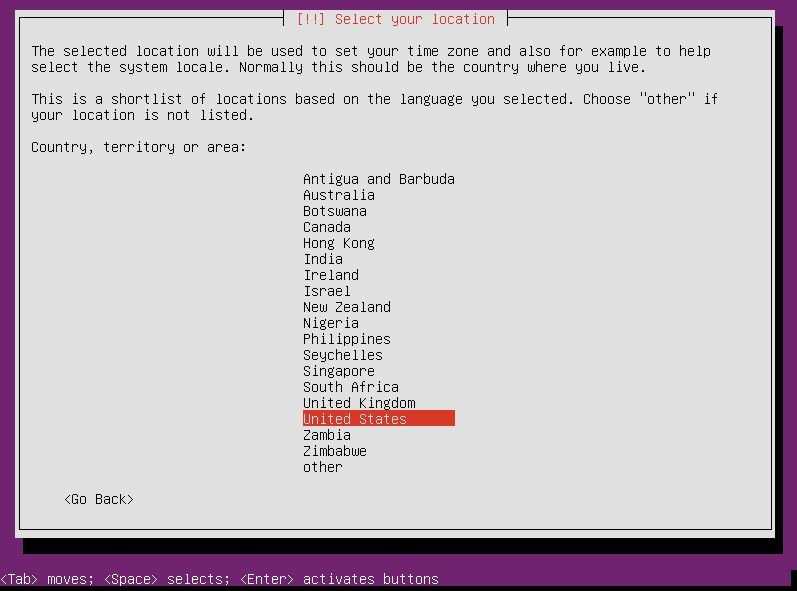
Step 7: Choose a keyboard layout
If you choose the ‘YES ‘Ubuntu installer will automatically detect your keyboard layout otherwise choose ‘NO‘ and based on location preference above it will select the default.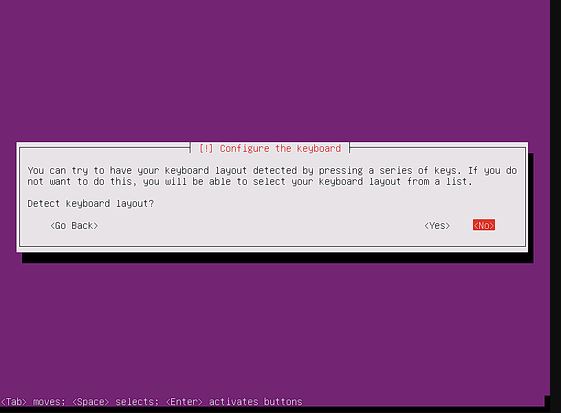
Step 8: Loading additional components
The Ubuntu installer start retrieving and loading additional components to configure further things.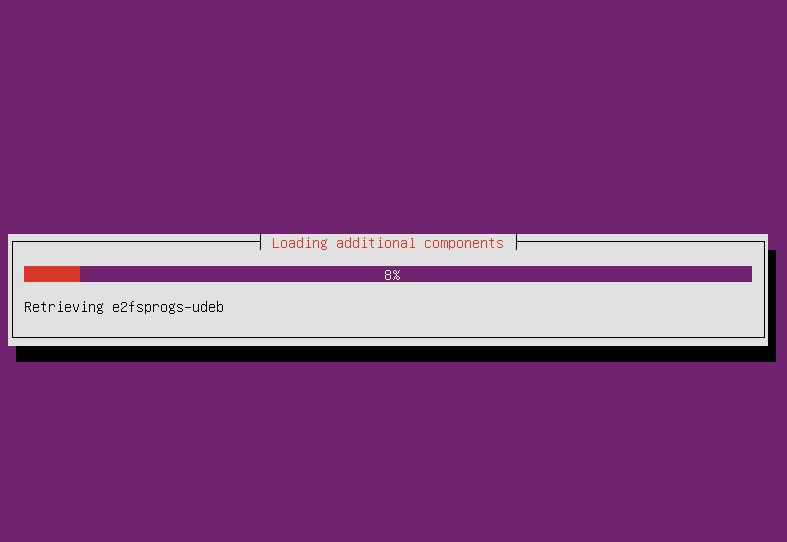
Step 9: Configure the network
Give the hostname to your server. It could be any by which you want to identify your system in your home network. But, if you are about to use the server for the commercial environment then either check your domain or contact the admin.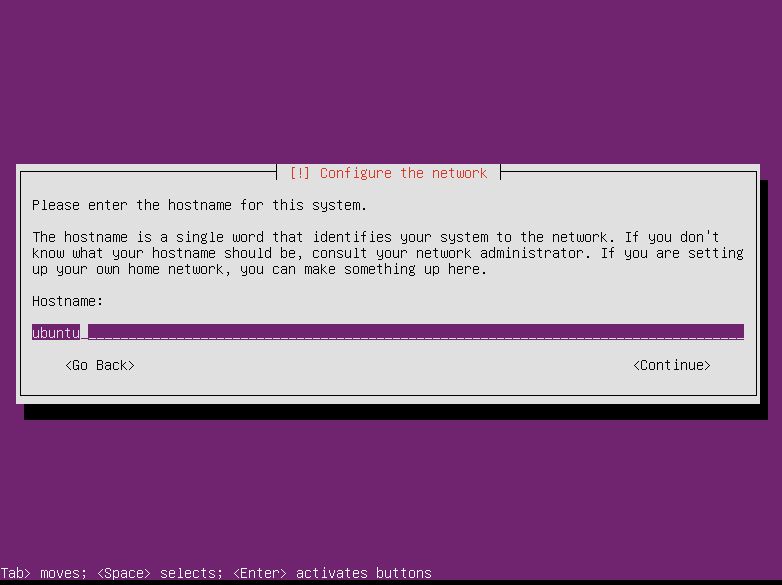
Step 10: Setup user and passwords
This account will use for non-administrative activities.
The password for the new user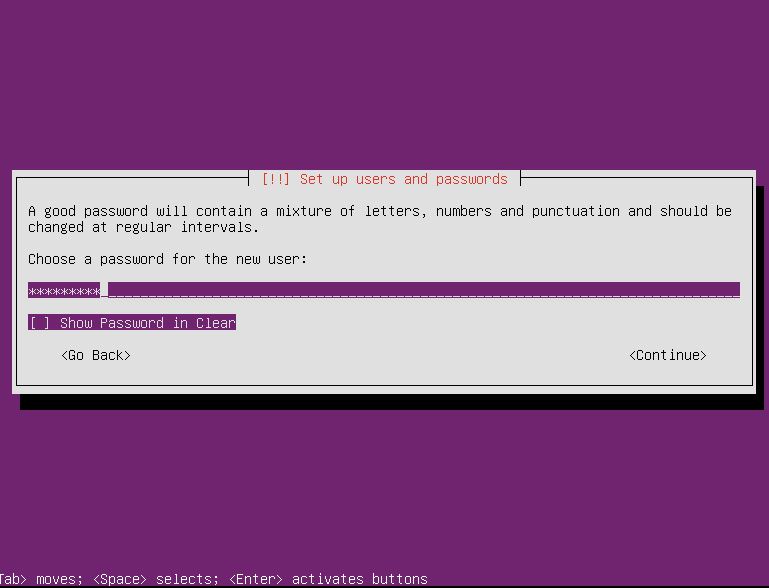
After setting up the username and password, the Ubuntu installer will start installing the base system for Ubuntu.
Once the basic configuration completed. It will ask you whether you want-to automate the security Updates or not. The options are: No automatic updates, Install security updates automatically and Manage system with landscape. Choose what is best for you.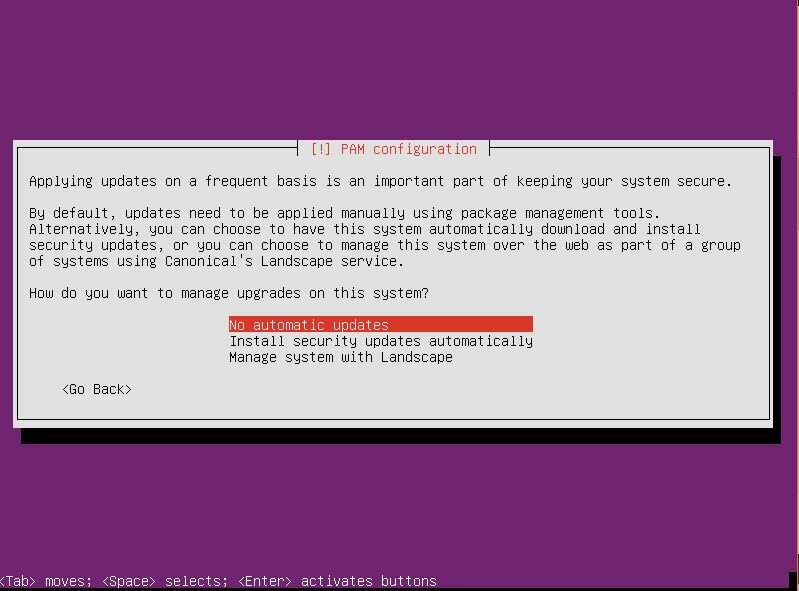
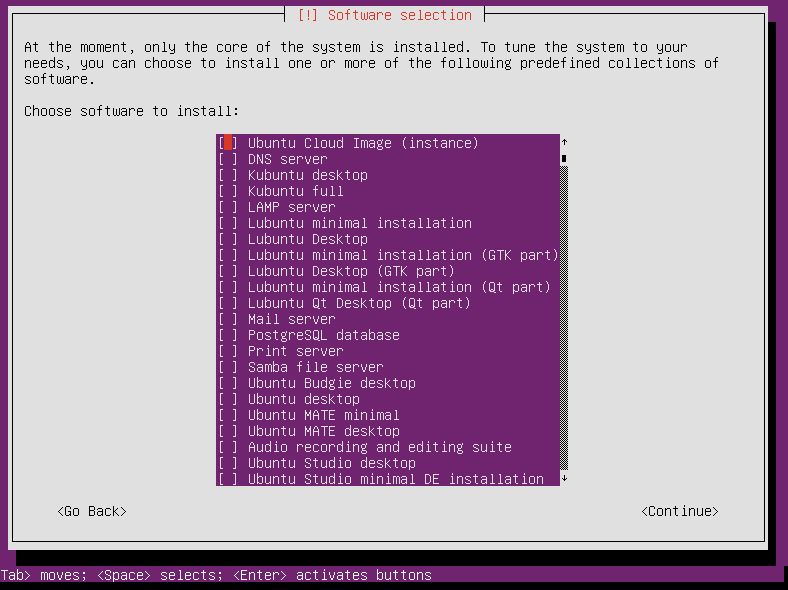
In this step, as far, the Ubuntu installer has only installed the core of the systems. Now it Gives you a list of software selection out of which you can choose according to your requirement, in case you want otherwise just continue.
-
- The List of software it provides are:
- Ubuntu Cloud Inage (Instance)
- DNS Server
- Kubuntu Desktop
- Kubtuntu full
- LAMP server
- Lubuntu minimal Installation
- Lubtuntu Desktop
- Lubtuntu minimal Installation (GTK part)
- Lubtuntu Desktop (GTK part)
- Lubuntu minimal Installation (QT part)
- Lubuntu Qt Desktop (QT part)
- Mail Server
- PostgreSQL database
- Print server
- Samba file server
- Ubuntu Budgie desktop
- Ubuntu desktop
- Ubuntu MATE desktopAudio recording and editing suite
- Ubtuntu Studio desktop
- Ubuntu Studio minimal DE Installation
- Large selection of font packages
- 2D/3D creation and editing suite
- Photograph touchup and editing suite
- Publishing applications
- Video creation and editing suite
- Vanilla GNOME desktop
- Xubutnu minimal Installation
- Xubuntu desktop
- OpenSSh server
- Basic Ubuntu server
- The List of software it provides are:
You can continue if you don’t want to install software. However, I want to use this server for the web so I have chosen the LAMP.
The Ubuntu installer will start the further installation process and ask for your permission to Install the GRUB boot loader to the master boot record? Just selects the YES.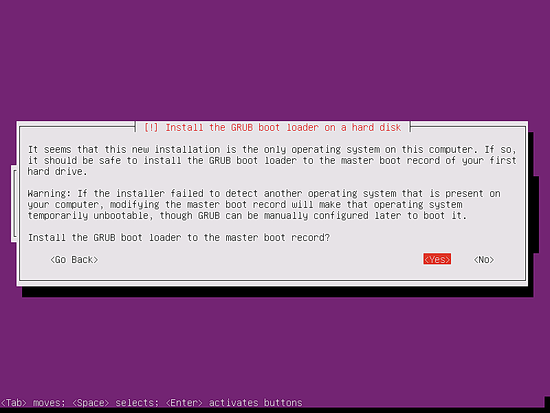
Wait for sometime, let the installer finish the installation and then eject the installation CD and reboot the system. You will get a minimal Ubuntu server environment. Login with the details of the user you set above.
-
- Note: By default, there is no password set for root and you need to change that. For this purpose see this guide: How to Setup Ubuntu Root User Password Using Command
Other Useful resources:
- How to install XAMPP on Windows and Linux to use Marina DB, Perl, and PHP on a localhost
- Install Android apps on PC with MEmu, the Android emulator for Windows
- How to Uninstall MySQL in Ubuntu Linux
- Setup Ubuntu server for WordPress blog/website on Droplet DigitalOcean
- How to Install WordPress on Cpanel – Step by Step
- How to install phpMyAdmin on Centos 7 & Centos 6
Related Posts
How to install Winget package manager in Windows 2022 Server
How to View Listening Ports Using Netstat
How to Install Pygame Zero on Windows 11
Single Command to install Android studio on Windows 11 or 10
How to Install DoXygen in Windows 11 or 10
Google Rolls Out Android 14 Beta 4.1 to Fix Bugs for the Pixel Fold and Tablet