It isn’t at all exciting these days to find people unlocking their smartphones by touching a button on the device with their fingers. Fingerprint sensors are so popular nowadays, that it has paved the way for in-display fingerprint sensors, that look kind of futuristic, making it a lot secure and easy to unlock smartphones in the first place. But people don’t search for fingerprint sensors in a laptop, as they do it for smartphones, and the absence of a fingerprint sensor can also be a deal-breaker today. If you are having a laptop that doesn’t come with a fingerprint sensor, you surely don’t need an external fingerprint sensor for authentication purposes at least.
If you are having a smartphone that comes with a fingerprint sensor, you can use it as a charm to unlock your laptop or computer without connecting a physical one. You just need to have an app on your Android smartphone and a corresponding module for Windows computer to get this working. That’s pretty interesting I know. Both the devices should have a network connection, as it is a kind of resource sharing that uses your smartphone fingerprint to unlock your computer. So there are some things, which you should have ready before proceeding with this tutorial.
So let’s find out how to implement this cool thing.
Perquisites
Before proceeding further, let’s have a look at the perquisites or the things that you should have in your hand, to get the thing working.
- You should already have a password for your user account on Windows. You might have other sign-in methods like PIN, picture password, or any other fancy thing, but there should at least be a text-based generic password for this to work.
- Both your Windows computer and your Android device should be connected to the same Wi-Fi network or should be connected to the same network.
- Your Android device should be running at least Android 6.0 or Marshmallow to get it working. So if you are having an older device, you are out of luck.
How to use Remote Fingerprint Unlock App on Android to unlock Windows
The steps to follow:
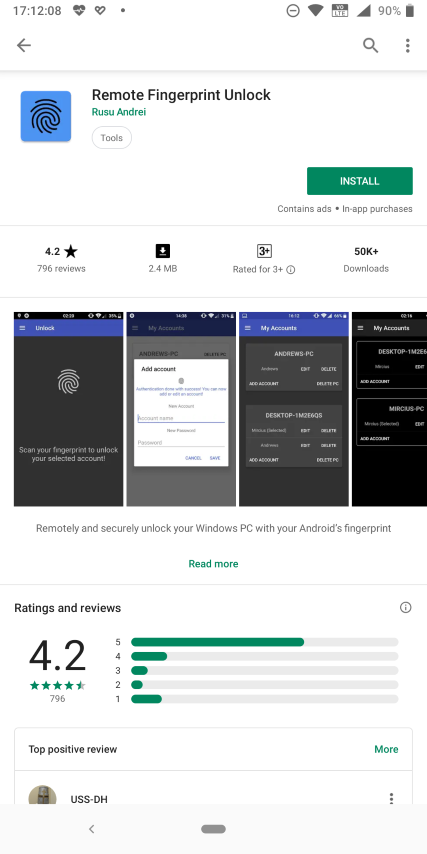
Step 1: Your first task would be to download two apps, one for your Android device, and the other program for your Windows computer, which is the Windows module for the app. Android app
Step 2: Before you proceed with downloading the Windows program for this tutorial, know your system architecture, i.e. whether your system has a 32-bit or a 64-bit system. Download Windows program
You can know your system architecture by opening ‘System’ within ‘Control Panel’.
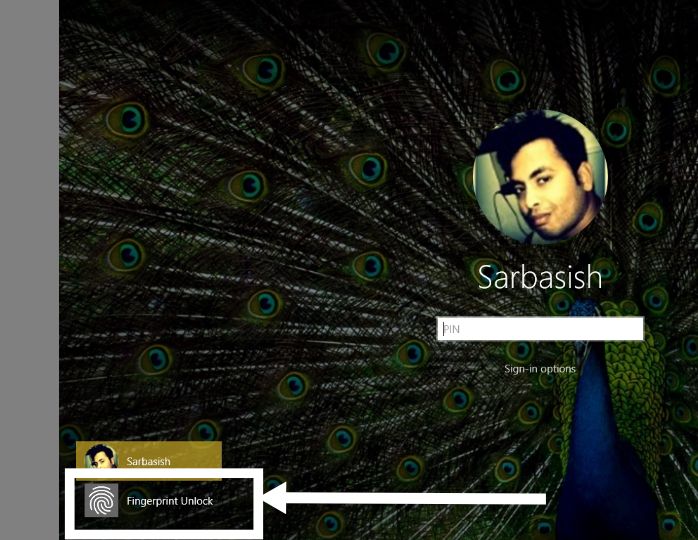
Step 3: After you are done installing the Android app and the Windows program, lock your computer by pressing the ‘Windows key + L’ or from the Start menu. Tap on ‘Fingerprint Unlock‘ on your Windows lock screen.
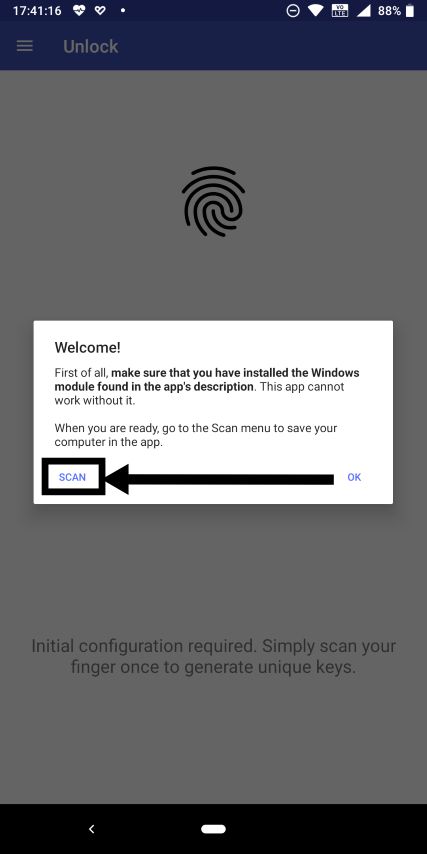
Step 4: Now open the ‘Remote Fingerprint Unlock’ app on your Android device, and you will get the following screen. Just tap on ‘Scan’ to make things go faster.
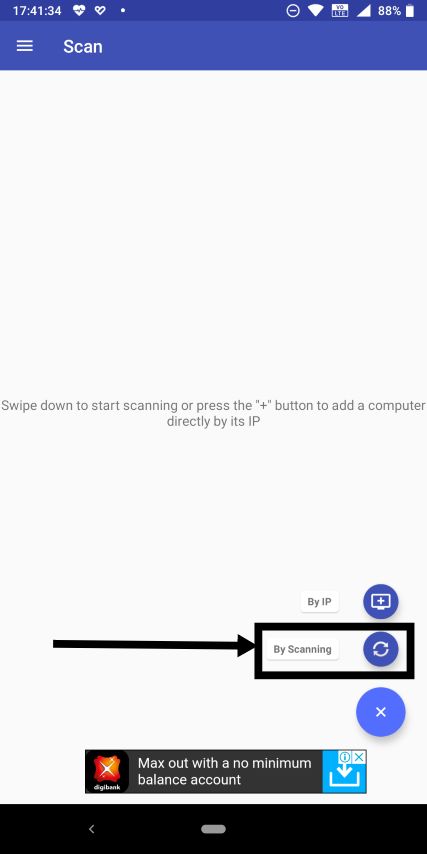
Step 5: Now you will get a blank screen, where you will have to tap on the ‘+’ button to add a new computer for unlocking, and then tap on ‘By Scanning’. This will scan computers in the network. You can even add your computer by entering the IP address directly.
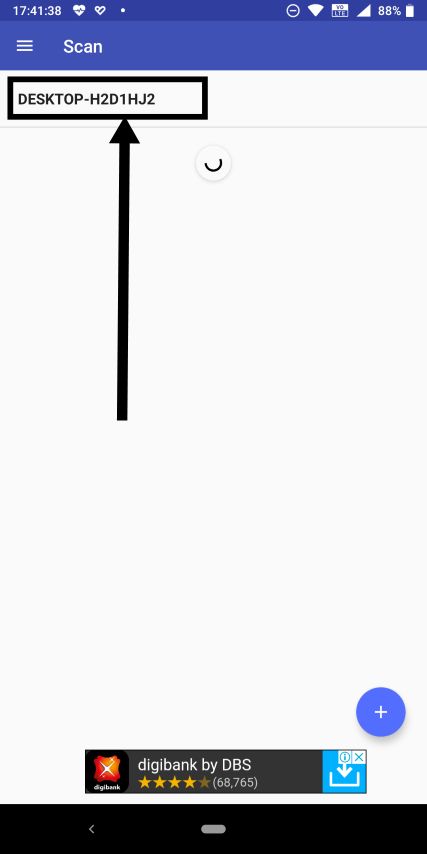
Step 6: If you have finished installing the Windows program, you should find the name of your computer in the list or the scan results. Just tap on it.
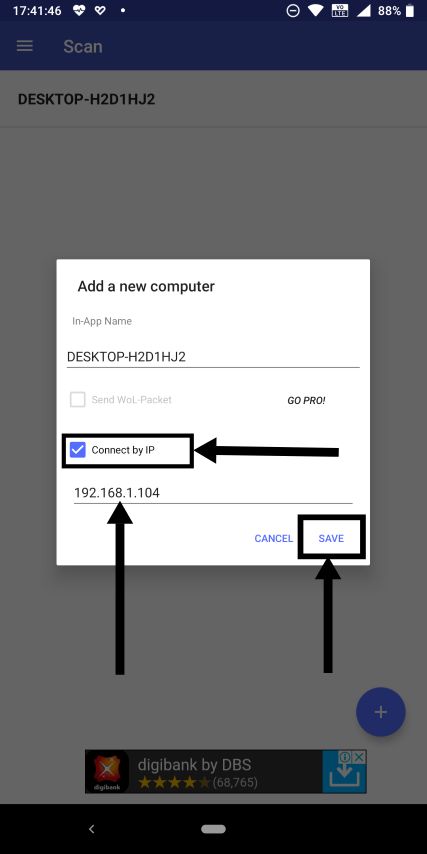
Step 7: Now tick on ‘Connect by IP’, and then enter the IP address of your computer in your Wi-Fi network, and then tap on ‘Save’. You can type the ‘ipconfig’ command on ‘Command Prompt’ to know the IP address of your computer.
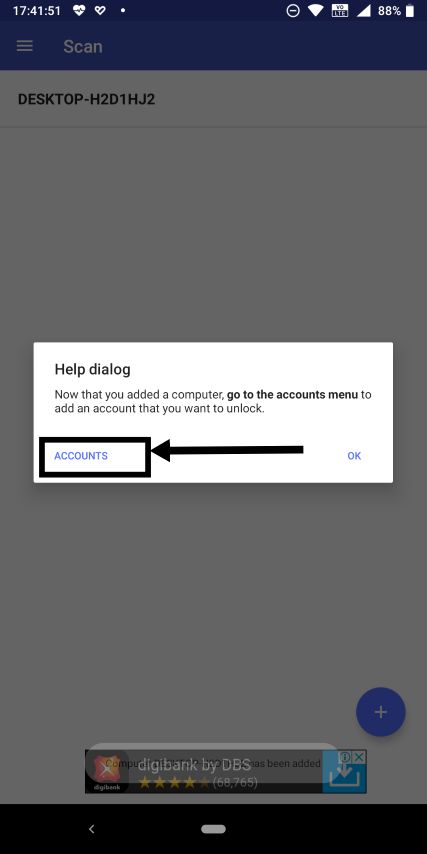
Step 8: Now a help dialog will appear, where you will have to tap on ‘Accounts’ to specify a particular account to unlock on your computer.
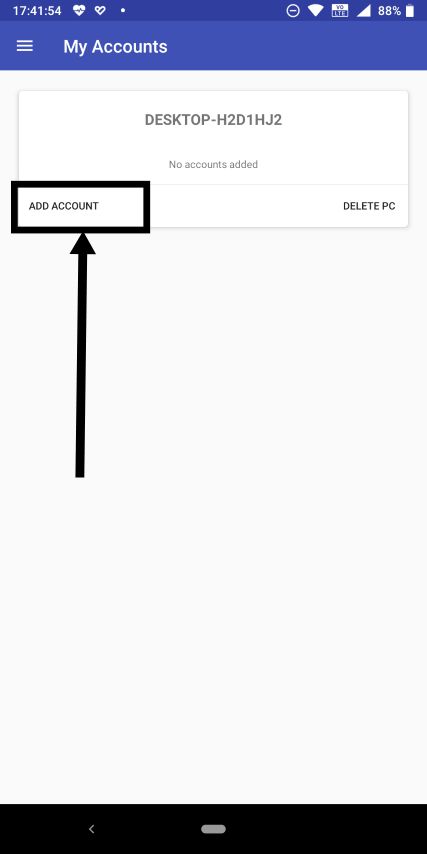
Step 9: Here tap on ‘Add Account’, the option for which should be available corresponding to the name of your system.
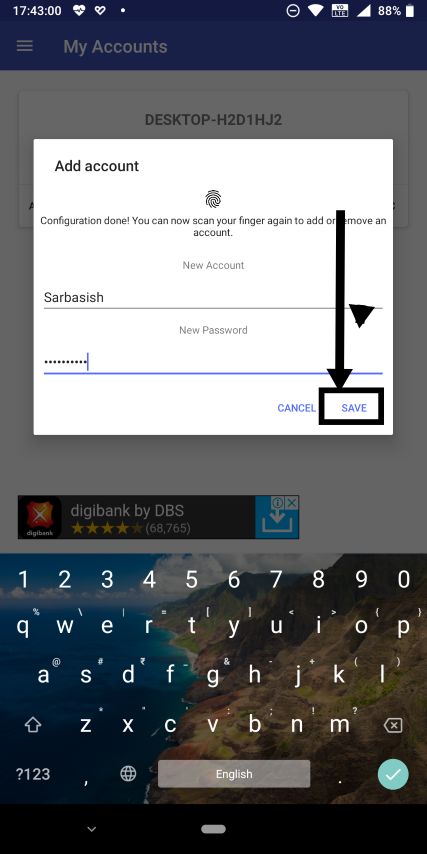
Step 10: Just tap on ‘OK’ in the next dialogue that appears, and then enter the name of your account, which is ‘Sarbasish’ for me and the password for the same. Just touch your fingerprint sensor once to verify your identity, and tap on ‘Save’.
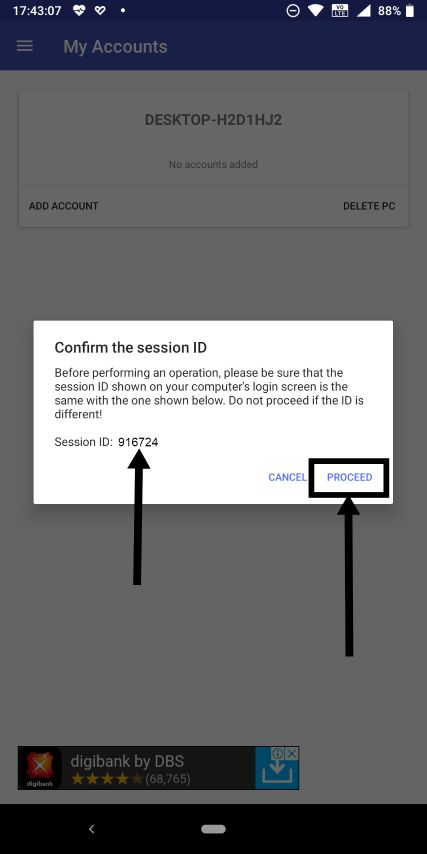
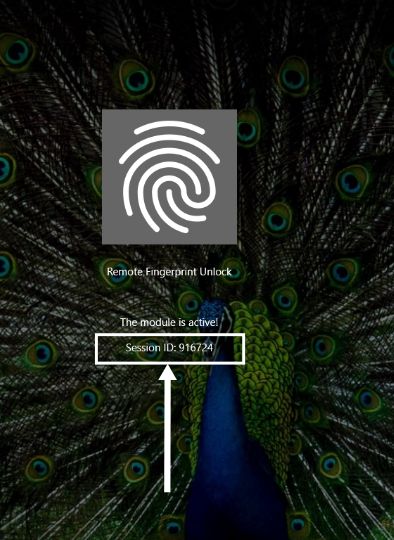
Step 11: Now you will have to confirm the session. Just compare the ‘Session ID’ that is displayed on the app with the one, that is displayed on your Windows lock screen. If everything is perfect, tap on ‘Proceed’.
Step 12: Now you can tap on the hamburger menu, i.e. the menu icon with three horizontal lines, and tap on ‘Unlock’.

Step 13: Now tap on the fingerprint button on your smartphone, and this should immediately unlock your Windows computer.
Now you can just open the ‘Remote Fingerprint Unlock’ to unlock your Windows computer at ease.
So that was it. Remote Fingerprint Unlock also has a pro version which can add more delicious items to your plate. You can upgrade to the pro version of Remote Fingerprint Unlock at just $1.12 or Rs. 80, and it is worth upgrading if you want to unlock multiple computers or want some advanced features from the app.
Pro version benefits
Here are some benefits of using the pro version of ‘Remote Fingerprint Unlock’.
- With the paid version of an app, the ads get removed at the first place, and Remote Fingerprint Unlock isn’t an exception to that.
- The pro version also has support for wake on LAN.
- You can unlock multiple computers, which can be useful if you have two or more computers.
- The paid version also has support for widgets to unlock your computer, and new features will keep coming once they are available.
This works flawlessly on all the major version of Windows, and it worked like a charm. I tried it on both Windows 7 and Windows 10 and there wasn’t even the smallest issue. All the information sent between your Android device and your computer is always encrypted, and thus, no worries about privacy. If you are having a laptop or a desktop and don’t want to invest in purchasing a new fingerprint reader only for authentication, this tutorial is for you.
So that was it. Hope the tutorial was helpful for you. Did you face any problems implementing the tutorial? Feel free to comment the same down below.
Other Tutorials:
Related Posts
10 Best PikaShow alternatives for streaming
8 Best Free QR Code Generator Android Apps on Play Store
6 Best Google Play Store Alternatives for Android Users to install
The Best Pokémon Games of All Time
7 Best Screen Mirroring Apps for Android and iOS
Best Mental Health Apps to Destress Your Life and Combat Anxiety