LAMP is a well-known abbreviation for Linux, Apache, MySQL, and PHP. This is a popular setup for servers and virtual servers for operating a web server. Ubuntu 20.04 LTS Focal Fossa is required by this tutorial.
On Linux when it comes to setting up a web server environment then LAMP, which is a combination of a couple of software comes first in mind. It is required by many popular and well-known web platforms around the world such as WordPress, Magento etc.
Requirements
So, we are creating this guide for Ubuntu 20.04 LTS, thus we need that along with a user with sudo access, to run install and run web server components (Apache web server, MySQL or MariaDB as a database server, and PHP to run applications needed it) we are about to install here. For previous Ubuntu versions, you can see LAMP stack on Ubuntu 16.04 & Ubuntu 18.04. You can also use the below steps for Ubuntu 19.10/19.04/18.10/18.04/17.10/17.04/16.04…
Step 1 – Install Apache
Apache which recognizes as apache2 on Ubuntu’s command line is one of the most popular web servers and many web hosting providers rely on it. Installation of it on Ubuntu is relatively easy, just need to execute one command, that’s it:
First, update your system to its latest state:
sudo apt update
Apache is available on the official repo of Ubuntu and can be installed using the APT package manager.
sudo apt install apache2
Once you execute the above command, being a sudo user, it will ask you to enter your user password and then type Y and hit the Enter button to install it.

Step 2 – Configure Firewall for Apache on Ubuntu 20.04
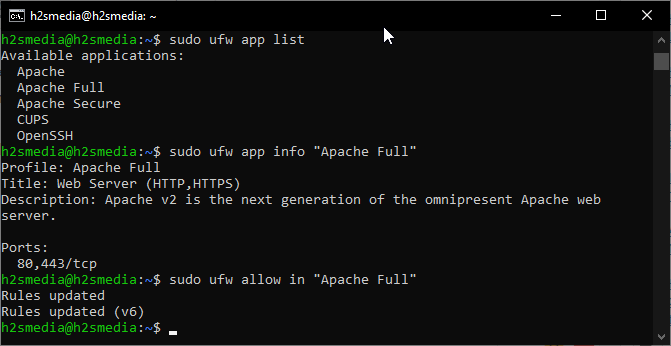
By default, on Ubuntu 20.04 LTS server you will have the UFW firewall enabled, however, if not then use the command sudo apt install ufw to install it and then sudo ufw enable.
So, I am assuming that you already have the firewall on your system, so its time to make sure all HTTP and HTTPS traffic is allowed to access that.
The ports available for Apache profile in Firewall are 80/443. Thus, to open them for only Apache use the below command:
sudo ufw allow in "Apache Full"
Now, we can access our web server both using a local desktop browser and if you are using server then any other computer in the local or remote network (the IP address of server should be accessible remotely). See: Manage your webserver with Cockpit.
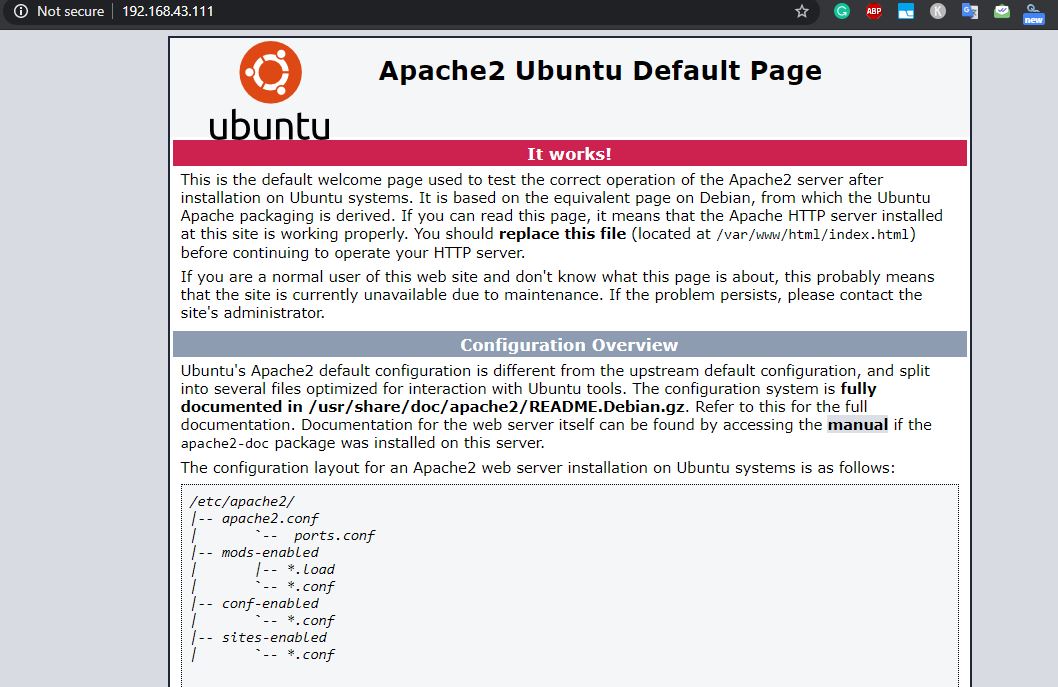
Thus, point your server IP address in the browser, for example, my local IP address is 192.168.43.111, thus using it in a browser will open the default web page of Apache server and the same will be in yours.
Step 3: MySQL installation
Although we already have created detail article on the installation and configuration of the MySQL on Ubuntu 20.04, you can see that. However, we are going to show the commands here too, quickly.
sudo apt install mysql-server
On Ubuntu 20.04, the latest version of the MySQL is available to install is 8.0 in the official Ubuntu repo using the APT. Thus, just use the above command.
After that to secure your MySQL installation run the security script:
sudo mysql_secure_installation
The security script will give you series of options to secure the database such as removing of anonymous users and demo database tables, and its access, Password strength checker plugin, allow you to set password MySQL root user.
Note: Install VALIDATE PASSWORD COMPONENT will ask you set the priority of password strength, I mean how strong and difficult to crack the password will be. So you can go for Low or high strength, remember, the higher the strength, more complex password will be required by the MySQL, which sometimes also irritates because the even slightly weak password will be rejected. Thus, if you are just setting the database for experiment or testing don’t enable this plugin or go for a low profile.
To create a user in MYSQL, use the following commands:
The command to create a database and user.
CREATE DATABASE db_name_here;
Note: Replace db_name_here with the database name you want to give it.
CREATE USER 'h2smedia'@'localhost' IDENTIFIED BY 'pass';
Grant rights to manage database activities to the user you have.
GRANT SELECT, INSERT, UPDATE, DELETE, CREATE, INDEX, DROP, ALTER, CREATE TEMPORARY TABLES, LOCK TABLES ON db_name_here. * TO 'h2smedia'@'localhost';
Note: Replace the h2smedia with the username and pass with the password you want to assign.
If you just want to set or change the root user password of MySQL then:
sudo MySQL
ALTER USER 'root'@'localhost' IDENTIFIED WITH mysql_native_password BY 'password';
Step 4: PHP installation on Ubuntu 20.04 LTS (Focal fossa)
Well, PHP is Hypertext Preprocessor open-source scripting language widely used around the world for web development, thus if we want to process and display dynamic content of the web applications developed in PHP, we need it on our web server. It also helps to fetch the data stored in MySQL database to show on web display for example WordPress.
By default, PHP version php7.4 is available on Ubuntu 20.04 repository to install, thus we go with that along with some other packages, so that our PHP can easily communicate with Apache server and MySQL database.
sudo apt install php libapache2-mod-php php-mysql
Your Apache web folder files are in the /var/www/folder. For PHP to work optimally, it is advisable to adjust the rights for this folder. For this, the owner and the group of the folder are changed to www-data.
sudo chown -R www-data:www-data /var/www/
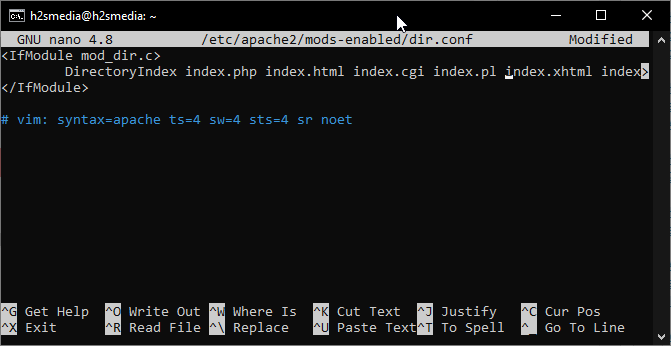
Now, by default, Apache first looks for index.html but as we mostly want our LAMP environment to use PHP applications, thus it would be best if our web server gives preference to PHP files and then others.
Therefore, edit the Apache directory configurations file using the below command:
sudo nano /etc/apache2/mods-enabled/dir.conf
Now, delete index.php
GNU nano 4.8 /etc/apache2/mods-enabled/dir.conf <IfModule mod_dir.c>
DirectoryIndex index.html index.cgi index.pl index.php index.xhtml index></IfModule>

# vim: syntax=apache ts=4 sw=4 sts=4 sr noet
And type it in the first position, so it will be something like this.
<IfModule mod_dir.c>
DirectoryIndex index.php index.html index.cgi index.pl index.xhtml index></IfModule>

# vim: syntax=apache ts=4 sw=4 sts=4 sr noet
To exit and save press CTRL+X and then type Y followed by the ENTER button.
To check whether your PHP is working fine or not, let’s create a PHP info file:
sudo nano /var/www/html/info.php
Copy and Paste the following code:
<?php
phpinfo();
?>
Now save the file with CTRL+X, type Y and press ENTER button.
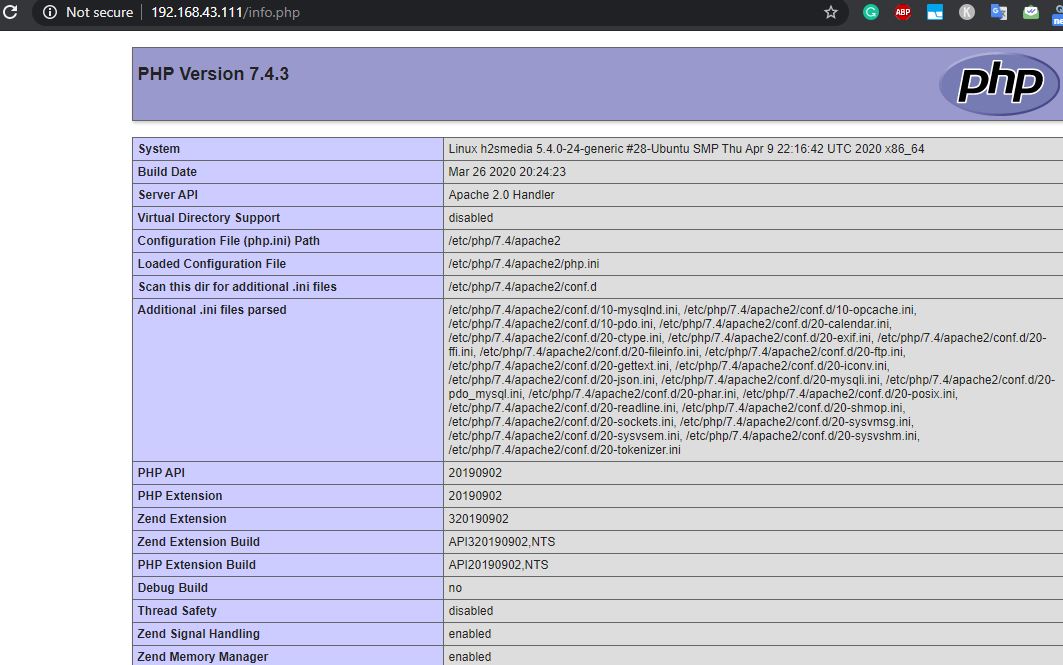
To check, go to browser and type you-server-ipaddress/info.php Something like below will appear with all information about PHP version and its installed modules.
Further, if you want to add your website files to display and access over the web, go to
cd /var/www/html/
Here delete the default index.html and copy your website files, for example- WordPress.
sudo rm index.html
Finally, reload the web-server services.
sudo systemctl restart apache2
Step 5: Install PhpMyAdmin (optional)
If you want to easily handle all your MySQL database on Ubuntu 20. 04 LTS (Focal Fossar) then installing phpMyAdmin will be a great idea.
sudo apt install phpmyadmin
While installing, it will ask you which webserver do you want to use? Select the Apache using spacebar and then OK button using the TAB key followed by the ENTER key…
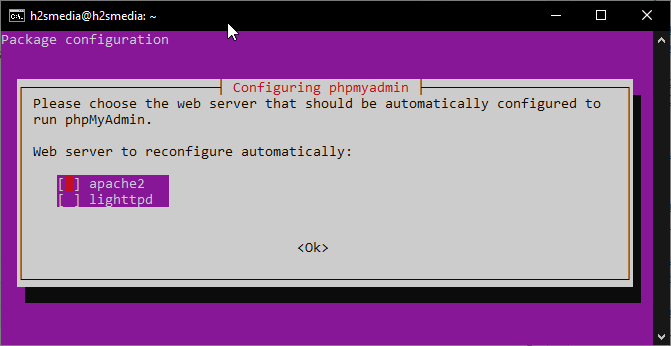
Using TAB select the OK button.
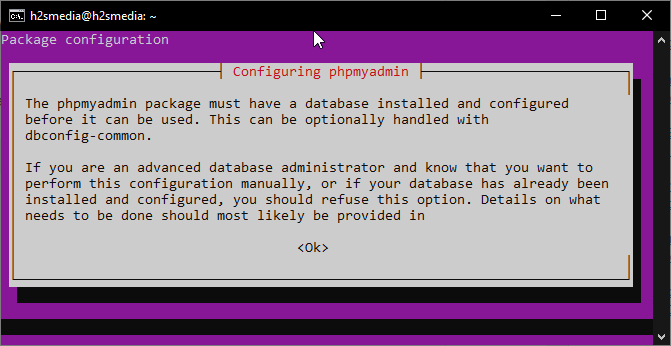
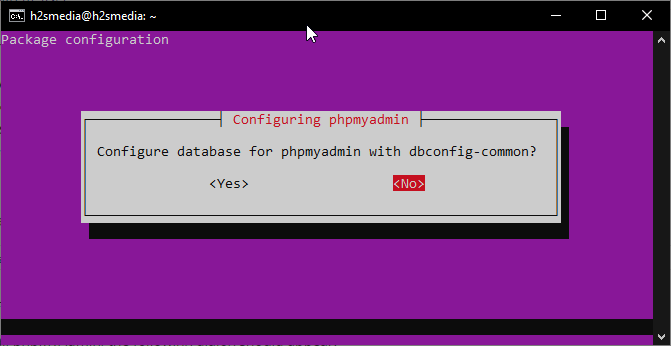
We don’t want to configure a database for PHPMyAdmin with dbconfig-common thus, simply select NO, In case you want then select YES and enter the MySQL application password.
Once installed, again go to browser and type your-server-ipaddress/phpmyadmin
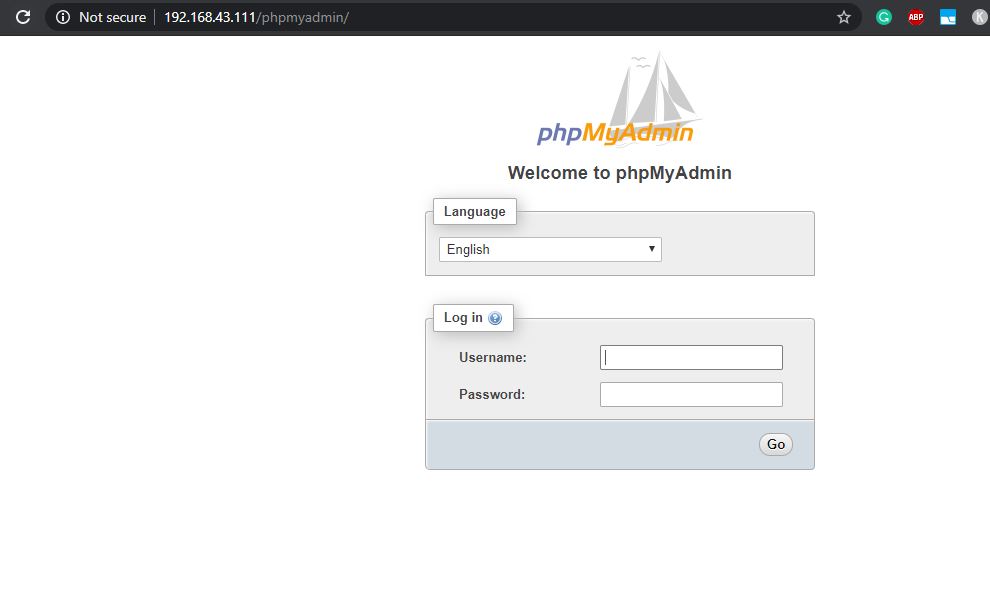
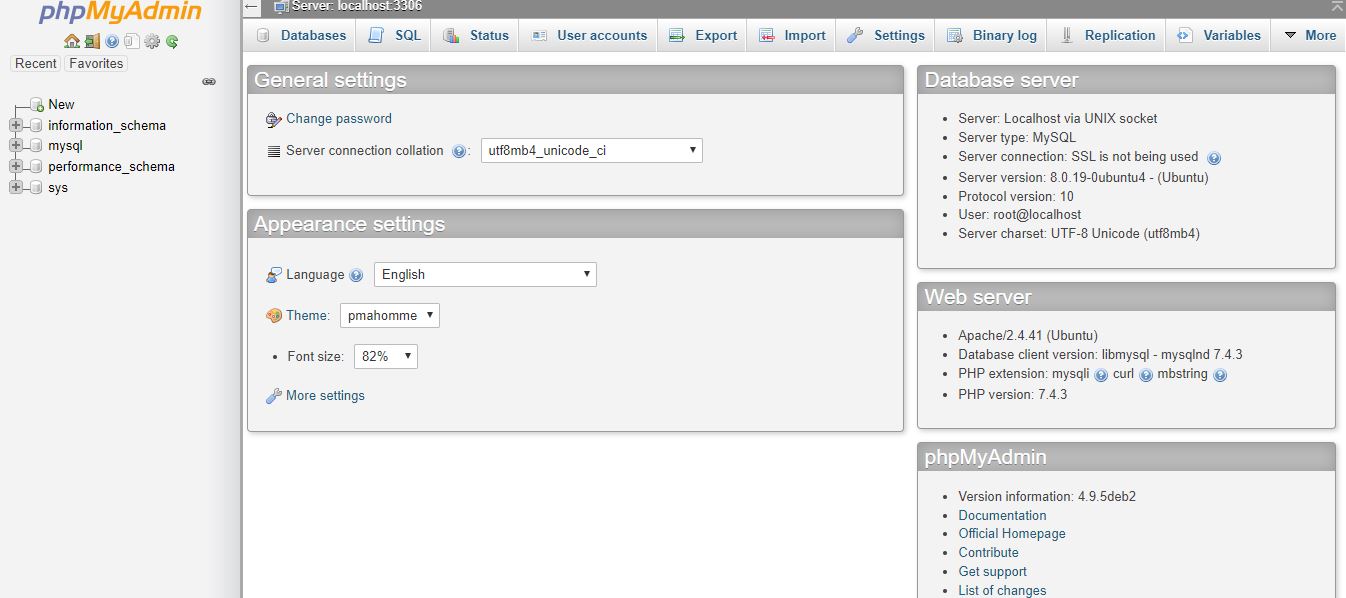
You will get a login screen. Enter your MySQL database username and password to access that in PhPMyAdmin. For example, I want to access my all databases present in MySQL, thus I will use the root user of my database.
Ending Notes:
These were the simple step to install LAMP web server environment on Linux such as Ubuntu 20.04 to host multiple website or web applications.
Other Articles:


Yes! Finally something about animal onesies.