The LAMP is an open source software Stack of Apache web server, PHP and MySQL database installed on Linux operating system systems such as Ubuntu server. A LAMP can be installed through some basic Terminal Commands on a server to enable it to host the websites and web apps.
The LAMP stands for:
L- stands for Linux operating systems
A- it represents the Apache web server
M- For MySQL database to store the websites and web apps data
P- Last ‘P’ is for the PHP to process the dynamic content
In this Linux tutorial, we will show you the commands and how to use them to install LAMP stack software on Ubuntu 16.04 using the terminal. The commands are almost same and can be used on all Debian based Linux operating system such as Linux Mint.
Install Linux, Apache, MySQL, PHP (LAMP) stack on Ubuntu 16.04
Steps to follow for the installation of LAMP server on Ubuntu
- Install Apache
- Install MySQL
- Install phpMyAdmin
- Install PHP
- Restart Apache Server
- Verify Apache Installation
- Check PHP
- Ubuntu LAMP Server installation successful
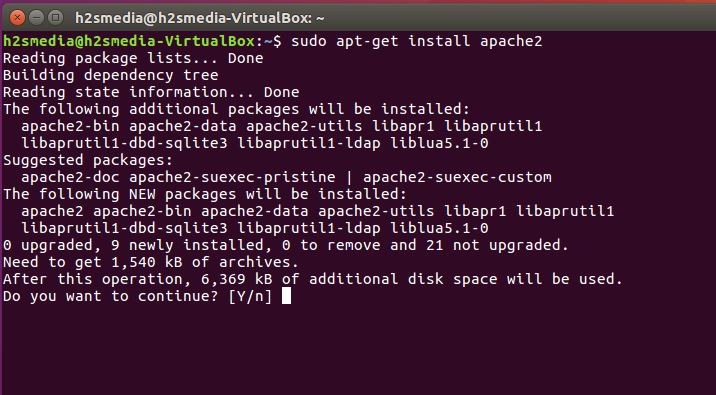
Step 1: Install Apache on Ubuntu 16.04
To enable the Apache web server on Ubuntu 16.04, we just need to install one Metapackage that contains all libraries and dependencies for Apache web server i.e apache2. You can install it directly from the Ubuntu Software Center by searching for it or just open the Ubuntu terminal and run the following command:
sudo apt-get update
sudo apt-get install apache2
First, update your Ubuntu system by running the update command and after that use the second to install the Apache. It will confirm before installation of apache2, just type ‘Y‘ and press Enter Key.
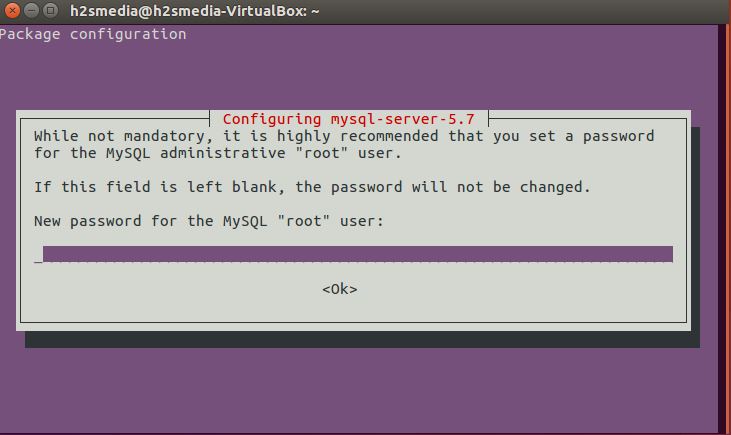
Step 2: Install MySQL on Ubuntu 16.04
To install the MySQL database on Ubuntu you need to run a command given in this step to install the mysql-server package. Again on the terminal run the below command and then press “Y” to install it.
sudo apt-get install mysql-server

Between the installation of MySQL, the system will ask to set the root password for MySQL database. Something, like shown in the below screenshot, will appear. Enter your password…
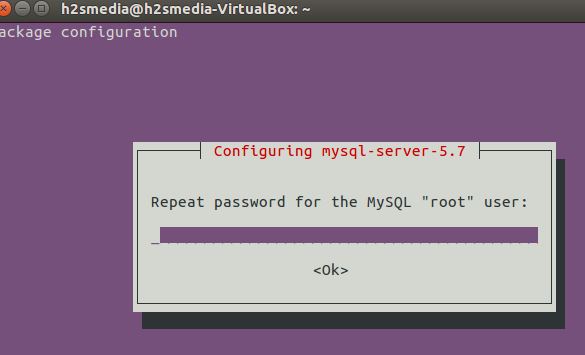
Confirm the above-given password again…
And the MySQL database will successfully installed on your Ubuntu system.
Step 3: Install phpMyAdmin
To access the MySQL database from the browser interface we need to install the phpMyAdmin
apt-get -y install phpmyadmin
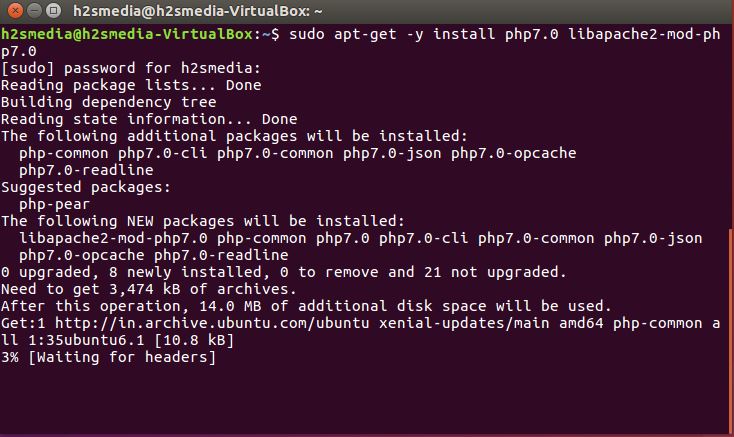
Step 4: Install PHP on Ubuntu
To install PHP 7.0 on Ubuntu 16.04, open the terminal to install meta packs php7.0 and libapache2-mod-php7.0. Run the following to setup PHP on your Ubuntu server.
sudo apt-get -y install php7.0 libapacher-mod-php7.0
Now we need to add MYSQL support to PHP and for that, we need to install a couple of packages; here is the command
apt-get -y install php7.0-mysql php7.0-curl php7.0-gd php7.0-intl php-pear
php-imagick php7.0-imap php7.0-mcrypt php-memcache php7.0-pspell
php7.0-recode php7.0-sqlite3 php7.0-tidy
php7.0-xmlrpc php7.0-xsl php7.0-mbstring php-gettext
If you want to speed up the PHP 7 you can also install the opcode cacher to speed and optimize the PHP page. We also install the php-apcu, to provide the cache function of the APC cache to Opcache which is another caching system to provide compatibility to different CMS systems.
apt-get -y install php7.0-opcache php-apcu
Step 5: Restart Apache Server
After the installation of MySQL and PHP, its time to restart the Apache web server by running the following command in your Ubuntu terminal.
sudo /etc/init.d/apache2 restart

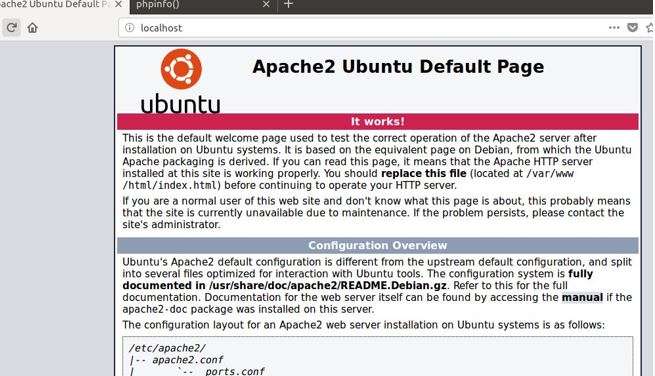
Step 6: Verify Apache Installation
Open a web browser and navigate to http://localhost/. You will find a default page of Apache2 as showm in the screenshot…
Step 7: Check PHP
To test the PHP installation PHP version, we need to first create the info.php file in the document root folder under /var/www/html. It will display all the details about your PHP version.
Use the following commands:
First, we create an info.php file for that run the commands in the terminal given below:
sudo nano /var/www/html/info.php
After executing the above command, a nano editor will open, now copy paste the below parameters…
<?php
phpinfo();
?>
Now press Ctrl+X and type Y and press Enter button to save & exit…
Then give owner permission of info.php file to the www-data user and group by using the command:
chown www-data:www-data /var/www/html/info.php
I am sure everything is set now, just open your browser and type http://localhost/info.php
Ubuntu LAMP Server installation is successful, if you have any question please let us know…
Also See:
- Install Plex Media Server on Ubuntu Step By Step
- How to install Wine on Ubuntu or Linux Mint using Terminal To Run Window Apps
- Backup WordPress database without phpMyAdmin: Using CPanel
- How to Install WAMP server for windows 10
Related Posts
Running PHP Files in Visual Studio Code with XAMPP: A Step-by-Step Guide
Install Apache, PHP & MYSQL on Windows 11 | 10 using CMD
How to know if PHP is installed on Windows?
How to create a Mysql Database on Amazon LightSail
Rufus for linux? Not available, Use these best alternatives
How to transfer a Blogger (Blogspot) site from one account to another