There are a couple of web servers that dominated the server world such as Apache and Nginx, apart from them Lightweight LiteSpeed webserver and Microsoft IIS are also there. However, no doubt these are the popular ones but there are some new emerging open source projects such as Caddy web server.
Now, what is Caddy?
It is an alternative option to a web server like Apache, Microsoft II and others. Yet, not much popular, however, developers are working on it. It has been designed to support all popular platforms that’s why it is available for Windows, macOS, Linux, BSD, Android, Solaris, 32-bit, x64, ARM, mips64 and more… Thus, it is a cross-platform server-side application that handles the HTTP/https request.
Caddy has a wide range of features:
- It comes in Single downloadable executable file, means no external dependencies.
- No need to install anything, just start using it from the downloaded Caddy directory.
- After issuing any changes to Caddy web server, with a single command, it can be reloaded with zero downtime.
- Cryptographically signed packages
- Can run on Docker images
- Easy to upgrade with zero downtime to server
- Caddy web server uses HTTPS by default.
- Caddy features can be extended with plugins.
- Available in community and Enterprise editions.
- Support multiple CPU cores
- Support Virtual Host
- QUIC, proxying, FastCGI, reverse proxy support
- Cipher technologies including AES-GCM, ChaCha, and ECC by default.
- TLS 1.3 by default
- PCI-compliant, load balancing; capable of proxying WebSocket connections, Gzip compression
- Scalable and more…
Tutorial to install Caddy web server on CentOS 8
It doesn’t matter you are on Ubuntu, Debian, RedHat or CentOS 8 / Stream, the Caddy is available for every Linux platform. Just download its executable package file and start developing your web app or website. The steps given here will be similar for any kind of Linux distro. It could be CetnOS 7, Ubuntu 18.04 etc. However, here we are using CentOS 8
Step 1: Login to CentOS 8 Linux server
If you are using a graphical version, simply open your Command Terminal from the Activities menu of GNOME GUI. After that login as root or you should have a user with sudo rights. If you are login with a user that is in the sudoers group, then you have to use sudo with every command given below.
Step 2: Download & Install Caddy Web Server
Here we are using the command line to download Caddy server, however, the users can go to its official page to download directly for Linux or other platforms such as Windows or Android.
Download Caddy web server with a license to install for Personal usage
sudo curl https://getcaddy.com | bash -s personal

or

sudo wget -qO- https://getcaddy.com | bash -s personal
Download Caddy to install for commercial usage (optional)
sudo curl https://getcaddy.com | bash -s commercial
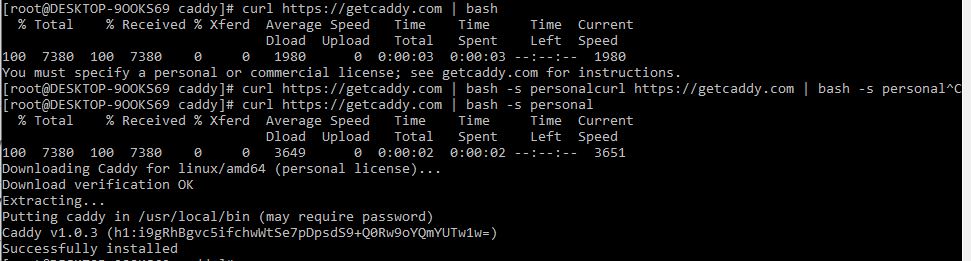
OutPut for the Personal download command:
[root@DESKTOP-9OOKS69 caddy]# curl https://getcaddy.com | bash -s personal
   % Total    % Received % Xferd  Average Speed   Time    Time     Time  Current
                                  Dload  Upload   Total   Spent    Left  Speed
 100  7380  100  7380    0     0   3649      0  0:00:02  0:00:02 --:--:--  3651
 Downloading Caddy for linux/amd64 (personal license)…
 Download verification OK
 Extracting…
 Putting caddy in /usr/local/bin (may require password)
 Caddy v1.0.3 (h1:i9gRhBgvc5ifchwWtSe7pDpsdS9+Q0Rw9oYQmYUTw1w=)
 Successfully installed
After the successful installation or placement of binaries, let see where are they located, for that simply use the command:
which caddy
And the output will be:
/usr/local/bin/caddy
Step 3: Change Caddy ownership and permissions
Assign Caddy binary to the root user and group with restricted permissions for other users. It is because in case some process of Caddy would get compromised that will not be able to take on its binary or system core files.
sudo chown root:root /usr/local/bin/caddy
Above command will give full read, write and execute access only to root while any other user will only read and execute it but will not be able to modify or write anything to Caddy directory or to its core file.
sudo chmod 755 /usr/local/bin/caddy
Step 4: Bind the Caddy process to low ports
Here we use setcap command that will help Caddy to bind to privilege pots without giving it a full privilege.
sudo setcap 'cap_net_bind_service=+ep' /usr/local/bin/caddy
Step 5: Create a www-data user for Caddy
In Apache or Nginx, while installing them a www-data user without the access of root automatically gets created for it. However, it doesn’t happen in Caddy web server and we have to do it manually.
sudo adduser -r -d /var/www -s /sbin/nologin www-data
sudo groupadd -g www-data
In the above command, we are adding a user named “www-data“. You can set something else. The user default directory will be /var/www, we have done this because we are going to use to install websites. As we don’t want to give root access and want to prevent it from any kind of system login, thus we use /sbin/nologin in the above command.
Step 6: Create a directory for Caddy to serve websites
Now, we have to create directory that holds the Caddyfile, it is a file which tells the Caddy web server what is the location of files that it has to display in the browser. For example, if you want to install WordPress on Caddy, so we have to tell the caddy where are the files of WordPress. For that, we use Caddyfile to give the path of WordPress installation files.
So, here we are creating a directory under /etc.
sudo mkdir /etc/caddy
Now we change will keep the ownership of this directory to root while we add it to the www-data group. So, our Caddy server can read the Caddyfile that will present inside this directory.
sudo chown -R root:www-data /etc/caddy
Note: Replace www-data with your created user in the above or upcoming commands, in case you have create eith some different name.
Step 7: Directory for SSL
As Caddy by default supports https, thus we need to create a directory where Caddy will save its Let’s Encrypt imported certificates.
sudo mkdir /etc/ssl/caddy
Change ownership and group
sudo chown -R root:www-data /etc/ssl/caddy
Above for security, we have changed the permission of the caddy directory that holds SSL certificates, thus only root user will be able to have full right while others can only read it.
sudo chmod 0770 /etc/ssl/caddy
Step 8: Create Caddyfile
Now, inside the caddy directory create an empty file called Caddyfile that we will use in the upcoming commands to tell the Caddy web server where is our website hosting files.
touch /etc/caddy/Caddyfile
Step 9: Directory for website files
Same like Apache or Nginx, we also create a directory for Caddy i.e /var/www. Where we save our website files to use with the webserver.
mkdir /var/www
Change the ownership of above directly completely to Caddy user. In our case, it is ‘www-data‘ and in your case, it would be what you have created in Step 3 of this article.
We are giving ownership full rights of the web directory to the user that will use by Caddy.
sudo chown www-data:www-data /var/www
Step 10: Create a System Service for Caddy webserver
By default, to run caddy every time we have to use its command i.e caddy and after using that we can’t run some other command in the same terminal. Thus, we will install a system service for Caddy web server which will run in the background just like Apache and Nginx services.
sudo curl -s https://raw.githubusercontent.com/mholt/caddy/master/dist/init/linux-systemd/caddy.service -o /etc/systemd/system/caddy.service
Step 11: Modified Caddy Service file permission
Here we will change the permission of the Caddy service and give its full access to root only while the rest of users can only execute or read it.
sudo chmod 644 /etc/systemd/system/caddy.service
Step 12: Start Caddy Service
Reload the system services to let it know about our newest addition:
systemctl daemon-reload
Check its status:
systemctl status caddy.service

If you got the output like shown in the above screenshot then it means Caddy service has been created successfully.
Step 13: Open port 80 & 443 in the firewall of the system
To access the Caddy web server outside the local system using browser we need to open HTTP and https protocols for the public so that they can connect to it in order to access the hosted web pages.
sudo firewall-cmd --permanent --zone=public --add-service=http
sudo firewall-cmd --permanent --zone=public --add-service=https
sudo firewall-cmd --reload
In case your firewall is not running then simply type
systemctl enable firewall-cmd
systemctl start firewall-cmd
Step 14: Create a Demo web page to test Caddy webserver
To see whether the created web server is working fine or not, here we create test HTML web page:
sudo touch /var/www/index.html
sudo vi /var/www/index.html
Press Insert button from keyboard. Copy and paste or type the following lines…
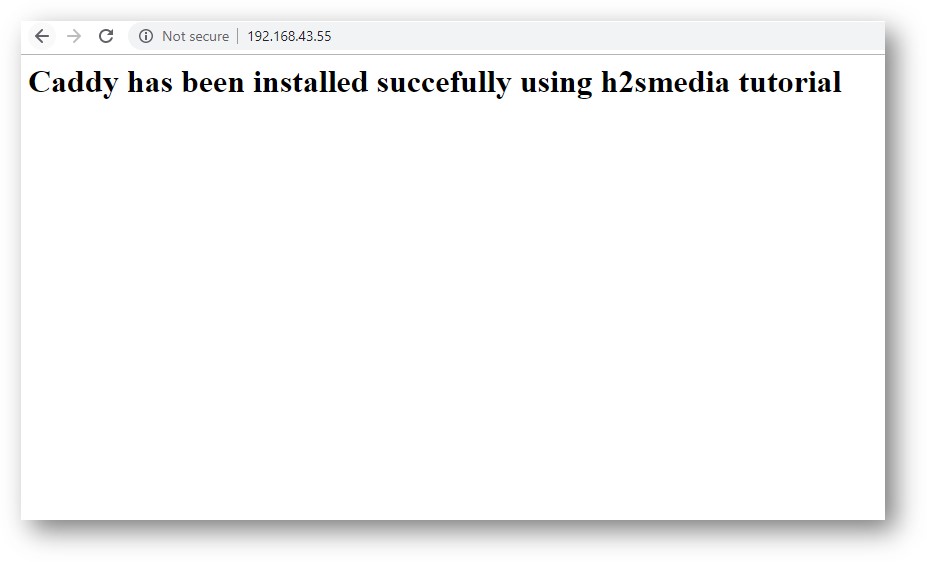
<h1>Caddy has been installed succefully using h2smedia tutorial</h1>
To save it, press the ESC key and then type :wq and hit the Enter button
Step 15: Edit Caddyfile
Now let’s show the way to our Caddy web server that where is our web page and which port to use.
sudo vi /etc/caddy/Caddyfile
:80 {
    root /var/www
}
Step 16: Enable and Start Caddy web service
Finally, everything is set up and its time to enable and run the service of Caddy in the background.
Below command will enable the service so that it can be automatically started with system boot.
systemctl enable caddy.service
Start the service with this command:
sudo systemctl start caddy
Check the status of the same
sudo systemctl status caddy
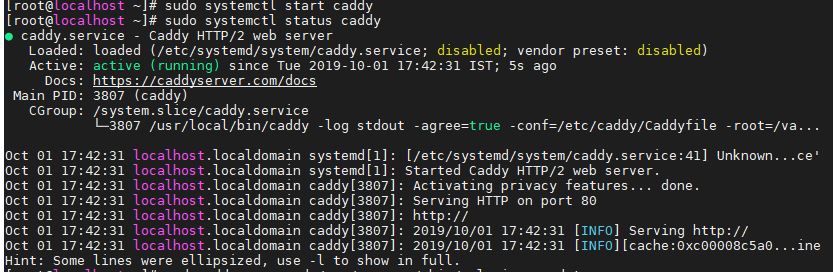
If you see below output then everything is OK!…
[root@localhost ~]# sudo systemctl status caddy
 ● caddy.service - Caddy HTTP/2 web server
    Loaded: loaded (/etc/systemd/system/caddy.service; disabled; vendor preset: disabled)
    Active: active (running) since Tue 2019-10-01 17:42:31 IST; 5s ago
      Docs: https://caddyserver.com/docs
  Main PID: 3807 (caddy)
    CGroup: /system.slice/caddy.service
            └─3807 /usr/local/bin/caddy -log stdout -agree=true -conf=/etc/caddy/Caddyfile -root=/va…
 Oct 01 17:42:31 localhost.localdomain systemd[1]: [/etc/systemd/system/caddy.service:41] Unknown…ce'
 Oct 01 17:42:31 localhost.localdomain systemd[1]: Started Caddy HTTP/2 web server.
 Oct 01 17:42:31 localhost.localdomain caddy[3807]: Activating privacy features… done.
 Oct 01 17:42:31 localhost.localdomain caddy[3807]: Serving HTTP on port 80
 Oct 01 17:42:31 localhost.localdomain caddy[3807]: http://
 Oct 01 17:42:31 localhost.localdomain caddy[3807]: 2019/10/01 17:42:31 [INFO] Serving http://
 Oct 01 17:42:31 localhost.localdomain caddy[3807]: 2019/10/01 17:42:31 [INFO][cache:0xc00008c5a0…ine
 Hint: Some lines were ellipsized, use -l to show in full.
Step 17: Now test the web page
If you are on a local server with GUI then you can simply type http://localhost:80 and for the remote server, use its http://ip-address:80 in the web browser.
Caddy Automatic TLS
As we know Caddy can provide SSL certificate automatically via Let’s Crypt using an email ID provided by the user. Thus, to set up that again edits CaddyFile.
sudo vi /etc/caddy/Caddyfile
And replace the port 80 with a domain name you want to use with your website. After that also mention your email ID which it will use to install SSL certificate.
h2sexample.com {
     root /var/www
     gzip
     tls [email protected]
 }
Replace the h2sexample.com with your domain name and [email protected] with your email address. And then access it using https, if everything went well, you see the secure webpage.
Other Articles:
Related Posts
Download Visual studio code portable for Windows 11/10 or Linux
15 Best Linux Based OS for Raspberry Pi
How to create a Mysql Database on Amazon LightSail
Rufus for linux? Not available, Use these best alternatives
How to install Anaconda on WSL Windows 10/11 using Ubuntu Linux App
How to transfer a Blogger (Blogspot) site from one account to another