Microsoft Hyper-V Server 2019 is a free product by Microsoft, it is a Type-1 Virtualization platform. This means we can install it on our PC or server (bare metal ) without any previous operating system on it. Furthermore, we can even set it up in already existing virtualization to create nested virtual machines.
If you have some spare system that you want to turn into a Virtual platform to run various Guest OS such as Windows 10/8/7, Linux – Ubuntu, CetnOS, Debian, RHEL, Linux Mint, etc. then you should look at this platform. Although, there are a couple of Best Open source Bare metal Virtualization available, however, being one of the trusted software giants, it deserves one chance.
Well, if you here then definitely you have already planned to use it. Nevertheless, Windows 10/7 pro & server editions already have this feature but running a standalone Hyper-V version will consume fewer resources.
However, there are some disadvantages of the standalone version, it doesn’t come with GUI, yes it is Microsoft product without a graphical user interface plus less drive support, roles, and hard to manage. Still, if you want to try the standalone product you are free to go. However, I recommend the Windows server rather just alone hyper.
Create bootable USB drive for Free Microsoft Hyper-V Server 2019 ISO
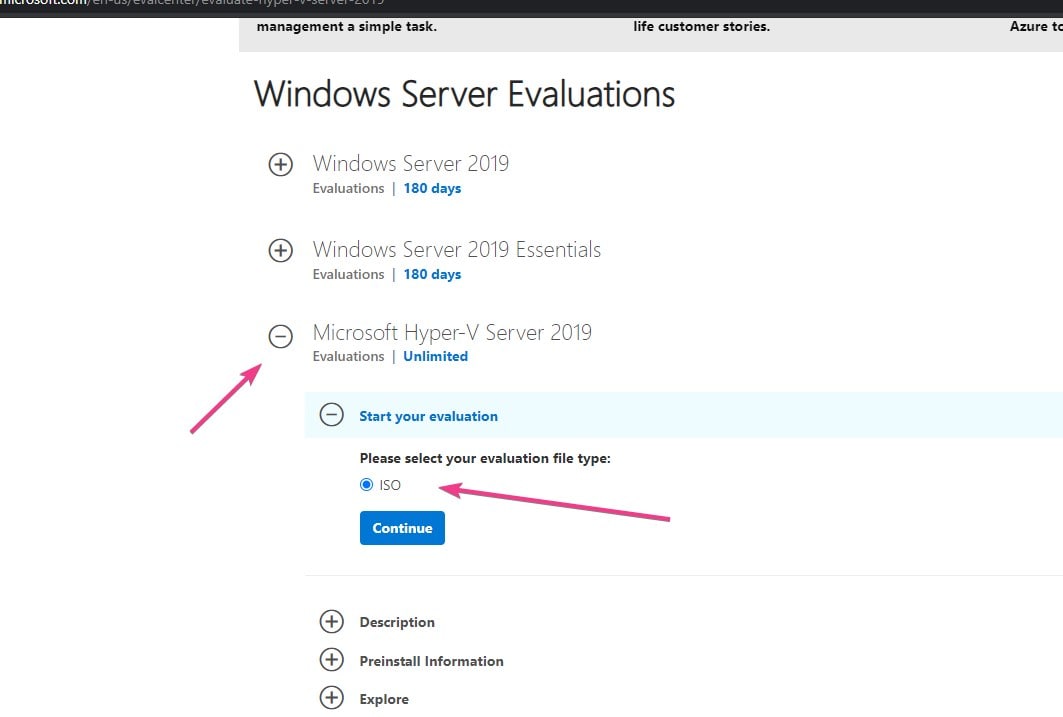
- Go to Microsoft’s official website to download the standalone free version of the Hyper-V 2019 server.
- Click on the Microsoft Hyper-V Server 2019 Tab to expand it
- Press the ISO button to get the file. The size of it will be around 2.6 GB.
- Now, I am assuming that you are on Windows 10/8/7 machine, thus get software called Rufus.ie.
- Rufus is a portable bootable USB drive maker, thus no need to install it. Just double click on its downloaded executable file.
- Plug-in the USB drive which you want to use into the system
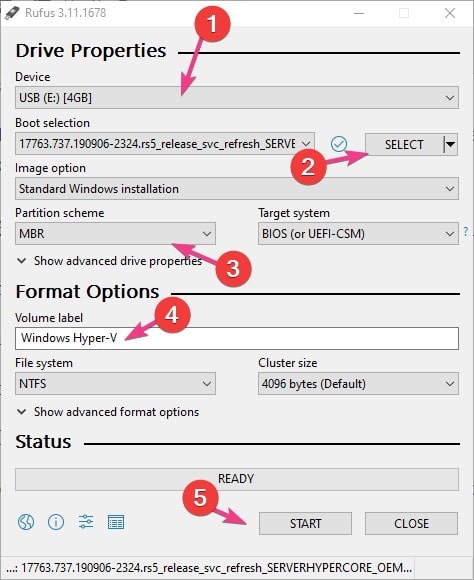
- Select that Pen drive from the Device drop-down of Rufus.
- Now, click on the SELECT button to browse and select the downloaded Hyper-V 2019 ISO.
- Set the partition scheme to MBR, to support UEFI or BIOS running motherboard system.
- Volume Label, this is an optional step. If you want to give some name that is easy to remember to a USB drive. Then type here.
- Leave the File system to its default value that is NTFS.
- Finally, click on the START button.
- You will get a message that the process will destroy all the existing data of the Pen drive. Thus, make sure nothing valuable would be there. Press OK/Yes to start button to start the formatting and flashing Hyper-V ISO file process.
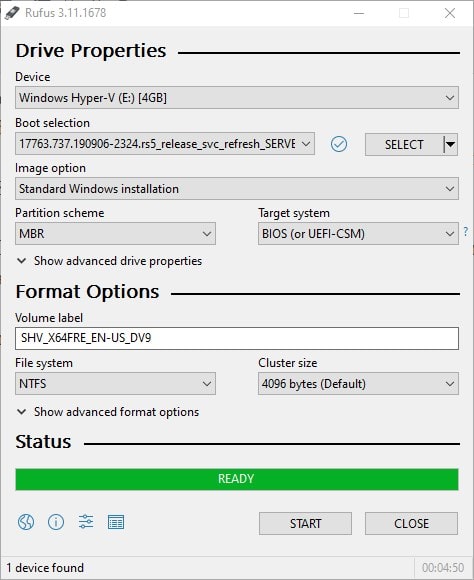
- Wait for some time, soon the green color process bar will be completed and show READY.
- Now, safely remove the Drive and insert in the system where you want to install Hyper-V.
Here are the screenshots for above steps to visually follow them.


Microsoft Hyper-V Server 2019 can be managed using the awesome Windows Admin Center which is also a free download from Microsoft. It’s a browser based management tool. Install WAC on Windows 10 and manage your Hyper-V Server. It’s awesome.