Amazon Linux 2023 is the upgraded version of Amazon Linux 2 which is derived from Fedora. It is created specially by Amazon to run on its Cloud services which is EC2 platform. Nevertheless, the cloud image of AWS Linux 2023 is available to download if anybody wants to try it locally or any other cloud service.
Even though the AL2023 is built by Amazon Web Services to use on its EC2 platform, it is a popular choice for many users instead of using other RHEL-based Linux. So, this was about the AWS Linux now let’s talk about how we can manage or create groups on Amazon Linux and add a user to a particular group. It is essential for securing access and managing permissions on servers because Groups allow users to set permissions for multiple users at once.
Steps will show the command to add a group in Amazon Linux 2023 which is crucial for system administration.
Step 1: Connect to Your Amazon Linux Instance
If you don’t have access to your AL2023 Linux already then we need to access our Amazon Linux instance to run the commands. So, either directly visit the AWS EC2 or use some local terminal to access it using SSH using the given command syntax.
ssh -i /path/to/your-key.pem ec2-user@your-ec2-ip-addressReplace /path/to/your-key.pem with your private key file and your-ec2-ip-address with your EC2 instance’s public IP address. If you are using MobaXterm then can learn – how to access Amazon Linux from MobaXterm.
Step 2: Add a New Group
Once we have the access to AL2023 terminal, we can directly issue all the required commands. So, now to add a new group on Amazon Linux, there is the simple “groupadd” command, let’s see how to use it.
sudo groupadd newgroupnameNote: Change the “newgroupname” with exactly the name you want to assign to your new group.
[Optional] Apart from the simple Group adding, if you are in a situation to add the Group with a Specific GID to ensure it does not conflict with other IDs, here is the command use:
sudo groupadd -g [GID] newgroupnameNote: Replace [GID] with the numeric ID you want to assign.
Step 3: Verify the Group Creation
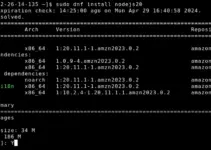
Once you have created a new group on your Amazon Linux 2023, it is a good idea to ensure that it was created successfully. For that, use the given command and you will have details of GID related to Group entry from the system’s group database.
getent group newgroupnameStep 4: Adding Users to the AL2023 Group
Well, we have learned how we can add a new group, now let’s also see the command that allows us to add an existing user to an existing group.
sudo usermod -a -G groupname usernameNote: Replace “newgroupname” with the Group in which you want to add the existing user while “username” with the name of an existing user. The -a option is used to append the user to the group, while -G specifies the group name.
Step 5: Verify User Membership
After adding a user to a group, we can confirm that as well. For that use the given command on your AL2023.
groups usernameOfcourse, replace the “username” with the user you have added, this will list the all groups the user belongs to.
Conclusion
The command to add groups in Amazon Linux is quite easy and the process is also not difficult to understand. Moreover, the commands given in this article are not just limited to AL2023 but can be used for other Linux systems as well such as Ubuntu, RHEL, Almalinux, and more…