
Focussing on the things that matter is one of the key ways to achieve success or to become happy in life. Moving the eyes from the materialistic world to those lovely photographs, capturing photos with blurred backgrounds or the photos captured in bokeh modes are quite popular today. If you really want to capture bokeh shots or photos with blurred backgrounds, you should certainly get a smartphone with a dual rear camera setup, or a smartphone which supports the bokeh mode. Just in case you are having an old smartphone, and do not have plans to purchase a new one right now, you might be apparently disappointed for not being able to capture bokeh shots.
If you are only concerned about blurring the background after capturing the best moments with your pals, you can do that without any toil even if you owe a very ordinary smartphone. Yes, you obviously need an app which can make that possible but wait, it is not going to be too difficult. There are a plethora of apps on the Google Play Store which can make it easy to blur the background images post-capture, but not all are too good. Some might be good for experienced photographers, but those apps are not easy to work with. So today, I will discuss how to blur background images with ease, using one of the most popular photo editing app available for Android on the Play Store. It is also available for iOS, and Windows.
So let’s get started with the tutorial on how to blur the background to get bokeh effect after capturing a photo.
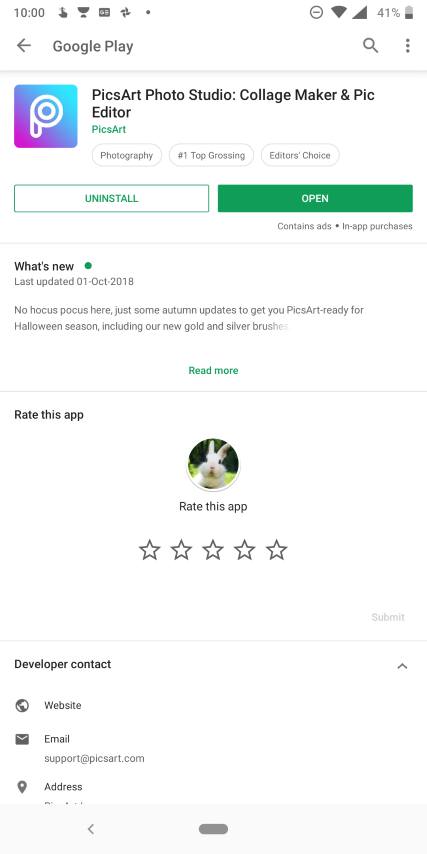
Step 1: Open Google Play Store and download PicsArt Photo Studio. The app is completely free to use.
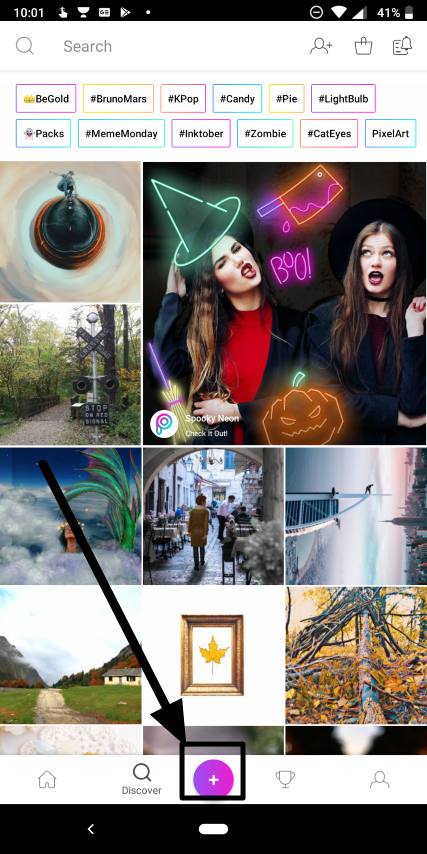
Step 2: Open PicsArt Photo Studio and tap on the ‘+’ button on the bottom middle part of the app.
In case you are not having the photos locally, or you have the photo on Google Photos, just tap on the triple dot menu, and tap on ‘Edit in’ followed by choosing PicsArt from the menu.
Step 3: Now you can get many options. Just focus on the thing you need, and blur the rest. Tap on ‘All Photos’ on the top part of the app to find all your personal photos on your smartphone’s local storage. Now tap on the photos which you want to edit.
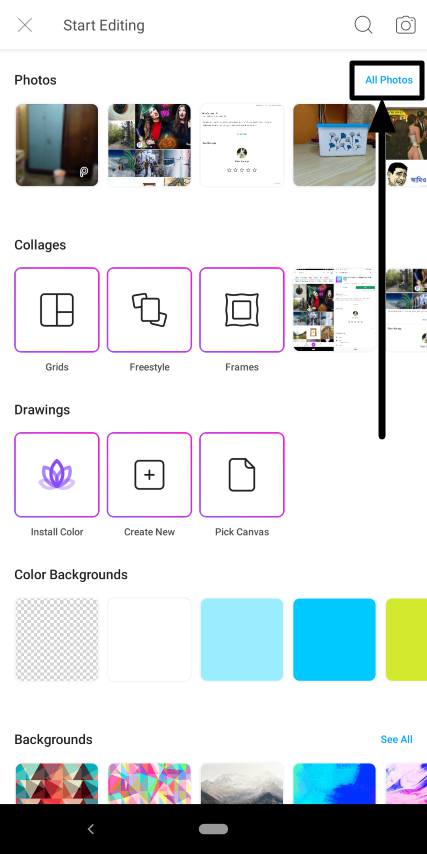
You can even choose a recently captured photo, if you can find that, without tapping on ‘All Photos’.
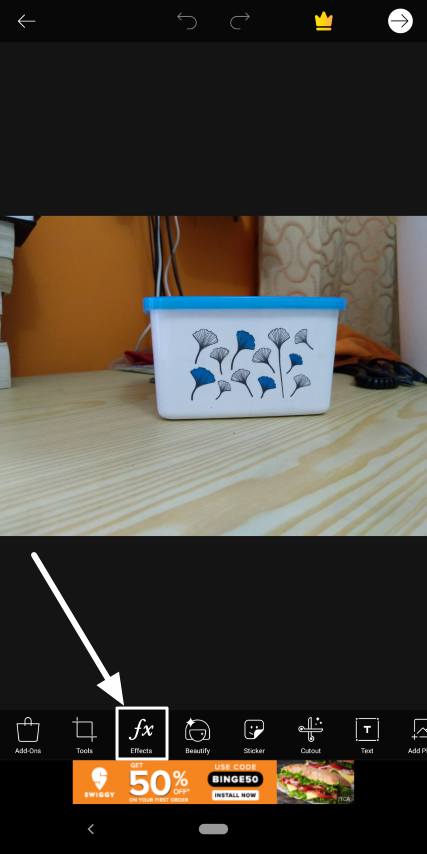
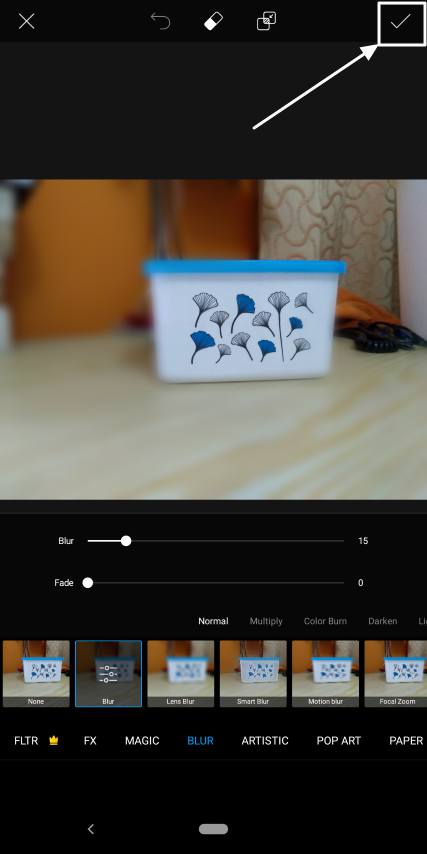
Step 4: After you open the photo on PicsArt Photo Studio, tap on the ‘Effects’ option, and choose ‘Blur’.
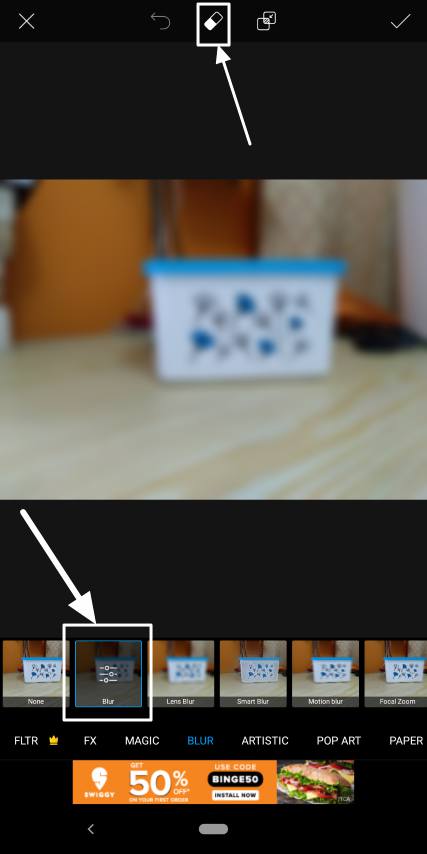
Step 6: Now tap on the eraser icon on the top of the app, and move your fingers on the part, which will remain in focus. For example, if you have taken a photo of your friend, and want the background blurred, move your fingers, across your friend’s, and make that part out of the blur.
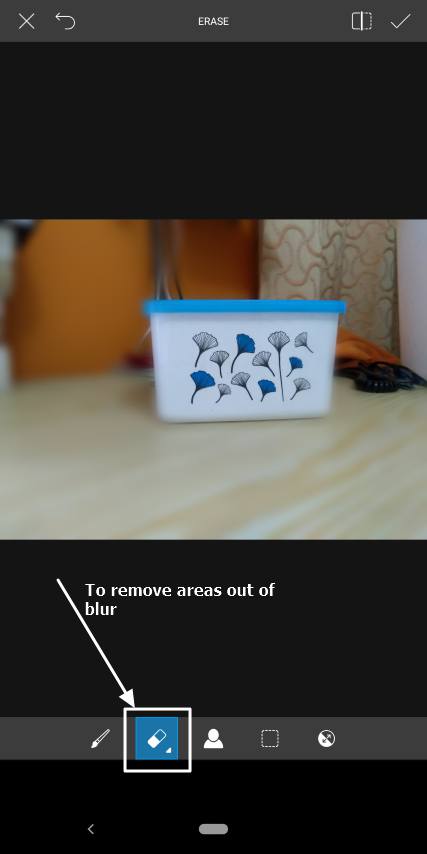
Step 7: Moving your fingers across the photo might lead to errors. No worries. Just tap on the small brush icon, which is present just beside the eraser button. Use that paint on the areas, which are supposed to be out of focus, but are actually within focus, due to the manual errors made by you.
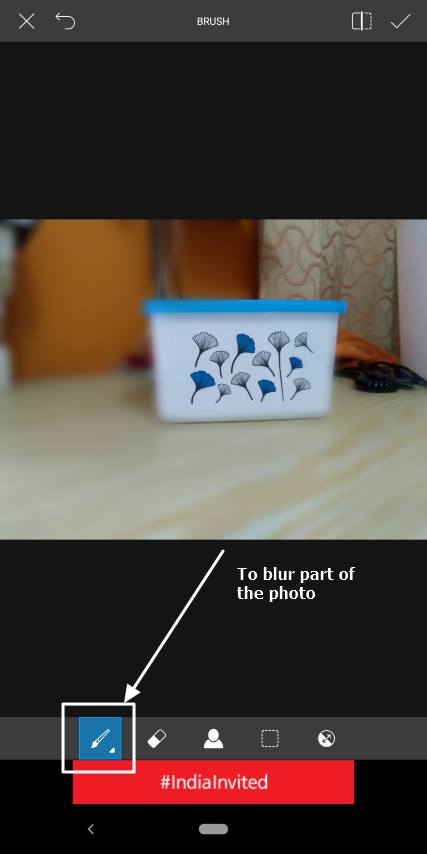
Step 8: Use the brush and rubber combo as many times as you can unless you get the most appropriate bokeh effect, which you want.
Step 9: To make the process more precise, just tap on the brush or eraser twice to modify the size, opacity, and hardness of the tool.
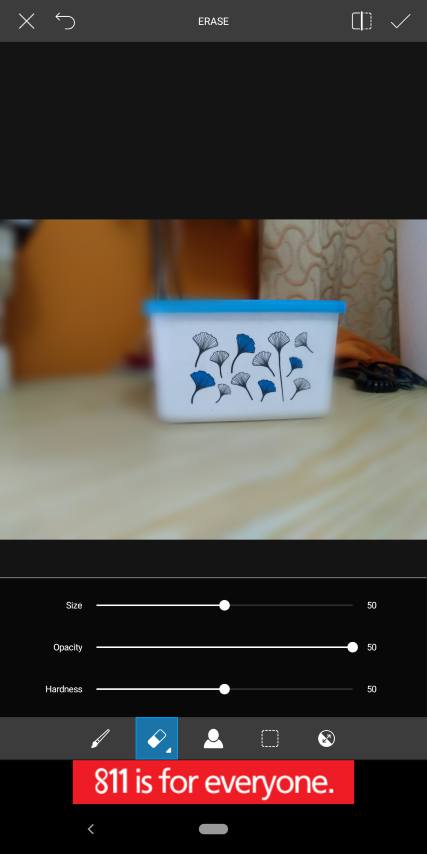
Step 10: Reduce the size if you just want to touch the corners, and make it big if you want to use on bigger areas of the photo.
You can modify the hardness as per your blurring requirements. With increased hardness, the effect of the blur will be better understood compared to reducing the same.
By modifying the opacity, you can change the visibility of the blurring effect. You can keep the hardness effect and the opacity to a particular level for the best blurring or bokeh effect as per your needs.
Step 11: Once you are done with it, tap on the small tick icon on the top right corner of the screen twice. The first one is to apply the blurring effect, while the second one is to get the final preview of the photo. PicsArt Photo Studio offers a plethora of other effects, which are worth using. You can apply those effects and can tap on the tick icon for the second time.
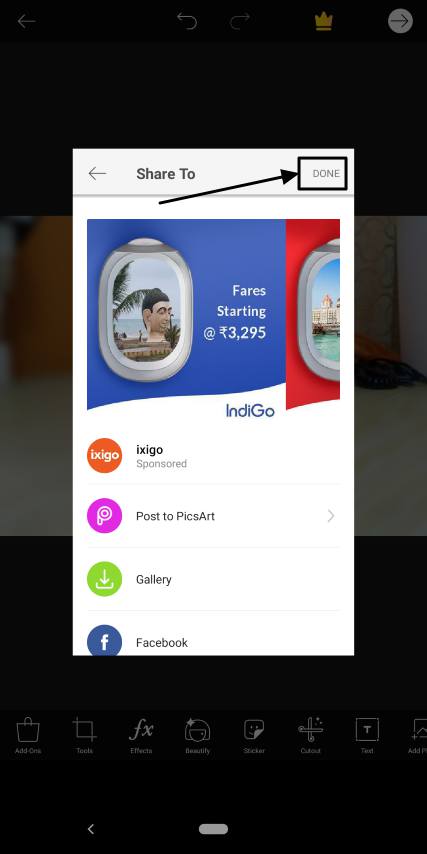
Step 12: Now tap on the forward icon on the same part of the screen.

Step 13: You can now save the final image to the gallery, or somewhere else, by tapping on the ‘More’ icon. You can even upload the pic directly to Facebook, send it through WhatsApp, send it to your PC, email it or do whatever you want.
You are done. While going through all the above steps, you might see ads in some of the steps. That is quite normal as PicsArt Photo Studio is a free ad-supported app.
PicsArt Photo Studio is one of the best apps to get bokeh effect in the easiest possible way if your smartphone does not have a dual camera setup.
Hope the tutorial will be helpful for you after capturing those cool pictures. It was just a software solution but should work for most users out there. Do you have anything to say about this tutorial? Feel free to comment it down below.
Other useful resources
- How to get perfect bokeh effect in any picture using the best camera bokeh app AfterFocus
- How to use both front and back camera using an app on Android phone
- 8 ways Google Lens can make your smartphone really smart
- Top 10 best free or open source Photoshop alternatives for Windows, MacOS & Linux
- 5 things to learn before going for still photography
- How to Use Bokeh Effect in Snapseed Camera Editing App
- Best Battery & Phone cooler apps for Android smartphone
- Dual cameras explained? Choose the best dual camera setup
Related Posts
SJCAM C300 Action Camera Review – Budget Alternative to GoPro
What we can expect from the upcoming GoPro Hero 10 Black
EZVIZ C6N Review: Smart Home camera with IR night vision
7 Best and Affordable Digital Cameras of 2020
What is Pill Camera Technology in the size of a capsule?
Background Eraser – AI to Remove Photo Background for Free