
Know how to install Docker on Windows 10 which includes Docker Engine, Docker CLI client, Docker Compose for Windows, Docker Machine, and Kinematic.
Docker, a popular operating system level virtualization platform, a Type-1 Virtualization released in 2013. It is free to use software that can run different tools and applications in containers. The containers are basically an isolated environment created by the Docker for each application or images of different Linux operating systems. However, despite the individual containers of each application, all of them run by using a single operating system kernel. The benefits of using the Docker is, it is a way lighter than the traditional virtual machines. Plus a wide range of images available on Docker hub.
Docker is available for Linux, MacOS and Windows. In this article, we learn step by step how to download the docker and install it on the Windows 10 operating system for using Ubuntu docker image.
Pre-requisite:
Software and Hardware system requirements for install Docker in Windows 10 are:
- Docker for windows requires Windows 10 64bit: Pro, Enterprise or Education (1607 Anniversary Update, Build 14393 or later).
- Support to Virtualization and must enabled in BIOS.
- Compulsory: Enable Hyper-V on Windows 10 because docker won’t work with VirtualBox/VMware player
- CPU SLAT-capable feature.
- At least 4GB of RAM.
Note: If you want to install and use Docker on previous Windows operating systems such as Windows 8 and Windows 7 then install the Docker took only. It uses Oracle Virtual Box instead of Hyper-V.
Step by Step install docker on Windows 10
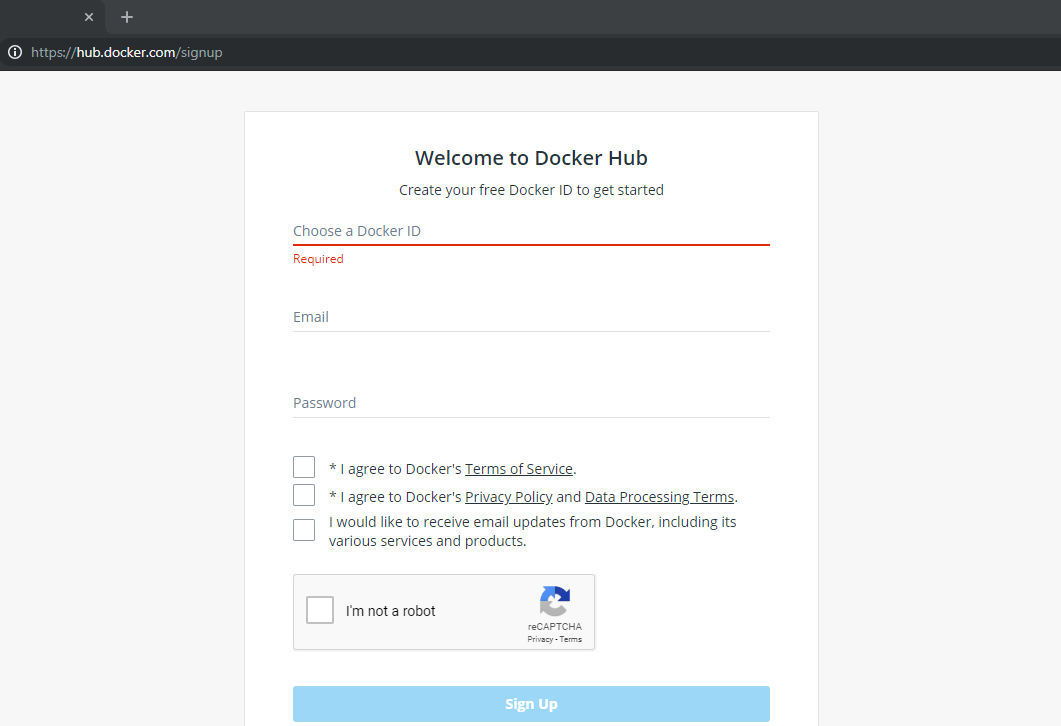
Step 1: Create a Docker account
To download the docker executable file for Windows 10, first, we need to signup and create an account on their official website. For your ease here is the link to signup. We can use the same account need to download the Docker images.
Step 2: Download Docker for Windows 10
After creating the Docker account download the Docker 64-bit for Windows (link). On the download page we will get two versions :
- Get Docker Desktop for Windows (stable): Stable is the best channel to use if you want a reliable platform to work with.
- Get Docker Desktop for Windows (Edge): Use the Edge channel if you want to get experimental features faster, and can weather some instability and bugs.
Click on the Windows (stable) to download the production version with stability.
Step 3: Enable Hyper-V on Windows 10
If you already have enabled Hyper-V on your Windows 10 operating system, then skip this step otherwise see our tutorial on the same: How To Install Hyper-V on Windows 10
Step 4: Run Docker for Windows Installer
Click on the downloaded EXE file which is Docker for Windows.exe and run it under administrative rights.
The first screen which will appear asks you whether you want the Docker shortcut on Windows desktop or not. By default, it is checked and leave it as it is. Furthermore, one more option will be there which is ” Use Windows containers instead of Linux containers (this can be changed after installation)“. This option solely depends upon the developer or the user who wants to run images inside the containers. In short, the Windows containers on Windows 10 uses Hyper-V Isolation means it runs via hyper virtualization while the Linux docker runs on Linux and work with Linux kernel so, it uses Alpine Linux runs again on Hyper-V. Its all depend upon what kind of application you want to run. The user can switch to Windows container or Linux containers anytime from the Docker settings.
However, right now leave this option unmarked and click on OK button.

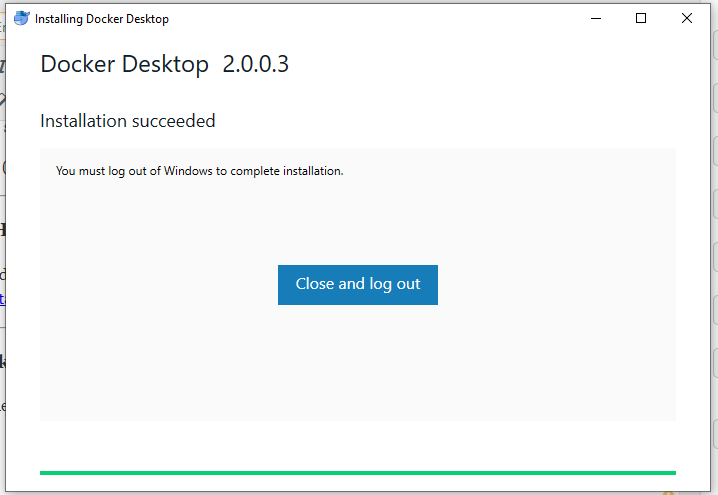
After that, the Docker will take a few seconds to get installed on your Windows 10 operating system.

Step 5: Close and logout
Once the installation of the Docker has done, you will get a blue colour button with text Close and log out. Before click on that please make sure nothing important or other application is running. If yes, then securely save and close that then click on the docker close and log out button.
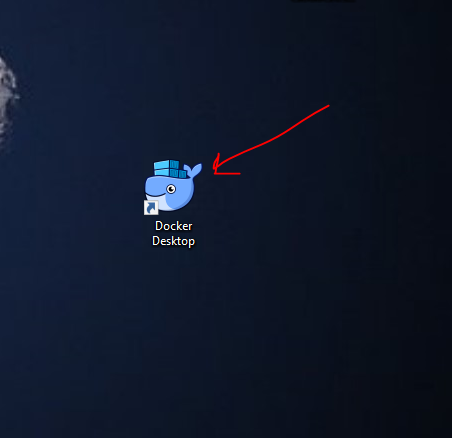
Step 6: Run the Docker on Windows 10
You will get a shortcut on your Desktop of Docker. Click on that to run it.
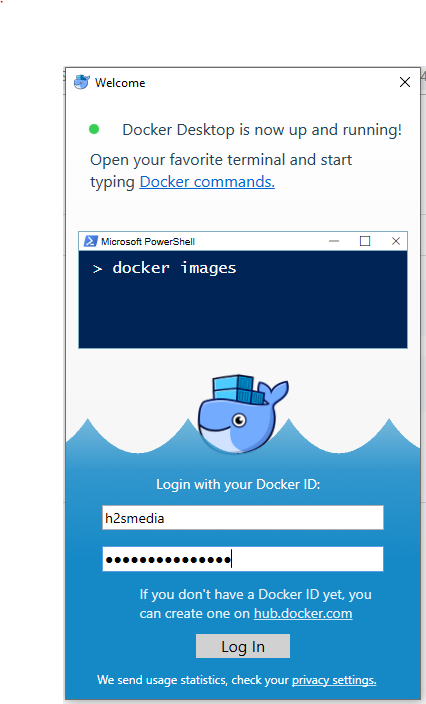
Login with the Docker ID and password which you have created at the beginning of this article.
Now go to Taskbar right side and click on the Show hidden icon and right click on the Docker icon to access its settings.

Step 7: Docker Settings
There are nine options given in the Settings section of the Docker, however, we will go through only the important ones only.
Shared Drives:
To access the local Windows 10 drives from containers, go to the Shared Drives and select drive’s letter which you want to share and make them available for different containers installed using the Docker.

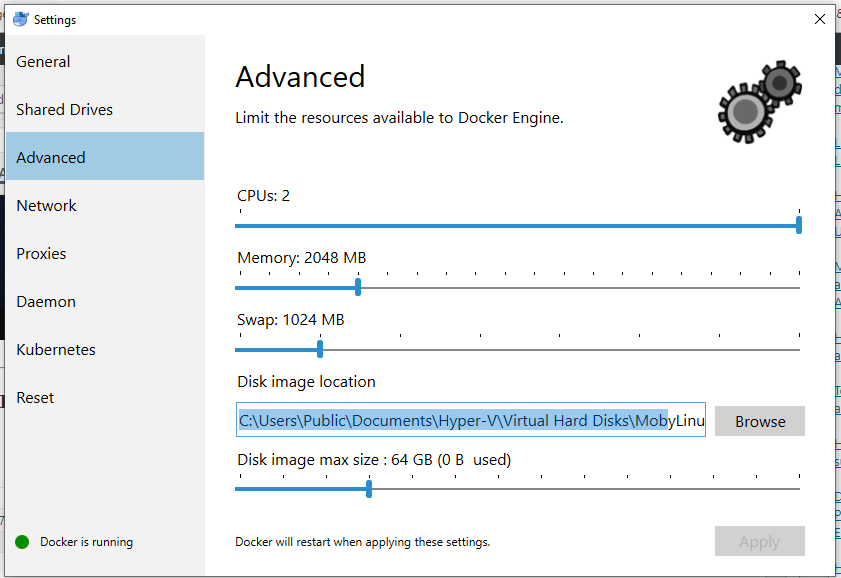
Advanced:
As we know the Docker’s installed containers also run on the Virtualization platform of Windows 10 which is Hyper-V, hence, we can control the amount system resources available for Docker engine which further assigned by it to the containers. We can manage CPU, RAM, SWAP memory, Disk image location (don’t change it until & unless you know what you are doing) and Hard Disk image size.
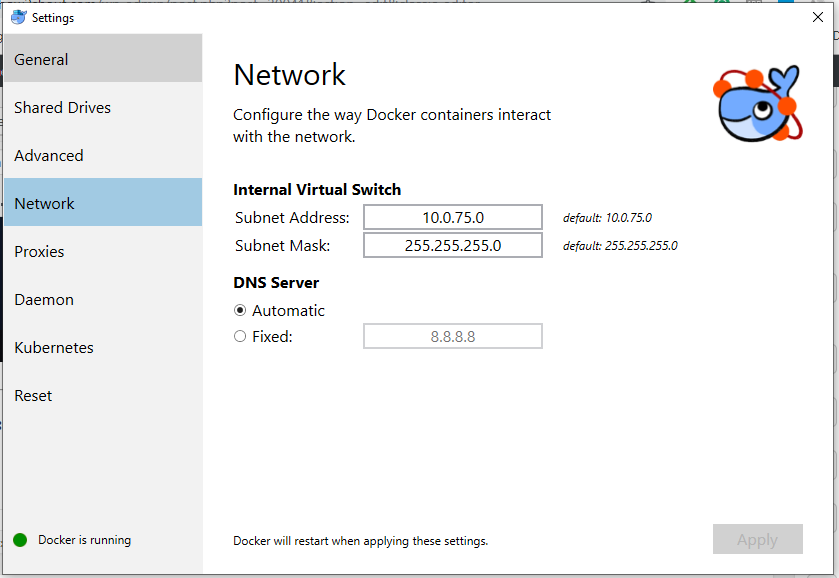
Network
To let the Containers to communicate with each other the Docker will automatically create an internal Virtual Switch with a default range of IP i.e 10.0.75.0. If needed, you can change to it to some other range.
Step 8: Switch Linux Containers to Windows containers or vice versa
In case you want to Switch the default Linux containers to Windows container then again go to taskbar click on Show hidden icon-> right click on the Docker icon-> Select the option “Switch to Windows containers“.

Step 9: Test the Docker version
Right Click on the Windows 10 start button and select the option Windows Powershell (Admin) or you can also use the command prompt.

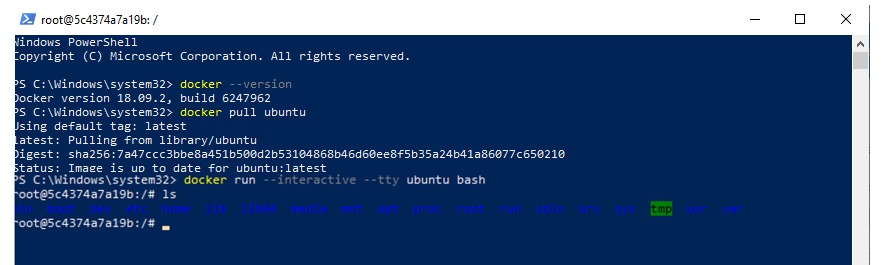
To test the version of docker type:
docker --version
The output:
Windows PowerShell
Copyright (C) Microsoft Corporation. All rights reserved.

PS C:\Windows\system32> docker --version
Docker version 18.09.2, build 6247962
Step 10: Install Ubuntu image on Docker Windows 10
To install the image of Ubuntu on Docker, first, we need to pull the image of the same from the Docker hub. And for that, we will use the following command on the Windows 10 PowerShell.
docker pull ubuntu
To connect and run the downloaded and running Ubuntu image, we enter the following command:
docker run --interactive --tty ubuntu bash
Other Useful Resources:
Related Posts
How to install Redhat Podman on Windows 10 or 11 via CMD
Install Docker Desktop on Windows 11 or 10 via PowerShell
Top 10 Features or benefits of running a Virtual Machine
How to download and install Hyper-v on Windows 10 Home edition
How to install Windows Server 2022 on VirtualBox
How to use existing VDMK Virtual hard disk in VMware Player