Do you want to install Linux Mint on your PC? In this tutorial, we will explain step by step how to do it for PC or Laptop or Virtual Machine.
The latest version of the Linux Mint is the 19.2 “Tara” which is available in multiple Desktop environments like previous versions. If you are new to Linux then it is one of the best Linux distros to start with because of its Windows 7 or Windows XP like interface, therefore well suited for beginners.
As Linux Mint is available in multiple flavours, thus which one should you install?
The latest version of Linux Mint is available in four Linux Desktop environments: Cinnamon, Xfce, KDE, and MATE. The base of the all will be the same but the hardware requirements will be different. If you have some old computer PC or laptop then use Xfce and MATE desktop environments because they consume less RAM and computing power since they are not graphically heavy. If you have the latest PC or laptop then simply go for Cinnamon and KDE.
Quick Start Guide Linux Mint Installation
- Create a bootable USB drive using ISO.
- Power up your PC and select the USB stick as the boot drive.
- Double click on ” Install Linux Mint ” CD.
- Select a language on the left side and click ” Install Linux Mint “.
- Check the option “Install third-party software for graphics and WLAN devices, Flash, MP3 and other media ” and click ” Next “.
- Mark ” Erase Disk and Install Linux Mint ” and click ” Install Now “. Note: All content on your hard disk will be deleted completely!
- Click ” Next “.
- Select a time zone and click ” Next “.
- Select the keyboard layout and click on ” Next “.
- Now enter your name and the new password and click on ” Next “.
- Click on ” Restart Now “.
How to install Linux Mint via USB- Step by Step
Here we are installing the latest Linux Mint 19.2 Cinnamon 64-bit on an empty hard disk. The steps given in this tutorial will be the same for older Linux Mint versions such as Linux Mint 18, 17, 16 and so on.
Step 1: Download ISO file of LinuxMint
If you already have the bootable ISO file of this Distro then simply move to the next step. In case, not, here is the official website link. Go there and get the latest version of Linux Mint.
Step 2: Create a Linux Mint Live USB
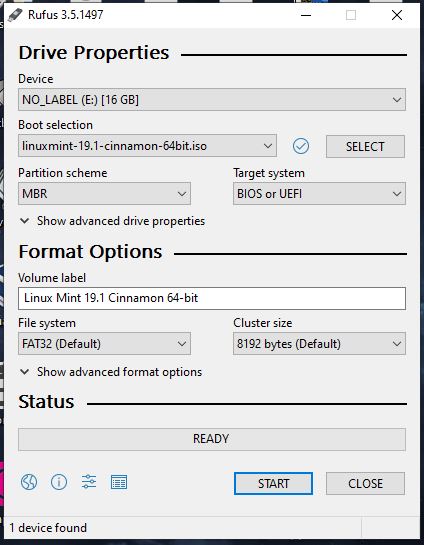
Next, step is to create a bootable USB drive of Linux Mint using its downloaded ISO file. For that, we use a software called Rufus. It is available for Windows 10/8/7, so no problem at all. Go to Rufus.ie and download it. After that run this portable Linux bootable USB maker. Click on Device select the connected USB drive and from Bootable selection click on the SELECT button. Windows explorer will open choose the download ISO file. Finally, click on the START to burn ISO on USB.
Step 3: Insert the bootable USB to computer
After flashing the USB with Linux Mint ISO file. Insert the same USB to the PC or laptop where you want to install the Linux Mint. Start the PC and press, F12 or Esc depending on your system, however, the F12 is a common one to get the boot menu. When it appears, select the connected USB drive to boot the system.
Step 4: Select the Linux Mint installation option
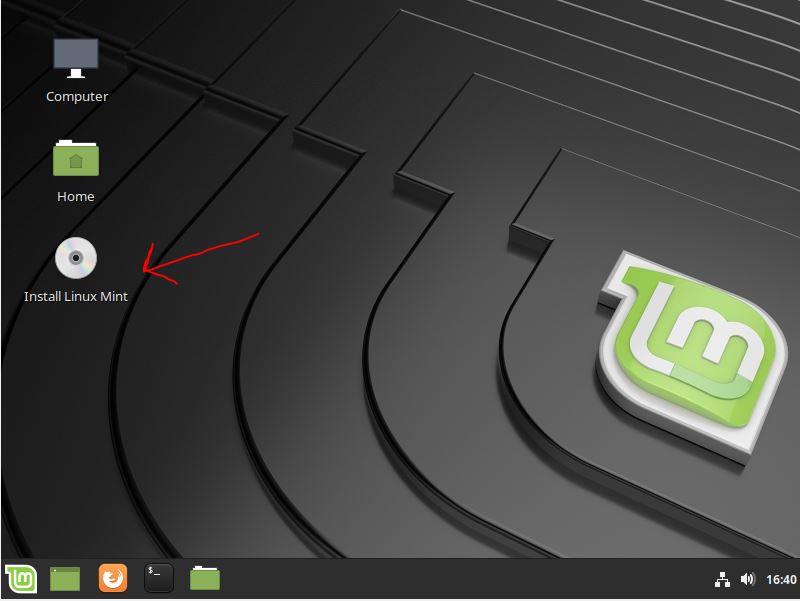
Once you boot the USB drive, the Live Linux Mint will run. Where you will see a DISC on the screen saying “Install Linux Mint“. Just double click on that to start the installation process.
Step 5: Select system installation Language
The first screen of the installation wizard will ask you to select the language in which you want to install the Linux Mint. Here we are selecting the English, you can select accordingly. After that just click the Continue button.

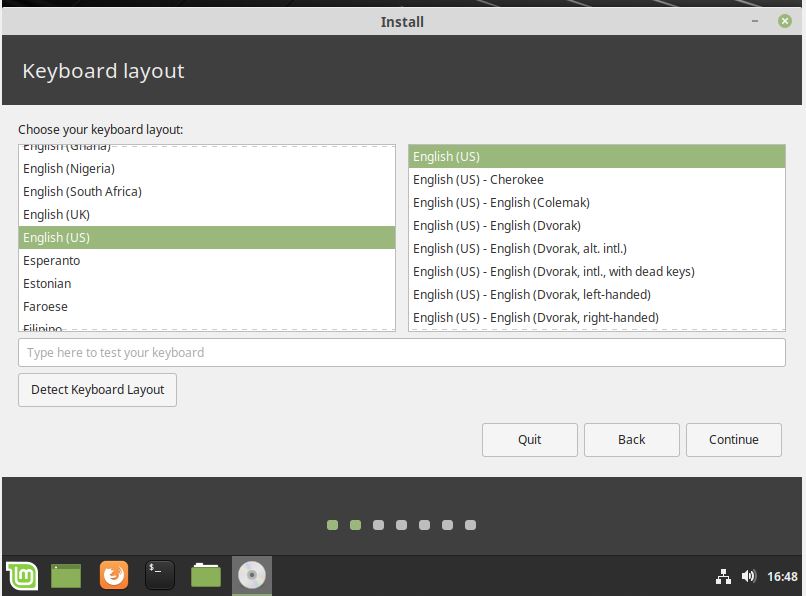
Step 6: Keyboard Layout
As per your language and keyboard type select the one from the installer, however, generally we use the English keyboard and same would have been there on the screen, selected as default. Simply click on the Continue button.
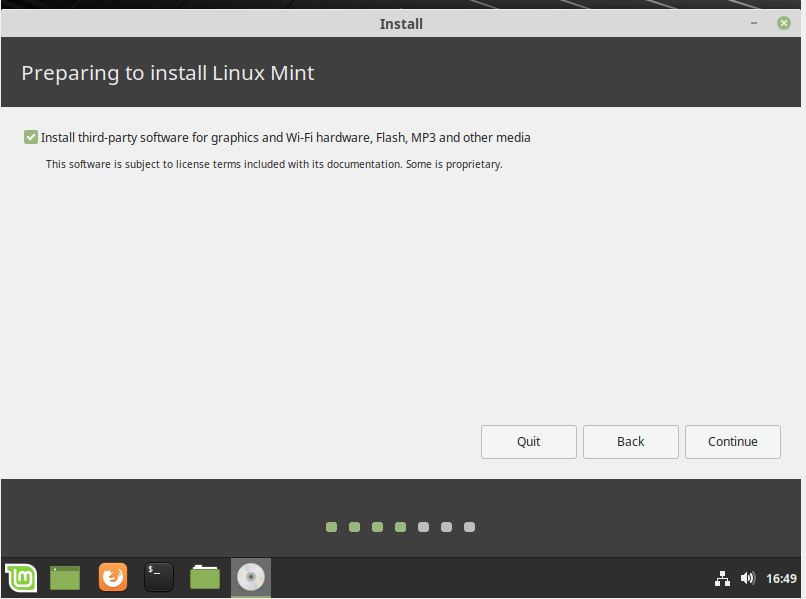
Step 7: Install third-party software for graphics and WiFi
Check the box the given in the front of “Install third-party software for graphics and Wi-Fi hardware, Flash, MP3 and other media”, following with a click on the Continue button.
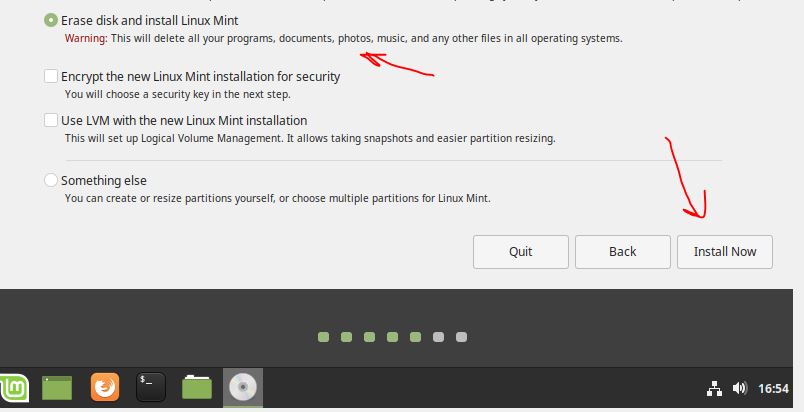
Step 8: Erase disk and Install Linux Mint
This is the step where we prepare of Hard disk for the installation. Here we are installing it on an empty hard drive, thus simply select the first option” Erase disk and install LinuxMint”.
In case you have multiple drives or partitions on your PC or laptop with data. Select the last option that is “ Something Else” and choose the particular drive where you want to install the Linux mint. After all this click on the option the Install Now.
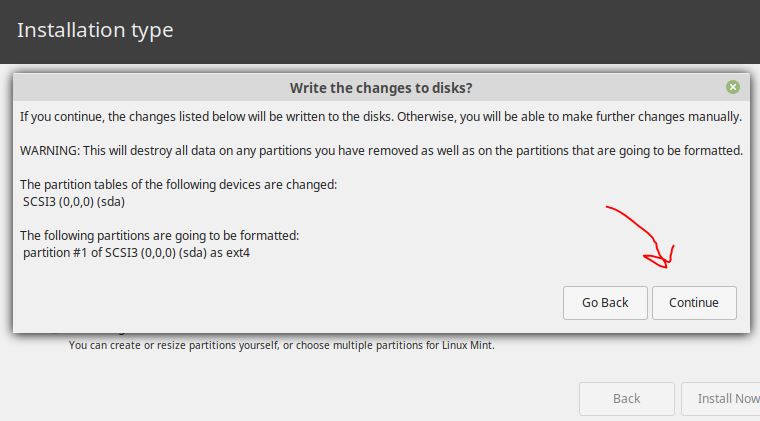
When it asks for your confirmation for writing changes to disks, select the Continue option.
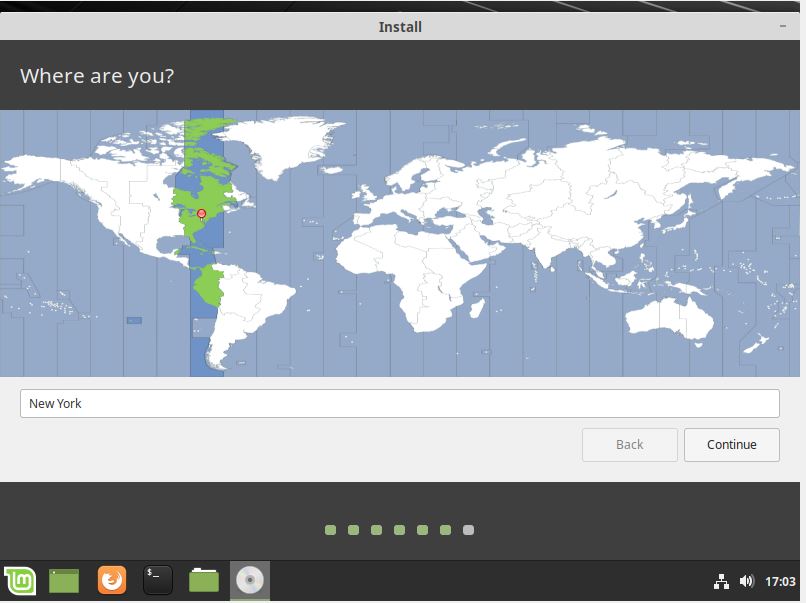
Step 9: Where Are You? Choose your Location.
Choose your geographical location, so that Linux Mint automatically select the Time zone for the OS. It helps in setting up the correct time for the system clock.
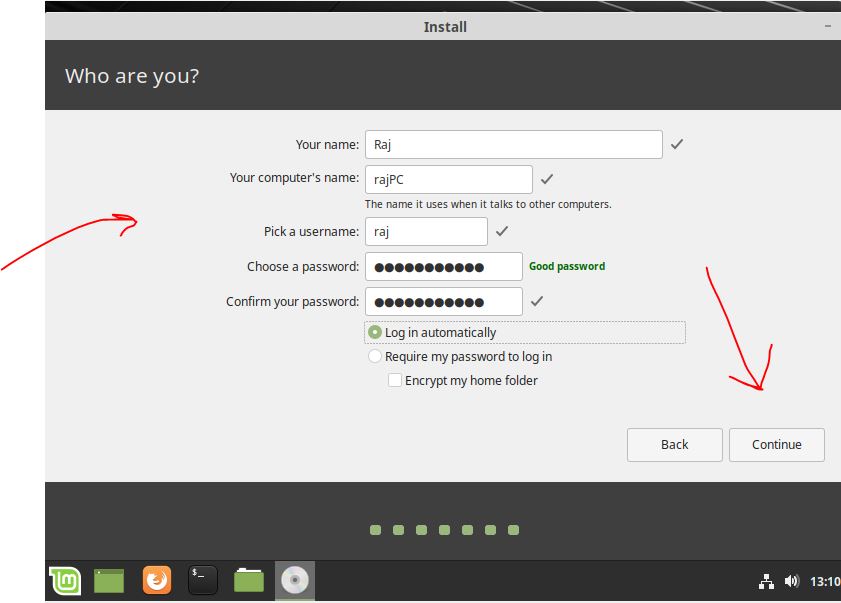
Step 10: Set Username and Password for Linux Mint
Here we will give some name to our system and also one to use as a standard username. At same place set the password for the same.
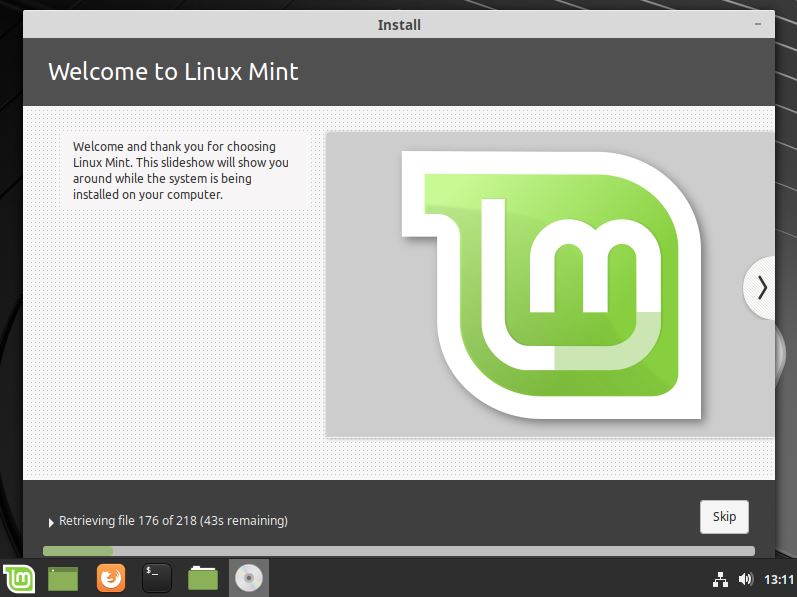
Step 11: Installation process started
So, now the Linux Mint Live installation from USB drive has been started, wait for a few minutes, depending upon your system configuration, it will take time. Once it gets completed, simply restart the system.
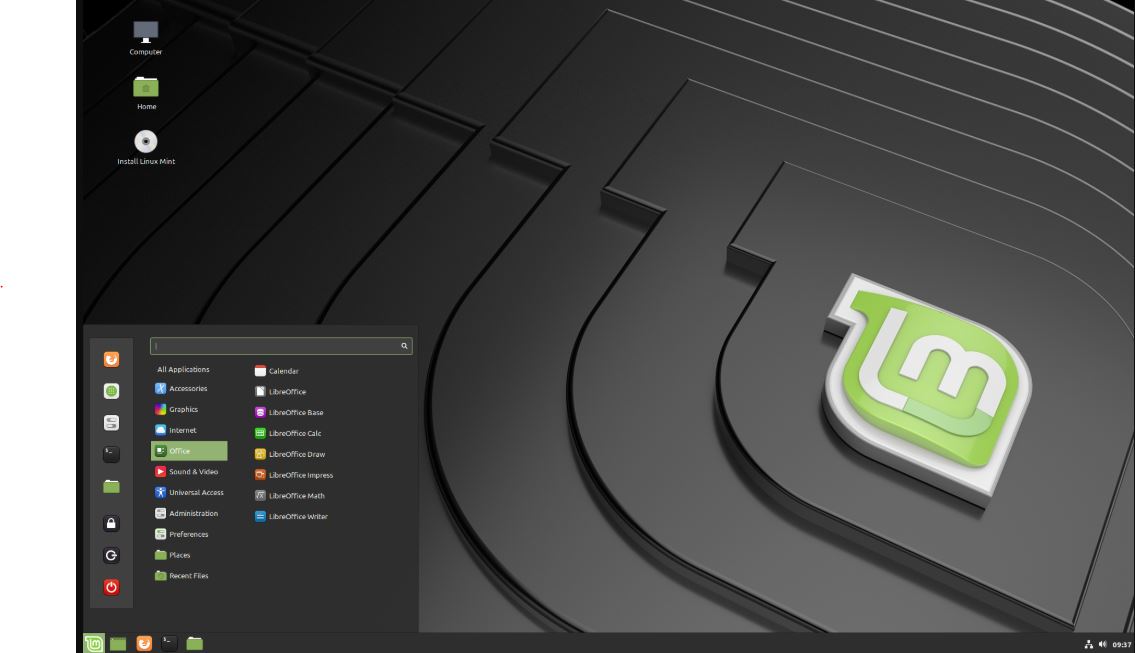
Step 12: Login to Linux
Use the password which you created in Step 10 of this article to log in your Linux Mint system. Finally, you will get a beautiful screen in black and green colour.
Other Tutorials and Articles:


About the install above – I have a LM distro already in the PC. I was thinking of installing LM19 on a brand new disk. How long does it take from step 7 to go to step 8? It keeps on grinding… 15 m and I am worried. I would like to click on something else…