Hosting a WordPress website on the Web servers offered by the hosting companies or installed on your local computer is pretty much easy but what about the Android smartphone? We all know, nowadays smartphones are enough powerful to handle Linux applications, nevertheless, the thing that refrains us from doing such stuff as creating a web server (Apache, MySQL, PHP, PHPMyAdmin) on Android devices is the lack of stable resources.
However, developers keep working on stuff to make others a complete benefit from their Android smartphones. There are some Android web server apps present on the Google Play store that are enough powerful to convert your Android device (smartphone or Tablet) into a full-fledged web server.
Here, in this tutorial, we let you know how to install and host WordPress on an Android Web server using the Ksweb app for testing purposes.
Overview of steps needed to install Android Web server and WordPress on it.
- Go to the Google Play store and search for KSWEB.
- Install the KSWEB server that comes with Lighttpd server, Nginx, Apache, PHP, MySQL, SMTP, Web Interface, KSWEBFTP, Editor, and Scheduler.
- Open the KSWEB Android Web server app and enable the Apache web server, PHP, and MYSQL.
- Go to WordPress.org and download the WordPress CMS files.
- Now open the file manager move the WordPress.zip folder to htdocs and extract it there.
- Make sure the KWSweb is running in the background. Go to the browser and point to 127.0.0.1:8000/wp-admin.
- Follow the rest of the process of the guided WordPress CMS interface.
Host WordPress CMS on Android Web server tutorial in detail with screenshots:
Step 1: KSWEB Android web server app installation.
The KSWEB app is available on the Google Play store and enables the user to use Lighttpd server, Nginx, and Apache webservers along the PHP and MySQL. It is a premium app that comes with 5 5-day trial. So, you can try it and if you like its functions and features then you could go for the premium which costs $3.99 for the KSWEB pro version and $2.99 for the KSWEB standard; not much costly. Here is the Link to download the KSWEB APP.
Step 2: KSWEB App Enable Web server
After downloading and installing the KSWEB App the next step is, which web server you want to use for WordPress CMS. In the Trial version only the Lighttpd and Apache servers are available to use whereas the Nginx is only available to use in premium versions. So, enable both Lighthttpd and Apache.
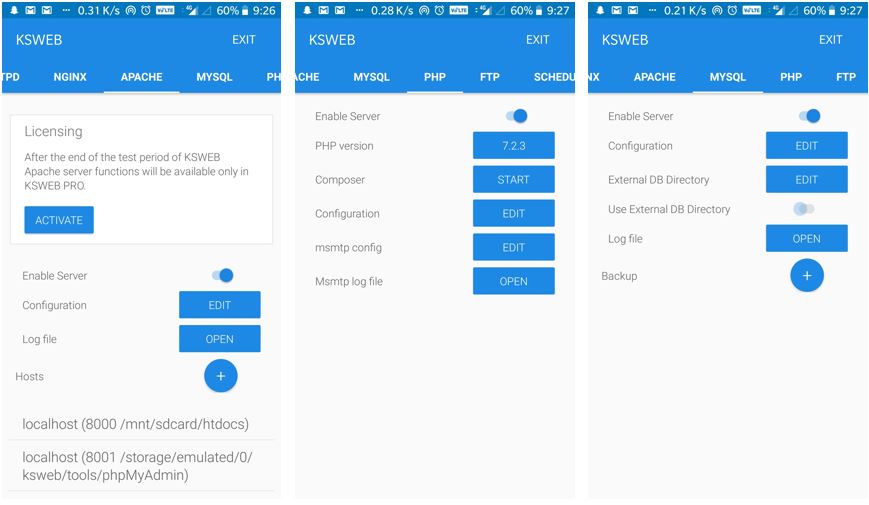
Step 3: Enable the MySQL, PHP, and FTP.
Just like we enabled Apache you will find tabs for MySQL, PHP, and FTP. Navigate to them and enable these features as well.
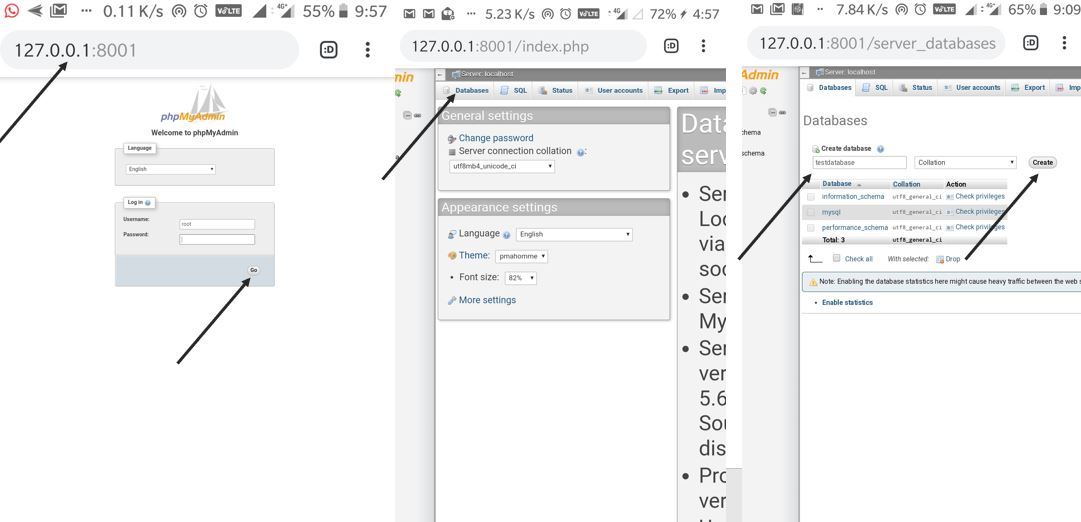
Step 4: Create a Database for WordPress using PHPMyAdmin on Android
- Go to the Tools tab tap on the PHPMyAdmin option select Apache. It will ask you to choose the browser( If you did not set any default). Once you select the browser, the PHPMyAdmin will open. Use the username-root leave the password column blank and tap on GO.
Credentials detials

MySQL host: localhost (or 127.0.0.1)
MySQL port: 3306
MySQL login "root" with a blank password
- Tap on the Database option from the menu of the PHPMyAdmin. Type some name for your Database, for example, here we have given a test database. After giving the name to your database tap on the Create button.
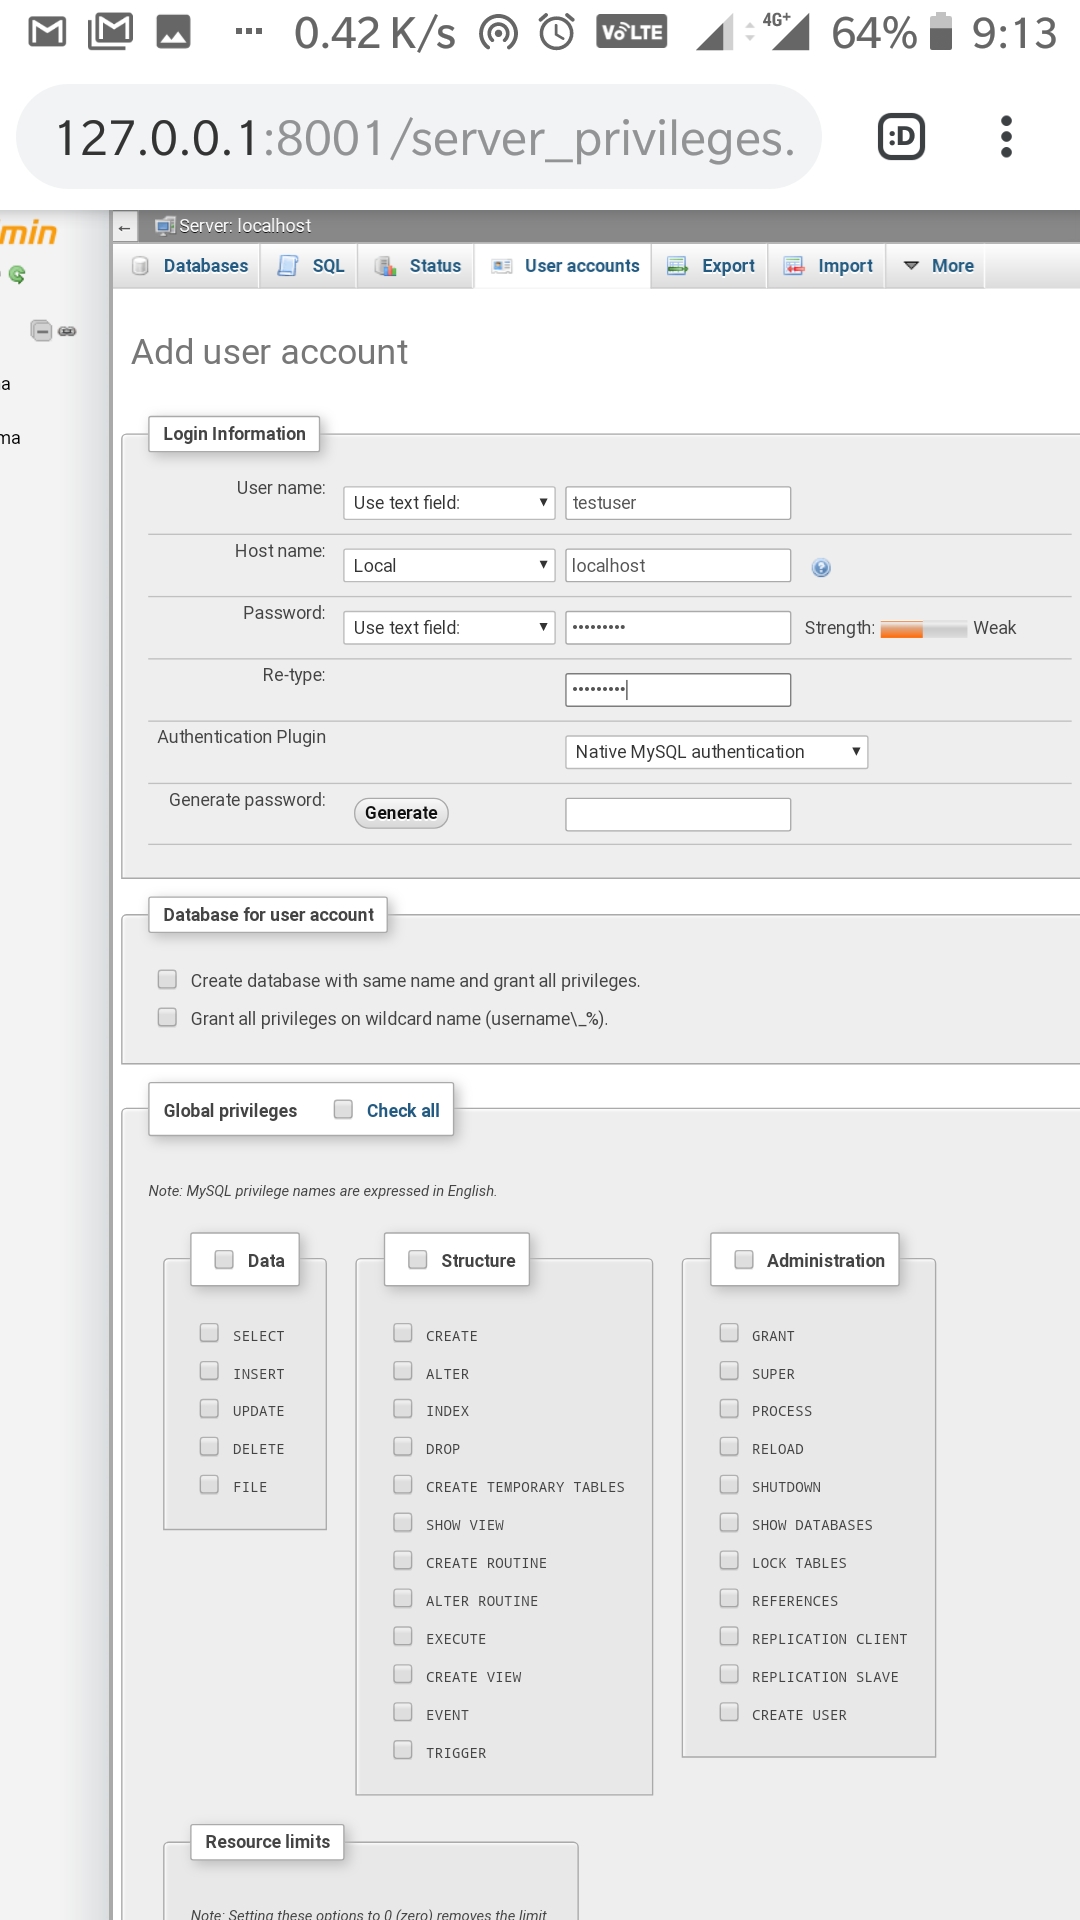
- After the above step tap on the option “User Account” and then Tap on the Add User Account option.
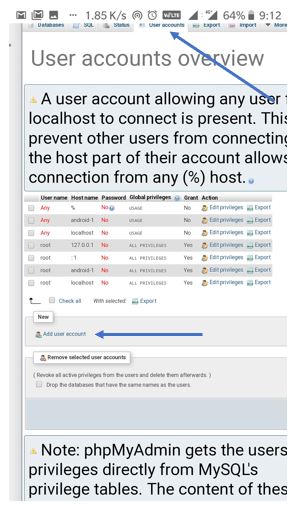
- Give some username, select hostname Local assign some password to your new account, and then scroll down and tap on the GO button.
- Now again go to the User Accounts tab from the menu of PHPMyAdmin select your newly created database and then tap on “Edit Privileges“.
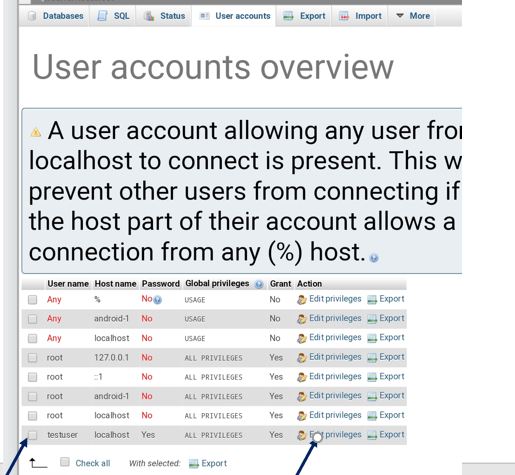
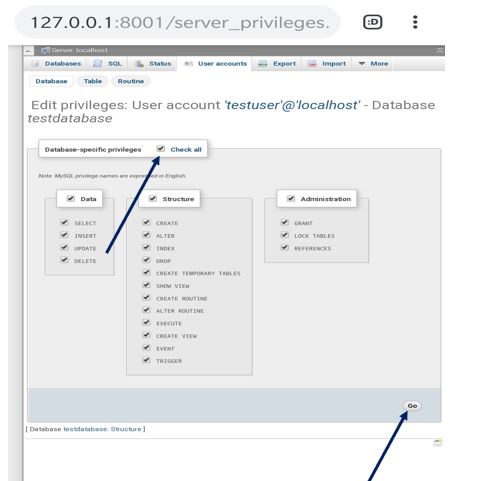
- Under the User Account option tap on the Database select your newly created database to assign the user to it and then tap on the GO button.

- Select the Grant All option and then tap on the GO button.
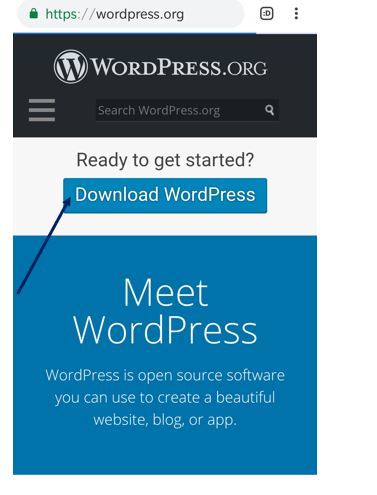
Step 5: Download the WordPress
Go to WordPress.org and Download the WordPress.zip file on your smartphone. Here is the link.
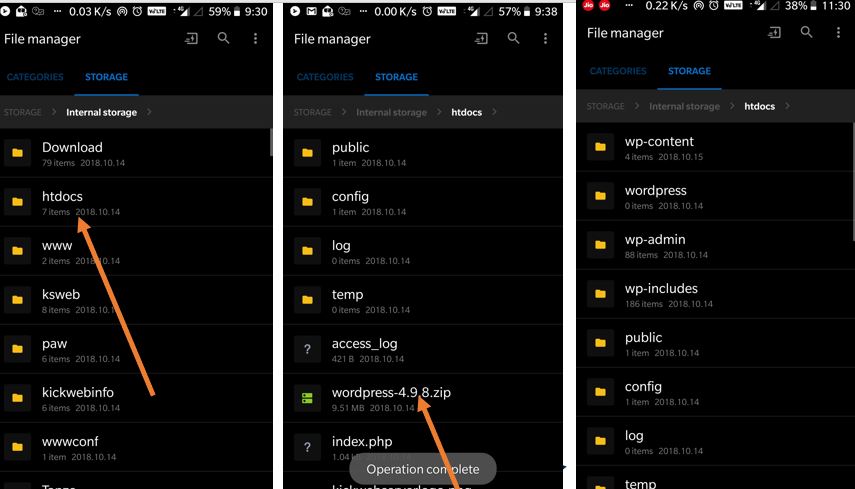
Step 6: Extract the WordPress Zip File
One of the WordPress.zip files was downloaded. Go to your smartphone File Manager -> Download folder-> select the WordPress.Zip folder and move it to the htdocs folder. And there in the htdocs folder extract all folders and files of the WordPress.zip.
Step 7: Set up WordPress on the Android Web server using KSweb.
Make sure your KSWEB App web server is working in the background. Now, go to the browser and type 127.0.0.1:8000/wp-admin. You will get the WordPress setup screen.

Step 8: Provide the Database information
Enter the database information that we created above in PHPMyAdmin. And then tap on the Run installation button.

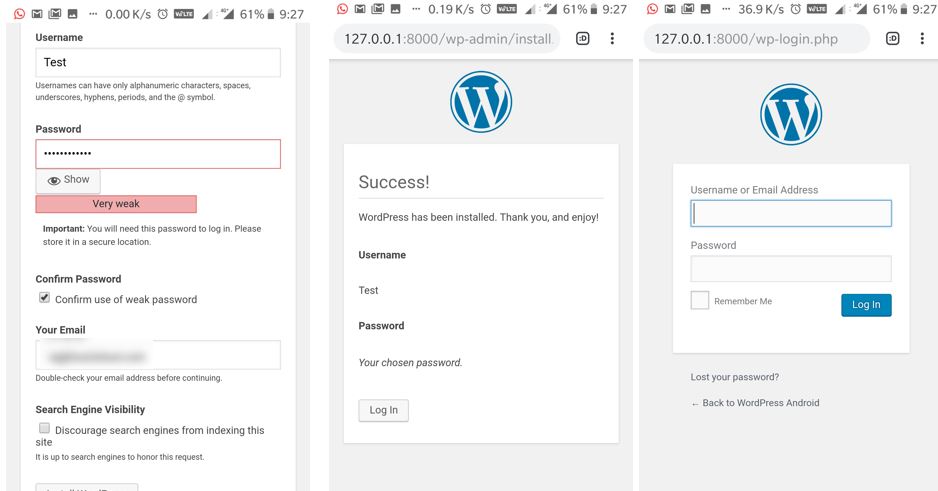
Step 9: Create the Admin account and log in to WordPress
Set up the WordPress admin account and click on Install WordPress. After the installation, it will ask you to log in. Enter the username and password you have just created and tap on the login button.
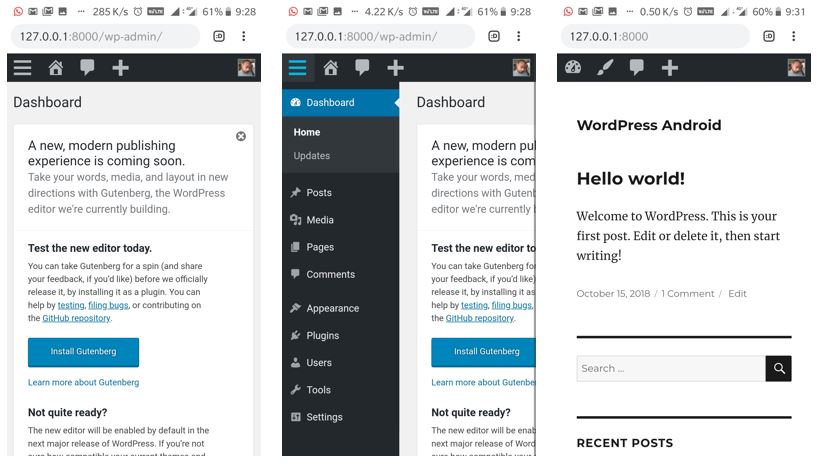
Step 10: WordPress Dashboard
Now finally you will see your Android web server installed with WordPress CMS.
How to access the installed WordPress CMS or Android web server from your Computer (PC)
To access the Android server or WordPress website from your PC, either it should be connected to the same Wifi your phone is on or simply ON the hotspot of your smartphone and connect your PC with it. It is because your smartphone and PC should be on the same network to communicate locally.
Now go to the Setting menu-> About -> Status and IP Address.
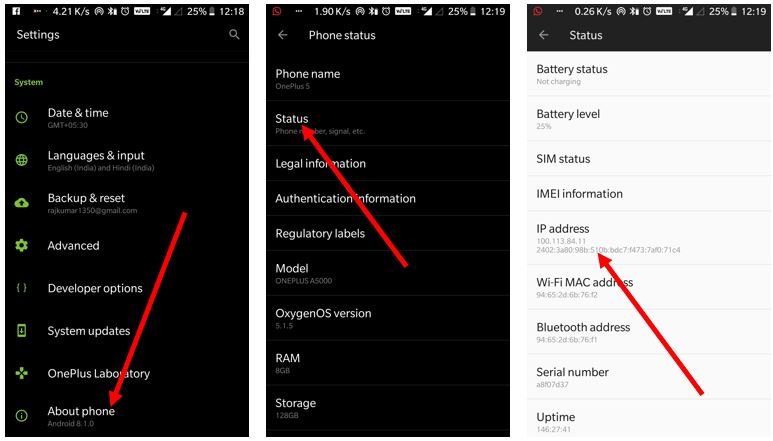
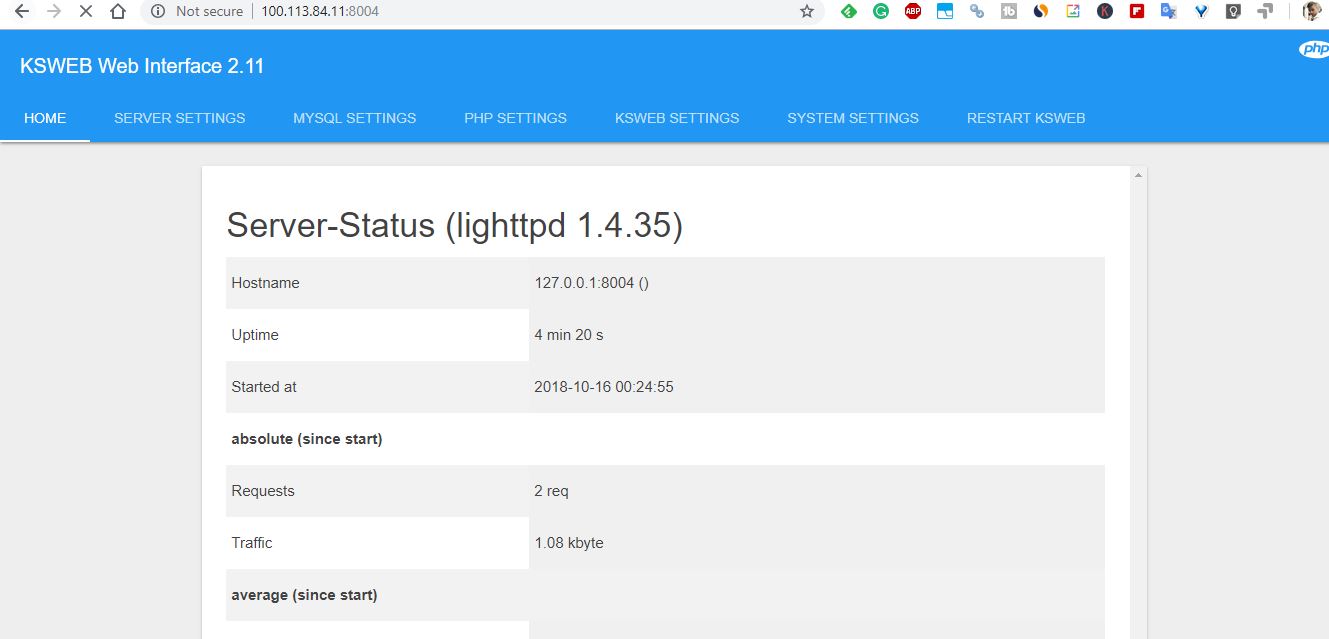
Go to your PC browser and type your IP there along with the port number. For example, my IP address is 100.113.84.11 so along with the port number it will be 100.113.84.11:8000. That’s it enter the IP address along with the server port you want to access.
Other Useful Resources


Really, I know something new from your article about install & run WordPress CMS on Android web server. Thank you very much Rajkumar Maurya to share this helpful article. Keep going on writing dear.
I need halp, when I select server then it was redirected to my phon browser but this notification is showing. What should I do? I can’t understand who is the server administrator? Whom do I mail? halp me.
” Internal Server Error
The server encountered an internal error or misconfiguration and was unable to complete your request.
Please contact the server administrator at admin@email to inform them of the time this error occurred, and the actions you performed just before this error.
More information about this error may be available in the server error log.”
sir i get an error while Tools tab and tap on the PHPMyAdmin option select the Apache. it ask me to online to continue .but i want to setup offlie .what to do.
It be nice to have my WordPress run on my cell phone they just will not make them so you can plug in your own emmc drive. For my WordPress to fit need about 2TB SSD. I can put a USB-C on the phone to a USB 3.0 SSD and it sees it and I moved the ksweb to it. But I can not pick it to use it. The ksweb.