In simple words, the Qemu is a software program which is free and open source; used to create virtual machines over the top of other Linux operating systems just like VirtualBox and VMware workstation player. Not only, the Linux but one can also install this software on Windows and MacOS to test different Linux distros. However, most of the Linux users prefer to use the VirtualBox because of its easy-to-use interface and a wide range of hardware compatibility. Although the VMware Workstation Player is available too for Linux, limited in terms of features as compared to VirtualBox. In such circumstances, there are a couple of well known opensource hardware virtualization software available with their own Linux operating system environment those can convert any bare metal machine into a full virtualization platform. We talk about such platforms in some other article.
Here in this Qemu Ubuntu tutorial article, we will see how to install and setup this open source machine emulator and virtualizer tool on Ubuntu.
We can run OSes and programs by executing the guest code directly on the host CPU using this software. It supports virtualization using the KVM kernel module in Linux. When using KVM, one can virtualize x86, server and embedded PowerPC, 64-bit POWER, S390, 32-bit and 64-bit ARM, and MIPS guests.
Qemu Ubuntu Tutorial: How to install via the command terminal
To install Qemu on Ubuntu run the following commands given below.
Note: We used Ubuntu 18.04 to install and create a Kernel based virtual machine but the commands given here are the same for the older versions such as Ubuntu 17.04, Ubuntu 16.04, Ubuntu 15.04… While the writing this tutorial the latest version of Qemu was 3.1.0.
- Go to Ubuntu
- Open the Command line terminal tool on Ubuntu. The shortcut is CTRL+ ALT+T.
- On the terminal run the below command:
-
sudo apt-get install qemu
- Install KVM package, the command is
-
sudo apt-get install qemu-kvm
- To check Qemu version use the below command
-
apt show qemu-system-x86
- For KVM version check
-
kvm -version
Sample output
h2s@h2s-VirtualBox:~$ sudo apt-get install qemu
[sudo] password for h2s:
Reading package lists... Done
Building dependency tree
Reading state information... Done
The following additional packages will be installed:
binfmt-support cpu-checker ibverbs-providers ipxe-qemu
ipxe-qemu-256k-compat-efi-roms libaio1 libcacard0 libfdt1 libibverbs1
libiscsi7 libnl-route-3-200 librados2 librbd1 librdmacm1 libsdl1.2debian
libspice-server1 libusbredirparser1 libxen-4.9 libxenstore3.0 libyajl2
msr-tools qemu-block-extra qemu-slof qemu-system qemu-system-arm
qemu-system-common qemu-system-mips qemu-system-misc qemu-system-ppc
qemu-system-s390x qemu-system-sparc qemu-system-x86 qemu-user
qemu-user-binfmt qemu-utils seabios sharutils
Suggested packages:
qemu-user-static samba vde2 qemu-efi openbios-ppc openhackware
openbios-sparc sgabios ovmf debootstrap sharutils-doc bsd-mailx | mailx
The following NEW packages will be installed:
binfmt-support cpu-checker ibverbs-providers ipxe-qemu
ipxe-qemu-256k-compat-efi-roms libaio1 libcacard0 libfdt1 libibverbs1
libiscsi7 libnl-route-3-200 librados2 librbd1 librdmacm1 libsdl1.2debian
libspice-server1 libusbredirparser1 libxen-4.9 libxenstore3.0 libyajl2
msr-tools qemu qemu-block-extra qemu-slof qemu-system qemu-system-arm
qemu-system-common qemu-system-mips qemu-system-misc qemu-system-ppc
qemu-system-s390x qemu-system-sparc qemu-system-x86 qemu-user
qemu-user-binfmt qemu-utils seabios sharutils
0 upgraded, 38 newly installed, 0 to remove and 366 not upgraded.
Need to get 54.9 MB/62.2 MB of archives.
After this operation, 341 MB of additional disk space will be used.
Do you want to continue? [Y/n] Y

h2s@h2s-VirtualBox:~$ sudo apt-get install qemu-kvm
[sudo] password for h2s:
Reading package lists... Done
Building dependency tree
Reading state information... Done
The following NEW packages will be installed:
qemu-kvm
0 upgraded, 1 newly installed, 0 to remove and 366 not upgraded.
Need to get 13.2 kB of archives.
After this operation, 120 kB of additional disk space will be used.
Get:1 http://in.archive.ubuntu.com/ubuntu bionic-updates/main amd64 qemu-kvm amd64 1:2.11+dfsg-1ubuntu7.9 [13.2 kB]
Fetched 13.2 kB in 2s (6,569 B/s)
Selecting previously unselected package qemu-kvm.
(Reading database ... 113459 files and directories currently installed.)
Preparing to unpack .../qemu-kvm_1%3a2.11+dfsg-1ubuntu7.9_amd64.deb ...
Unpacking qemu-kvm (1:2.11+dfsg-1ubuntu7.9) ...
Setting up qemu-kvm (1:2.11+dfsg-1ubuntu7.9) ...
Processing triggers for man-db (2.8.3-2) ...
Create VirtualMachine
After installing the Qemu on Ubuntu host system, its time to create virtual machines.
Create Virtual hard disk
The command to create virtual hard disk is
qemu-img create Puppy.vdi 10G
Note: In the above command the Puppy.vdi is the name of our virtual hard drive. You can name it as per your choice. The extension.VDI will create a Virtual DISK image format if you want you can replace it with .img (raw image format) .vhd, and .vmdk formats you do that too.
We can also use the Qemu default virtual hard disk formats which are .qcow2, .qed, .qcow and .cow.
So, if the same hard drive which we created above; need to be created in Qemu disk format then the command will be
qemu-img create -f qcow2 Puppy.qcow 10G
10 G is the amount of space we want to allocate to the Virtual hard drive. Here we are installing Puppy Linux which doesn’t require a high amount of space at all, so we used 10 G (G stands for Giga Byte GB). However, in this tutorial, we are using the VDI disk format.
Boot from ISO image
After creating the Virtual hard disk, let’s boot the ISO in Live environement. We are using OS type Linux i.e the Puppy Linux ISO image resided on the desktop of our Ubuntu.
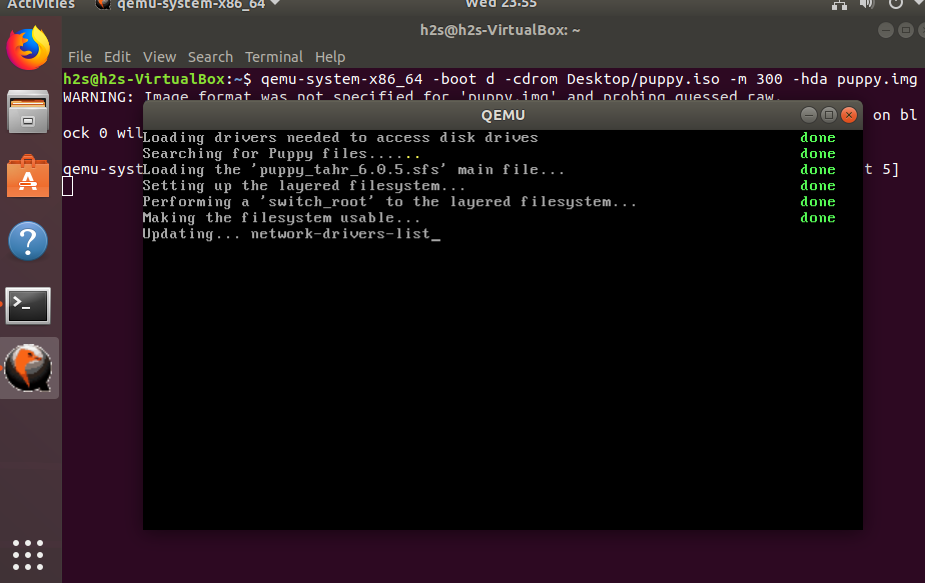
qemu-system-x86_64 -boot d -cdrom Desktop/puppy.iso -m 512
In the above command, we used the ISO image that is on our desktop folder. In the same way, you have to mention the path of your ISO file in the command; rest of the command will remain the same. The -m indicated the amount of RAM assigned to guest OS from the host system, here it is 512 MB.
Running Qemu to install OS on Virtual hard drive
As soon as you run the above command, the guest Linux OS will start booting and can be tested in the live environment but for its installation, we need to attach virtual hard disk. So, for example, you also want to install the guest OS like Windows or any other Linux; then we have to tell the Qemu, hey! here is the drive. Just type the name of the Virtual disk you have created above
qemu-system-x86_64 -boot d -cdrom Desktop/puppy.iso -m 512 -hda Puppy.vdi
Boot Directly from CD ROM
Besides the ISO files, the user can also boot the OS directly from CD ROM:
qemu-system-x86_64 -boot d -cdrom /dev/cdrom -m 512
In the above command line, the Qemu will fetch the booting files from the CD-ROM disk drive.
Enable KVM or intel acceleration modules
To accelerate QEMU virtual machines, we can enable the KVM or Intel HAXM. So, to run VM faster use the instructions -accel kvm or -enable-kvm for KVM and -accel hax or -enable-hax for Intel HAXM.
For example:
qemu-system-x86_64 -boot d -cdrom /dev/cdrom -m 512 -enable-kvm
or
qemu-system-x86_64 -boot d -cdrom /dev/cdrom -m 512 -enable-hax
Boot from Virtual Hard drive
After the installation of the guest operating system, now if we want to boot our Virtual hard disk for further use or already have some VDI or VHD hard disk image then simply use it with the below command.
qemu-system-x86_64 -hda (path of the Virtual hard disk)
qemu-system-x86_64 -hda puppy.vdi
Qemu img convert
This command based virtualization tool not only can create VMs but also enables the users to convert the image formats. Here is the command for that
qemu-img convert {image_name} {image_name}
For example, we want to convert the ISO or qcow2 to IMG raw format the above command will use like this
qemu-img convert /Desktop/ubutnu.iso /Desktop/new.img
Note: We have to give the complete path where the image resides and also where we want to save the converted one.
Virt Manager for Qemu
After going through the above command and the procedure for installing a virtual machine on QEMU; you might want to give up because of its complexity. But wait there is a simple and easy to use create VM method on this Virtualization Tool. It is by giving it a graphical user interface just like the Virtual Box. Hence, if you are a new user and want to save your self from writing the lengthy commands then run the below command to install the Virt Manager on Ubuntu.
sudo apt-get install qemu virt-manager virt-viewer libvirt-bin
Sample output for the above command:
h2s@h2s-VirtualBox:~$ sudo apt-get install qemu virt-manager virt-viewer libvirt-bin
[sudo] password for h2s:
Reading package lists... Done
Building dependency tree
Reading state information... Done
qemu is already the newest version (1:2.11+dfsg-1ubuntu7.9).
The following additional packages will be installed:
augeas-lenses bridge-utils dmeventd ebtables gir1.2-appindicator3-0.1 gir1.2-gtk-vnc-2.0
gir1.2-libosinfo-1.0 gir1.2-libvirt-glib-1.0 gir1.2-spiceclientglib-2.0
gir1.2-spiceclientgtk-3.0 libaugeas0 libdevmapper-event1.02.1 libgovirt-common libgovirt2
libgtk-vnc-2.0-0 libgvnc-1.0-0 liblvm2app2.2 liblvm2cmd2.02 libnetcf1 libosinfo-1.0-0
libphodav-2.0-0 libphodav-2.0-common libpython-stdlib libpython2.7 libpython2.7-minimal
libpython2.7-stdlib libreadline5 libspice-client-glib-2.0-8 libspice-client-gtk-3.0-5
libusbredirhost1 libvirt-clients libvirt-daemon libvirt-daemon-driver-storage-rbd
libvirt-daemon-system libvirt-glib-1.0-0 libvirt0 libxml2-utils lvm2 osinfo-db python
python-asn1crypto python-cairo python-certifi python-cffi-backend python-chardet
python-cryptography python-dbus python-enum34 python-gi python-gi-cairo python-idna
python-ipaddr python-ipaddress python-libvirt python-libxml2 python-minimal python-openssl
python-pkg-resources python-requests python-six python-urllib3 python2.7 python2.7-minimal
spice-client-glib-usb-acl-helper virtinst
Suggested packages:
augeas-doc augeas-tools libosinfo-l10n gstreamer1.0-plugins-bad gstreamer1.0-libav
libvirt-daemon-driver-storage-gluster libvirt-daemon-driver-storage-sheepdog
libvirt-daemon-driver-storage-zfs numad radvd auditd systemtap nfs-common zfsutils pm-utils
thin-provisioning-tools python-doc python-tk python-cryptography-doc
python-cryptography-vectors python-dbus-dbg python-dbus-doc python-enum34-doc
python-openssl-doc python-openssl-dbg python-setuptools python-socks python-ntlm
python2.7-doc ssh-askpass python-guestfs
The following NEW packages will be installed:
augeas-lenses bridge-utils dmeventd ebtables gir1.2-appindicator3-0.1 gir1.2-gtk-vnc-2.0
gir1.2-libosinfo-1.0 gir1.2-libvirt-glib-1.0 gir1.2-spiceclientglib-2.0
gir1.2-spiceclientgtk-3.0 libaugeas0 libdevmapper-event1.02.1 libgovirt-common libgovirt2
libgtk-vnc-2.0-0 libgvnc-1.0-0 liblvm2app2.2 liblvm2cmd2.02 libnetcf1 libosinfo-1.0-0
libphodav-2.0-0 libphodav-2.0-common libpython-stdlib libreadline5
libspice-client-glib-2.0-8 libspice-client-gtk-3.0-5 libusbredirhost1 libvirt-bin
libvirt-clients libvirt-daemon libvirt-daemon-driver-storage-rbd libvirt-daemon-system
libvirt-glib-1.0-0 libvirt0 libxml2-utils lvm2 osinfo-db python python-asn1crypto
python-cairo python-certifi python-cffi-backend python-chardet python-cryptography
python-dbus python-enum34 python-gi python-gi-cairo python-idna python-ipaddr
python-ipaddress python-libvirt python-libxml2 python-minimal python-openssl
python-pkg-resources python-requests python-six python-urllib3 python2.7 python2.7-minimal
spice-client-glib-usb-acl-helper virt-manager virt-viewer virtinst
The following packages will be upgraded:
libpython2.7 libpython2.7-minimal libpython2.7-stdlib
3 upgraded, 65 newly installed, 0 to remove and 363 not upgraded.
Need to get 11.0 MB/15.8 MB of archives.
After this operation, 57.5 MB of additional disk space will be used.
Do you want to continue? [Y/n] y
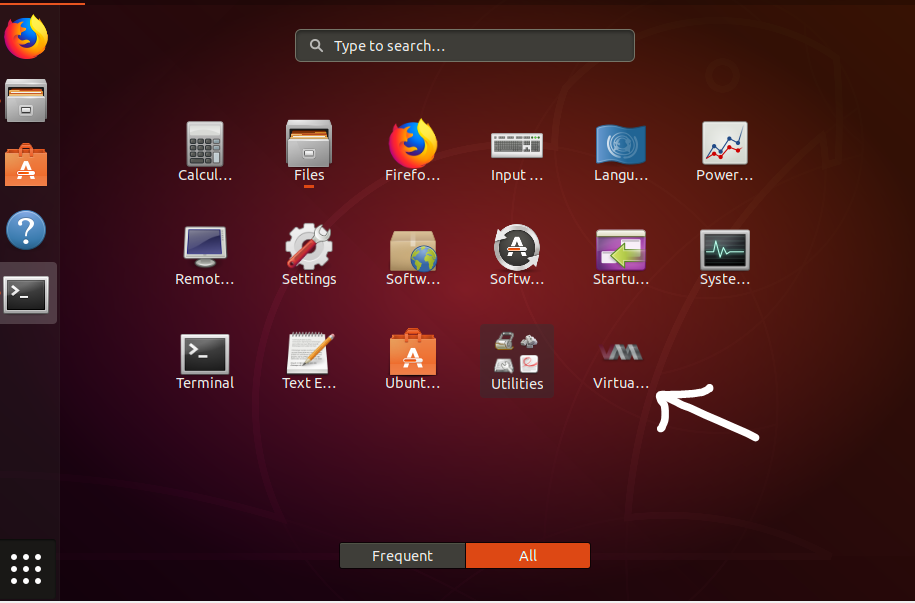
After running the above command you will see a Virtual Machine Manager tool called Virt on your Ubuntu system. To access the Virt Manager virtual machines, go to all applications and click on the Virt icon.
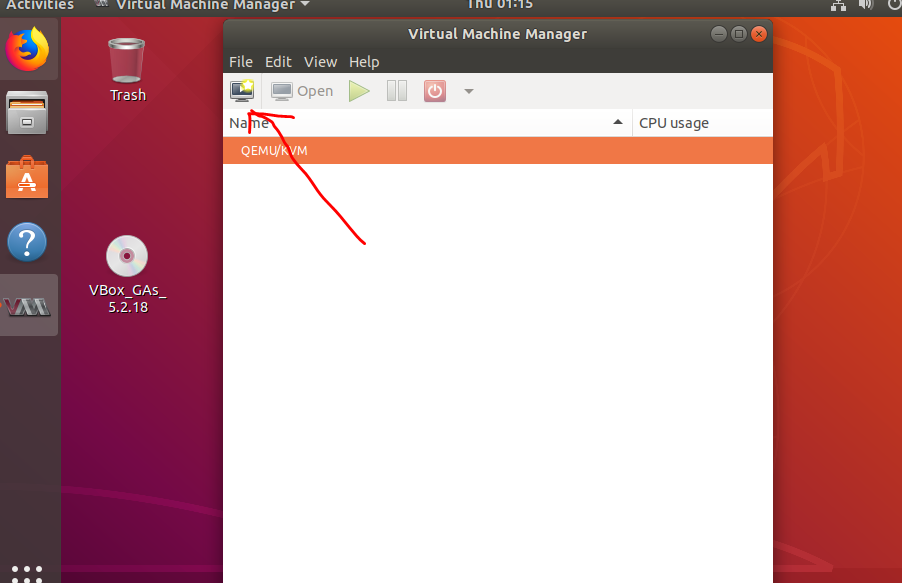
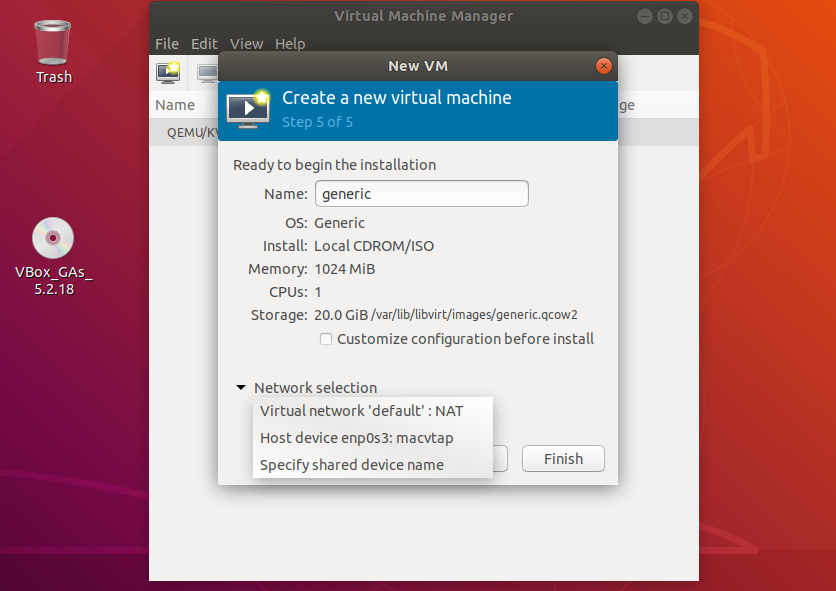
When the Virt Manager opened, Click on the first option from the left side given in the top menu. This option will give you a guided GUI for creating and setting up Virtual Machines. The process is the same as the VirtualBox.
Then select the booting of medium to ISO image and then assign the RAM, number of CPUs, and virtual hard disk.

While creating the VMs on the Virt Virtual Manager for Qemu you will get a network selection option too from where we can select the Virtual Networks for our machines. By default, the Virtual network ‘default’ NAT is selected, leave it is as it is if you don’t have multiple connections. It is in the NAT that uses the host IP address range to share the internet connection.
So, in this way, we can use this Virtualbox alternative software not only on Ubuntu but also for other different Linux OSes for creating Virtual Machines. This Virtualization software has its own benefits over the VirtualBox such as faster speed as it directly uses the kernel module. Moreover, if you make your self acquainted with its commands then setting up VMs on the headless servers become a piece of cake. However, it supports almost every kind of operating system emulation but as compared to Linux for Windows guest OS it is a little bit slow. In such situations please enable the KVM or Intel HAXM accelerator modules. Also, the point to be noted, in the latest version KVM support has been dropped but the open source HAXM will still continue.
If you faced any problem with following this tutorial, please let us know the comment section is all yours!
Other useful resources:


I am using a Raspberry Pi 4 with 4gb memory. I am trying to load an x64 version of ubuntu in qemu so that I can try to get some x64 programs running using wine. I can create the disk file. I try to boot the livecd image as per above (both with and without the virtual drive specified) but all I get is an immediate response in the terminal window saying VNC server started on ::x:xxxx. I never see any sort of screen indicating that the livecd is booting. Can you help me at all?
Thanks.