Developers use Jupyter Notebook for having a web-based interactive development environment. It is pretty popular among the developers of Data science and scientific computing because of its ability to share live code and an intuitive way to explore data, experiment with algorithms, and communicate findings.
We can install Jupyter Notebook on Ubuntu Linux and other distros including Windows and macOS. Even programmers can use NoteBook with code editors such as Visual Studio Code (VSCode), developed by Microsoft and supports a wide range of programming languages and extensions.
So, to use Jupyter Notebook in Ubuntu Linux with VSCode, we need to install its extension for VS Code. This extension provides seamless integration between Jupyter Notebook and VSCode, allowing programmers to create, edit, and run notebooks directly within the VSCode environment.
Steps to install the Jupyter extension for VSCode on Ubuntu
1. Instal VSCode on Ubuntu
The first thing which we must have on our Ubuntu system is the availability of VS Code on our system, if you not have already then look at this tutorial. How to use the terminal to install VScode on Ubuntu Linux?
2. Open Extension Panel
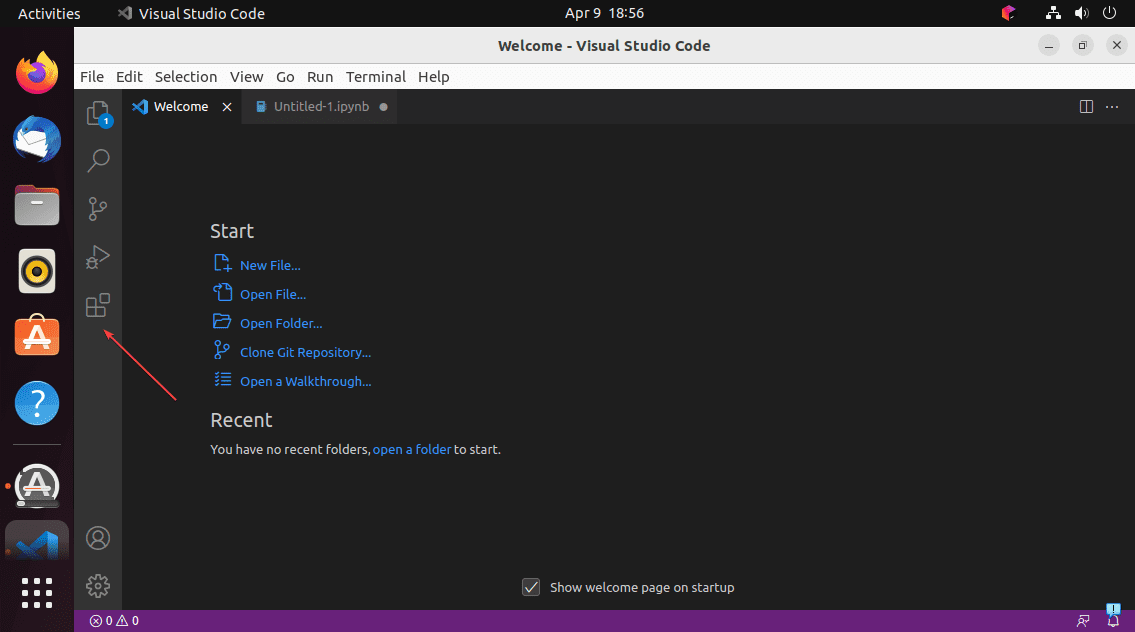
Once you have the VSCode installed on your Ubuntu Linux, run it and click on the icon given on the left side to open the Extension panel or use the keyboard shortcut – Ctrl+Shift+X.
3. Install the Jupyter Notebook extension for VSCode
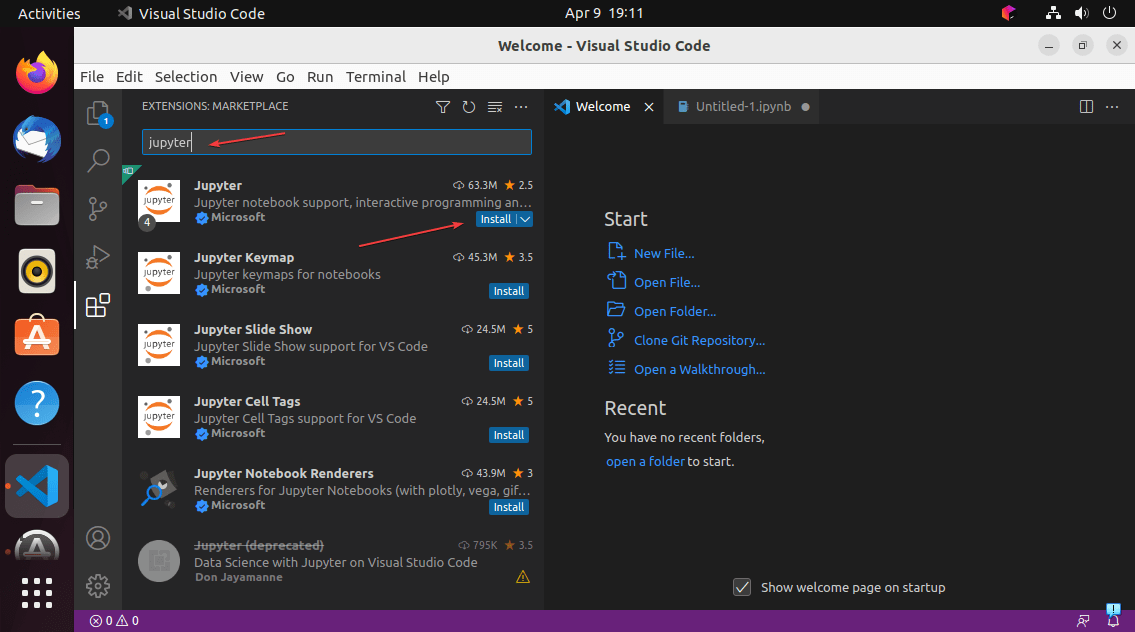
As the Extension panel opens, go to the Search box and there type – Jupyter. Soon, in the search results, you will see the option to install the available Jupyter Extension for VSCode on your Ubuntu Linux. Click that and then again, to install the extension.
Note: Also, in the same way, install the Python extension to efficiently write the codes.
4. Jupyter: Create a new blank notebook
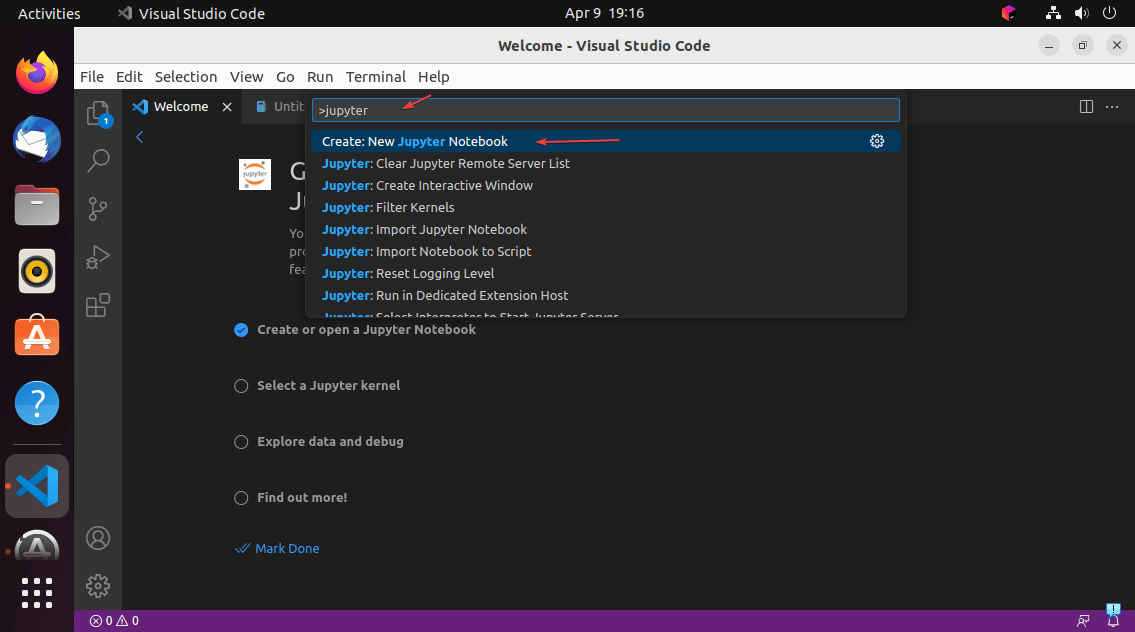
Once the extension is installed, you can open a Jupyter notebook by searching Jupyter and clicking on the “Create new blank notebook” command in the Command Palette. To open Palette you can use the shortcut- Ctrl+Shift+P.
5. Select Kernel Version
The Jupyter kernel is a runtime environment that provides programming language support for the Jupyter Notebook application; allows it to run the code written on NoteBook directly from the Interface. For example, ipykernel is the reference Jupyter kernel built on top of IPython, providing a powerful environment for interactive computing in Python. Using kernel users can use the Notebook to execute their Python program without leaving the interface of VScode.
To select it, click on the “Select kernel” button given on the right side of the editor display. After that, type Python in the search box and then select the version installed on your system that you want to use.

6. Run your Python Code
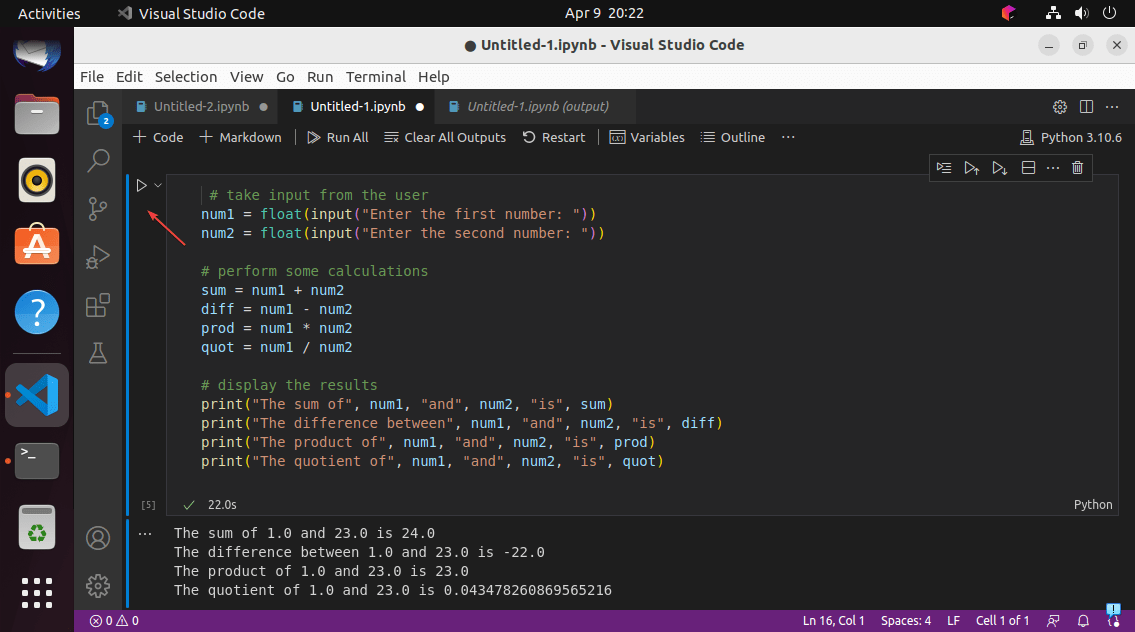
Write or paste the Python code that you want to run on Jupyter Notebook and then click on the Play icon to execute it.
Overall, Jupyter Notebook in Ubuntu with VSCode provides a powerful but flexible environment for data science developers and scientific computing. With the Jupyter extension for VSCode, you can take benefit of the rich features of both tools to create, edit, and share notebooks seamlessly.
Other Articles:


