Does Java need an introduction, absolutely not. It is a versatile and widely used programming language and the open source implementation of JAVA is known as OpenJDK. It is actively maintained and supported by the open-source Java community. And today here we learn the commands to install OpenJDK version 17 on Ubuntu Linux, one of the most widely used Linux distributions.
Prerequisites
Well, there is nothing special we need on our Ubuntu Desktop or Server where you are planning to install Java 17 ( OpenJDK 17). We just need system administrator rights a.k.a sudo access along with an active internet connection. So, if you have both, just open your Ubuntu’s command terminal and follow the below-given steps:
Step 1: Update Ubuntu Package Lists
It is essential to run the system update command on your Linux if you haven’t for a while before installing a new package. This will ensure the system has the latest versions of installed packages and also refresh the APT index cache, which help it to download and install up-to-date applications.
sudo apt updateStep 2: Install OpenJDK 17 on Ubuntu 22.04 or 20.04
Unlike Oracle’s Java, OpenJDK is purely maintained by the open-source community, therefore, it is available directly via the Ubuntu Linux official repository. This means we don’t need to add anything extra to our system to get it. Just use the given command on your terminal and the OpenJDK’s 17 version will be installed on your Ubuntu system.
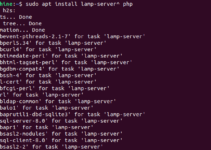
sudo apt install openjdk-17-jdkConfirm your password by entering it, when the system asked for the same. After that type ‘Y‘ and press ‘Enter‘ to proceed with the installation.

Step 3: Confirm OpenJDK is Installed
Although by running the above command, OpenJDK 17 will be on our system but still those who want to confirm it can use the given command. It will showcase the current version of Java on your Ubuntu.
java -versionYou should see output similar to the following:
openjdk version "17.0.7" 2023-04-18
OpenJDK Runtime Environment (build 17.0.7+7-Ubuntu-0ubuntu122.04.2)
OpenJDK 64-Bit Server VM (build 17.0.7+7-Ubuntu-0ubuntu122.04.2, mixed mode, sharing)
Step 4: Set Default Java Version (Optional)
There might be a chance you have multiple versions of OpenJDK already installed on your system. In such a case, if you want to set some particular version of the JAVA as the global default version on Ubuntu for all applications then can do that using the update-alternatives command. It helps the user to manage multiple Java installations.
To configure the default Java version, use the following command:
sudo update-alternatives --config javaThe above command will give you the list of all installed Java versions. Type the number corresponding to the OpenJDK entry that your want to set as default and then press ‘Enter‘.

Step 5: Set Java Home Environment Variable (Optional)
Like the previous step, this one is also not necessary to follow but there are some applications or tools, especially the ones used by developers, that may require the JAVA_HOME environment variable to be set. To set the JAVA_HOME variable to OpenJDK 17, follow these steps:
Find the installation path of OpenJDK 17. You can do this with the update-alternatives command:
sudo update-alternatives --list javaCopy the path corresponding to OpenJDK 17.
Open the .bashrc file using a text editor using Nano or any other editor you prefer:
nano ~/.bashrcAnd add the following line at the end of the file, but don’t forget to replace /path/to/your/openjdk-17 with the actual path you copied.
export JAVA_HOME=/path/to/your/openjdk-17Save the file and exit the text editor (Ctrl + X, then Y, and finally Enter in the nano editor).
To apply the changes, either close the terminal and open it again or use the given command.
source ~/.bashrcConclusion
Using this tutorial you will be able to install OpenJDK 17 on your Ubuntu system without any issue. If you are planning to develop Java applications, you can also set the appropriate environment variables to streamline your development process.


Very helpful, thank you and God bless you in Christ Jesus