GitLab Runner is a tool developed to allow users to run continuous integration and continuous deployment (CI/CD) jobs for GitLab projects. It works as an agent that executes the commands specified in GitLab CI/CD configuration. We can easily install GitLab Runner on your Ubuntu Linux to automate the testing and deployment process, which ultimately makes it easy for us to manage and maintain software projects.
We will go through the steps for installing GitLab Runner on Ubuntu.
Prerequisites
To follow this tutorial you must have sudo (administrative) privileges and ofcourse an Ubuntu server or desktop with an internet connection. Apart from this, a GitLab account is also required to register and use GitLab Runner.
Step 1: Update Ubuntu Packages
As usual before installing any package on Linux start with a system update command to not only update the package list but also upgrade the existing packages to their latest versions. So, in your command terminal run:
sudo apt update && sudo apt upgradeStep 2: Add the GitLab Runner repository
The Runner is not like some common Linux packages that are available through the default Ubuntu system repository. Therefore, to install it easily, let’s add the official repository of GitLab Runner. The process of adding its repo is quite straightforward because of the script provided by its developers. Here are the commands to follow:
2.1. Install Dependencies
We need curl, if you don’t have it already use this command to get it.
sudo apt install -y curl2.2. Add the Repository:
Use the given command to run the script that will configure the required repo on our Ubuntu Linux system.
curl -L https://packages.gitlab.com/install/repositories/runner/gitlab-runner/script.deb.sh | sudo bash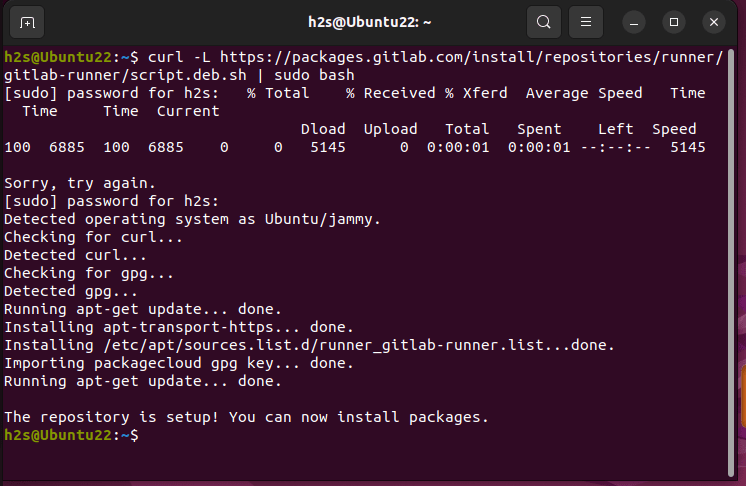
Step 3. Install GitLab Runner on Ubuntu 20.04 or 22.04
Now, we have the source configured on our Ubuntu system from where we can download and install the latest version of GitLab Runner on our Linux system. Now, let’s use the APT package manager to install it.
sudo apt install gitlab-runner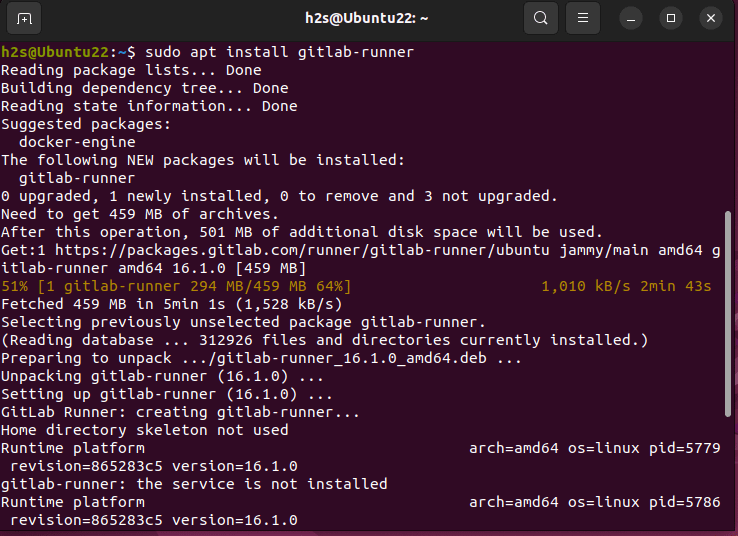
Step 4: Register GitLab Runner
With GitLab Runner installed, you need to register it with your GitLab account. This registration associates the Runner with your projects and allows it to execute CI/CD jobs. Follow the steps below to register the Runner:
3.1. Obtain your GitLab Registration Token
Go to your GitLab project on the GitLab website and sign in with your account.
After that, if you already have a project then open that otherwise create a new one. Now, click on your project to open it.

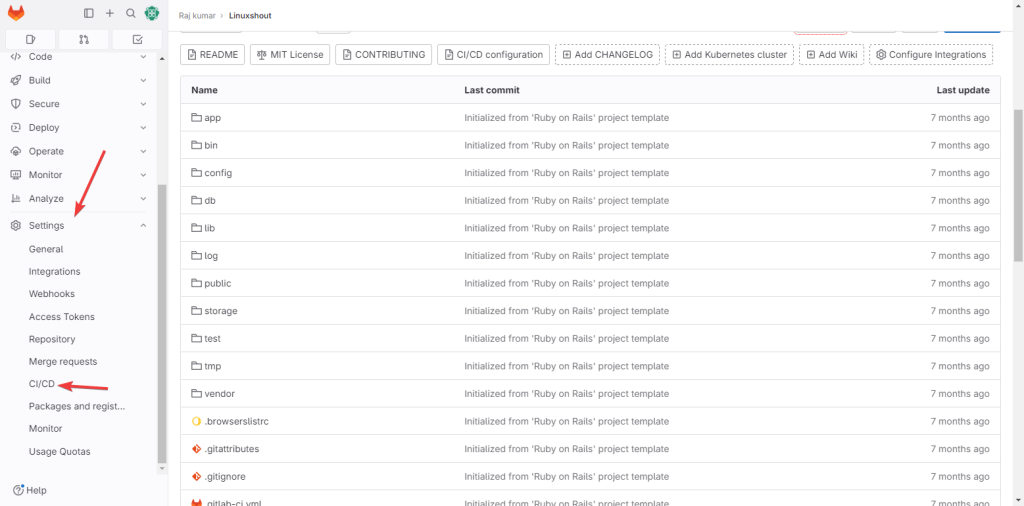
From the Project Dashboard where you can see all the files of it, you will also have multiple options on the left side there click on Settings to select CI/CD.
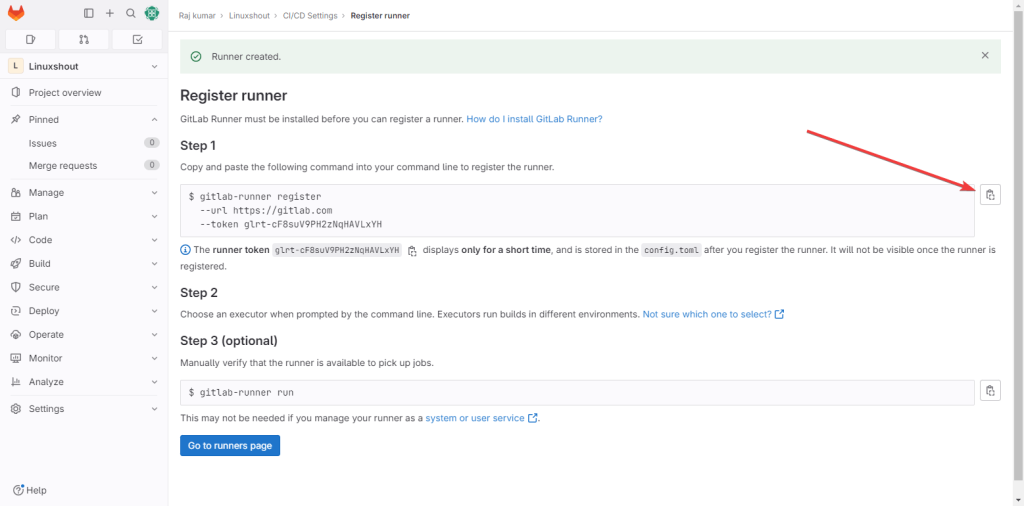
There, look for the section titled “Runners” and open your project’s runner to copy the –token value given there which is also your registration token.
Note: If you don’t have any Runners then click on the New Project Runner to create one.
3.2. Register the GitLab Runner
Once you have copied the token from your Runner page, get back to the Ubuntu terminal where you have just installed the GitLab Runner and run the given command:
sudo gitlab-runner registerThe registration process will prompt you for the following information:
- GitLab instance URL: Enter the URL of your GitLab instance, typically “https://gitlab.com” for GitLab SaaS.
- Registration token: Paste the registration token you obtained in Step 3.1.
- Runner description: Provide a descriptive name for your Runner (e.g., “My Ubuntu Runner”). You can give whatever you want.
- Runner tags, if asked (optional): You can add tags to your Runner to control which jobs it picks up.
- Executor: Choose an executor based on your project needs. The “shell” executor is sufficient for most use cases.
- After the registration is successful, the Runner is ready to execute jobs for your projects.

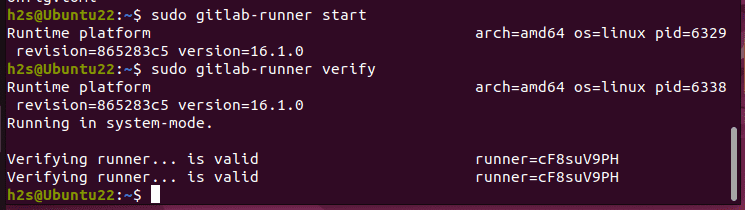
Step 5: Start and Enable its Service
Once you have successfully registered the GitLab Runner, now it’s time to start and enable its service, so that it can automatically get started every time with the system boot.
Start the service
sudo gitlab-runner startEnable the service to start with the system boot
sudo gitlab-runner enableStep 6: Verify Runner Status
To confirm that GitLab Runner is active and registered with your GitLab account, use the following command:
sudo gitlab-runner verifyThis command should return a “is valid” message that will indicate our Runner is online and can accept jobs, as shown in the below-given screenshot:
Uninstallation (optional)
If you don’t require the Gitlab runner anymore on your Ubuntu system then to remove it completely, here are the commands to follow:
- First, stop Runner service:
sudo gitlab-runner stop- Now, remove it from your system:
sudo apt autoremove --purge gitlab-runner- After that also delete the repository:
sudo rm -rf /etc/apt/sources.list.d/runner_gitlab-runner.list- Finally, remove the user and directories created by Runner:
sudo deluser --remove-home gitlab-runnersudo rm -rf /etc/gitlab-runnerConclusion
So, these were the steps that we can use to not only install GitLab Runner successfully on our Ubuntu system and register it with a GitLab account but even to remove it completely if required later.
It can help you greatly to utilize GitLab CI/CD pipelines to automate the testing and deployment processes for your projects.


