Franz is a messaging app for WhatsApp, Facebook Messenger, Slack, HipChat, Telegram and many many more. That can be set up on Windows. Linux and MacOS.
What is Franz social media app?
For the requirement of the era, we all have accounts in a number of social networking platforms, and social networks are undoubtedly fun to use for communicating with colleagues, friends, and family members. But, using social networks while doing some important work in the same browser can be a cause of distraction, and it can affect our productivity while working. But if you want to be more productive, and want to get access to all your social networks at the same place, there are only a few options available for you. Among the very few options available, Franz is one of the best ways to get connected with all your friends, access emails, see messages, and everything else, all under one roof.
Yes, it is that good. Franz is very easy to use, and the best part is, the app doesn’t change the look and feel of the individual platforms. So Facebook will be blue, Instagram will be pink, WhatsApp will be green, and so on. Just install it, and you are ready to go. You will not have to spend a single minute learning, how to use the app, as you will feel like at home on all your favourite platforms with Franz. It is pretty easy to setup it on Windows but can be slightly complicated on Linux.
So, let’s find out how to install and get started with Franz on a Linux based operating system. I am using Ubuntu 18.04.2 for this tutorial, but it is not going to be too different for other Linux distributions, as well; including Ubuntu 17.04, Ubuntu16.04, Ubuntu 15.4, 14.04…
Installing Franz on Linux (Ubuntu, Debian, LinuxMint)
Step 1: Download the Franz deb file on your Linux system, from the following link. (The download should start immediately on clicking the link. So make sure, you make the necessary arrangements).

Step 2: Once the download is complete, open your Terminal, and navigate to the folder, where the Franz deb file is present. If you didn’t change any settings, it should be in the ‘Downloads’ folder within your ‘Home’ folder, and just type in the following command to move to the ‘Downloads’ folder.
cd Downloads
Step 3: Now type in the following command to start the installation of Franz on your Linux system.
sudo dpkg -i ‘file name.deb’
Step 4: My command should look somewhat like this. However, depending upon when you are downloading Franz, the version can be different, which can eventually change the filename.
sudo dpkg -i ‘franz_5.0.0_amd64.deb’
Step 5: You can just type in ‘sudo dpkg -i ‘, and then drag and drop the Franz setup file into the ‘Terminal’.
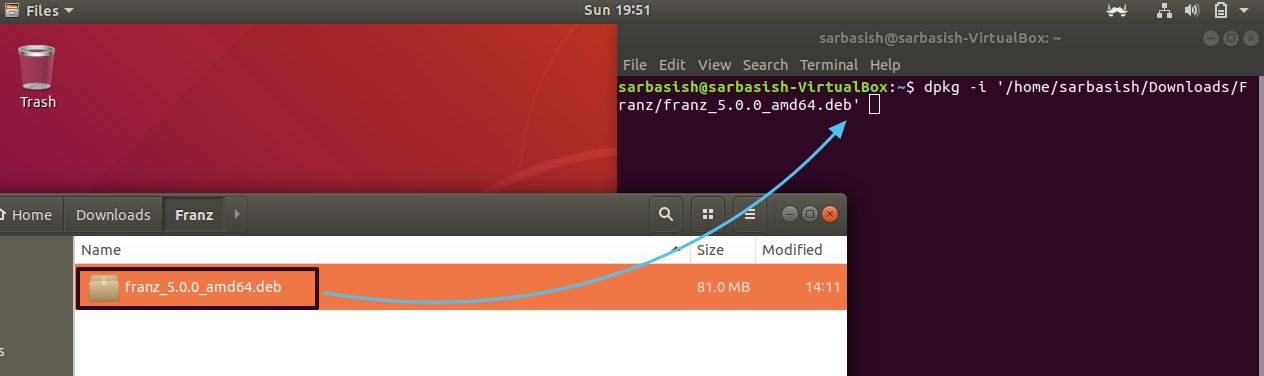
Step 6: The installation should take some time, and once it is complete, you will get back the prompt to enter new commands.
Now you can exit the terminal window. Your job is done
How to use Franz (same for all platforms, including Windows)
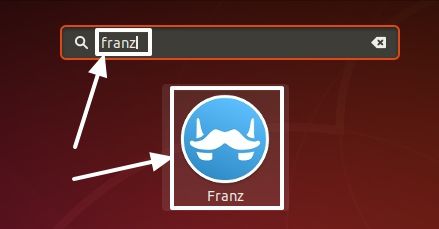
Step 1: Open ‘Apps’ section, type in ‘Franz’ and click on the ‘Franz’ icon that appears in the search results.
Step 2: After the first start, the Franz icon should be present in the status bar on Ubuntu. You can even right-click on that, and click on ‘Show Franz’ to open the Franz window.

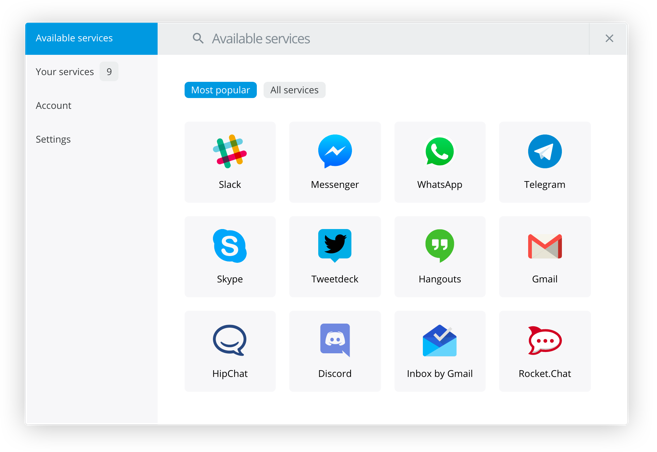
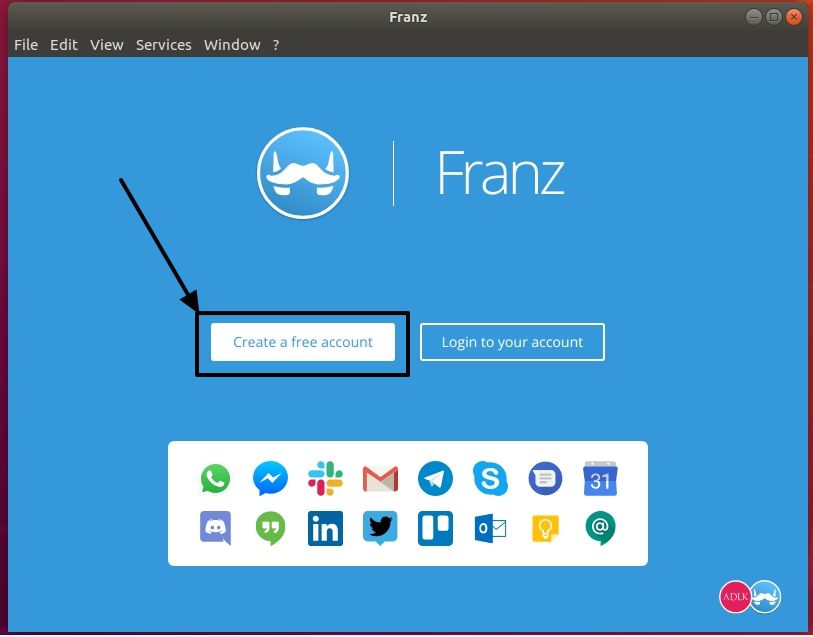
Step 3: It supports a number of accounts and Facebook Messenger, WhatsApp, Gmail, Telegram, Twitter, LinkedIn are a few of the most popular ones in the catalogue. Just tap on ‘Create a free account’ to create a new account on Franz, or log in to your existing account.
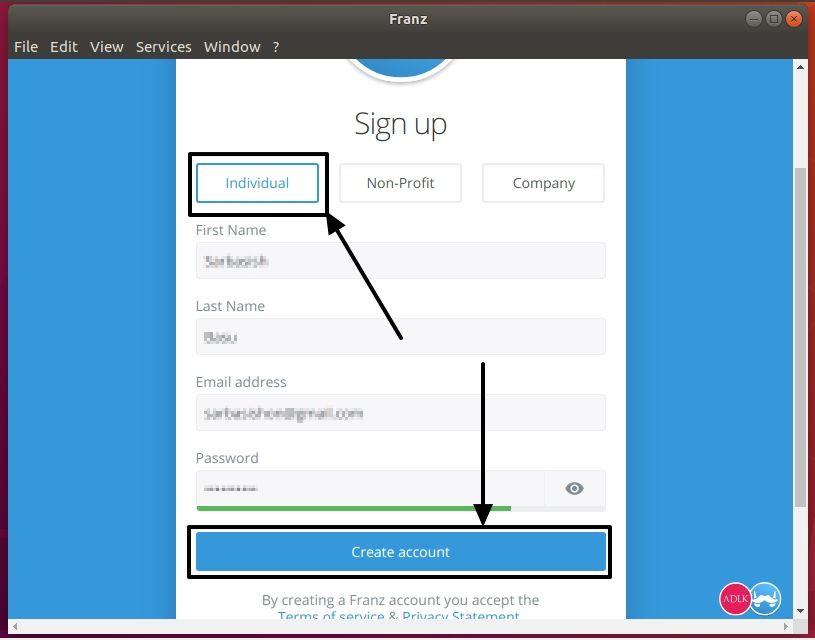
Step 4: If you are creating a new account, just click on the type of account, which should be ‘Individual’ for most users. Enter the additional details, and click on ‘Create account’.
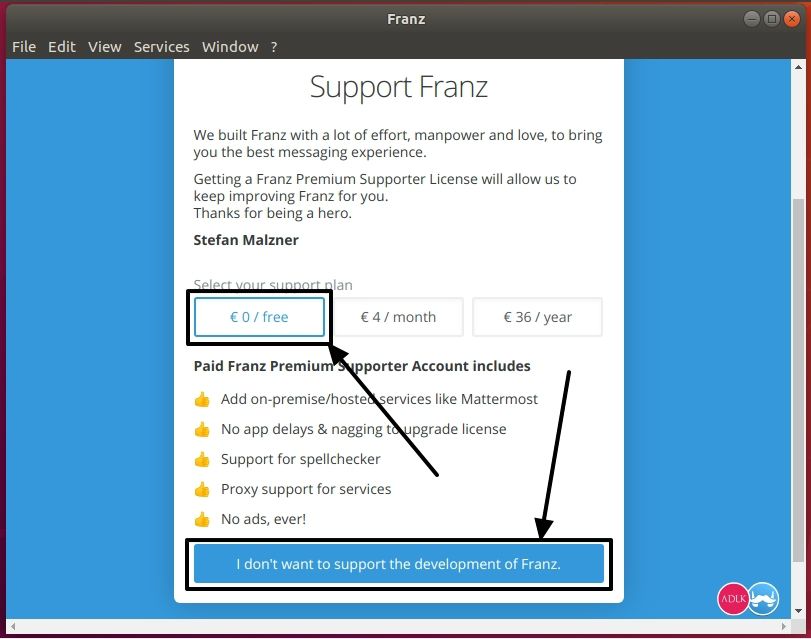
Step 5: Here choose the type of account you want. I am choosing the free service. If you want to support the development of Franz, you can choose other plans, as well. Once you are done, click on the blue button to move on to the next page.
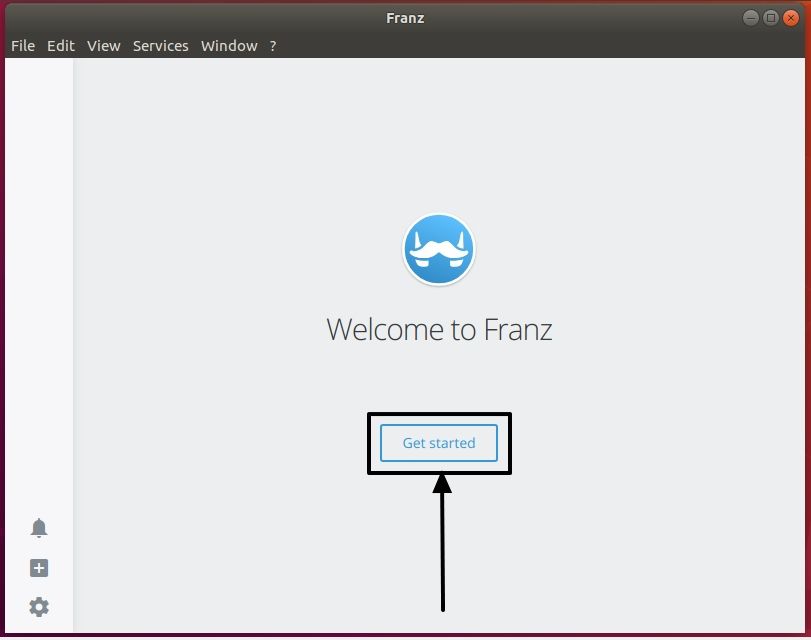
Step 6: Just click on ‘Get started’ to find the type of accounts, which are supported by it.
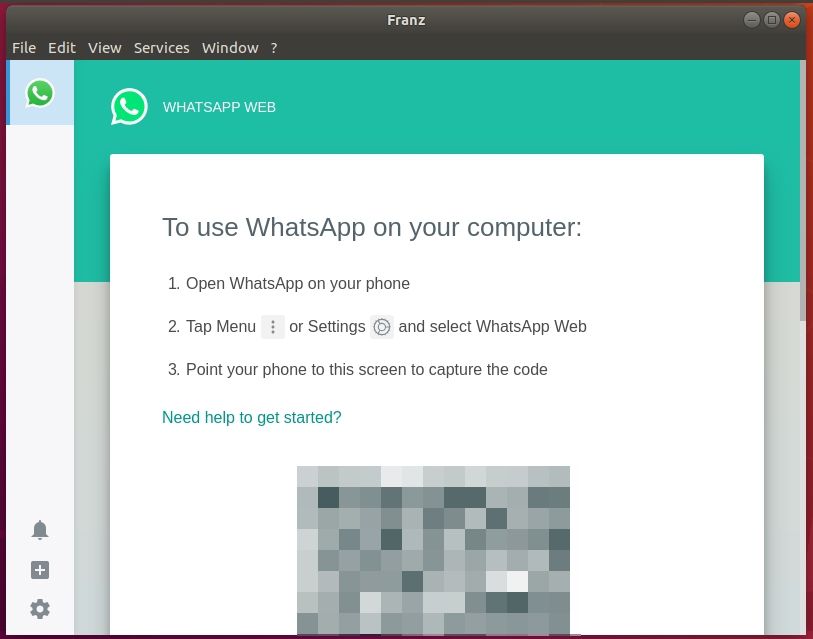
Step 7: For this tutorial, I am setting up a WhatsApp account. You can set up multiple accounts, one by one, and that is the bottom line of Franz. Just tap on the selected service, you want to set up, which is WhatsApp for my case.

Step 8: Here you can change the name of the service. You can change the other settings, or carry on with the default settings, as well. You can disable notifications, disable audio, or enable or disable unread message badges for every account. Once you are done, click on ‘Save service’, and then close the mini window.

Step 9: Now login to WhatsApp Web the same way you do on the browser.
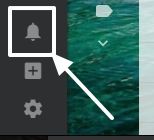
Step 10: Franz is free to use, and you can easily take a break from the distracting social network, with just a single click on Franz. Just click on the small bell icon to stop notifications from the added social networks.
Franz also makes it easier to get access to all your social network and work accounts from a single app. You can get your job done, with the free version of Franz, but you can also pay for the service a nominal fee to remove ads, get support for spellchecker, get proxy support, and finally support the further development to make it even better.
Hope the information was helpful for you. Did you face any problems installing or using it? Feel free to comment the same down below.
Other Useful Resources:
Related Posts
How to install Winget package manager in Windows 2022 Server
How to View Listening Ports Using Netstat
How to Install Pygame Zero on Windows 11
Single Command to install Android studio on Windows 11 or 10
X Social Media to Offer Basic features for Pocket Change
How to Install DoXygen in Windows 11 or 10